
Chrome OS was released back in 2011, and since then, it has seen a steady improvement across the spectrum. While some are still critical of its viability in today’s market, Chrome OS is doing pretty well in the US, mainly in the education sector. So if you already have a Chrome OS device or are looking to buy a Chromebook, we have some amazing Chromebook tips, features, and recommendations for you in this article. We bring you the 50 best Chrome OS tips and tricks, which will help you master this new operating system with ease. We have also added a number of unique tricks for both beginners and advanced users, so this guide has something for every set of users. Now having said all that, let’s go through the list and check out the 50 best Chrome OS features you should be using in 2022.
Best Chrome OS Tips and Tricks (Updated July 2022)
As mentioned above, the article is categorized into two sections: one for Beginners and another for Advanced users. Based on your level of expertise, go through the article and learn the top Chrome OS tricks. We have compiled the list based on Chrome OS 103 version in the stable channel. For quick navigation, expand the table below and move to the relevant feature description.
Chrome OS Tips and Tricks for Beginners
1. Set a Pin for a Seamless Login
As you might already know, Chromebook is deeply tied to our Google account. So, before accessing anything, you need to enter your Google account password every single time. I find this tiring and frankly a big chore. Coming from a Windows PC, I want to set a pin for hassle-free login, and thankfully, Google now allows you to set a PIN to log into your Chromebook.

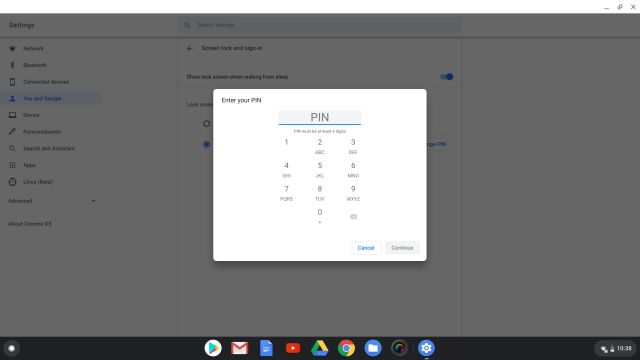
To create a PIN, open Settings (cogwheel icon) from the Quick Settings menu and open “Screen lock and sign-in” under the “You and Google” section. Here, enter your Google account password for the last time and set a 6-digit pin. Voila! You are done.
2. Enable Offline Mode

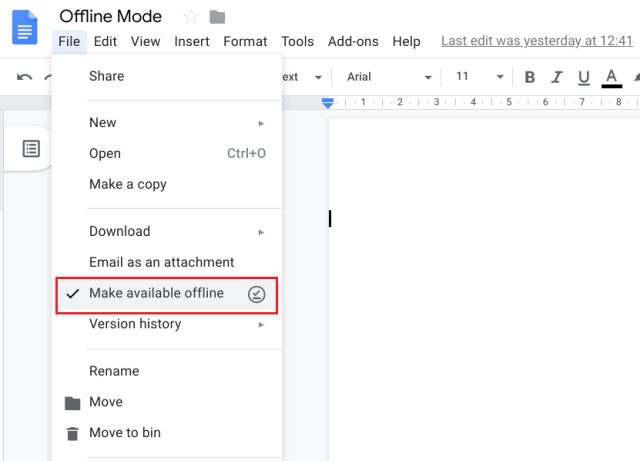
You can enable Offline Mode on Chromebook for Google Docs and Drive. For Google Docs, install this extension first and turn on the checkbox for “Offline” Mode from here. You can also make a particular document offline by going to the Files menu and checking the option for “Make available Offline”. However, make sure to modify all these settings while you are connected to the internet.
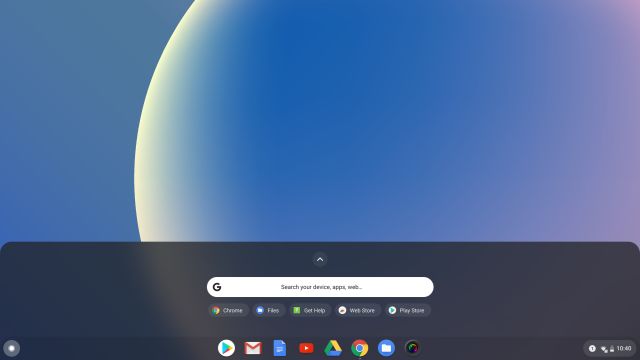
3. Master Search on Chromebook
The best part about Chromebook is that Google Search is integrated across the system and the web. So, just press the dedicated search button on your keyboard and start typing, and hit enter. No need to open Chrome then open a new Chrome tab and look for things. No matter where you are– under the Settings page or in Chrome itself– the search button always opens the result in a new tab instantly. I would say it’s better than opening a tab through Ctrl + T shortcut. Other than that, you can also search for Chrome apps and settings through the search button.
4. Summon Google Assistant
You can also get your things done through Google Assistant, similar to what you can do on your smartphone. It works quite well and does not have any limitations in comparison to the Assistant on our Android smartphones. Just press “Search” and “A” keys simultaneously on your keyboard and Google Assistant will pop up, ready to listen to your command. You can also trigger Google Assistant through voice. Open Settings and click on “Search and Assistants” in the left-pane menu. Here, click on “Google Assistant” and enable the toggle for “Ok Google”.


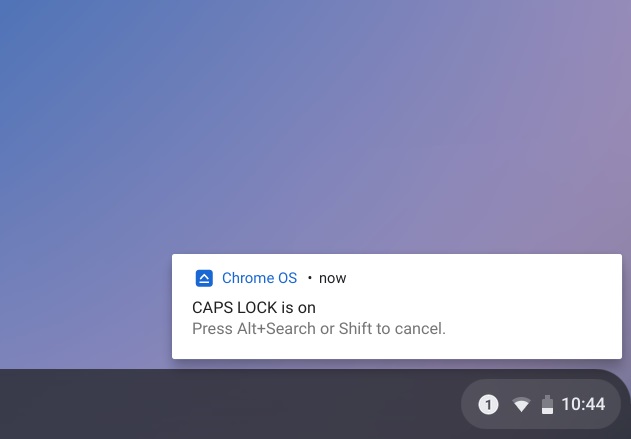
5. Enable Caps Lock
I know the frustration when you find out Chromebooks don’t have a dedicated Caps Lock button. But worry not, you can enable it easily by pressing the “Search” and “Alt” keys at once. A notification will pop up that Caps Lock has been turned on it will remain there until you turn off Caps Lock using the same shortcut. I know it’s not straightforward, but at least there is a way out.

6. Navigate Chrome OS Through Gestures
Unlike Windows and macOS, you don’t have a range of gestures on Chrome OS. However, you can access the overview window with a simple 3-finger swipe up/down gesture. Also, if you are in the Chrome browser, you can use the 3-finger slide in the left and right direction to move between the tabs effortlessly. This is one of the best gestures I have found on Chrome OS and I use it regularly while multitasking. Apart from that, you can close a tab by simply tapping 3 fingers at once on a Chrome tab.
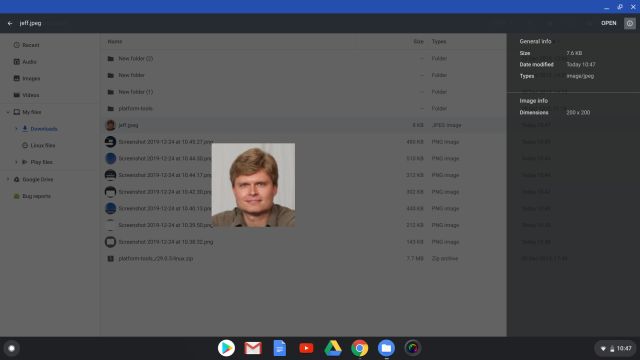
7. Preview Files Quickly
Sure, the file manager is not that great on Chrome OS, but I love the fact that it has a quick preview shortcut for any file, similar to what we have on macOS. Just select a file and press the “Space” key. Instantly, the file will be previewed in a large window with all the details (file size, format, etc.) in the right pane. Besides that, you can also switch between files while being in the preview mode and exit it by pressing the “Esc” key. It’s these small things that make Chrome OS a delight to use.
8. Split the Screen
Similar to Windows 11’s Snap Layouts, Chrome OS also offers a way to split the screen using a keyboard shortcut. Just press the “Alt + ]” key combination to snap the window to the right and “Alt + [” to snap the window to the left. It’s one of my favorite keyboard shortcuts on Chrome OS to quickly split the screen. If you want to be productive, you must utilize this Chrome OS hack.
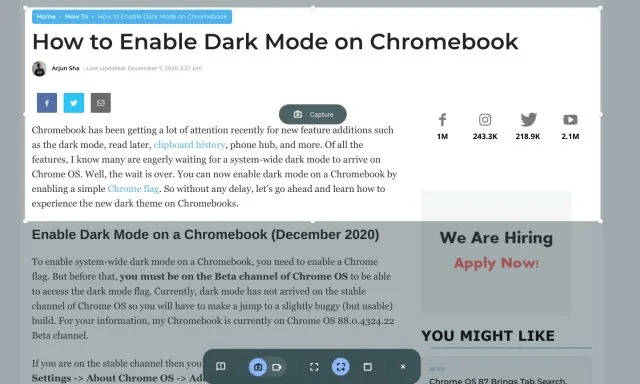
9. Take a Screenshot
In case you are unaware, you can take a screenshot on Chrome OS just like other desktop operating systems. In fact, the screen capturing experience on Chrome OS is much better than on Windows. Simply press the “Ctrl + Shift + Overview button (above 6 key)” shortcut and you can select your own area, choose a window or take a full-screen screenshot. It just works great and I love using screen capture on my Chromebook.

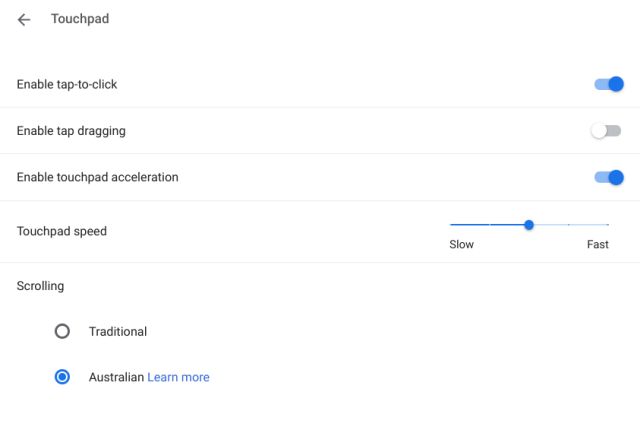
10. Touchpad Scrolling Behavior
Many people who are coming from Windows PC find the default scrolling behavior on Chrome OS the opposite and frankly, it was quite jarring for me too. However, there is a way to change the scrolling behavior from the Settings page. Click on “Device” from the left menu and open “Mouse and touchpad”. Here, scroll down and change the scrolling to “Australian” which is also called natural scrolling on macOS.

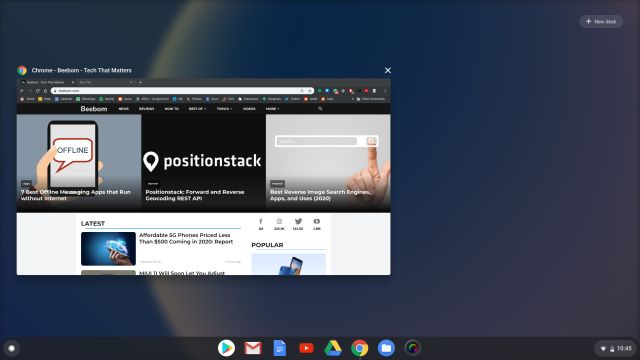
11. Virtual Desktop
Users have been asking for a virtual desktop environment on Chrome OS for quite some time. Finally, it’s available in the stable channel starting with Chrome OS 78. For multi-taskers, it’s a huge help as it lets them focus on important things first. So here is how you can access it. Just do a 3-finger slide-up gesture and you will find the “New Desk” option on the top-right corner.
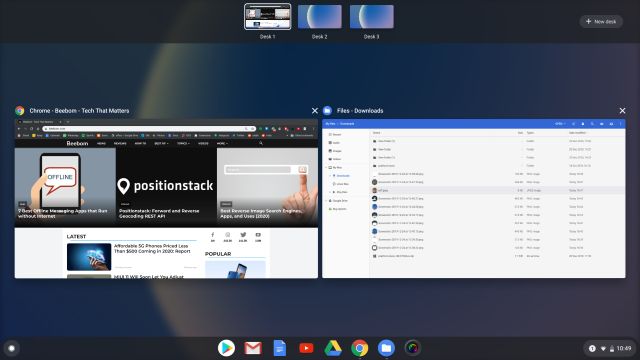
Alternatively, you can use these shortcuts as well: Shift + Search + = to create a new virtual desktop and Shift + Search + – to delete one. You can switch between them using Search + ] and Search + [ shortcuts.
12. Helpful Chrome OS Shortcuts
While there are endless keyboard shortcuts on Chrome OS, here are some crucial ones that will help you navigate through Chrome OS like a pro.
- Search for anything: Press the Search button
- Trigger Google Assistant: Search + A
- Lock your Chromebook: Search + L
- Take a Screenshot: Ctrl + Overview button (you will find it just above the 6 key)
- Delete: Alt + Backspace
- Snap Windows to left/right: Alt + ] and Alt + [
- Keyboard Cheatsheet: Ctrl + Alt + ?
13. Play Steam Games (Project Borealis)
Google has finally launched Steam on Chromebooks aka Project Borealis. You can now play high-end Windows and Linux games on your Chromebook through Steam. Google built a new container for Steam gaming on Chromebook which is based on Arch Linux. Naturally, you need high-end specs to run Steam so very few Chromebooks currently make the cut. You need 8GB of RAM (or more), an 11th-gen i5/i7 processor (or later), and Intel Iris Xe Graphics support.

In case, you want to utilize the Linux Crostini container (based on Debian) to install and play Steam games on your Chromebook, you can do so. However, the experience won’t be as good as Borealis. I have played Stardew Valley, Among US, and a few other lightweight games on my Chromebook and they were decent enough. So go ahead and enable Borealis or install Steam directly in the Linux container to play PC games on your Chromebook.
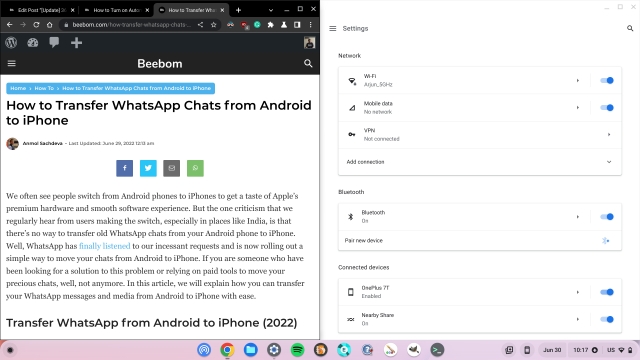
14. Enable Phone Hub
Google has brought Phone Hub for Android devices on Chromebook which can help you get many things done seamlessly. You can get notifications from your Android phone, reply to the notifications, locate your phone, find recent tabs, and more. In case, there is no WiFi available, you can also quickly tether your Android device for always-on data connectivity.

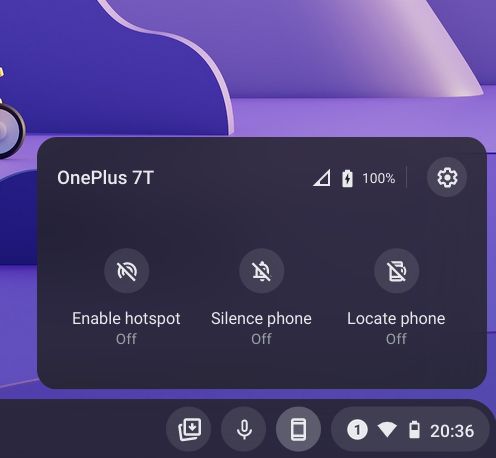
Apart from that, you can also seamlessly sign into your Chromebook by unlocking your Android device. And the recent Phone Hub update has brought the ability to view photos from your Android phone on Chromebook. Basically, with Phone Hub, both devices will always be in communication so that you get the best of the Google experience. So if you want to enable Phone Hub on your Chromebook, follow our linked guide.
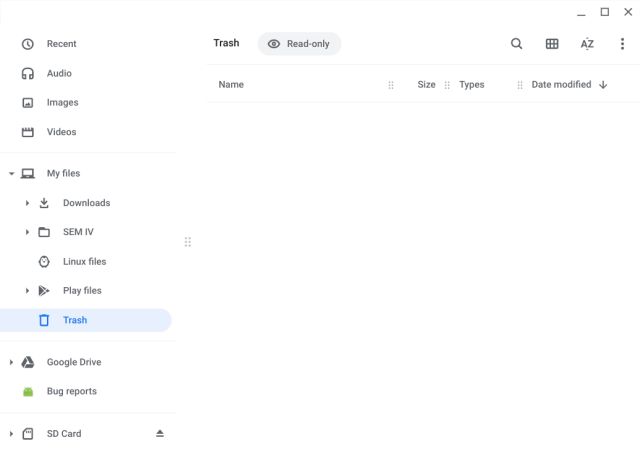
15. Enable Recycle Bin
For so long, users have been asking for Recycle Bin on Chromebook and finally, now you get it. Hidden behind a flag, Recycle Bin or Trash can be enabled right away. Just go through our short guide on how to enable recycle bin on Chromebook and you will have it in just a few seconds.
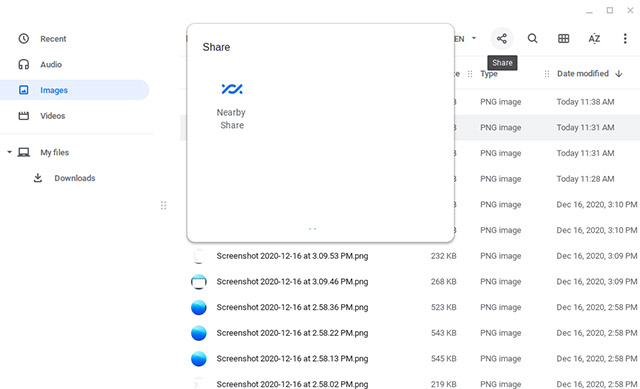
16. Take Advantage of Nearby Share
I know all of us are envious of how cohesive and streamlined the Apple ecosystem is, but believe me, some of the niceties are also getting ported to the Google side. Similar to AirDrop, Google has brought Nearby Share to seamlessly share files between Android devices and Chromebooks. It even works without WiFi and has great transfer speed. You can just go through our quick tutorial on how to enable Nearby Share on Chromebook to get it running.

Google is also said to be working on a self-share mode where you don’t need to authenticate file transfers every single time. Overall, Nearby Share has seen quite an improvement since it was launched. In case, you are interested in an alternative to Nearby Share then check out Snapdrop.
17. Clipboard History
Sure, copying and pasting on Chromebook is dead simple and works pretty well. However, if you want to copy multiple items and paste them then the whole process becomes convoluted and taxing on the user. That’s why Google has added Clipboard History to Chromebooks which can remember your last five copied items. You can then press the Search + V shortcut to bring up the Clipboard History and paste any item you want. For a full explainer, go through our guide on how to enable Clipboard History on Chromebook.

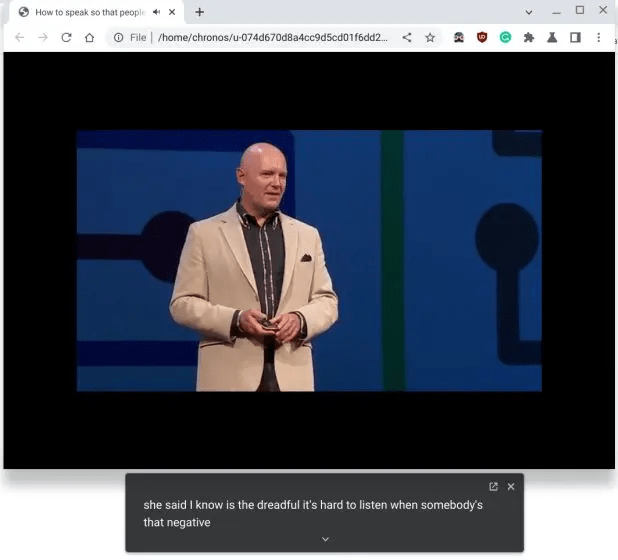
18. Enable Live Caption
One of the best Chromebook hacks and tricks is the Live Caption feature that not many are aware of. It’s a speech recognition technology that transcribes whatever is being played on your Chromebook. Live Caption translates speech in real-time and works even when you are offline with great accuracy. You can stream a video on YouTube or play a local media file through Chrome, Live Caption does a wonderful job at captioning speech. Currently, Live Caption is only supported in the English language on Chromebooks. You can move to our guide and learn how to enable Live Caption on your Chromebook.

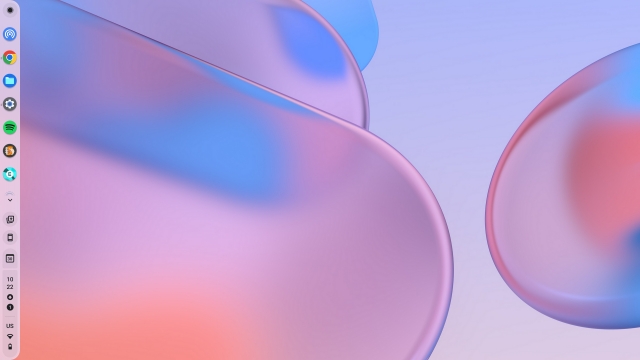
19. Change Shelf Position
You can now change the Shelf position on Chrome OS and it’s awesome. Simply right-click on the Shelf and open “Shelf Position”. Here, you can choose Left, Bottom, or Right. It does not have a top position, but that’s fine. I usually go with the default Bottom position, but users who have moved from Linux distros such as Ubuntu or for that matter, Windows, can very well change the Shelf position. One more Chromebooks trick to customize the appearance of Chrome OS.
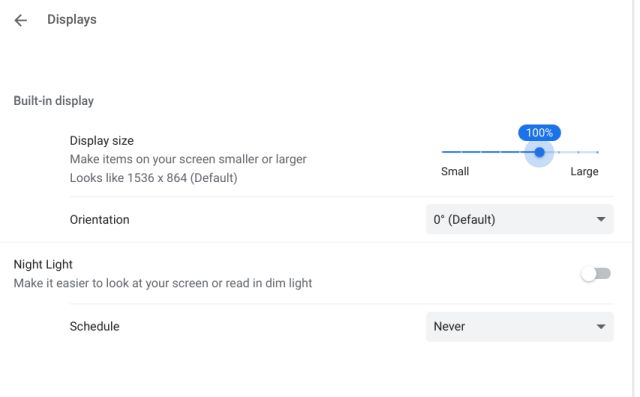
20. Change Screen Resolution
While Chrome OS is optimized out of the box and you generally don’t need to adjust system settings, in case you want to, you can change the screen resolution. Open Settings -> Device -> Displays -> Display Size. Here, adjust the screen resolution as you want.

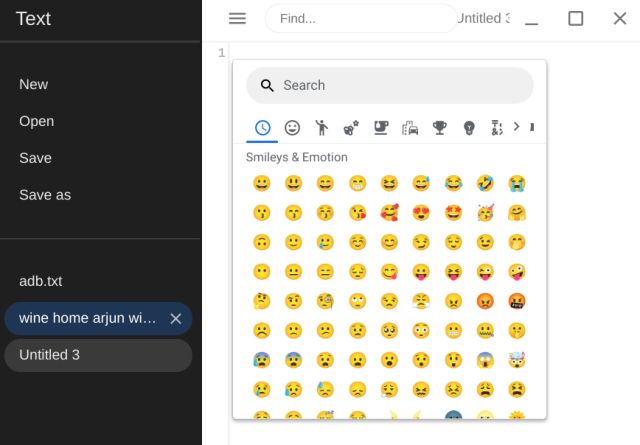
21. Emoji Picker
After Clipboard History, Google has also brought Emoji Picker on Chrome OS. You can now insert emojis on any text field in Chrome OS. Currently, you need to enable a Chrome Flag. Open chrome://flags/#enable-cros-ime-system-emoji-picker and enable it. After that, press Search + Shift + Space to bring up the Emoji Picker. You can also right-click on a text field and insert an emoji.

22. Add a Secondary Google Account Inside the Existing Profile
On Windows, you can add multiple Google accounts under a single Chrome profile, but on Chrome OS, Google creates a new profile for every new Google account. While I get the idea behind it, sometimes I just want to check my work email or access Drive files from another Google account and that’s when it becomes frustrating.
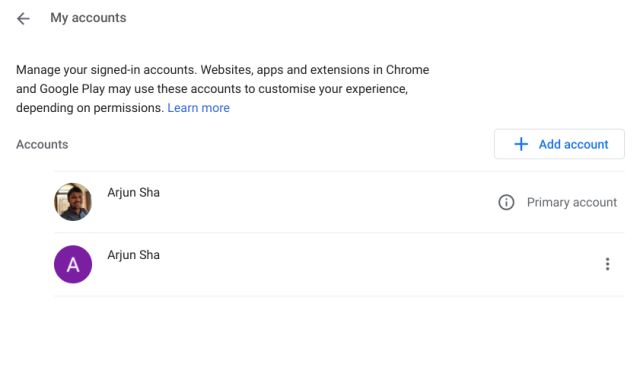
Nevertheless, now Google has provided an option to add a secondary account to the existing profile itself. Here is how you can access it. Open Settings and click on your name under the “You and Google” section. Here, click on “Add Account” and enter the new Google account credentials. Enjoy!
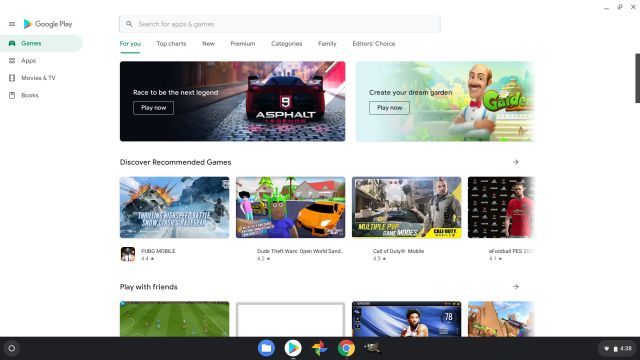
23. Enable Android Apps
As most of you know, Google has brought Android app support on Chromebooks and it’s a great step toward creating a coherent Google ecosystem. You can install and use millions of Android apps directly from the Google Play Store. In case, it’s not turned on by default, you can enable Play Store from the Settings page. Click on “Apps” on the left pane and open “Google Play Store”. Here, allow various permissions and set up the Play Store. That’s it. Enjoy your favorite apps from the Play Store on your Chromebook.
Google is quite serious about improving the Android experience on Chromebooks. It has even developed a new Android container called ARCVM to bring Android 11 update to Chrome OS. The new container is better at scaling UI elements and comes with its own Linux kernel to offer better performance. You can follow our guide to get the Android 11 update on your Chromebook. And to check if your Chromebook makes the cut, go through our list of Chromebooks that will get the Android 11 update.
24. Share your Chromebook
As we have mentioned before the Chromebook is, in some sense, a very private computer. It’s directly linked to your Google account so anyone gaining access to your Chromebook means they can view your photos, check your emails, and read your notes among many other things. In a way, it’s not easy to share your Chromebook as it’s with Windows-based computers. So, what if someone asks to use your Chromebook for a while, say your sister or someone from your family?

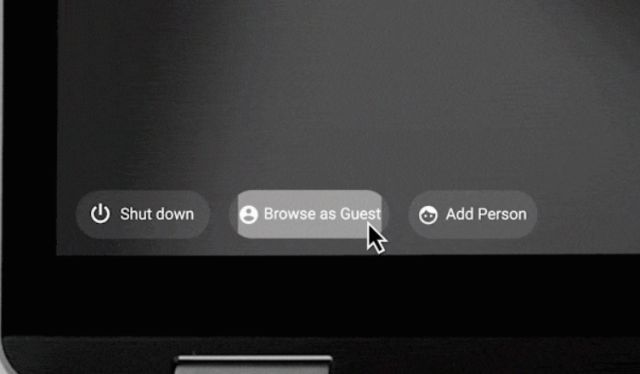
Well, you can create a separate account or better, take advantage of the “Guest Mode”. It lets you access most of the Chrome OS features without adding any account. Open the Quick Settings menu from the bottom-right corner and sign out of your current profile. Now, click on “Guest Mode” at the bottom and you will be in a temporary profile.
25. Record the Screen With Screencast
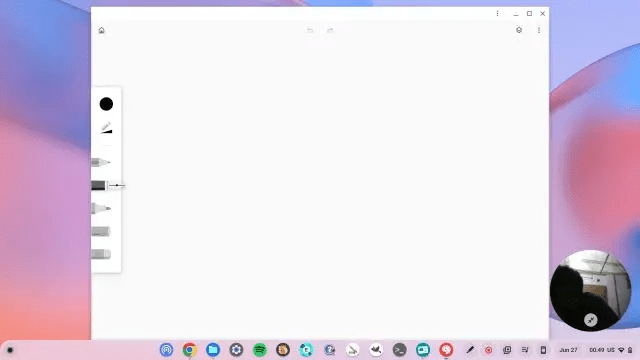
Screencast is one of the best tools to record the screen on Chrome OS. It has been recently launched by Google for teachers and students to make instructional videos using annotation, webcam view, audio support, transcription, and more. Basically, Screencast is an all-in-one tool for screen recording on Chromebooks. To get started, open the App Drawer and click on “Screencast”. Note that, for some reason, Screencast does not work if your Chromebook language is set to English (India). Change it to “English (US)” and Screencast gets enabled.
26. Share Wi-Fi Password
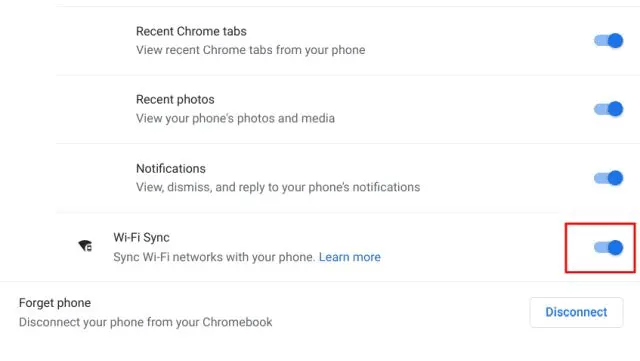
One of the best hacks of Chrome OS is that you don’t need to manually perform everything. It syncs everything in the background to offer a seamless experience. For example, if you have moved to a new Chrome OS device, simply log in with your Google account and it will automatically sync all your saved Wi-Fi networks from your Android phone. This will allow you to quickly connect to the internet on a new Chromebook. There are several other ways to share Wi-Fi passwords between Chromebooks and Android phones so go through our linked article to learn more.

27. Create GIFs
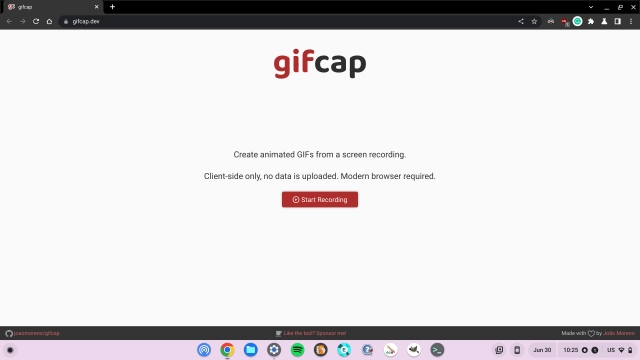
While Chrome OS comes with a native screen recorder tool, it does not support GIFs which is disappointing. So if you want to quickly create GIFs on Chromebooks, simply head over to gifcap.dev and click on “Start recording”. You can choose a partial area, window, or full screen and start the recording. Post that, it will automatically process the recording and will download the GIF on your Chromebook. The developer says that the data is not uploaded to the web server so that is pretty good.
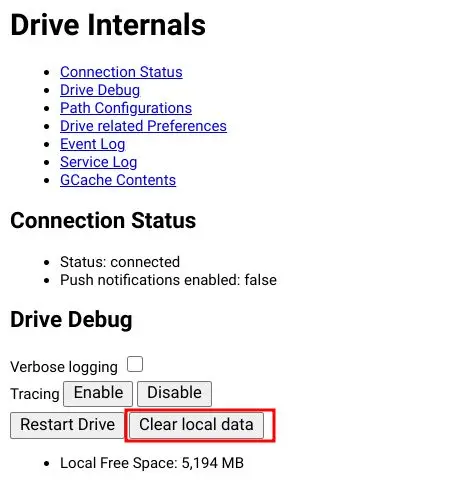
28. Free Up Storage
We all know budget Chromebooks pack very little storage, somewhere between 16GB to 64GB. Sometimes, it gets harder to store files and folders, especially when you are using Linux on your Chromebook. You may think there is nothing to remove from Chrome OS, but there are a few hidden options that will help you free up storage on your Chromebook. You can open chrome://drive-internals in Chrome and clear the local data to get much-needed space back. There are also other ways to free up disk space so follow our linked guide above for more information.

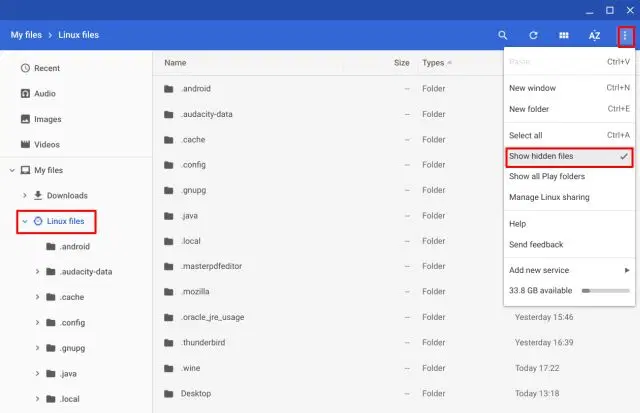
29. Show Hidden Files
If you want to show hidden files in Chrome OS, you can do so from the default Files app. It does not show hidden system files and folders for Chrome OS, but you can find all the hidden Linux files and folders. You can access folders like “.local” or “.profile” to find out the Application directory and customize the shortcut to Linux apps. So to show hidden files, open the Files and click on the 3-dot menu in the top-right corner. Here, enable “Show hidden files”. If you use Wine on your Chromebook, this Chromebook trick will help you a lot.

30. Night Light
If you work on your Chromebook till late at night, consider enabling Night Light to reduce eye strain and dim the light. It’s a native feature to Chrome OS so you don’t need to install a third-party app. Just open the Settings page and move to Device -> Displays -> Night Light. You can also tune the cooler and warm temperature and schedule when the Night Light should turn on. It’s a nifty Chromebook trick that can protect your eyes and improve sleep.


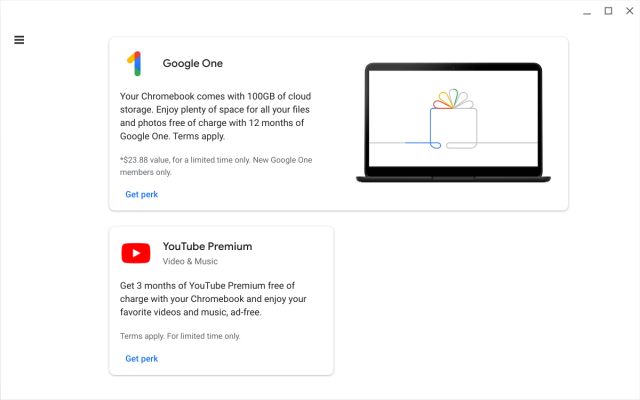
31. Explore Chromebook Perks
You might be unaware but Google from time to time offers a number of perks to Chromebook users. You can get 3 months of free YouTube premium along with a free Google One subscription for a month. In other regions such as the US, you can find perks for Google Stadia, discounts on premium versions of apps, and much more. To find out Chromebook perks, open the App Drawer and locate the “Explore” app. Open it and move to “Perks” from the hamburger menu. That’s it.

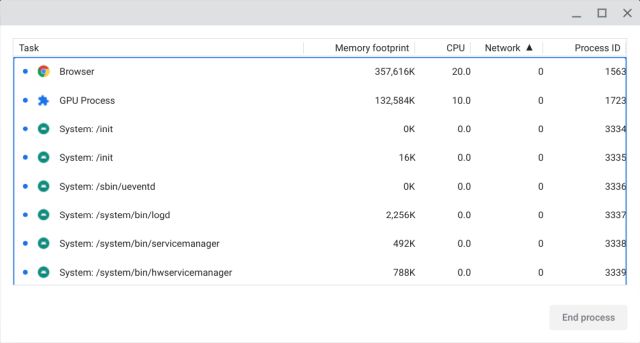
32. Open Task Manager
Similar to Windows, Chrome OS also has a Task Manager but you will seldom use it. Anyway, to open the Task Manager, press the “Search + Esc” shortcut to open the Task Manager instantly. Here, you can go through all the Chrome OS processes and choose to end an app, service, or process. Note that, the Task Manager on Chrome OS does not show processes from the Linux container.

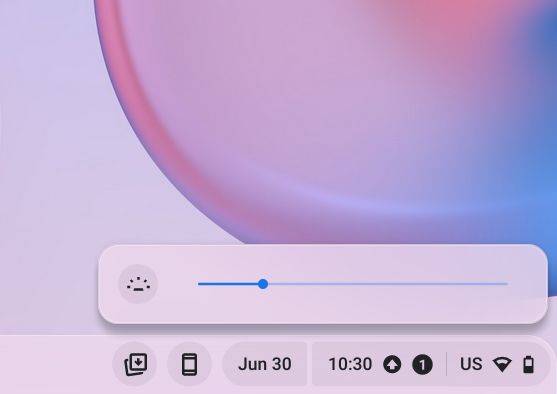
33. Reduce Backlit Keyboard Brightness
What I love about Chromebooks is that even mid-range and affordable machines come with a backlit keyboard. That said, did you know you can customize the backlit keyboard brightness level with a simple shortcut? Just press the “Alt + lower Brightness button (above 7 key)” shortcut and you can reduce it. You can also press the “Alt + higher Brightness button (above 8 key)” to increase the brightness level of the backlit keyboard. It’s one of my favorite Chromebook hacks and you can definitely use it.

34. Add a Restart Button on Chromebook
We know that Chromebooks don’t come with a Restart button. You either shut down your Chromebook or just close the lid to put the laptop in sleep mode. But at times, you want to quickly restart the Chromebook to fix some performance issues like mouse latency, graphical issues, etc. For such cases, you can manually create a Restart button through a bookmark.

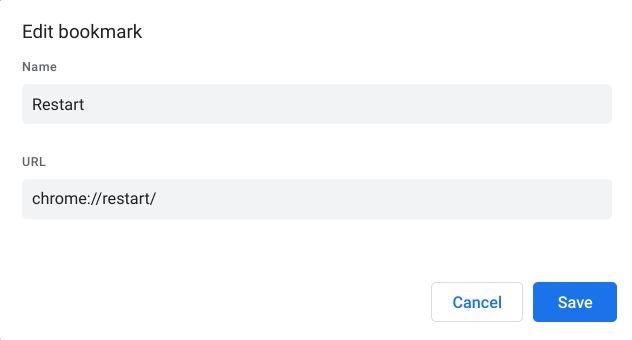
To do so, press Ctrl + Shift + O and click on the 3-dot menu in the top-right corner. Here, click on Add New Bookmark and put “Restart” in the Name field and chrome://restart in the URL field. Now, save the bookmark and drag it to the Bookmark Bar to keep it upfront. Now whenever you want to restart your Chromebook, simply click on the “Restart” bookmark in Chrome and your Chromebook will instantly restart. That’s one nifty trick, right?
35. Reset Your Chromebook and Revert to an Older Chrome OS Version
If you are having any problem with your Chrome OS, you can easily factory-reset (called Powerwash on Chrome OS) your machine, similar to Android devices. The great part about Chrome OS is that all your files are synced to Google Drive so you don’t have to worry about data loss.

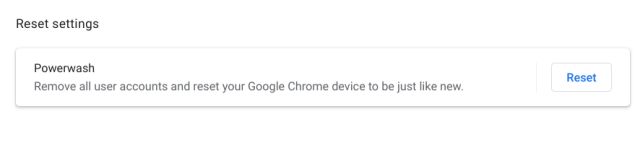
Just open the Settings and click on “Advanced” from the left-pane menu and then move to “Reset Settings”. Here, click on the “Reset” button and the computer will restart to complete the process. After that, sign in with your Google account and everything will fall into its place just like before. And if the problem persists, you can revert Chrome OS to an older version on a Chromebook. This will allow you to gain features on older versions that are missing on the current build.
Chrome OS Tips and Tricks for Advanced Users
36. Enable Linux on Chromebook
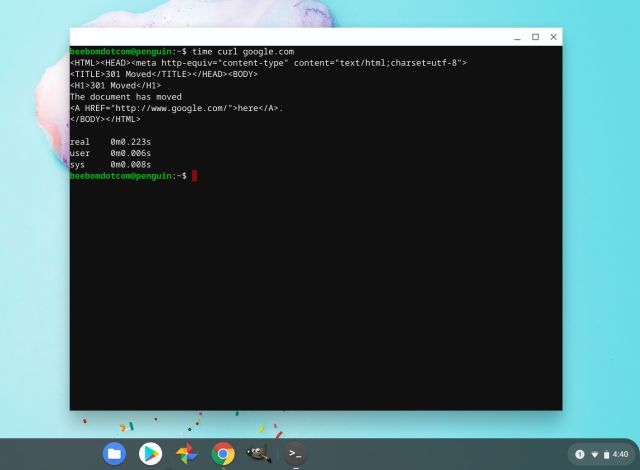
In 2018, Google added support for Linux (Beta) on Chrome OS and it has changed the utility of Chromebooks in many ways. The project is out of beta now and you can update the Linux container to the latest Debian Bullseye build on your Chromebook right now. The Terminal works quite well with support for all the Linux commands. You can install a broad range of Linux apps on Chrome OS and they work absolutely great. If you want to get started, follow our tutorial on how to run Linux on Chromebooks.

The Linux environment on Chrome OS currently supports microphone, graphical acceleration, USB devices, and more. That said, keep in mind Chrome OS and Linux both have different storage systems so you will have to share your local folders with Linux. You can do so from the native File Manager itself. Just right-click on the folder that you want to share and choose “Select with Linux”. That’s it.
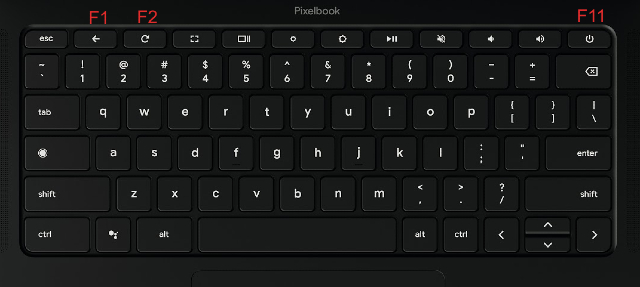
37. Turn On Function Keys
Developers who have moved to a Chromebook might find it hard to perform their usual keyboard shortcut operations because there are no dedicated function keys. However, Chrome OS offers you a way to replace the top-row keys with function keys. Just follow our guide and learn how to turn on function keys on Chromebook.

38. Customize DNS Server
Just like you can change the DNS settings in Windows 11, you can also customize the DNS server in Chrome OS. This will help you prevent DNS logging, and improve privacy and security on your Chromebook. You can find out the best DNS server from our list and then make the changes on Chrome OS’ settings page. Open Settings and navigate to Security and Privacy -> Use secure DNS -> Custom. Now, choose your choice of DNS server from the drop-down list or enter the IPv4 address in the fields below.
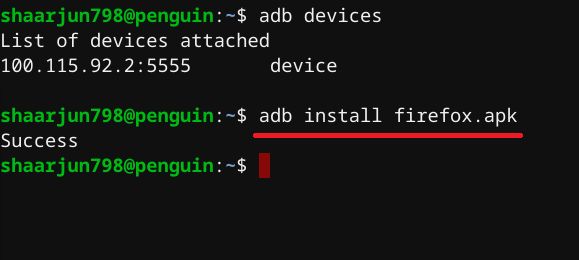
39. Sideload Android Apps
Chromebooks do come with native Android app support through the Play Store, but it does not feature all the Android apps. That’s why users want to sideload Android apps that are not available on the Play Store. We have put together a detailed guide on how to sideload Android apps on Chromebook so just follow that. Don’t worry, you don’t need to move to the Developer mode to use the sideloading feature.

40. Enable Dictation
One of the best tricks of Chrome OS is Dictation, which is not the coolest feature per se but makes a difference for many users. For example, you can just start speaking, and Chrome OS will transcribe your speech in real-time in any text field. The transcription is accurate, and it’s really fast. I use the Dictaation feature at times, and it is super useful.

To enable it, open Settings -> Advanced on the left pane -> Accessibility -> Manage Accessibility features -> Enable dictation. Now, the Dictation button will appear on the Chrome OS shelf. From now onwards, whenever you are not in the mood to type things, just click on Dictation and go on a transcription spree.
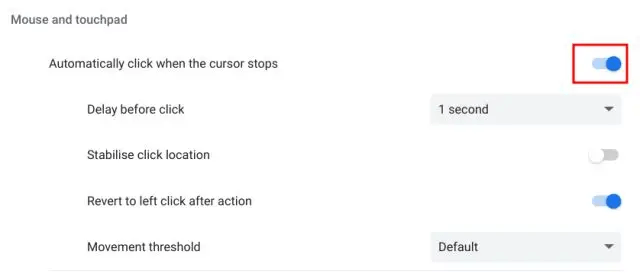
41. Turn on Automatic Clicks
Users who are diagnosed with motor impairments find it harder to click on buttons and menus. So to help with this, Google has brought an accessibility feature that automatically clicks when the cursor stops on a UI element. It also offers many customization features including delayed response, right-click, left-click, drag and drop, and more. You can follow our guide and learn how to enable Automatic Clicks in a Chromebook.

42. Screensaver
In case you are unaware, Chrome OS offers some customization features too that make Chromebooks a joy to use. One of them is the screensaver which is deeply integrated with Google Photos. You can learn how to set up a screensaver on Chromebook from our short guide.

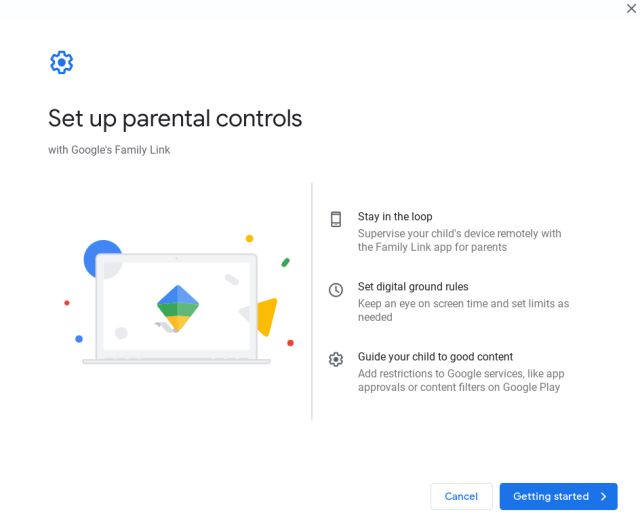
43. Parental Controls
If you are a parent then you must take advantage of this Chromebook trick. It allows you to supervise your child’s activities on the Chromebook. You can manage your kid’s screen time, block mature content on the web, approve or block purchases, allow certain apps, and more. I would recommend you follow our in-depth guide to set up parental controls on Chromebook. The steps are a bit long but can be done if you stick to the guide.

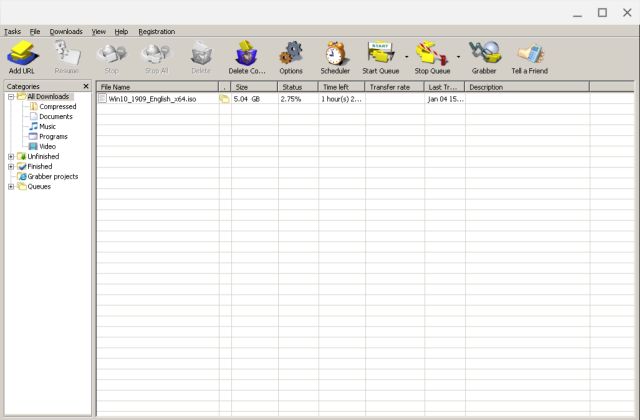
44. Run Windows Apps
Yes, you read that right. You can run most of the lightweight Windows 10 programs on Chromebooks without any issues. However, note that Linux support is absolutely mandatory. Using a compatibility layer called Wine, you can actually run Windows apps without any hiccups. We have put together a detailed tutorial to run Windows apps on Chromebooks so go through that. Just to give you an idea, I use the Windows version of IrfanView, Microsoft Office, gImageReader, and MATLAB on my Chromebook.

45. Change Update Channel
If you are someone who wants to taste the new and exciting features of Chrome OS then you will have to jump the ship from Stable to another channel. There are four update channels: Stable, Developer, Beta, and Canary. I would advise you to stick with the Developer or Beta channel as these are relatively bug-free than Canary and also allow you to enjoy the upcoming features.

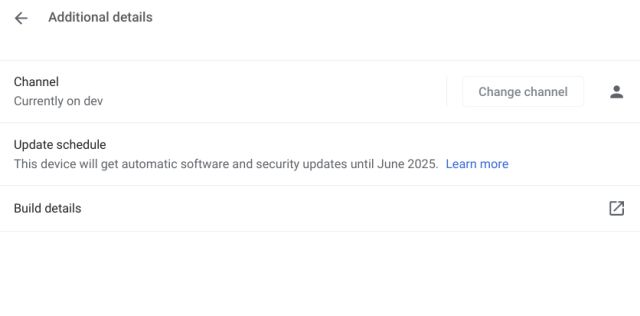
So to change the update channel, open Settings -> Click on “About Chrome OS” in the left pane -> Change Channel. Here, choose the update channel of your choice then go back and check for updates. After downloading the update and installation, just restart your Chromebook and you will be in.
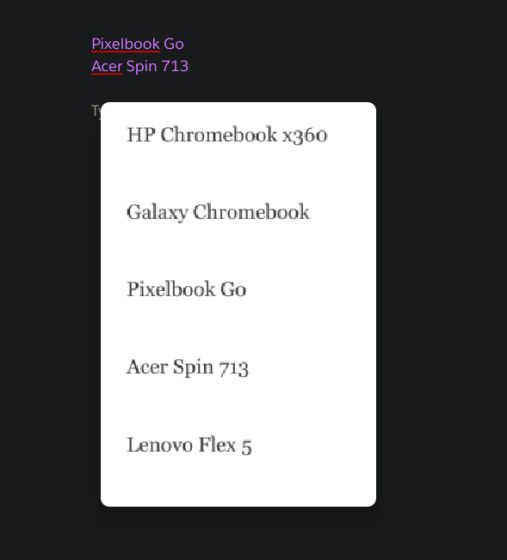
46. Create Standalone Apps from Websites
If you want some websites to behave like an app with a separate window and launcher menu then you can create such standalone apps on a Chromebook. However, keep in mind that it’s only possible on those websites which adhere to the PWA (Progressive Web App) standard. For example, you can easily create apps from websites of Spotify, Twitter, and our own portal, beebom.com.
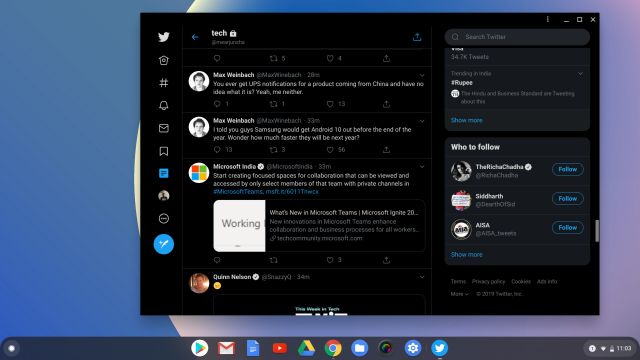
To do so, open the website of your choice and click on the 3-dot menu in the top-right corner. Here, open More Tools -> Create Shortcut -> Check the box for “Open as Window” and click on the “Create” button. Now, you will find the website as a separate app available in your launcher and you can even pin it to your shelf.
47. Find System Information and Run Hardware Tests
Chrome OS is very minimal and consumer-facing so it does not provide details like system memory, CPU usage, background processes, and similar metrics for the end-user. However, if you want to access those metrics, there are some hidden commands that let you do it. Just enter chrome://system/ in the address bar and hit enter. You will get all the information from hardware to software on this page. Other than that, you can also install a Chrome extension called Cog (Free) which allows you to monitor many metrics like CPU usage, temperature, etc. in a slick and graphical interface.

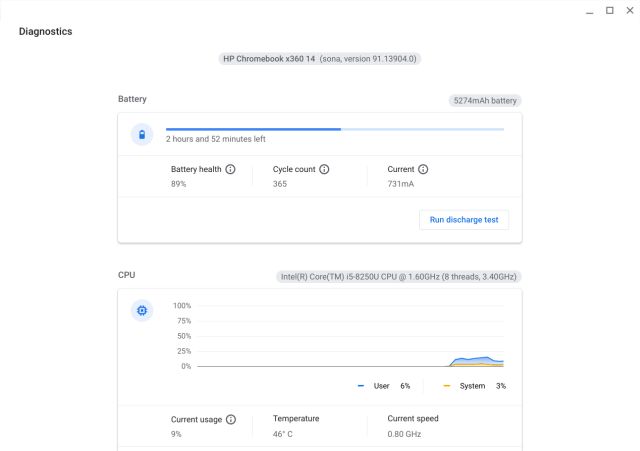
Apart from that, Google has also brought a first-party Diagnostics app on Chrome OS that allows you to test your current battery capacity, CPU performance, memory usage, and more. It also lets you test the connectivity on your Chromebook, in case you are having issues with your internet connection. You can simply open the App Drawer or tap the Search key to find the Diagnostics app.
48. Share Windows Folders to Chromebook (Network File Share)
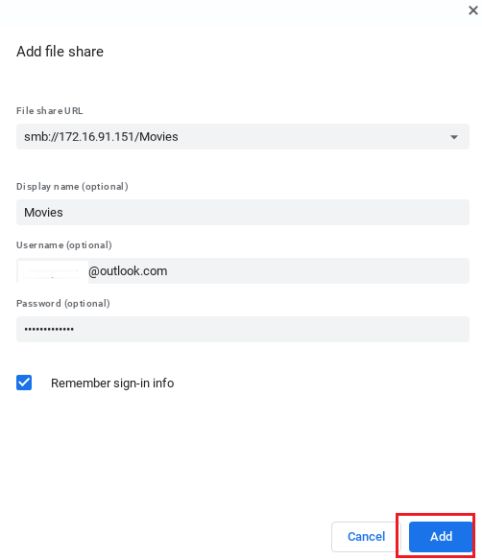
One of the best features of Windows OS is that you can seamlessly access files and folders from other Windows computers using a common wireless network. So to make the desktop experience similar on Chrome OS, Google has also brought Network File Share and it’s embedded in the native File Manager. Basically, you can remotely access all your Windows files and folders on your Chromebook without any hassle. I have written a detailed guide on how to use this feature so go through the steps and you will be all set.

49. Enable ADB on Chrome OS (Android Debugging Bridge)
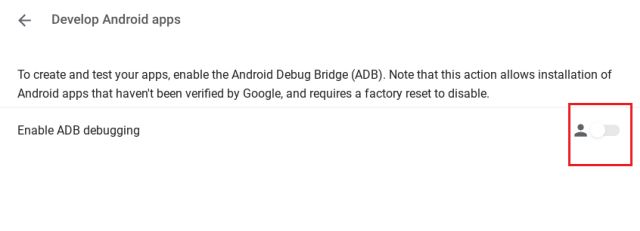
Earlier, there was an unofficial way to enable ADB on Chrome OS through Linux and platform tools. However, things have changed now since Google has brought native ADB support to Chrome OS. You can find the dedicated page from Settings -> Linux -> Develop Android apps and enable the toggle for “Enable ADB Debugging”. You are good to go.

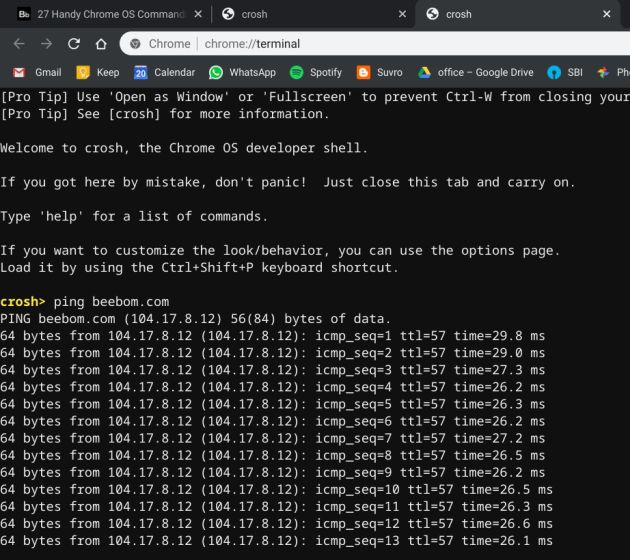
50. Learning Chrome Shell (Crosh)
Similar to Command Prompt on Windows, Bash in Linux, and Terminal on macOS, Chrome OS has its command line called Chrome Shell (Crosh). It allows you to modify system settings that are otherwise not available on the Settings or Flags page. So, if you want to dive deep into Chrome OS, you must learn what Crosh offers and how it can help you do many things. We have already written a tutorial on the best Crosh commands so go through that as a primer.

The Best Chrome OS Tips and Tricks in 2022
So that was our exhaustive list of tips and tricks that you should know before using Chrome OS. In the past few years, Chrome OS has improved by leaps and bounds so naturally, many new features have been added. I have made sure to include all those neat hacks so that you get the best Chrome OS experience. Anyway, that is all from us. If you want to learn more about Chromebooks and Chrome OS in general then stay tuned with us. We are going to bring some cool stuff for you in the coming days.


