The stable, iOS 10 Public Release has been out for quite some time, now, and if you’re on the Public Beta, then you might want to switch over to the stable build. Unless, of course, you want to stay on the bleeding edge of iOS 10 updates. So, if you want to switch from iOS 10 Beta to the iOS 10 Public Release, here is how you can do it:
Backup Your iPhone
The first step to take, whenever you do something such as this, is to backup your iPhone. I can’t stress this enough, you should always back your iPhone up. This will help prevent accidental loss of data, and will save you from pulling your hair out in case something goes wrong. If you don’t know how you can backup your iPhone, you can check out our article on the same.
Once you have backed your iPhone up, you can proceed with this guide, in order to update from the Beta to the Public Release of iOS 10.
Updating on Your iPhone
Updating your iPhone to the latest Public Release is quite easy, and is possible even without connecting your iPhone to a Mac, or a PC, with iTunes on it. To do this, simply follow the steps below:
Note: I tried this method, and did not lose any data; however, I would still recommend that you backup your iPhone before taking these steps.
1. On your iPhone, go to Settings -> General -> Profile.
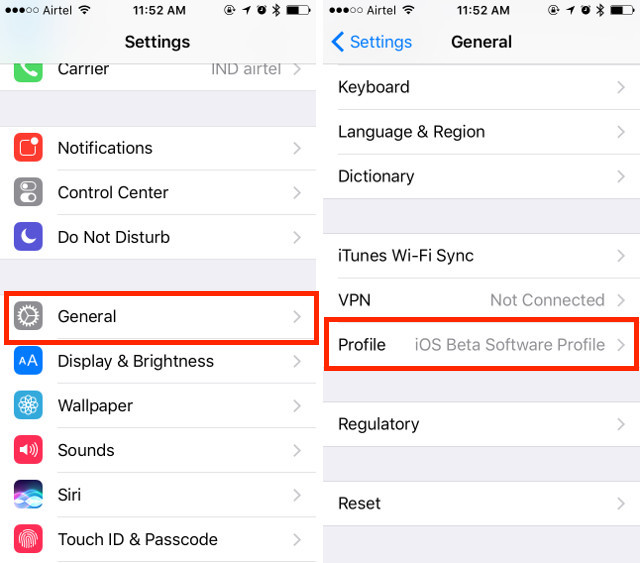
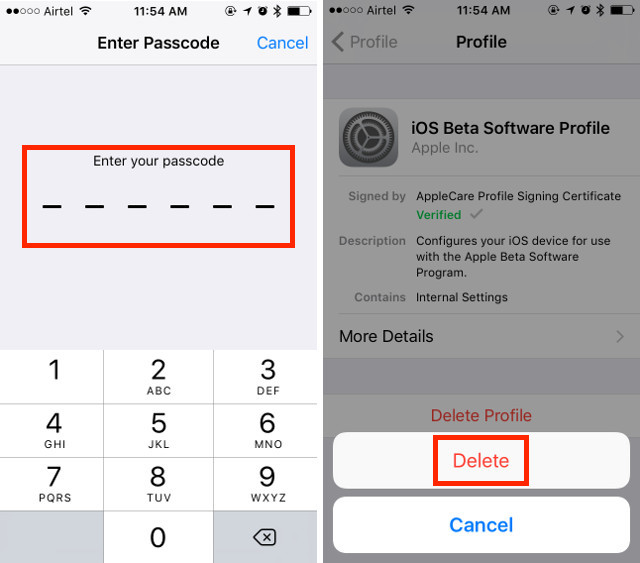
2. Here, tap on the iOS Beta Software Profile, and then on “Delete Profile“.
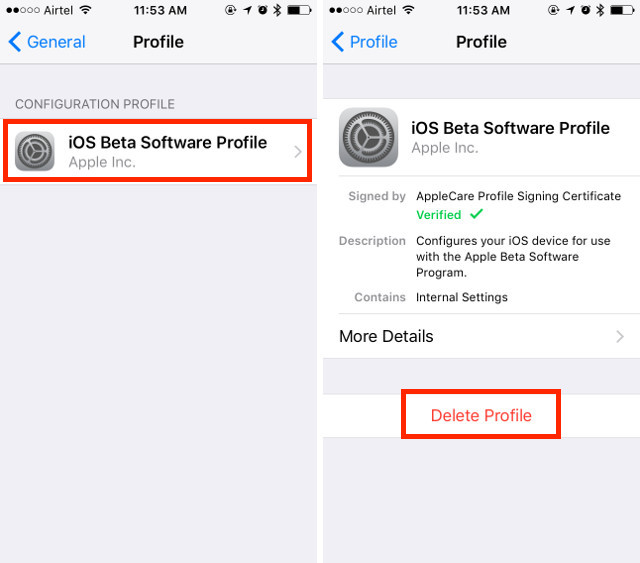
3. You will be asked for your passcode; enter it, and then press on “Delete“.
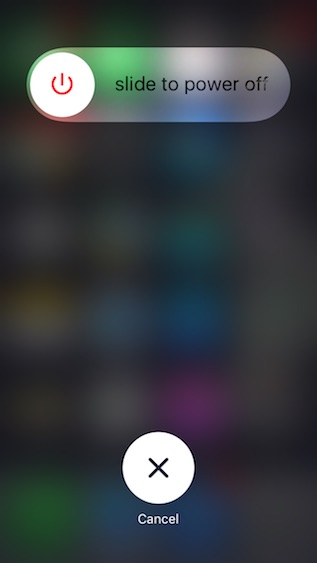
4. Switch your iPhone off, by pressing the Power button, and sliding to power it off.
5. Now, turn your iPhone back up again.
This will remove the Public Beta profile from your iPhone, and you will only receive updates that Apple pushes to its casual, and general users. If you don’t want to use this method, there is another way that you can use. However, it involves using iTunes, so keep a lightning cable handy.
Updating Using iTunes
If you want, you can use iTunes to remove the beta profile from your iPhone, as well. To do this, you just have to follow the steps below:
Note: Once again, don’t forget to backup your iPhone before you do this. This method may cause data loss, if the update fails, and you need to restore your iPhone using iTunes.
1. First, connect your iPhone to your Mac. Once you have done that, press and hold the Power button, and the Home button, at the same time. Don’t let go even when the Apple logo shows up. This will restart your iPhone in recovery mode.
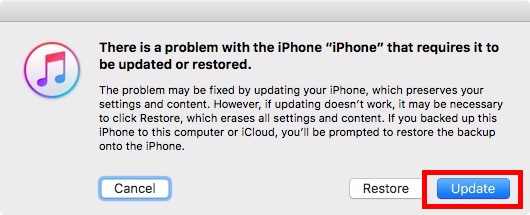
2. iTunes will automatically prompt you to Update your iPhone. Click on “Update”.
3. In the next dialog box, click on “Update” again.
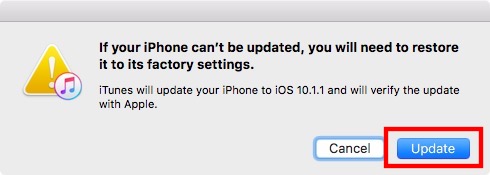
4. Click on “Agree” on your computer to install the latest Public Release version of iOS 10 on your iPhone.
Your iPhone will now be running the latest Public Release of iOS, and you can simply go to the Apple beta website, and un-enroll your device from there, if you want.
SEE ALSO: 12 Best iOS 10 Widgets You Should Try On Your iPhone or iPad
Switch to the iOS 10 Public Release with These Methods
You can choose to use any of the methods mentioned above to update your iPhone to the latest stable build of iOS 10. While staying on the beta release ensures that you get the latest features, and bug fixes, before anyone else; beta versions are always prone to running into issues, both big and small. So, unless you have a good reason for staying on the iOS 10 beta, you should definitely update your phone to the Public Release of iOS 10, which is stable, and bug free (for the most part).
As always, let us know about your thoughts on iOS 10, and whether or not you’re sticking it out with the beta version of iOS, in the comments section below.

