The Apple ecosystem is primarily known for its connected experience across devices. There are several ways your iPhone and Mac can connect and communicate with each other, letting you share media, use Continuity features, and more. While it’s appealing, there can be instances when you wish to disconnect from your iPhone from your Mac. Maybe you wish to stop getting your iPhone messages on Mac or stop seeing those Handoff prompts. Or maybe you simply want more privacy and better device management. In this guide, we’ll show you 10 ways to disconnect an iPhone from a Mac. No matter which model you’re using, this guide should come in handy. Let’s begin!
Method 1: Disconnect iPhone From Mac in Finder
If you don’t want your iPhone to appear in the Mac Finder, you can simply unplug the iPhone. Once you do that, your iPhone will no longer show up in the Finder. In case this doesn’t help, you probably have configured Finder to detect iPhones over Wi-Fi. Here’s how to do it:
- Open Finder on your Mac.
- From the sidebar, click on iPhone and uncheck the Show this iPhone when on Wi-Fi option.

Now, once you disconnect and reconnect your iPhone’s Wi-Fi, it shouldn’t appear in Mac’s Finder.
Method 2: Disconnect iPhone’s Hotspot from Mac
There can be instances when you need internet access on your Mac and there’s no Wi-Fi network available. In such cases, you can use the iPhone’s Personal Hotspot. However, if you no longer need it, it’s a nice idea to disconnect the iPhone’s hotspot from the Mac. This can help you save the battery of your iPhone.
To disconnect the iPhone’s Personal Hotspot, click on the Wi-Fi icon in the top menu bar on Mac and switch to a different network. This will disconnect your iPhone’s hotspot on Mac but will automatically connect to it the next time.
To stop your Mac from asking you to connect to your iPhone every time, go to System Settings -> Wi-Fi and turn off the “Ask to join hotspots” option.

Method 3: Disable AirDrop to Disconnect iPhone from Mac
If you don’t want your iPhone to show up in the list of nearby devices for AirDrop on Mac, you should disable AirDrop on your iOS device. To do this, go to Settings -> General -> AirDrop and select Receiving Off. Unfortunately, this will disable your iPhone from receiving AirDrop files from other Apple devices as well.

To stop your Mac from appearing in AirDrop on your iPhone, open the Finder app, choose AirDrop from the sidebar, and set “Allow me to be discovered by” to No One.

In case the iPhone or Mac doesn’t belong to you, setting AirDrop to Contacts Only should prevent the device from appearing in AirDrop nearby devices.
Method 4: Disconnect Handoff
Apple’s Handoff is an incredibly useful feature that lets you start something on one device and finish it on another. For instance, you can start drafting an email on your iPhone and pick it up later on your MacBook. That said, those constant Handoff alerts can be distracting. If you also feel the same, here’s how to turn off Handoff on your iPhone:
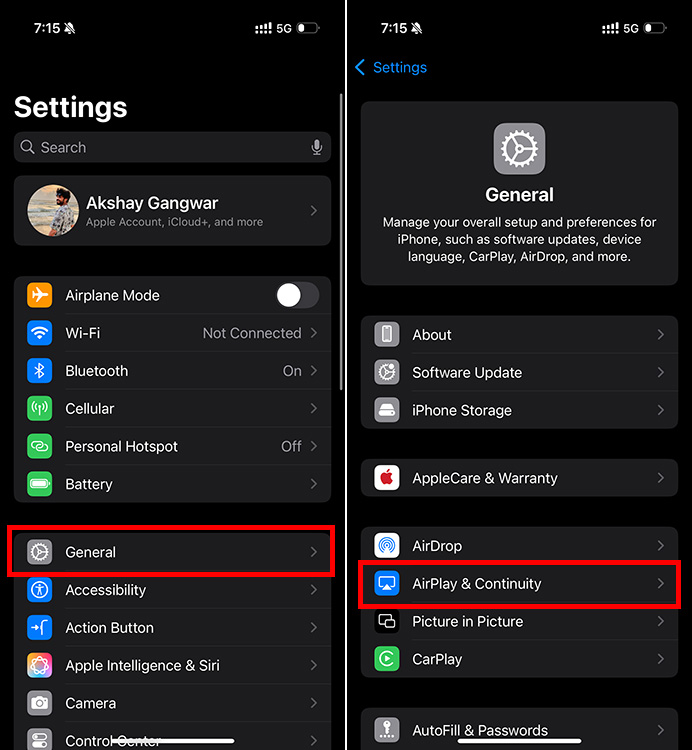
- Go to Settings -> General -> AirPlay and Continuity.
- Here, turn off the Handoff toggle.

To disable Handoff on Mac, go to System Settings -> General -> AirDrop & Handoff and turn off Allow Handoff between this Mac and your iCloud devices.

However, bear in mind that turning off Handoff also disables the Universal clipboard feature that lets you copy & paste between your Apple devices.
Method 6: Unsync iCloud Between iPhone & Mac
Unless you manually turn it off, your iPhone and Mac automatically sync photos, messages, contacts, and other data with iCloud. If you don’t want your iPhone to sync its contacts, photos, notes, and other stuff with MacBook, you must unsync iCloud between your devices.
- On your iPhone, go to Settings -> Apple ID -> iCloud
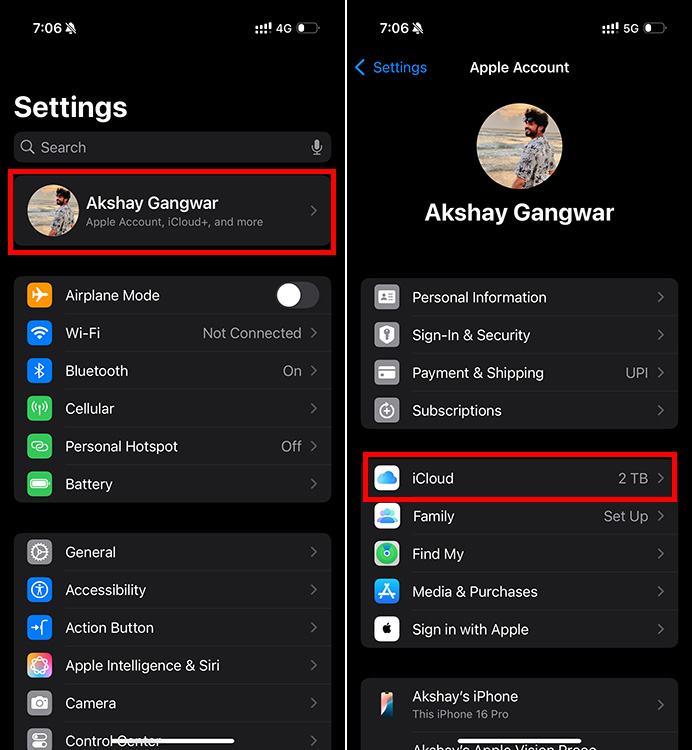
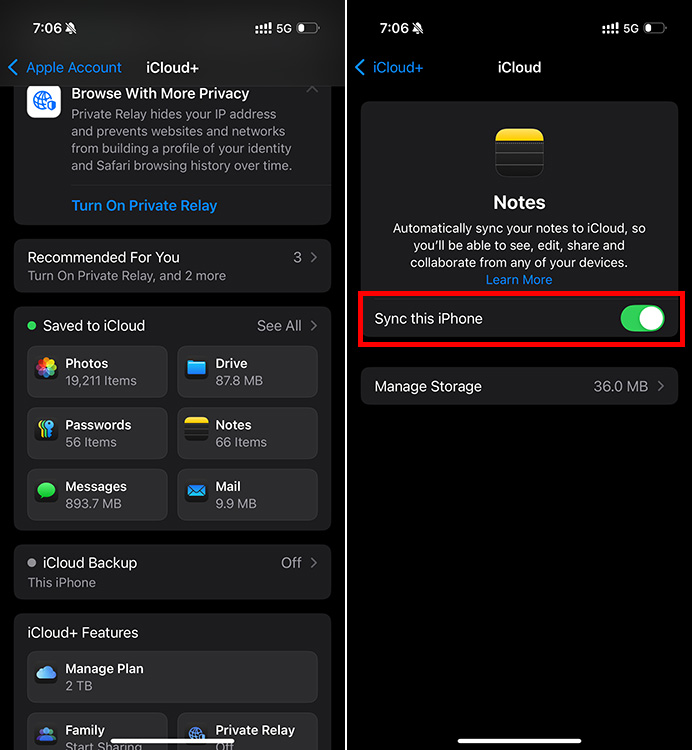
- Here, tap on the apps or services you no longer want to sync with iCloud and turn off the Sync This iPhone option.
- Repeat the above steps for every app you wish to stop syncing your data.
To stop your Mac from syncing data to your iPhone, go to System Settings -> Apple ID -> iCloud. Select the apps or services you no longer wish to sync and turn off the Sync This Mac option.
Method 7: Stop Getting iPhone Messages on Mac
By default, your Mac shows up all the text and iMessage you get on your connected iPhone. While it’s convenient to get your messages on both devices, some people may want to keep private and work messages separately. If you don’t wish to get iPhone messages on your Mac, here’s what you need to do:
- Open the Messages app on your Mac.
- From the top menu bar, click on Messages -> Settings.
- In the iMessage tab, deselect the “Enable Messages in iCloud” option.
- Here, you can also disable getting messages on any email address (the one related to your Apple ID).

Going forward, your iPhone iMessages won’t show up on your iPhone.
Method 8: Stop Getting iPhone Calls on Mac
Tired of your Mac ringing every time you get a FaceTime call on your iPhone? Not only this is distracting but an utter annoyance when you’re attending a meeting or working on something important. To stop getting your iPhone calls on Mac, just follow the steps below:
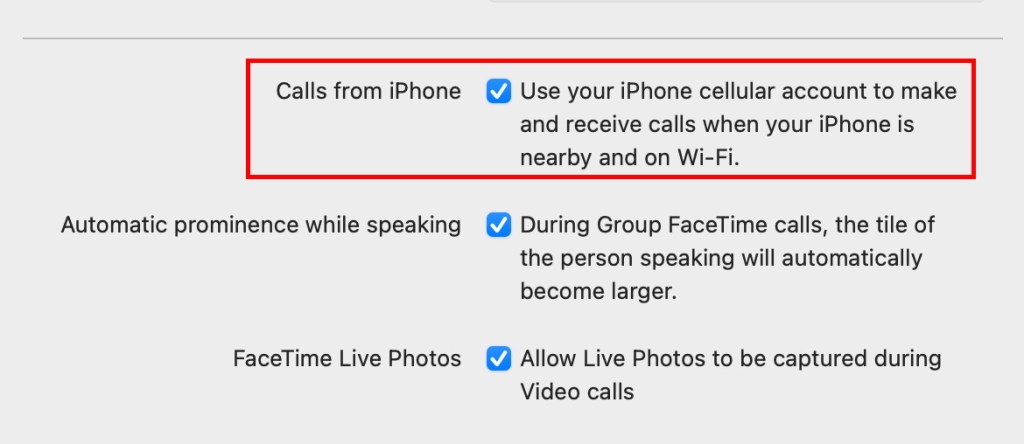
- Open FaceTime on your Mac and head to “FaceTime -> Settings” from the menu bar
- Here, uncheck the “Calls from iPhone” option to stop getting iPhone calls on Mac
Alternatively, you can also configure your iPhone so it doesn’t transfer calls to your Mac or any other device. For this, go to Settings -> Apps -> Phone -> Calls On Other Devices and turn off Allow Calls on Other Devices toggle.

Method 9: Remove Mac from iPhone Mirroring List
Apple’s iOS 18 and macOS Sequoia bring an impressive iPhone Mirroring feature that lets you use your iPhone on your Mac wirelessly. While it’s a fantastic addition, you should take care of a few important things. If you’ve used your friend’s Mac to mirror your iPhone or someone else wishes to use your Mac, you would probably want to ensure that no one else can mirror your iPhone. For this, you must delete that Mac from the list of devices allowed to mirror your iPhone.
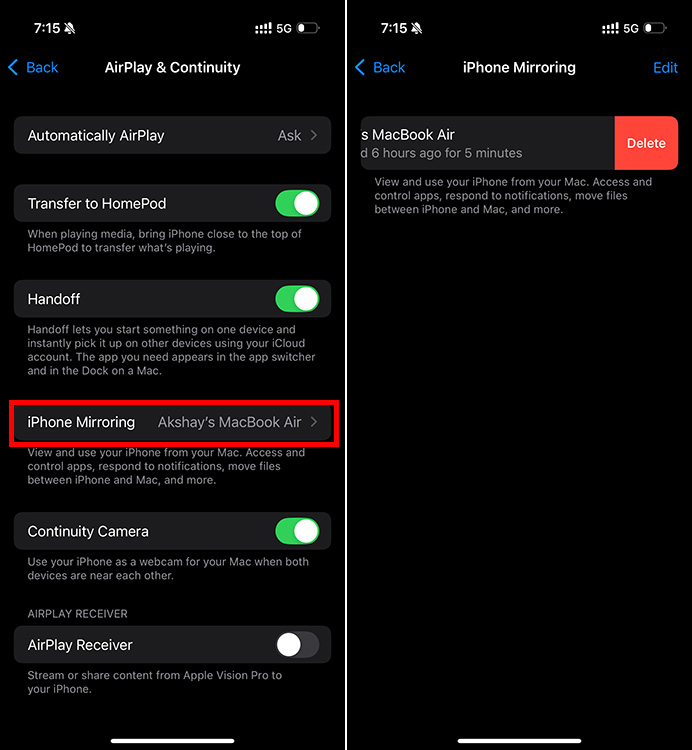
- On your iPhone, go to Settings -> General, and tap on AirPlay & Continuity
- Next up, tap on iPhone Mirroring and swipe left on the Mac’s name to delete it from the list
If you wish to use iPhone Mirroring on your Mac, you’ll have to follow the setup process again.
Method 10: Sign Out of Apple ID
If you wish to disconnect your iPhone from your Mac completely, you must sign out of Apple ID on at least one device. That’s because as long as your iPhone and Mac are connected to the same Apple ID, they will be connected to each other in some way. For this, go to Settings -> [Your Name] and you’ll find the option to sign out of Apple ID.

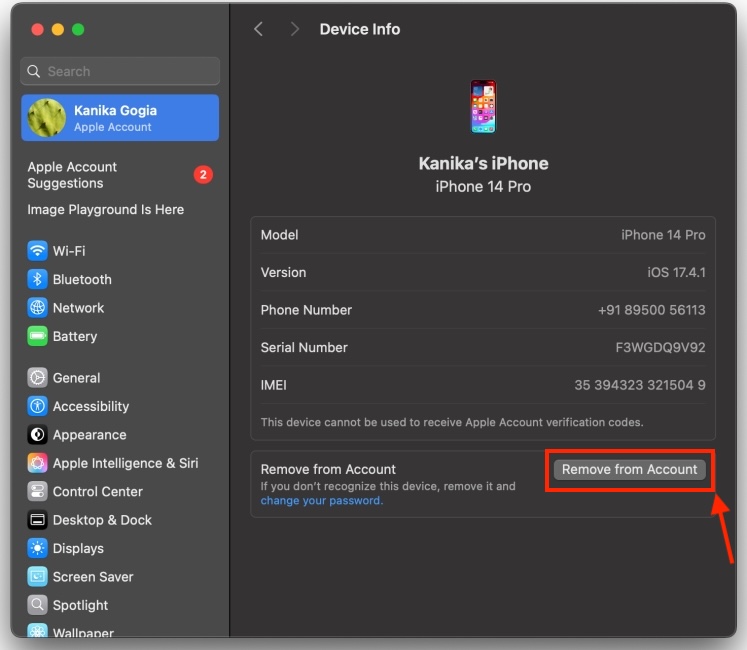
Alternatively, you can remove your iPhone from your Apple ID using a Mac. To do this, go to System Settings -> [Your Name] and scroll down to see the list of devices associated with your Apple Account. Finally, select your iPhone and choose Remove From Account.
If you wish to change the Apple ID on your device, you can refer to our step-by-step guide here.
The methods discussed above should help you disconnect your iPhone from your Mac. If you wish to truly disconnect your iPhone and Mac, you may consider one of the devices from your Apple Account. You can then create a new Apple ID for your iPhone so it doesn’t sync with any other device. On the flip side, you can also choose to keep your iPhone and Mac connected and simply turn off the features or services that are bothering you. In case of any doubts, you can reach out to us in the comments below.

 Anshuman Jain


![How to Zoom Out on Mac [2024 Guide]](https://static.beebom.com/wp-content/uploads/2024/02/How-Zoom-Out-on-Mac.jpg?w=300&quality=75)


