
Zoom is seeing an unprecedented growth amid the Coronavirus outbreak. Its online solution to video conferencing and webinar is unmatched and there only a few Zoom alternatives that are comparable to its range of features and scale. Recently, after seeing the surge, we wrote a guide on how to install and use Zoom like Pro for new users. And this time, we bring you a list of 15 best Zoom tips and tricks to master this popular video conferencing tool. We have mentioned useful tips related to productivity, security, and some fun ones too. So without further delay, let’s go ahead and learn about the latest Zoom tips and tricks in 2020.
Zoom Tips and Tricks for Video Conferencing in 2020
1. Add a Virtual Background
Among the plethora of features on Zoom, Virtual Background is my favorite one. It allows you to add a custom background — a photo or video — during your Zoom meeting. While Zoom offers some cool media out of the box, you can also add your own images and videos to the background. In my usage, it worked really well and the software was able to distinguish the face from the background in real-time. So to enable it, click on the “cogwheel” icon to open Settings and switch to the “Virtual Background” tab. Here, you can choose a background from the given options or add your own custom image or video.


2. Mute and Unmute Your Mic Quickly
If you have to follow just one tip for Zoom then let it be this one. When there are too many participants in a meeting, it’s hard to hear everyone because of cross-talk and background noise. But you can reverse this behavior by a simple hack. For example, if you are in a web conference and not speaking then keep your mic on mute. And when you want to talk briefly, simply hold the space bar to enable the mic and speak. Once you release the space bar key, you’ll be muted again. This way, the meeting will be super-smooth, Zoom will eat less bandwidth, and everyone will be able to hear others clearly.


So to use this feature, open Settings -> Audio -> Enable “Mute my microphone when joining a meeting” to permanently change the behavior. Now, whenever you are in a meeting, press and hold the space bar to temporarily unmute yourself and speak thereafter. How awesome is that?
3. Disable Video when Joining Meeting
Sometimes, we get a meeting notification and we hurriedly join the conference in our clumsy self. To avoid any such embarrassment, you can permanently disable the video when joining a meeting. Once you are in your best composure, you can enable the video. To use this feature, open Settings -> Video and enable “Turn off my video when joining meeting”. That’s it.


4. Useful Keyboard Shortcuts
If you want to master Zoom, you must know some of the helpful keyboard shortcuts. Just above, I mentioned how to mute/unmute yourself by simply holding the space bar. But apart from that, there are many other shortcuts as well. Here are some key shortcuts for Windows and macOS.
- Turn on/off video: Alt + V or Command + Shift + V
- Turn on/off screen sharing: Alt + S or Command + Shift + S
- Take a screenshot: Alt + Shift + T or Command + T
- Turn on/off local video recording: Alt + R or Command + Shift + R
- Read active speaker name: Ctrl + 2 or Command + 2
Apart from this, you can also enable “Global Shortcut” which means, when the Zoom app is not in focus, you can execute the keyboard shortcuts from anywhere in the operating system. You can enable it from Settings -> Keyboard Shortcuts. Here, enable the Global parameter for the shortcuts which you are most likely to use. As far as Zoom tips go, this is the one to memorize.
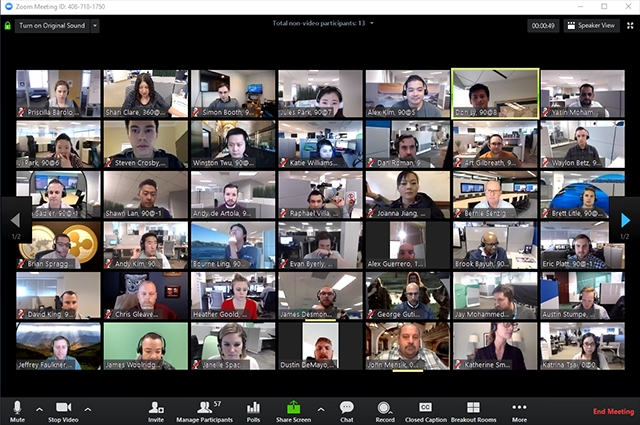
5. Enable Gallery View
Among Active Speaker, Gallery, and Mini layouts, I love Gallery View the most. It’s because everyone is on the same page and you can easily monitor all the participants at once. That said, it’s advised to use this feature when you have a small group otherwise Active Speaker is quite good. So to enable it, click on “Gallery View” in the top-right corner of your Zoom window and you are done.

6. Automatically Copy Invitation URL
If you tend to invite many participants to your Zoom meeting, you can enable a global feature that copies the invitation URL automatically to your clipboard. It will save you a lot of time from clicking on “Invite” and finding the Invitation URL. So open Settings and switch the “General” tab. Here, enable “Automatically copy invitation URL once then the meeting starts” and now you can ask people to join your meeting by sharing the URL to Slack, WhatsApp, and other social media platforms seamlessly.


7. Use Snap Camera on Zoom
Snap Camera is a desktop version of Snapchat where you can apply many beauty filters from Snapchat to create lenses. You can further share these lenses with Zoom as your default look. While I don’t know how useful it is, the Snap Camera integration with Zoom is pretty fun, especially when you are having a group call with your friends. To use it, all you have to do is download Snap Camera application for Windows or macOS (Free) and then click a picture using any of the lenses available there. After that, simply open Zoom and go to Settings. Under the “Video” tab, change the Camera from the drop-down menu to “Snap Camera”. Enjoy! If you are an avid Snapchat user, you should also read our article on best Snapchat tips to get the most out of the service.


8. Share Your Screen
Screen Sharing is one of the best features of Zoom and you should definitely take advantage of it. While many organizations use it for remote assistance, some users share the screen and watch videos and movies together. So to use it, just start a meeting and click on “Share Screen” at the bottom. Thereafter, you can enable the whole screen or only the active window. You can also turn on the computer sound for a better experience.


9. Integrate Third-party Apps
Zoom has some of the best third-party apps which you can integrate with just one click. You want to join a Microsoft Teams meeting from Zoom? No worries, simply add the app from its marketplace and you are done. Want to import all your meeting schedules from Google Calendar or Outlook? There are dedicated apps for that as well. You want to meet your colleagues from Slack and start video conversation in one click, well, there is an app for that. Simply put, third-party integration on Zoom is incomparable and you must take advantage of it. You can find all the apps in Zoom App Marketplace.


10. Enable Local Recording
The best part about Zoom is that it offers major features under the free tier. For instance, you can record all your video meetings locally on your computer. Simply click on the “Record” button during a meeting and it will start the recording in just one click. You can find all your recordings in the Documents folder. Apart from that, Zoom also offers cloud recording but that is available only to paid users.


11. Enhance Your Look
Apart from Snap Camera integration, Zoom also offers a native option to beautify your look. It softens your skin tone and smooths out any blemish on your video display. Overall, it offers a more polished and pleasing appearance to your look while you are in a meeting. So to enable it, open Settings -> Video -> turn on “Touch up my appearance” and you are done.


12. Audio Transcript
Zoom has this awesome feature where it can automatically transcribe the audio of a meeting or webinar. It will help you in record-keeping crucial parts of a meeting in a searchable VTT text file. However, this feature is only available to paid users who have opted for cloud recording. So if you are a premium user, open the web portal of Zoom Recording Settings and enable “Cloud Recording”. After that, click on “Advanced cloud recording settings” and enable the “Audio Transcript” checkbox. Now whenever you are in a meeting, choose “Cloud recording” at the bottom. Finally, after some time, you will receive an email letting you know that the audio transcript for the recording is available.


13. Schedule Meetings
While the desktop app of Zoom has an option to schedule meetings, it requires you to open the app which can take too much time. So if you want to schedule Zoom meetings in a jiffy, install the Zoom Scheduler (Free) Chrome extension. You can just click on it and add an event then and there.


14. Waiting Room
Recently, there have been many cases of Zoom Bombing where strangers and hackers show up in a meeting without any authorized access. So to avoid any such mishaps, you can enable the Waiting Room feature. It allows you to admit participants one by one or hold all attendees in the waiting room. Consider it as an essential feature to secure your Zoom meetings.


To enable Waiting Room, open Zoom Account Settings on a web browser and move to “Account Management”. Here, open the “Waiting Room” option and enable it. After that, choose whom do you want to keep in the waiting room: all participants or guest participants who are not on your Zoom account or those who don’t have a Zoom account. This will stop gatecrashers to enter your Zoom meeting. In case, you are not available to authorize a guest, you can also allow “internal participants to admit guests from the waiting room”. Finally, click on “Save” and you are done. Keep in mind, this feature is only available to premium users.
15. Breakout Room
In case, you are having a large meeting or a webinar, you can split-out the meeting into several rooms with separate sessions. The main host can assign sub-hosts who will deal with participants in each room. Zoom allows you to create 50 Breakout rooms of up to 200 participants; 30 Breakout rooms of up to 400 participants and 20 Breakout rooms of up to 500 participants. You can enable it from the web portal of Zoom Account Settings. From there, navigate to the Breakout Room option and enable the toggle. Having said that, bear in mind, this feature is only available to paid users.


Apply the Best Zoom Tips and Tricks for Video Conferencing
So these are the 15 best Zoom tips and tricks that you should use on Zoom for video conferencing. We have offered all kinds of tips from helpful ones to some funny features too. In the end, we have also mentioned a few security-related tricks which you should certainly use on your Zoom account. Anyway, that is all from us. If you found our list helpful then do comment down below and let us know.


