The flashlight has long been a useful iPhone tool that most of us use in dark/ low-lit environments. Whether while trekking in the wild or fumbling in a dark room, we bring on the flashlight to find our way or spot something. That’s why Apple has made it accessible right from the lock screen of your iOS device so that you can bring it into action with ease. Even though this useful feature is designed to work reliably, it’s not immune to failure. But fret not, we’ve jotted down the 9 pro tips to fix your iPhone flashlight if it’s not working.
10 Ways to Fix iPhone Flashlight Not Working Issue (2022)
What Could be Preventing the iPhone Torch from Working?
The flashlight issue could be both hardware and software related. If it’s due to a random software glitch, you can get rid of it by trying out some trusted software hacks. However, if it’s due to a hardware failure, you will need to contact Apple or an authorized iPhone service center. Keeping both these aspects in mind, we’ve suggested the solutions that are likely to troubleshoot the flashlight not working problem on your iPhone.
1. Make Sure the Camera App is Closed
As both the camera’s flash and the flashlight use the same bulb, it’s better to keep the camera app closed while activating the flashlight to prevent any possible conflict. So, if the camera app is open in the background, make sure to force quit it (swipe up from the home bar or double-press the home button to bring up the app switcher and then swipe up on the app card to kill the app).
2. Remove Any Case or Screen Protector
Believe it or not, some iPhone cases/covers, accessories, and even films tend to block the flash and prevent it from working normally. So, remove any case or film and then try to use the flashlight on your iPhone. If it starts working now, your case/film was at fault, and not your iPhone.
3. Restart Your iPhone
Another way to fix your iPhone’s torch if it’s not working is to try a simple restart. Here’s how you can restart your iPhone depending on whether it has Face ID or Touch ID.
- On iPhone without Home Button: Hold down the volume up/down button and the side button until the power off slider shows up. After that, drag the power off slider to shut down your device. Then, press and hold the side button until the Apple logo appears.
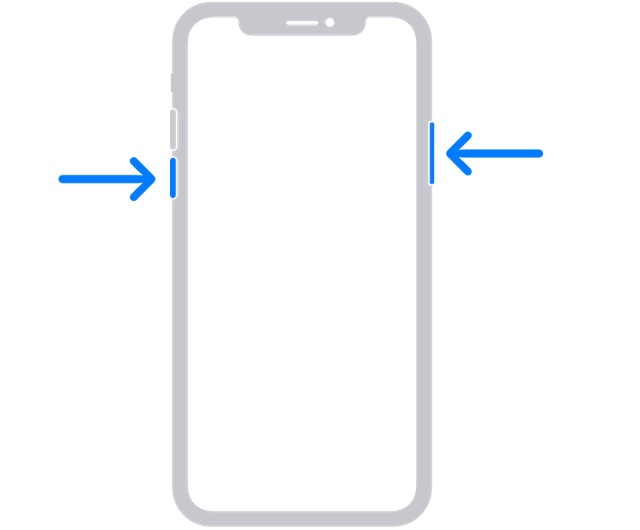
- On iPhone with home button: Press and hold the side/top button and then drag the power off slider to turn off your device. After that, press and hold the side/top button to reboot your device.
4. Hard Reset Your iPhone
The hard reset aka force restart is slightly more effective than a simple restart when it comes to fixing weird iOS issues. Therefore, you should try this out as well.
- On iPhone 8 or later: Press and release the volume up button. Then, press and quickly release the volume down button. After that, press and hold the side button until the Apple logo comes up on the screen.
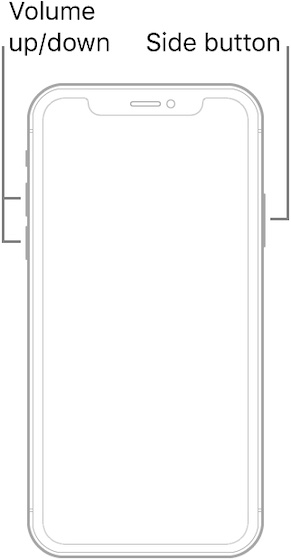
- On iPhone 7/7 Plus: Press and hold the side button and volume down button simultaneously until the Apple logo appears on the screen.
- On iPhone 6s/6s Plus or earlier: Hold down the home button and the side/top button at once until you see the Apple logo on the screen.
5. Test LED Flash by Using the Flashlight in Control Center
A quick way to test whether or not the flashlight is working is by using the control center. Moreover, you can also adjust the brightness of the flashlight by using its slider.
- On iPhone with Face ID: Swipe down from the top right corner of the screen to access the control center.
- On iPhone with Home Button (Touch ID: Swipe up from the bottom edge of the screen to bring up the control center.
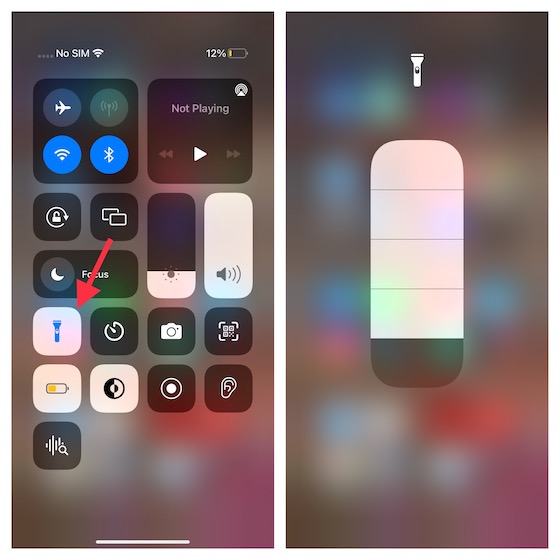
Now, tap the Flashlight icon to check if it’s working normally. Besides, touch and hold the flashlight icon to access the slider and then ensure that the brightness is set at the highest level.
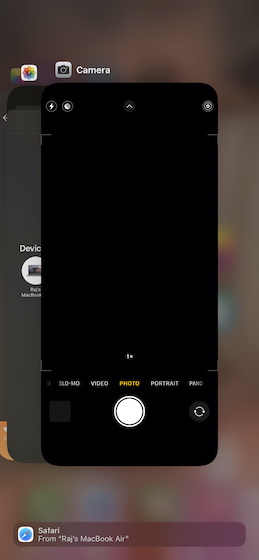
6. Test LED Flash by Using the Camera
You should also check whether the flash-bulb itself is working or not. One easy way to do this is to simply use your iPhone’s camera app. Here’s what to do.
- Open the camera app on your iPhone and head into the ‘Photo’ option. Here, tap on the arrow icon (or swipe up on the viewfinder) to view extra settings.
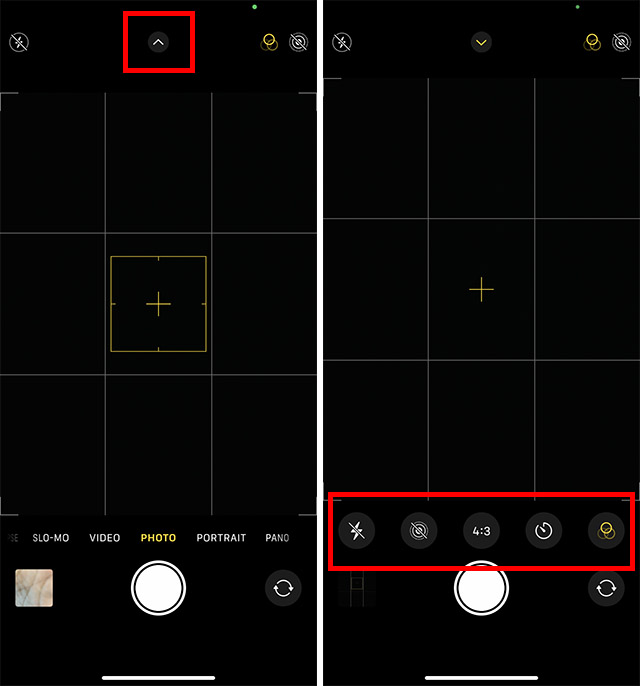
- Now tap on the flash icon and choose ‘On’ instead of ‘Auto’ or ‘Off’.
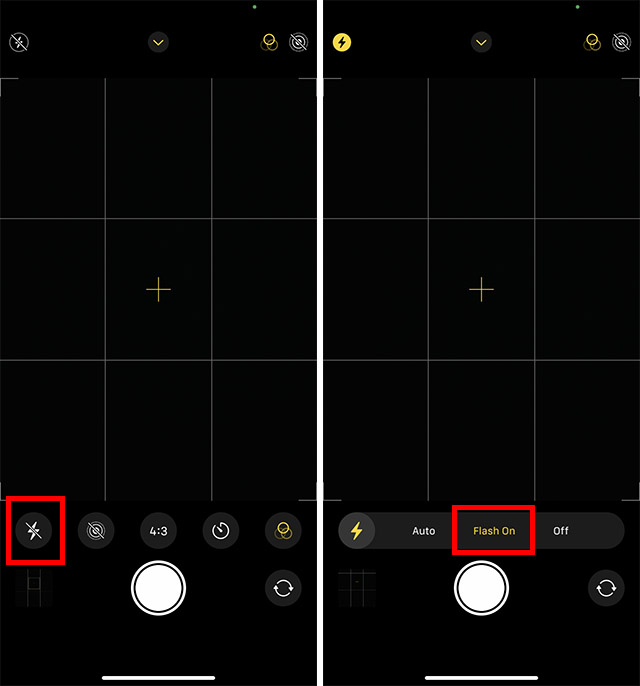
Try clicking a photo and see if the flash fires. If it does, then the issue is not with the hardware LED flash, but rather a software glitch.
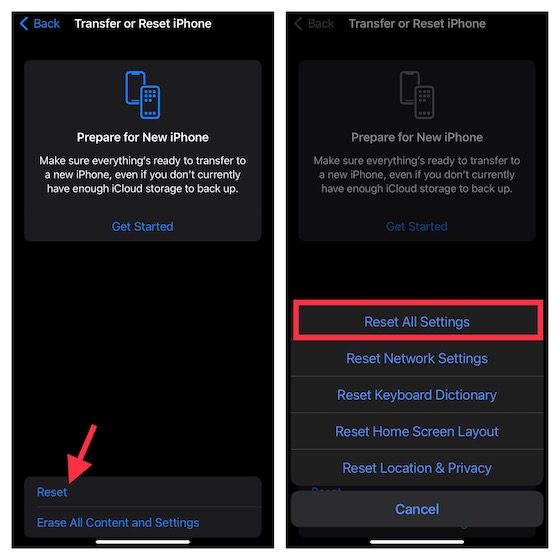
7. Reset All Settings
Resetting the iPhone to factory default is the sort of solution that comes in handy when dealing with persistent issues. Since it has always been like a go-to troubleshooter for fixing major software-related issues, it’s worth trying out as well.
- iOS 15 or later: Navigate to the Settings app on your iPhone -> General -> Transfer or Reset iPhone -> Reset -> Reset All iPhone.
- iOS 14 or earlier: Head into the Settings app -> General -> Reset -> Reset All Settings.
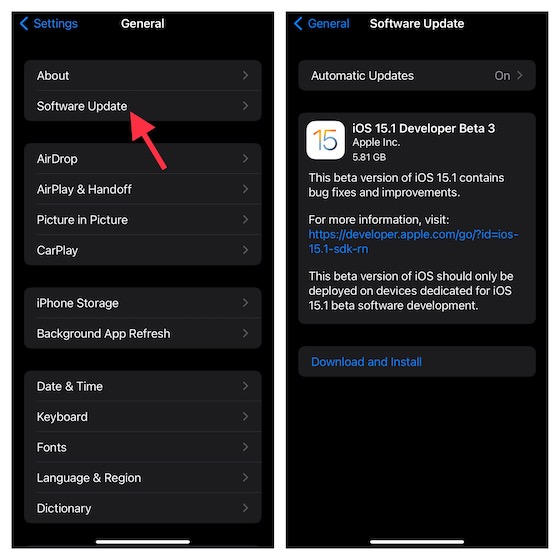
8. Update Software
If the flashlight continues to misbehave on your iPhone, update the software. If the issue is due to a rare software bug, updating the software can resolve it.
- Open the Settings app on your iPhone -> General -> Software Update. Now, allow iOS to check for the update.
- When it shows the latest update, download and install it as usual.
9. Restore Your iPhone to a Previous Backup
This one has long been a nuclear solution for iPhone, especially when faced with a complex issue. So, if none of the above-mentioned tricks has worked in fixing the iPhone flashlight not working issue, restore your iPhone from the previous backup.
Bear in mind that it will erase your entire iPhone wiping out everything that exists on your iOS device. Therefore, do not proceed with it until you have fully backed up your device.
- If you have an iCloud backup (Settings app -> Apple ID banner -> iCloud -> iCloud Backup), you can restore your device without using Finder/iTunes. Head over to Settings app -> General -> Transfer or Reset iPhone -> Reset -> Erase All Content and Settings.
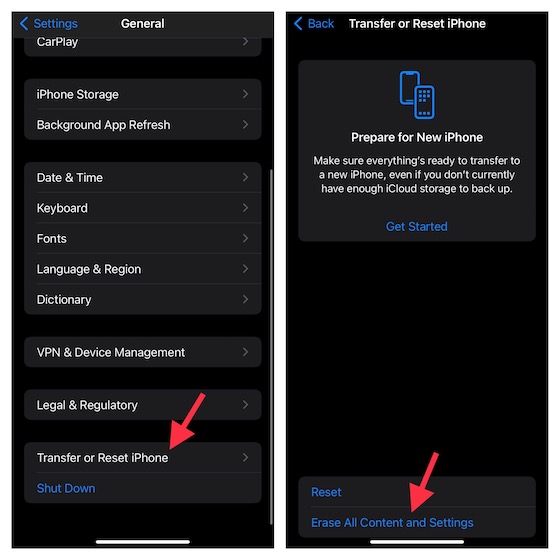
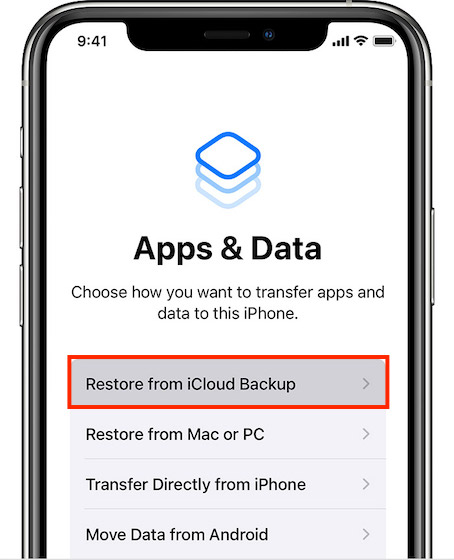
- Once your device has been successfully erased, follow the setup assistant to set up your device. Along the way, you will get an option to restore your iPhone from an iCloud backup.
Note:
- With iOS 15 or later, you can get free unlimited iCloud backup, which you can use to back up your device to the cloud and then restore your data. If your device is running the latest iOS version, make sure take advantage of the free unlimited storage to back up and restore your device.
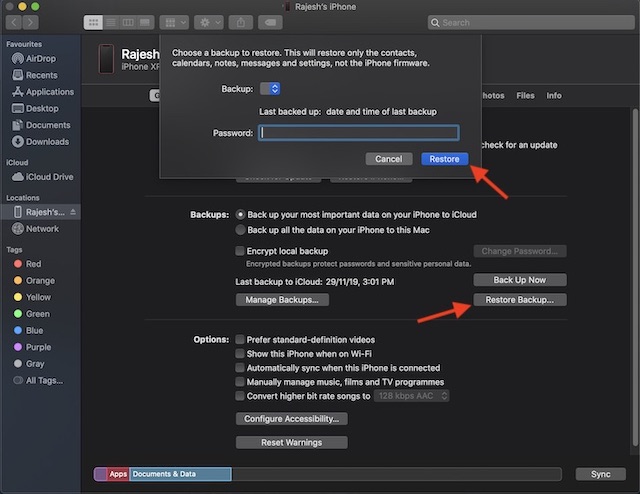
Alternately, you can also use your Mac or Windows PC to restore your iPhone from the previous backup.
- Connect your iPhone to your computer using a USB cable and then launch Finder/iTunes. Now, make sure to back up your device if you haven’t done it as yet.
- After that, click Restore Backup -> select the most recent backup and hit Restore.
10. Contact Apple Support
If your iPhone flashlight has not yet started to work normally, there is a good chance that the issue could be related to hardware. And in this situation, you should contact Apple Support without any delay.
Fixed Flashlight Not Working Issue on iPhone
That’s it! Hopefully, your iPhone flashlight is back to normal. As I said above, if the problem is due to the ill-functioning of the software, a hard reset or software update is more than capable to resolve the issue. However, if it’s because of hardware failure, contacting a trusted iPhone repair center is always the right way to go. Anyway, let us know the hack that has fixed your iPhone flashlight. And if you know any other reliable solution for resolving this issue, tip us about that as well.