In this age of social media where sharing a photo has become as important as clicking one, photo editing skill has become an indispensable tool. After all, who doesn’t want to share photos which look good? When it comes to photo editing, people mostly fall into one of the two following categories. The first kind uses professional grade software, like Adobe Photoshop, and tinker with every little detail in their photos to make them look as beautiful as humanly possible. The second kind doesn’t have enough skills or passion to edit their photos vigorously, so most of the time, they are stuck using Instagram filters.
But, what if there was a common ground? What if, you could make your photos look almost as good as the ones edited using a professional grade software, without actually having to invest the time to learn them? Movavi Photo Editor for Mac lets you do just that. Using this software you can give professional editing touches to your photos in just a few minutes. If I have piqued your interest even a little bit by now, let us take a deep dive into the Movavi Photo Editor and find out if it lives up to its claims:
Key Features
The first thing that jumps out at you when you launch this app is its interface. I am used to seeing a lot of indiscernible tools and icons on all the photo editors I have used in the past, however, Movavi’s interface is as clean as they can come. But a cleaner interface should not be used as an excuse for limited features. I am happy that Movavi doesn’t take that route and has ample features to satisfy most of its target users. Now it will be impossible to discuss all of them here, so, I have decided to mention only the top 5 features of the app.
Note: I did not spend more than five minutes on editing any of the photos, so don’t judge them on the basis of accuracy. I have done this to showcase how easy it is to edit photos using this tool. If you want perfect editing, you will have to spend some time on those editing processes which require a little bit of finesse.
1. Magic Enhance
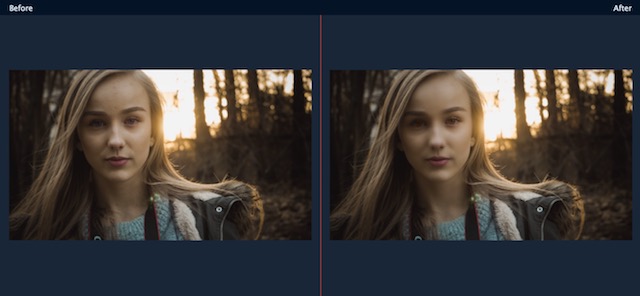
Let’s start our list with what probably is the most used feature of this app; the Magic Enhance. The feature is a god send for people with zero photo editing skills. You import your photo and click on the Magic Enhance button and voila, your photo suddenly starts looking beautiful. It’s no difficult than applying a filter on your photo and yet the end results are as stunning as ever.

However, sometimes the magic enhance button does make the photo feel a little bit over saturated. But that’s a problem which can be fixed easily. Below the magic enhance button, there’s a set of manual controls for changing the brightness, exposure, contrast, saturation, and temperature among others. It will just take a few minutes of tweaking with these tools to solve the over saturation problem. However, in the photos that I have attached, I have not done any manual alteration. I just clicked on the Magic Enhance button and found the result to be quite stunning.
2. Object Removal
I don’t know how many times I have waited to take a perfect picture, only for it to be ruined by an uninvited guest in the frame. It’s very hard to get rid of an object from a photo without degrading the background with it. However, Movavi Photo Editor makes it look really easy. Not only it is easier, the precision with which the object is removed is also astounding. If you don’t see both the before and the after photos, you won’t even believe that something was removed from the image, such is the quality of the software.

The process is pretty simple too. You just need to select the object removal tool and then paint over the objects you want to remove. When you are done selecting the objects, just click on the “Start Erasing” button and you are done. The editor will process the photo and the end result will be nothing short of magic trick. You will have to use the software to really understand how easy it is. By the way, here’s a fun exercise, look at the photos and find out the objects that I removed.

3. Background Change
This is one of the fun features which I have only used to experiment with my photos. Suppose, you have a photo with a beautiful object in the focus, however, the background doesn’t do justice to the photo. Using Movavi you can entirely change the background.

You can either select a solid colour for the background, or, you can choose one from the stock backgrounds which comes with the app. You can even select your own photos and use them as a background. I don’t use this feature a lot, but it is surely a lot of fun to use.

4. Touch Up (Beauty Enhancement)
One of the features of the app which will come in handy for everyone is called the “Touch Up”. Basically, it allows you to beautify pictures of human faces by allowing to remove wrinkles and blemishes, applying digital makeup, and changing the colours of the eyes and the hair among other things. This is the tool which will require the most precision when using, as even the minute mistakes will make your photo look horrible. The tools are marked properly and are easy to use. The only thing you will have to do is to use them precisely, the rest will be handled by the software.
5. Insert Text, Watermarks, and Captions
The app also makes it very easy to insert texts, watermarks, and captions in the photos. The text format, colour, and appearance can be heavily edited. The app really gives you total control over inserting and editing of texts. Also, if you want to add your own watermarks to your photos, that can also be easily done here. The editing process is pretty simple and straightforward. The below change took me less than a minute to make.

Ease Of Use
All the features that I told you about can be performed with any other professional grade photo editing software too, however, as I mentioned earlier, it’s not the features that make this software unique but it’s the way the app allows you to implement them. The app makes editing photos a piece of cake. You get the option to choose automatic editing like the Magic Button which transforms your pictures in a few seconds, or, you can spend a few minutes to manually edit the photos for getting a better finesse. What makes this app so user-friendly are its user interface and the editing tools. We are going to take a deeper look into them now.
1. User Interface
As I mentioned earlier, the biggest strength of this app is its user interface. It makes accessing all its features effortless. Every control and tool are available to you at your fingertips. All the main tools can be accessed from the top of the screen while the sub-tools will appear on the right-hand side as you click on the main tool. The tools are also pretty easy to manage. Considering the fact that I edited all the photos just by using my trackpad, I would say the controls are pretty good too.
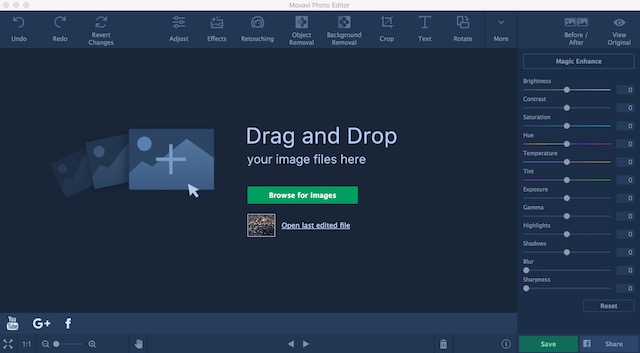
Moving between the tools and navigating the app is very easy. Each and every tool and functions are marked with text, so you don’t have to hover over the tools to know what they do. I also love the before/after button. The button allows you to view the edited and the original picture side by side, allowing you to get a comprehensive idea of the changes you have made. All in all, the app get perfect points when it comes to ease of use of its user interface.

2. Editing Tools
The best thing about Movavi Photo Editor is that it seems to know about its customer base. This has resulted in a software which packs a limited amount of tools but makes using them easier. Every tool follows more or less the same controls. You got your different types of brushes, slider controls, and one or two extra buttons here and there, and that’s it. This allows the users to get immediately familiar with the app. Basically, once you learn to use one of the tools (for example: touch up tool) in the software, you learn all of them. This is because all the tools are based on the same underlying structure and follow the same mechanics. They just behave differently when you are in different tool menus.
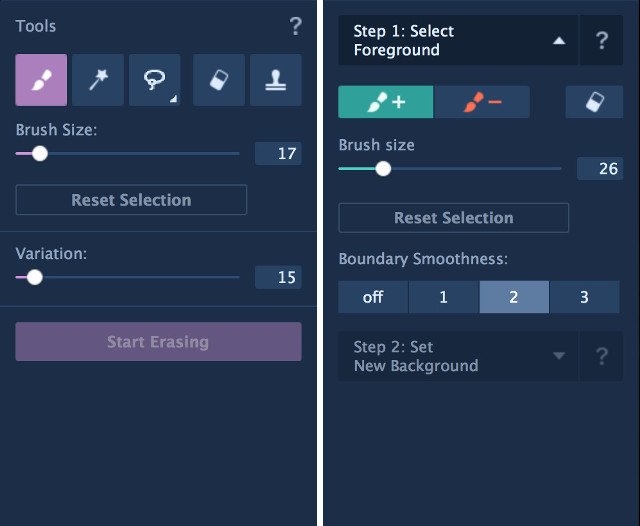
Learning the first one is also very easy. It won’t take you more than 5 minutes to do that. You select the brush, you slide to adjust its size, you outline the objects in the photos, and so on. One neat feature about the app is that it shows a short animation on how to use a tool whenever you select one. Of course, you can disable this feature once you know how to use them. Basically, the tools are easier to learn and once you learn one, you learn them all. No tool bar can be easier to learn and use than this.
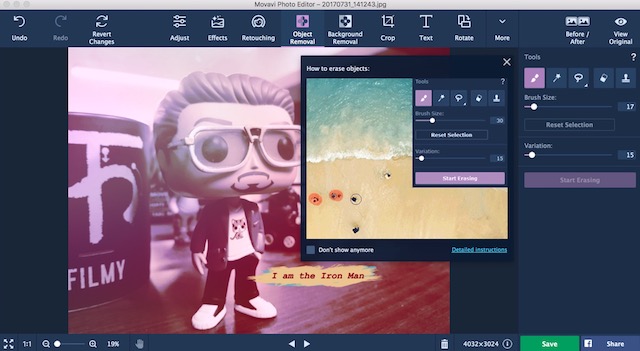
The extremely simple user interface together with the easy to learn tools make Movavi Photo Editor a dream editing software for novice photo editors. The fact that the app doesn’t go overboard on features just for the namesake, really makes this one stand out of the rest.
Pricing & Availability
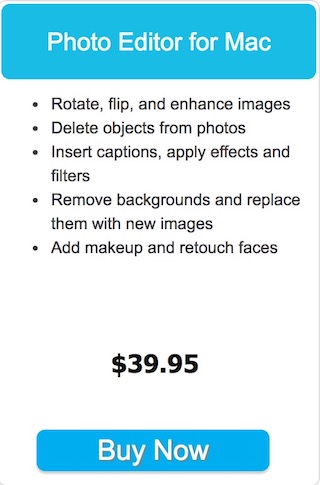
Movavi Photo Editor is available for both Mac and Windows and can be downloaded from their website. There’s a free trial version which you can use to check the app out for yourself before purchasing it. If you decide to purchase the app, the personal version will cost you $39.95. However, if you want to use the app for business or commercial purposes you will have to shell out $79.95.
Pros:
- Easy to Use
- Intuitive User Interface
- Limited but sublime tools selection
- Zero learning curve
Cons:
- Commercial or Business version of the app does not provide a good value for money.
- Minute controls are missing.
- Feature set could be a little better.
Edit Photos Like A Pro With Ease
Movavi Photo Editor gives power to the users who do not want to spend a lot of time learning a complex photo editing tool. Its simple interface along with the easy to use tools, allow the users to edit photos with ease, while maintaining the quality of the editing at the same time. The end results are superb and the photos look as if they have been edited by a professional. This feat is pretty hard to achieve and I commend Movavi for attaining that. I do consider that the feature set could have been a little better, but that probably will be nitpicking on my part. Movavi has done a great job here and the photo editor will surely serve its target audience well.
Check Out Movavi Photo Editor here


