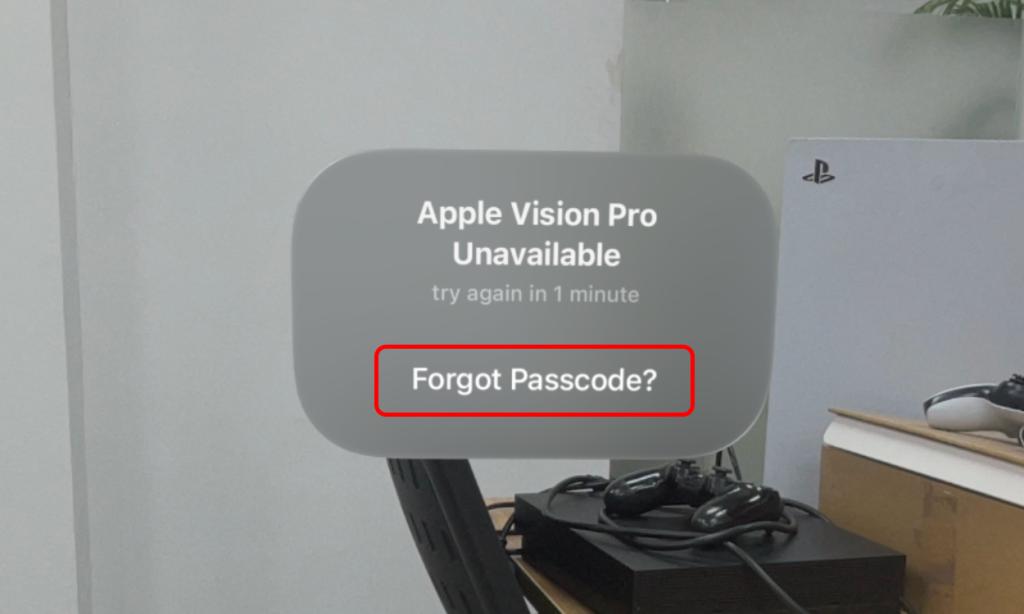
- To reset your Apple Vision Pro's passcode, you will need to reset the device altogether.
- For that, Select Forgot Passcode? -> Start Apple Vision Pro Reset ->type Apple ID password -> Erase Apple Vision Pro.
- When setting up the device again, simply restore your iCloud backup for Vision Pro to get the backed-up data back.
Initially, if you forgot the Apple Vision Pro’s passcode, there was no way to use the device. You would have to take it to a nearby Apple store to let you in. However, when Apple realized how big this issue was, with the visionOS 1.0.3 update, they added a workaround functionality. But, there’s a catch. You will have to reset your Vision Pro, losing all your data in the process. Well, if you have forgotten your Vision Pro passcode, here’s how to reset it easily!
Reset Vision Pro Passcode
- Right underneath the “Apple Vision Pro Unavailable” message, you will see the Forgot Passcode? button. Select this.
- Then, you will be taken to the Apple Vision Pro Reset window. Here, you will see the Start Apple Vision Pro Reset button. Pinch this.

- Next, you will need to type in the password of the Apple ID being used on the Vision Pro. If you have forgotten your Apple ID password, you’ll need to reset it first.

- After a few seconds, a confirmation window will pop up. Pinch the Erase Apple Vision Pro option and take off your Vision Pro to start the reset process.

That’s all you need to do to reset your Vision Pro passcode. The good thing is that when you start setting up your Vision Pro again, you can restore your iCloud backup for it. That will bring all your data back to the device in no time at all.
How to Turn on iCloud Backup for Vision Pro
However, understandably, if your backup is a bit older, you will lose your newer data. And, if you had your Vision Pro’s iCloud backup turned off, all your data is anyway gone. I guess you have learned your lesson. So, it’s vital to ensure that your headset’s iCloud backup is turned on. Here’s how to check that:
- Press your Vision Pro’s Digital Crown button once to summon the Home View. Here, select Settings.

- Then, you can simply tap on [your name] at the top. Then, in the right panel, select iCloud.
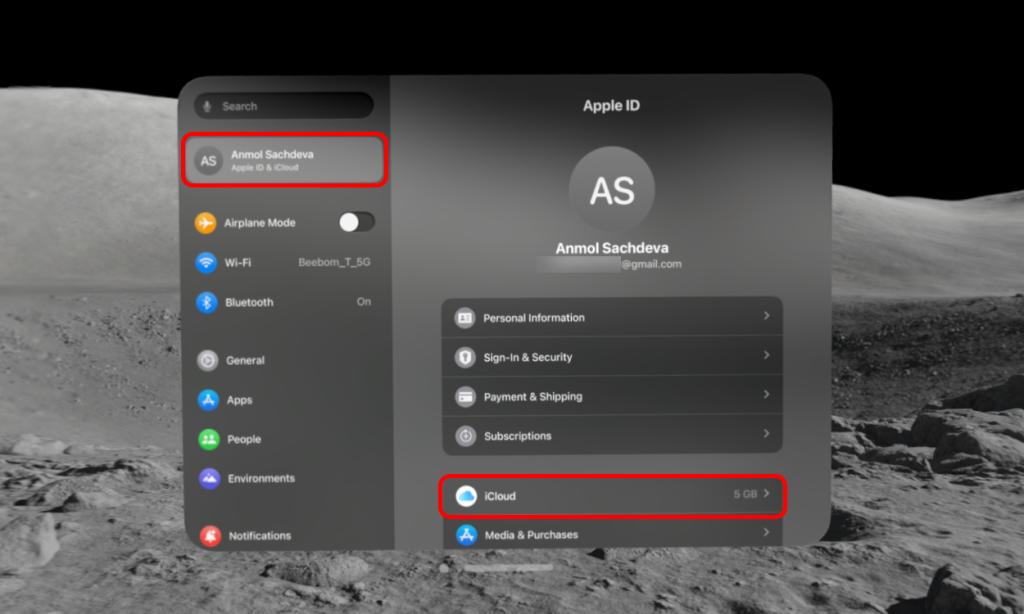
- Under the Device Backups section, you will see the iCloud Backup panel. Pinch this.

- See if the Back Up This Apple Vision Pro setting is toggled on. If not, look at the toggle and pinch it to do so.

While you are at it, why not use the Back Up Now setting to be extra sure? I’d recommend doing that.
How to Set Up Optic ID on Vision Pro
However, to avoid this passcode inconvenience, I’d recommend setting up your Optic ID. This prevents you from having to go through the passcode hassle again. Optic ID is faster and automatically kicks in every time you put the device on, to let you in. So, if you didn’t set up the Optic ID when setting up your Vision Pro, you can do it later as well. Here’s how:
- When in your Vision Pro Settings, scroll down to find the Optic ID & Passcode panel. Pinch this.
- Then, type in your Vision Pro passcode.
- Here, select the Set Up Optic ID option and that will take you to the calibration page.

- Select the blue Set Up button on this page and look where the Vision Pro is asking you to look to successfully complete the Optic ID registration. That’s it.


If you want, you can actually turn off your Vision Pro’s passcode altogether. But, I definitely wouldn’t recommend that, for it removes your Optic ID as well.
Now, while that’s the end of this guide, you can take to the comments down below to let me in on any additional queries you have. I’ll be happy to answer them for you!


