While tech giants are bringing dark mode left, right, and center, they are leaving a crucial feature behind. Microsoft brought the dark theme on Windows 10 last year, but still, we can’t schedule theme switching. Similar is the case with Google which rolled out system-wide dark mode on Android 10 but without any scheduling feature. We have already covered how to schedule dark mode on Android 10. So, in this article, we are going to cover how to schedule theme and automatically switch between dark and light mode on Windows 10. The process is quite simple and straightforward so no worries there. Now having said that, let’s jump right in.
Automatically Switch Between Dark and Light Mode on Windows 10
There is a popular method to schedule dark mode using Task Scheduler on Windows 10. However, the process is quite complex and can be tough for a layman to set it up correctly. So, we have brought a straightforward way to schedule dark mode on Windows 10 with a simple app. That said, let’s go through the easier method first and then we will show you how to set it up manually.
-
Schedule Automatic Dark and Light Mode on Windows 10 with a Simple App
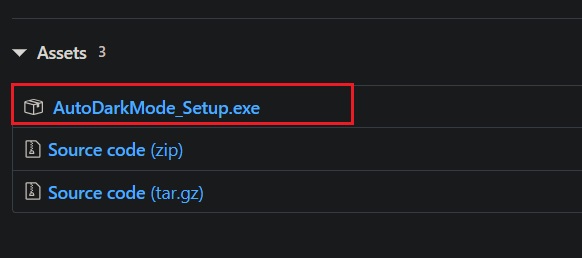
1. We are going to use a free application called Auto Dark Mode which is developed by Armin Osaj. Open this link and download the latest version of Auto Dark Mode. After that, run the app and install it on your PC.
2. Next, open Auto Dark Mode and click on “Enable automatic theme switching” on top. Following that, enter your preferred time for both light and dark mode and then click on the “Apply” button. Keep in mind, the app only supports 24-hour clock so enter your input in that particular format. Now you are done and theme switching should work flawlessly.

3. In case you want Windows 10 to automatically switch between dark and light mode based on your local sunrise and sunset time then you can enable the toggle for “location service”. It will search for your location and set the theme accordingly.

4. Further, you can also set custom desktop backgrounds for both dark and light mode. Tap on “Configure Background” and pick your image file. You can go ahead and also tinker with other settings based on your preference.

-
Set Dark and Light Mode on Windows 10 using Task Scheduler
While Auto Dark Mode can switch themes in just a few clicks, I am primarily showing the manual steps so that you can learn how to automate tasks on Windows 10. It could help you automate other routine tasks on your PC. Apart from that, I have explained the steps for switching from light to dark mode only, but you can repeat the same steps for light mode too. I have provided detailed instructions so there is nothing to worry about. Having said that, here are the steps to follow.
1. Press the Windows key once and type “Task Scheduler”. Open the first result and a new window will open up.

2. Click on “Create Basic Task” on the right pane.

3. Now give a name to the task. I have entered “Dark” as I want to change the theme from light to dark. After that, click on the “Next” button. Keep in mind, you will have to create a separate task for light mode just like this.

4. Here, select “Daily” and then move forward.

5. After that, set the time when you want Windows 10 to switch to dark mode. Do note, it’s a 24-hour clock so provide the data in the same format. Now, click on the “Next” button.

6. On the next page, select “Start a program” and then move ahead.

7. Finally, paste the below commands in their respective fields. Reminding again, it’s for switching from light to dark mode. After that, click on the “Next” button.
Program / Script:
%SystemRoot%\system32\WindowsPowerShell\v1.0\powershell.exe
Add arguments (optional):
New-ItemProperty -Path HKCU:\SOFTWARE\Microsoft\Windows\CurrentVersion\Themes\Personalize -Name SystemUsesLightTheme -Value 0 -Type Dword -Force; New-ItemProperty -Path HKCU:\SOFTWARE\Microsoft\Windows\CurrentVersion\Themes\Personalize -Name AppsUseLightTheme -Value 0 -Type Dword -Force

9. Similarly, for switching from dark to light mode, paste the below commands and click on “Next”.
Program / Script:
%SystemRoot%\system32\WindowsPowerShell\v1.0\powershell.exe
Add arguments (optional):
New-ItemProperty -Path HKCU:\SOFTWARE\Microsoft\Windows\CurrentVersion\Themes\Personalize -Name SystemUsesLightTheme -Value 1 -Type Dword -Force; New-ItemProperty -Path HKCU:\SOFTWARE\Microsoft\Windows\CurrentVersion\Themes\Personalize -Name AppsUseLightTheme -Value 1 -Type Dword -Force
10. Now, it will show the final window with task and schedule details. Click on the “Finish” button and you are done. The task should run at the scheduled time and it will run a Powershell window for a split second. For light mode, repeat the same process but with different commands mentioned above.

SEE ALSO: How to Center Taskbar Icons on Windows 10
Experience Both Dark and Light Mode on Windows 10
So that was our guide on how to automatically switch between Dark and Light mode on Windows 10. We have shared two different methods so depending on how much control you want over scheduling, you can choose the process. I would say, if you want a simple solution, just go with Auto Dark Mode app. Anyway, that is all from us. If you liked our guide, do let us know in the comment section below.