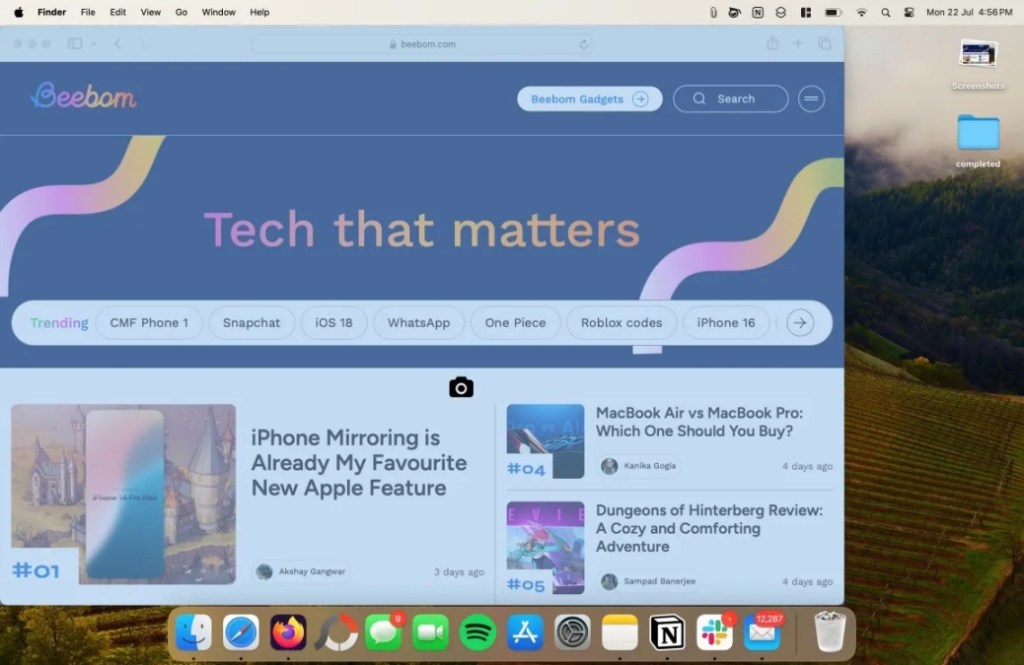
- If you are wondering how to screenshot on Mac, press 'Shift + Command + 3' to capture a screenshot of the entire screen.
- To capture a portion of the Mac screen, use the 'Shift + Command + 4' Mac keyboard shortcut.
- You can also use the 'Shift + Command + 4 + Space bar' shortcut to capture a window or menu on your Mac.
If you have just switched from a Windows laptop to a MacBook, the first thing you must have noticed is that there is no PrntScrn button to take screenshots. But you can easily capture the entire screen, a window, or just a portion of your screen with just a few key combinations. So, keep reading to learn how to take a screenshot on MacBook or a Mac using different keyboard combinations.
How to Screenshot on Mac: Keyboard Shortcuts
While taking a screenshot on Mac is actually simple, it can come off as complicated for new macOS users. That is why I have come up with this table to easily explain how to take different types of screenshots.
| Shortcut | Action | Description |
|---|---|---|
| Shift + Cmd + 3 | Capture fullscreen | Takes a screenshot of the entire Mac screen |
| Shift + Cmd + 4 | Capture the selected portion | Turns the cursor into a crosshair that you can drag to take a screenshot of the selected portion |
| Shift + Cmd + 4 + Spacebar | Capture a Window or menu | Take a screenshot of the currently highlighted app or menu |
| Shift + Cmd + 5 | Opens the Screenshot app | Bring up the Screenshot app at the bottom, where you can pick from different screen capture options |
| Shift + Cmd + 6 | Capture MacBook Touchbar | Takes a screenshot of the touchbar (works only with MacBook Pro models which have a touchbar) |
This table sums up all the shortcuts to take screen captures on MacBook and Mac desktops, but if you need more detailed instructions, then you can take a look at the step-by-step guides below.
Method 1: Take a Full-Screen Screenshot on Mac
To capture a high-resolution screenshot of your entire Mac screen, you can use this default keyboard shortcut.
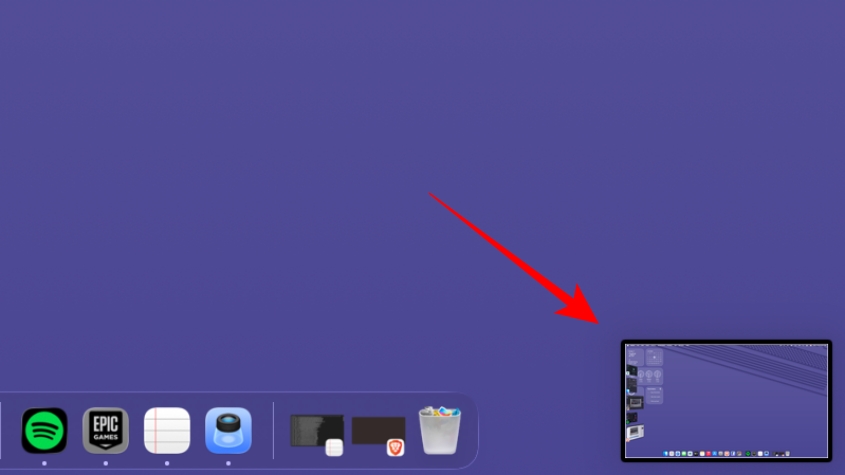
- Press Shift + Command + 3 to grab a screenshot of the entire MacBook screen.

- You will see a thumbnail at the bottom right of your screen, confirming that the screenshot has been taken.
- You can click on it to view the screenshot or wait for it to get saved on your desktop.
For the best effect, I recommend that you hide desktop icons on Mac while taking a full-screen screenshot.
Method 2: Grab a Partial Screenshot on Mac
If you want a cropped screenshot on Mac of a specific portion of the screen, you can use this keyboard shortcut instead.
- To grab a partial screenshot, hold Shift + Command + 4, and the cursor will turn into a crosshair.
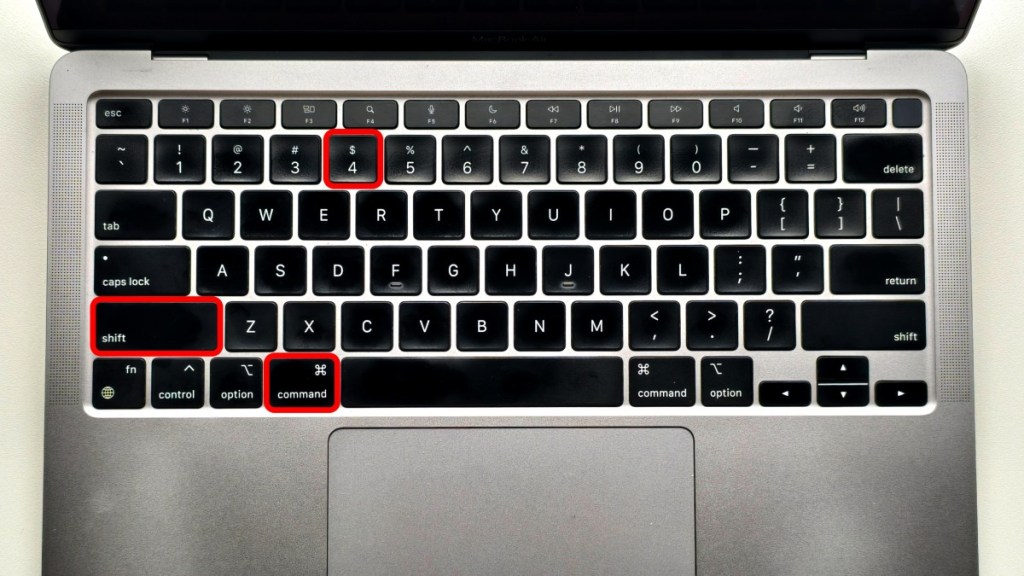
- Now, left-click and drag the crosshair to select the portion and release it to capture the screenshot.
- You can also press & hold the Space bar while dragging to move the selection.
- If you don’t want to take a screenshot, press the Esc key.
Method 3: Capture a Screenshot of a Window/Menu
While you can capture a window using the method discussed earlier, there’s another Mac screenshot shortcut to capture a particular window or menu. This is how it works:
- Open the window or menu you want to capture.
- Press the Shift + Command + 4 + Space bar keys.
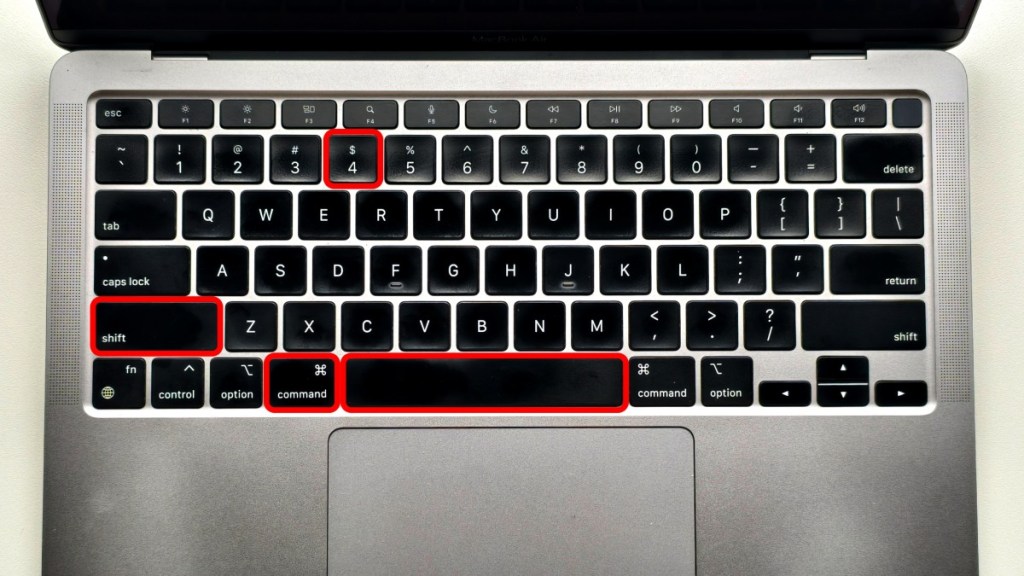
- The particular window gets greyed out, and the pointer turns into a camera icon.
- Now, click on a window where you want to capture a screenshot.
- To exclude the window’s shadow from the screenshot, press and hold the Option key while taking the screen capture.
Method 4: Use macOS Screen Capture Tool
Till now, I have detailed all common Mac screenshot shortcuts, including how to capture full-screen screenshots, capture a portion of a screen, and take screenshots of a window. While you can use all the above-discussed methods separately to capture different screenshots, Mac also offers a full-fledged screen-capturing tool to take screenshots from a single dashboard. Here’s how this works:
- Press the Shift + Command + 5 keyboard shortcut to bring up the screen capture window.

- Here you get the different options to take screenshots on a Mac.
- Here are your options to capture screenshots: Capture the entire screen, selected window, or selected portion. You can also use this method to screen record on Mac.

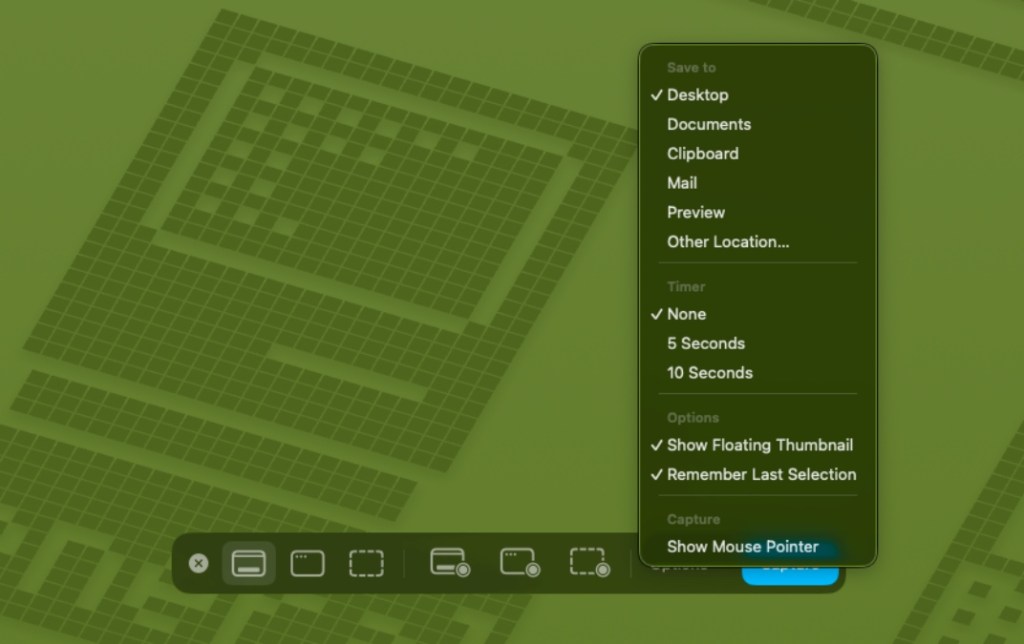
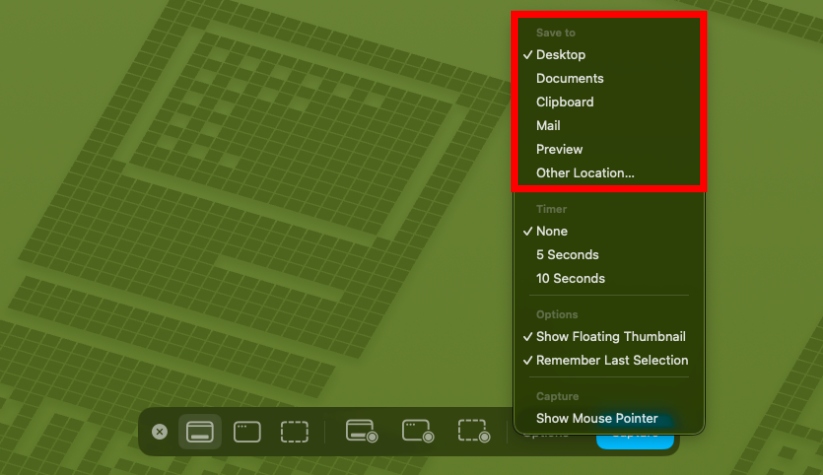
- You can also click on Options to set a timer to take the screenshots or change the save location.
- Once you are ready, click on the Capture button to grab the screenshot.
Method 5: Take a Screenshot of MacBook Pro Touchbar
Did you know that macOS also lets you take a screenshot of the MacBook Pro touchbar? Yes, and not many Mac users know about this secret trick. Here’s how you can do it:
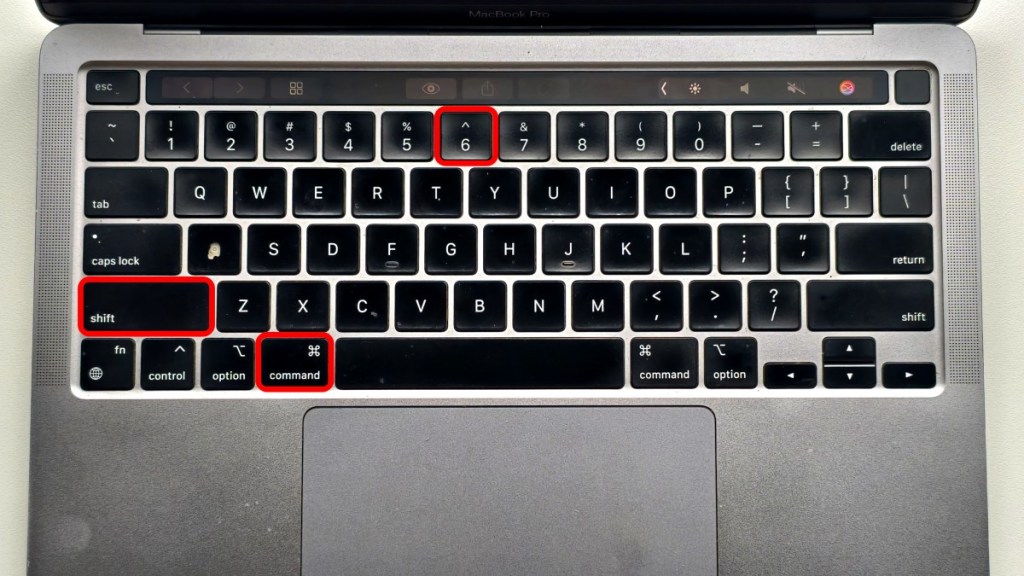
- To take a screenshot of the MacBook Pro touchbar, press Shift + Command + 6.
- It will show a small thumbnail in the bottom right corner of the screen.
- You can click on the thumbnail to view it or wait for it to be saved.
How to Change Save Location of Screenshots on Mac
By default, all the screenshots you take on your MacBook or Mac are saved on your desktop, whether it is a full-screen or a partial screenshot. If you want to change this default location, follow the methods discussed below:
Method 1: Using Screen Capture Tool
The easiest way to change the default save location of screenshots on your Mac is through the Screen Capture tool. It gives you the option to pick the folder where you want your screen captures to be saved. Let me show you how it works:
Note:
This method works only for a particular screenshot, and you will have to set the location every time you capture a screenshot.
- Press the Shift + Command + 5 keys to bring up the screen capture window.
- Now, click the Options tab at the bottom and choose the location in the pop-up menu.
Method 2: Using Terminal To Change Save Location
If you wish to change the default save location of screenshots on Mac permanently, you can do it using Terminal. Here’s what you need to do:
- Open the Finder app and press the Shift + Command + N keys to create a new folder to save screenshots.
- Now, open the Terminal app and copy this command to your Mac clipboard.
- Then paste it in the Terminal window and hit space:
defaults write com.apple.screencapture location- Now, drag the newly created folder into the Terminal window.

- The folder path will appear after the command.

- Hit Return, and it will change the default location of screenshots on Mac.
How to Change Default Screenshot File Format in macOS?
Many new macOS users don’t know that by default, all screenshots on Mac are saved in the PNG format. The PNG format preserves a lot of details, but they are fairly large in size. However, if you want to change the default screenshot format in macOS to JPG, which is more universally used, then there are 2 ways to do so.
Change macOS Screenshot Format Using Preview
You can use the Preview app to take a screenshot on your MacBook or Mac computer and change the file format thereafter. Here’s how to do it:
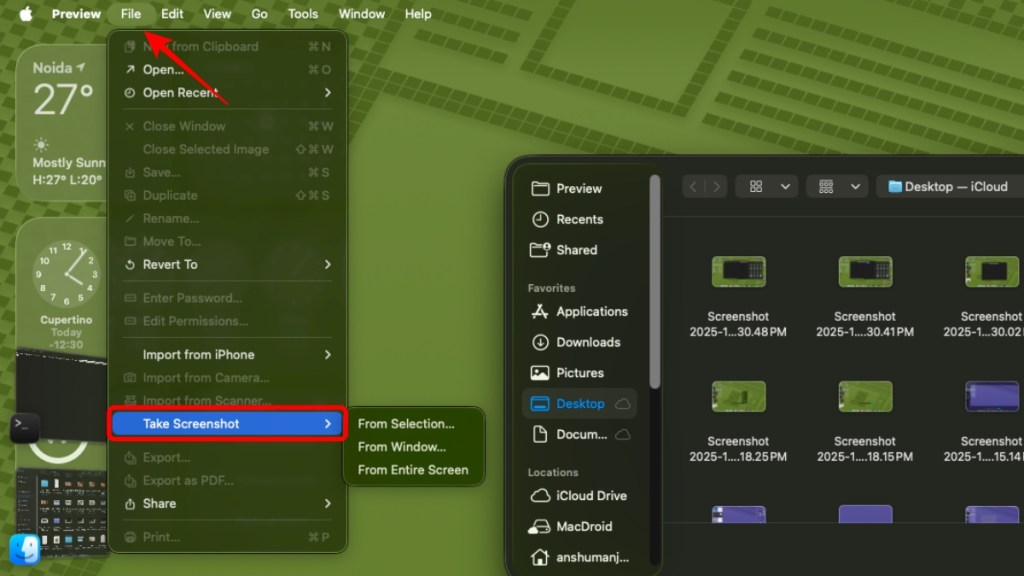
- Open the Preview app on your Mac.
- Click on the File option in the top toolbar, and select Take Screenshot. You can pick between the options: From Selection, Window, or Entire Screen.
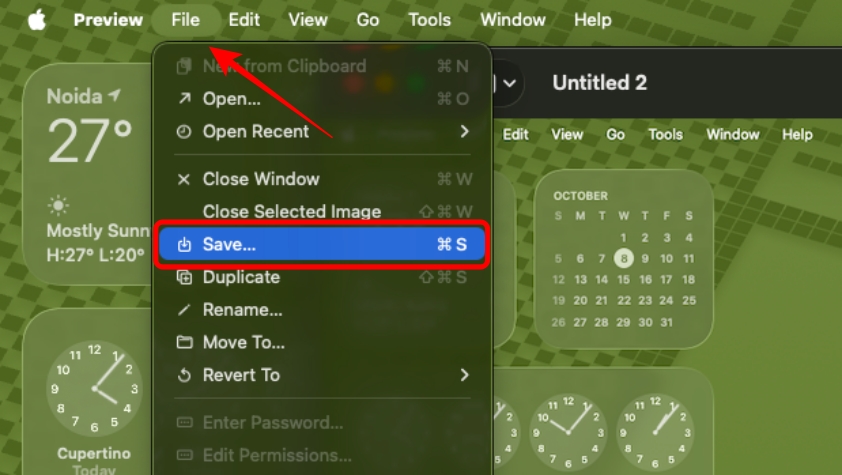
- After the screenshot is taken, open it in the Preview app again.
- Now, go to the File option again, and select Save.
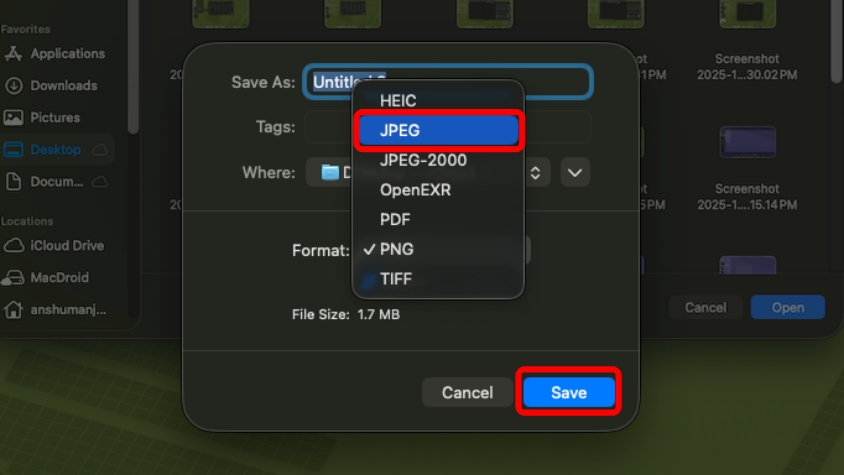
- Open the Format field, pick JPEG, and click on Save.
Default All Mac Screenshots to JPG with Terminal
With the Preview method, you will have to change the default screenshot format every time you take one on your Mac. But if you want to completely change the file format from PNG to JPEG, then use this Terminal method. This is how it works:
- Open the Terminal app on your Mac.
- Enter this command to change the default screenshot format to JPEG:
defaults write com.apple.screencapture type jpg;killall SystemUIServer- If you want to switch back to PNG, then enter this command in Terminal:
defaults write com.apple.screencapture type png;killall SystemUIServerYou can even use this option to create GIF on Mac by changing the format and saving files in the .gif format.
Screenshot Not Saving on MacBook? Try These Fixes
I have known many people who sometimes run into an issue where any screenshots taken on a MacBook are not saved. This can also happen to those with a Mac desktop. So if you are running into this problem, here are some troubleshooting fixes to help you out.
- Check if you are using the correct keyboard shortcuts to take a screenshot on Mac.
- Full storage can also prevent Mac from saving screenshots. Check if you have enough space.
- You can also clear cache of your MacBook, which can help make some space and fix the issue.
- Change save location by using Shift + Cmd + 5 > Options > select Desktop folder.
- Disable the Preview app as it can prevent screenshots from saving automatically.
- Restart your MacBook, as there could be a bug interfering with screenshots.
- Relaunch Finder by clicking on the Apple icon > Force Quit > select Finder > Relaunch.
- If you use Dropbox, then change its settings by going to Dropbox > Preferences > Import and untick the option for “Share screenshots using Dropbox”.
This brings us to the end of this little crash course. As someone who also switched from Windows to Mac, I understand that it can be frustrating at first to learn how to take screenshots on a MacBook, which is why I have detailed all the things that you need to know in this guide. But if I left something out, then let me know in the comments below.
Generally, screenshot-capturing shortcuts are enabled by default on your Mac, but in some cases, you may be required to configure the settings. Here’s how you can: Apple menu > System Settings > Keyboard > Shortcuts > Screenshots
Fortunately, it does. You can access it by pressing Command + Shift + 5 keys.


 Anshuman Jain


