If you recently moved to Ubuntu from Windows or macOS and are looking for a way to install drivers in Ubuntu, you have come to the right place. We have added 4 detailed methods to update drivers in Ubuntu, right from downloading additional drivers to installing Nvidia’s latest graphical drivers. Apart from that, we have written separate articles on how to switch between Wayland and Xorg in Ubuntu and have compiled the best screen recording tools on Ubuntu for new users on Linux. On that note, let’s go ahead and learn how to manually install drivers in Ubuntu.
Install Drivers in Ubuntu (2022)
In this tutorial, we have added 4 ways to install drivers in Ubuntu. From updating additional drivers to moving to the latest branch for bleeding-edge updates, we have covered everything. You can expand the table below and move to any section you want.
Note: The below methods have been tested on Ubuntu 22.04.1 LTS (Jammy Jellyfish) build, and they work flawlessly well.
Install Drivers in Ubuntu From Software and Updates (GUI Method)
In case you are unaware, drivers on Ubuntu or Linux are directly built into the kernel, and they are handled by the system automatically. So whenever the kernel is updated, drivers are also patched immediately. Unlike Windows, you don’t need to manually find and install each of the drivers.
Having said that, there are some exceptions, mostly for graphical and Wi-Fi hardware devices since there are proprietary and open-source drivers. Even for those devices, Ubuntu has made it easier to install the drivers through a GUI interface. Here is how you install drivers in Ubuntu from the Additional Drivers menu.
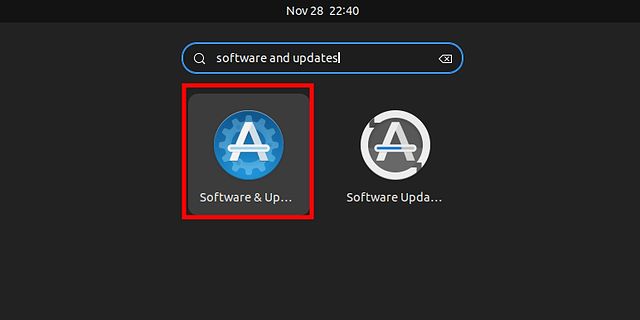
1. First of all, open the App Launcher on Ubuntu and open “Software and Updates“. You can also directly open “Additional Drivers”.
2. Next, move to the “Additional Drivers” section. Here, you can see that it’s already using the recommended driver (proprietary and tested) for my Nvidia GeForce GT 730 graphics card.

3. In case, you want to move to an open-source driver or downgrade to an older graphics driver, select it from the options and click on “Apply Changes“. Now, restart your computer and you will move to the particular driver version.

Install Drivers in Ubuntu From Terminal (CLI Method)
1. If you wish to update drivers in Ubuntu from the Terminal, well, you can do so using a bunch of commands. First off, open the Terminal from the app launcher or by pressing the “Ctrl + Alt + T” shortcut.

2. Now, run the below command to list the drivers. It’s a kind of Device Manager in Ubuntu but in the command-line interface. On my computer, it displays the Nvidia graphics card.
ubuntu-drivers devices

3. Here, you can choose which driver to install. For example, to install the latest recommended driver which is nvidia-driver-470, run the command in the below fashion.
sudo apt install nvidia-driver-470
or
sudo ubuntu-drivers install nvidia:470

4. You can also run the below command to install all the recommended drivers automatically in Ubuntu.
sudo ubuntu-drivers autoinstall

4. After the installation, reboot your computer and you will move to the latest stable version. Run the below command to check the current driver version.
nvidia-smi

Install the Latest (Beta) Nvidia Drivers in Ubuntu
Users who want to be on the bleeding edge can install the beta Nvidia drivers in Ubuntu. You just need to add a new PPA repository. Here are the commands to follow.
1. Open the Terminal in Ubuntu and run the below command to add the graphics driver PPA.
sudo add-apt-repository ppa:graphics-drivers/ppa

2. After that, run the below commands to update all the packages.
sudo apt update
sudo apt upgrade

3. Now, execute the below command and it will list out all the latest drivers including both stable and beta builds. However, in my case, 470 is the latest driver, superseding even the beta build which has a version number of 465. So I can comfortably stay on 470.
ubuntu-drivers devices
4. If a new version displays for your graphics card, you can run the below command to install the beta Nvidia drivers. Just replace 470 with your latest beta build.
sudo apt install nvidia-driver-470

Install Nvidia Drivers in Ubuntu Using Official Installer
Similar to how you download Nvidia drivers on Windows, you can also follow similar steps in Ubuntu. However, this requires you to completely disable the GUI interface and apply the changes through the command line. After that, you need to re-enable the GUI interface. Yes, the process is a bit lengthy and complex, but if you want to proceed with this method, follow the below steps. Make sure to remember your username and password before you jump to the steps.
1. First off, open Nvidia’s website and enter your graphics card detail. Choose “Production Branch” for stable and “New Feature Branch” for beta drivers.

2. On the next page, download the Nvidia driver for your Ubuntu system. It will download a file in .run format.

3. Next, locate the downloaded file and right-click on it. After that, open “Properties“.

4. Move to the “Permissions” tab and enable “Allow executing file as program“.

5. Having done that, now you need to move to the Text console mode. Press “Ctrl + Alt + F3” to exit the GUI interface. Do not worry, to restore everything like before, press “Ctrl + Alt + F2”.
Note: I have SSHed into the Ubuntu computer from my Chromebook to capture the screen. It may look a bit different on your system.

6. In the text console mode, enter your Ubuntu username and password and log in. After that, run the below command to disable the graphical server.
sudo systemctl isolate multi-user.target

7. Now, unload the Nvidia driver that is currently in use by running the below command.
sudo modprobe -r nvidia-drm

8. Finally, run the below command to start the driver installation. Make sure to replace filename with the actual name of the downloaded file. You may have to move to the “Downloads” folder before executing the script.
cd Downloads
sudo sh filename.run

9. This will open the command-line installer. Follow the on-screen instructions and you will be able to install the Nvidia drivers in Ubuntu easily.

10. Once the installation is done, execute the below command to enable the display server.
sudo systemctl start graphical.target

11. You may have to perform one more step. Run exit to close the current session and press “Ctrl + Alt + F2” to bring back the GUI interface.

12. Now, restart your computer, and the Nvidia driver in Ubuntu should be upgraded to the latest version.
Update Drivers in Ubuntu Using 4 Easy Ways
So these are the methods you can follow to update and install drivers in Ubuntu. I have mentioned both graphical and command-line methods so based on your preference, you can pick one. Anyway, that is all from us. If you are looking for a quick way to install Deb files on Ubuntu, we have a dedicated guide for you. And to install Python on Ubuntu, head to our linked tutorial for detailed instructions. Finally, if you have any questions, let us know in the comment section below.