Generally, Python comes pre-installed in Ubuntu, but if it’s not available on your Linux distro for some reason, you can install Python in Ubuntu in a few steps. If you’re a developer, Python is essential to build various software and websites. Other than that, a lot of Ubuntu’s software relies on Python, so you must have it for the smooth functioning of the OS. On that note, let’s go ahead and learn how to install Python in Ubuntu.
Install Python in Ubuntu (2022)
In this tutorial, we have included three ways to get Python on Ubuntu. But before that, let’s check if Python is already installed on your system and update it accordingly.
Note: We tested the commands and methods listed below on the latest version, i.e. Ubuntu 22.04 LTS and Ubuntu 20.04.
Check If Python is Already Installed on Ubuntu
Before you install Python in Ubuntu, you should check whether it’s already installed on your system. This allows you to update the existing Python installation without having to install it from scratch again. It should also come in handy if you ever wish to downgrade to a different Python version. With that said, here are the steps to follow.
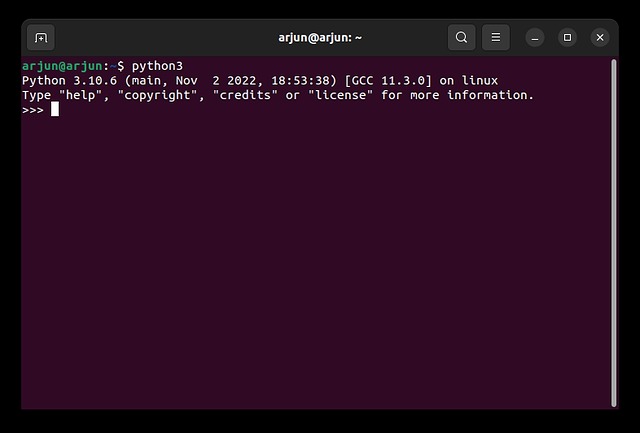
1. First, open Terminal using the “Alt + Ctrl + T” keyboard shortcut and run the below command. If the command gives an output with the version number, it means you already have Python installed in Ubuntu. To exit Python’s environment, press “Ctrl + D”. In case you get an error message like “Command not found”, you don’t have Python installed. So move to the next method to install it.
python3
2. You can also run the below command to check the Python version on your Ubuntu installation.
python3 --version

3. If an older version of Python is installed, run the below command to update Python to the latest version on your Linux distro.
sudo apt --only-upgrade install python3

Install Python in Ubuntu from Official Repository
Python is available in Ubuntu’s official repository, so you don’t have to do much other than execute a simple command to seamlessly install it on your system. Here is how to do it.
1. Open Terminal in Ubuntu and run the below command to update all the packages and repositories.
sudo apt update && sudo apt upgrade -y

2. Next, install Python in Ubuntu by running the below command. This will automatically install Python on your machine.
sudo apt install python3

Install Python in Ubuntu from Deadsnakes PPA
Apart from the official repository, you can also pull newer versions of Python from Deadsnakes PPA, which is popular for hosting new and old versions of Python. If Ubuntu’s official repository (APT) was unable to install Python on your system, this should certainly work. Here are the steps to follow.
1. Fire up the Terminal using the “Alt + Ctrl + T” shortcut and run the below command. This is needed to manage your distribution and software sources from independent vendors.
sudo apt install software-properties-common

2. Next, run the below command to add Deadsnakes PPA to Ubuntu’s repository. When prompted, press Enter to continue.
sudo add-apt-repository ppa:deadsnakes/ppa

3. Now, update the package list and run the next command to install Python.
sudo apt update
sudo apt install python3

4. You can also choose to install a specific version (old or new) of Python from Deadsnakes PPA. It also hosts nightly builds of Python (experimental), so you can install them as well. Run the commands in the following fashion:
sudo apt install python3.12
or
sudo apt install python3.11

Build Python in Ubuntu from the Source Code
If you wish to go the extra mile and build Python directly in Ubuntu from the source code, you can do so. But bear in mind, it’s a slightly lengthier process and might require more than 15 minutes to compile Python, depending on your hardware specs. Here are the steps you need to follow.
1. First, open the Terminal and run the below command to update the packages.
sudo apt update

2. After that, run the next command to install the required dependencies to build Python in Ubuntu.
sudo apt install build-essential zlib1g-dev libncurses5-dev libgdbm-dev libnss3-dev libssl-dev libreadline-dev libffi-dev wget

3. Next, create a “python” folder and move to the said folder. If you get a “Permission denied” error, run the command with sudo.
sudo mkdir /python && cd /python

4. Following that, use wget to download the latest version of Python from the official website. Here, I am downloading Python 3.12.0a1.
sudo wget https://www.python.org/ftp/python/3.12.0/Python-3.12.0a1.tgz

5. Now, extract the downloaded file using the tar command and move to the extracted folder.
sudo tar -xvf Python-3.12.0a1.tgz
cd Python-3.12.0a1


6. After that, run the below command to turn on optimizations before building Python in Ubuntu. This will reduce the time for Python compilation.
./configure --enable-optimizations

7. Finally, execute the below command to build Python in Ubuntu. This will take anywhere between 10 to 15 minutes to complete the process.
sudo make install
8. Once it’s done, run the python3 --version command to check the Python version number. And you are done.

Install or Update Python in Ubuntu in 4 Easy Ways
So this is how you can install Python in Ubuntu Linux. If you didn’t choose a minimal setup during installation, then you likely have Python installed on your system. Then, you only need to check the version and update the existing Python installation. However, if you don’t have Python installed, you can follow one of the three methods described above to install it right away. Anyway, that is all from us. If you want to run Android apps in Linux without an emulator, follow our guide for detailed instructions. Finally, if you have any questions, let us know in the comment section below.