
With the TPM and Secure Boot requirements to run Windows 11, Microsoft has made a bold decision in the right direction. It will bode well for Microsoft in the long run as far as Windows 11’s security is concerned. The good part is that most laptops nowadays come with the TPM module. You just need to enter the BIOS in Windows 11 to turn on TPM or Secure Boot. In case you are not aware of how to enter the BIOS or UEFI, fret not, as you have come to the right place. Here’s a simple guide on how to open the BIOS or UEFI on your Windows 11 PC. So without any delay, let’s go ahead and learn about the instructions.
We have included three different methods to enter the BIOS/ UEFI settings page in Windows 11. You can open the BIOS on both Windows 11 laptops and desktops using these methods.
Enter the BIOS in Windows 11 Using a Dedicated BIOS Key
Every laptop and desktop comes with a special key that lets you access the BIOS during startup. In this section, we have compiled the BIOS keys for various laptop and desktop manufacturers. You can find the BIOS hotkey right below and follow the steps to enter the BIOS on Windows 11.
BIOS Key for Laptops:
- BIOS key for HP laptops — F10 or Esc
- BIOS key for Asus laptops — F2
- BIOS key for Dell laptops — F2 or F12
- BIOS key for Acer laptops — F2 or DEL
- BIOS key for Lenovo laptops — F2 or Fn + F2
- BIOS key for Samsung laptops — F2
- BIOS key for Sony laptops — F1, F2, or F3
- BIOS key for Toshiba laptops — F2
- BIOS key for Xiaomi laptops — F9 or F12
- BIOS key for Realme laptops — F2
BIOS Key for Desktop Motherboards:
- BIOS key for Asus motherboards — F2 or DEL
- BIOS key for MSI motherboards — DEL
- BIOS key for Gigabyte motherboards — DEL
- BIOS key for ASRock motherboards — F2
- BIOS key for Zebronics motherboards — F2
Go ahead and turn off your computer completely. Now, turn it back on and keep pressing the BIOS key. It will directly open the BIOS on your Windows 11 computer.


Enter the BIOS in Windows 11 from the Settings
Apart from the BIOS hotkey, you can also enter the BIOS in Windows 11 from the Settings. If the BIOS key mentioned above didn’t work, don’t worry, as this method will surely take you to the BIOS screen. Simply follow the instructions below.
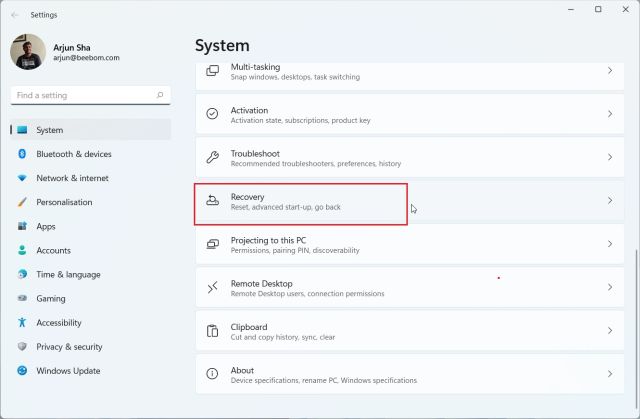
1. Use the Windows 11 keyboard shortcut “Windows + I” to open the Settings. Then, move to System from the left sidebar and open the “Recovery” setting from the right pane.

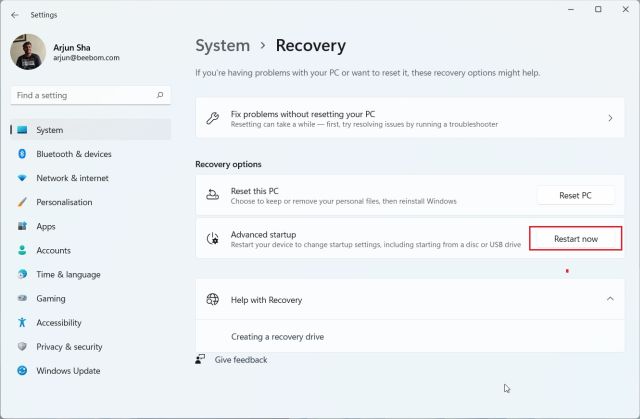
2. Here, click on “Restart now” next to “Advanced startup”. If you get a pop-up, confirm your selection, and click on “Restart now”.
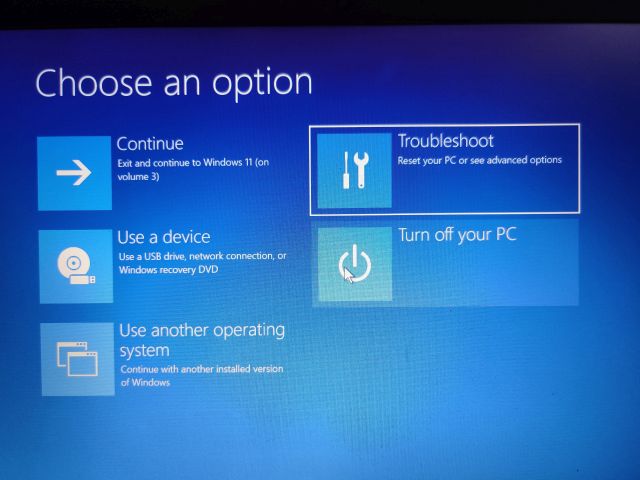
3. Once you are on the Advanced options screen, click on “Troubleshoot” and move to “Advanced options“.

4. Here, click on “UEFI Firmware Settings” and choose “Restart”.
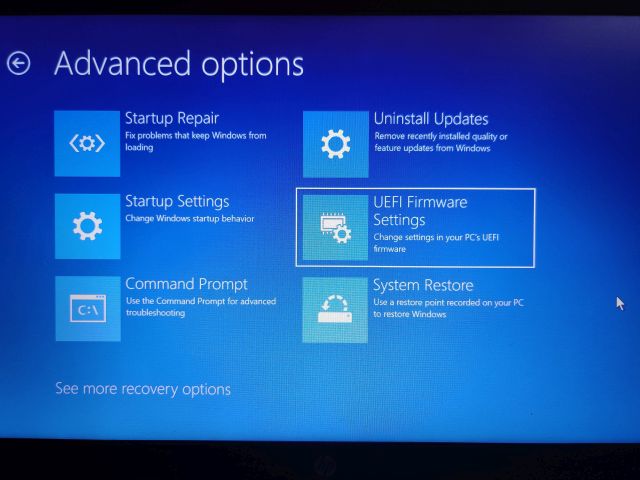
5. Now, you will enter the BIOS or UEFI settings page on your Windows 11 PC.
Enter the BIOS in Windows 11 from Command Prompt
Command Prompt also lets you access the BIOS settings page in Windows 11. Just execute a command, and you will enter the Advanced options screen, and you can open the BIOS from there. Here is how it works.
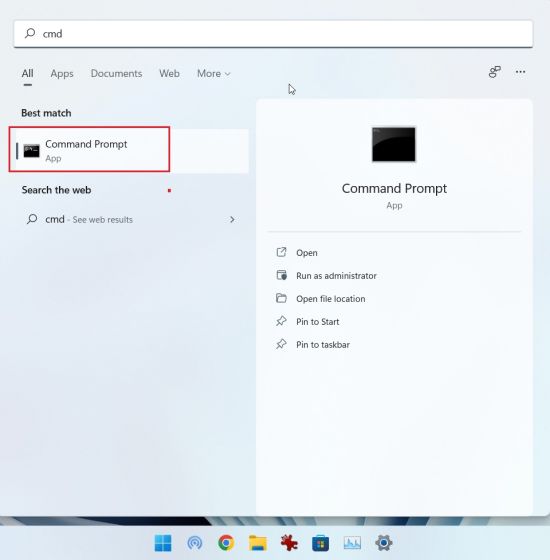
1. Press the Windows key once, search for “cmd,” and open the Command Prompt. In this instance, you don’t need to run the Command Prompt as an administrator.

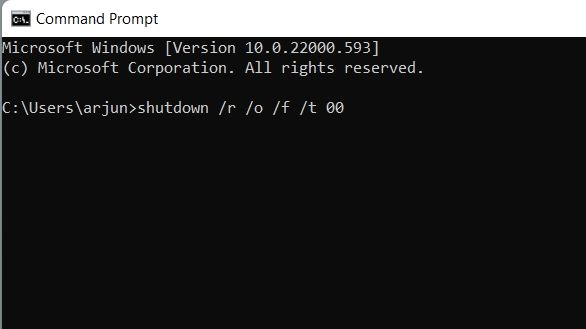
2. In the CMD window, run the below command. Note that executing this command will instantly restart your PC, so save all your work before running this command.
shutdown /r /o /f /t 00

3. Once your computer reboots, it will open the same Advanced options screen. Here, move to Troubleshoot -> Advanced options -> UEFI Firmware Settings -> Restart.
4. You will enter the BIOS on your Windows 11 computer right away.


