The home screen of an Android device is probably the most underutilized space on a smartphone with most users placing some frequently used apps, a Google Search bar, and a clock on there. If you want to make efficient use of the Android home screen and get more information from the space or perhaps get some work done right there, you need to use widgets on Android. A number of apps on the Play Store come with widgets of their own while quite a few others are entirely dedicated to creating and adding widgets. But these widgets don’t just appear on the home screen on their own. You’ll need to select and add these widgets to your home screen and if you’ve been wondering how you can add widgets on your Android device, we’ve prepared a simple guide for you.
How to Add Widgets on Android in 2020
The first step in adding a widget to the home screen is narrowing down on a space on the home screen where you want to place the widget. This might not seem like a crucial step, but do keep in mind that if you place a widget on a populated home screen it will mess up the organization by creating space and moving older icons and widgets to other pages.
So, if you’re someone who’s particular about how their home screen is organized, it’s better that you choose an empty page for a new widget or make enough space for the widget so that it doesn’t move around the contents of the home screen. Once you’re done allocating space for the widget, follow these steps to add a widget on your Android device:
Adding Widgets on Android
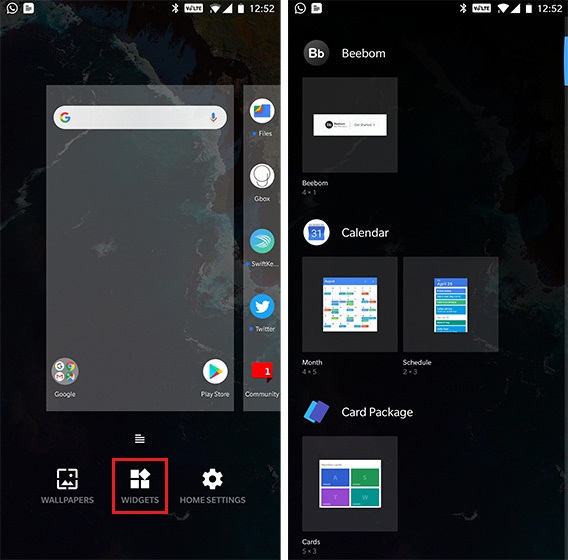
1. Long press on an empty space on the home screen and you’ll be greeted with a pop-up menu. In the pop-up menu select Widgets.

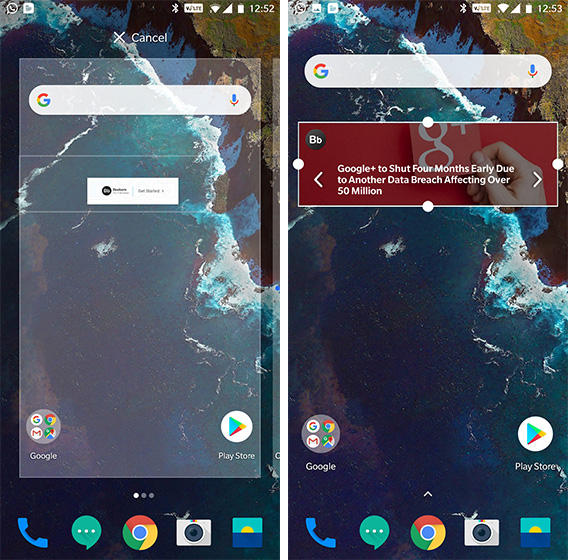
2. Now, Choose a widget from the menu that you want to add to your home screen. Touch and hold on the widget and drop it on the space you allocated on the home screen.

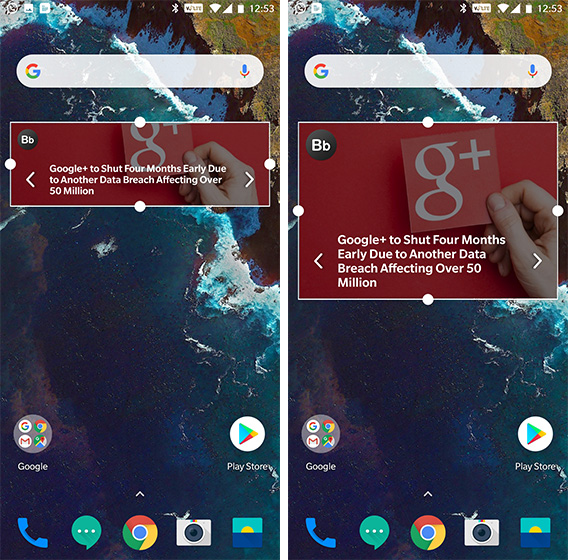
3. Once the widget is in place, you can adjust the size by long pressing on the widget and then dragging from the corner.

4. If, for whatever reason, you don’t like the widget, you can simply remove it by dragging and dropping it onto the remove pop-up.

Do keep in mind that the process for adding or removing widgets varies slightly from one Android skin to another but the main steps remain the same. Now that you’ve successfully added a widget to the home screen, you can make some changes to its settings by tapping on the widget. This options isn’t available on all widgets, as not all widgets support customization.
Add Widgets on Android Using Third-Party Apps
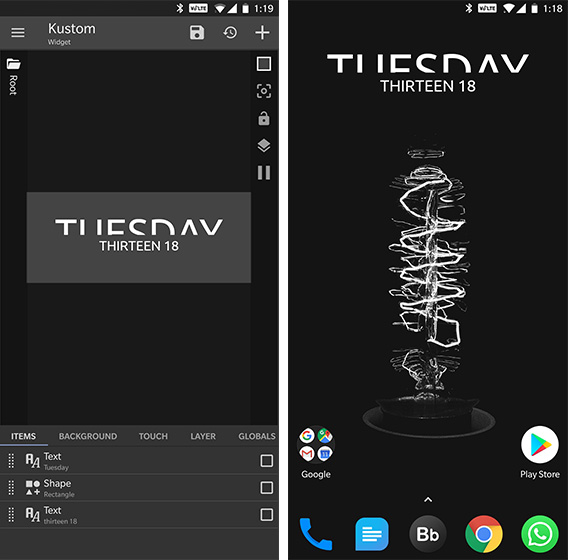
While the aforementioned method to add widgets on Android works with all apps that include widget support, you can make and add your own widgets using third-party apps. KWGT is one of the most popular custom widget makers for Android which allows you to create your own widgets, customize widgets created by other users, and add them to your home screen to give it a unique look.

With KWGT you can create customized widgets like clocks, live maps, weather, battery monitors, music players, etc. making it quite a useful tool for those who like to customize their Android smartphones. The app can seem like a bit complex to work with, so if you’re having trouble making custom widgets with KWGT let us know in the comments down below and we’ll make a simple step-by-step guide for making custom widgets with KWGT.
Install KWGT: Free, in-app purchases
Use Widgets to Streamline Your Smartphone Use
Well, now that you know how to add widgets on Android, you might be wondering which widgets you should add to your home screen to begin with. In order to help you get started, we’ve also compiled a list of the most useful Android widgets you should try, which you should definitely check out if you want to make efficient use of the feature. If you like this little tip, you should also check out our article on getting iOS like search feature on Android devices. Also, let us know your feelings about Android Widgets by writing in the comments section below.


