While Microsoft has doubled-down on updates with Windows 10, there are some basic issues that make the update experience disappointing. Many Windows 10 users have complained in the recent past that the updates get stuck on checking for updates for many days and it does not go away even after restarting the computer. In this article, we are going to tackle this issue. We have offered two full-proof methods which can restart the Windows update service from scratch so you can install updates without any issue. That being said, let’s begin the article and learn about the steps in detail.
Fix Stuck on Checking for Updates Issue on Windows 10
First of all, we will go through an automatic method where we will use a script file to reset the Windows Update Agent. Following that, we will use manual steps in case the automated script does not solve the “checking for updates” issue. Keep in mind, none of your personal data will be deleted in either process so no worries on this front. Now having said that, let’s begin without further delay.
-
Resolve Checking for Updates Issue on Windows 10 with a Script
1. All you have to do is download this ZIP file from here. It’s a script file written by
Manuel F. Gil to reset the Windows Update Agent. After downloading it, unzip the file on your computer.

2. Next, open it and right-click on “ResetWUEng” and select “Run as Administrator”. Keep in mind, Administrator privilege is a must to fix the checking for updates error on Windows 10.

3. Now, a small window will open up asking for your permission to run the program. Type “Y” and hit enter.

4. Next, type “2” to select “Resets the Windows Update Components” from the menu and then hit enter. It will immediately start checking for corrupted update files and invalid values in Registry.

5. After a complete rundown, it will show an “operation completed” window within a few minutes. Now, close the window and restart your PC. The “Checking for Updates” error should be gone by now on your Windows 10 PC.

-
Resolve Checking for Updates Issue on Windows 10 Manually
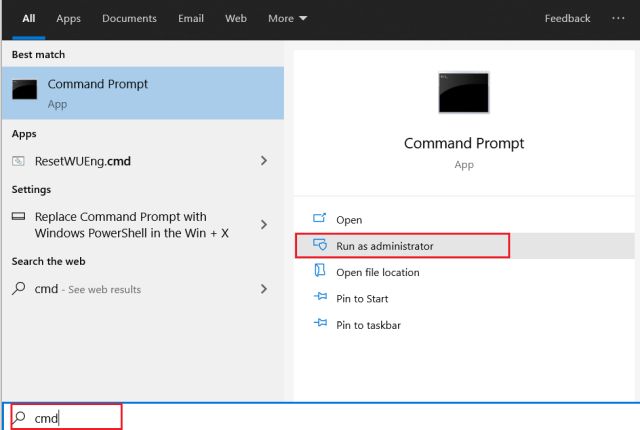
1. If you have some expertise on Windows 10, you can solve this problem without downloading any program. Just search for cmd in the search bar and click on “Run as administrator” in the right pane.
2. After that, paste the first command in Command Prompt and hit enter. It will delete the BITS (Background Intelligent Transfer Service) file which might have gone corrupt during a transfer service. Now, close the window. Alternatively, you can find the qmgr.dat file from the path below and delete the file manually.
Del "%ALLUSERSPROFILE%\Application Data\Microsoft\Network\Downloader\qmgr*.dat"
C:\ProgramData\Microsoft\Network\Downloader

3. Now, press Windows and R keys at once to open the Run window. Type services.msc in the text box and hit enter.

4. It will open the Windows Service Manager. Here, scroll down and look for “Windows Update”. Now, double-click on it to open the service and then click on the “Stop” button.

5. After a while, click on the “Start” button to restart the service. Now, close the window and restart your computer. This time you should not be stuck on Checking for Updates error on Windows 10.

Is Your PC Still Stuck on Checking For Updates Error?
So that was our short tutorial on how you can fix checking for updates issues on Windows 10. We have mentioned both automatic and manual methods so you can choose whichever one you find easier to use. Apart from that, most of the time, the Windows update gets stuck due to issues like metered usage of your network or corruption in the downloaded image. Anyway, that is all from us. If our guide helped you fix the issue, do let us know in the comment section below.