
- If you have a compatible PC, you can effortlessly update to Windows 11 from Windows Settings.
- However, if you have unsupported hardware, you can use the Flyby11 tool to update Windows 11 to the latest build.
- You can also download the MSU file manually and apply the update.
Microsoft recently rolled out the Windows 11 24H2 update so users are looking to update Windows 11 to the latest version. It brings many AI features, but most of them are reserved for Copilot+ PCs. Nevertheless, if you have been sitting on the fence and now want to update Windows 11, we bring you 5 ways to get the newest update without any wait. Follow our tutorial and learn how to update Windows 11, overcoming all restrictions.
Update Windows 11 From Settings
The easiest way to update Windows 11 is through the Windows Settings page. You can download and apply the update on your Windows 11 PC in a few clicks. Here is how it works.
1. First, press the Windows 11 keyboard shortcut “Windows + I” to open the Settings app. Next, navigate to the “Windows Update” section from the left sidebar.
2. Once here, enable the toggle next to “Get the latest updates as soon as they’re available.”
3. Now, click on “Check for updates“. If there is an update available, it will show up here and will be downloaded automatically.

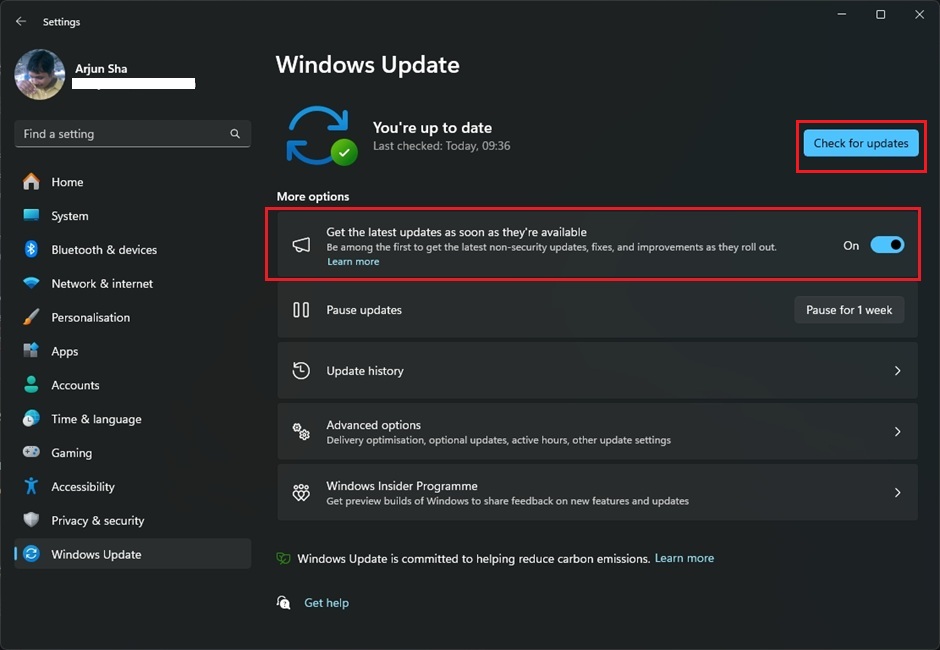
4. After that, the update will be installed, and you will be asked to restart your PC. Simply reboot your computer, and you will have updated your Windows 11 PC in no time.


Update Windows 11 With Windows 11 Installation Assistant
You can also take advantage of the Windows 11 Installation Assistant to update Windows 11 to the latest build. It’s an official utility by Microsoft that finds the latest build and installs the update without having to wait for the update to hit your PC. This tool can also be helpful to users who want to apply Windows 11 feature updates as they are large in size.
1. Go ahead and download Windows 11 Installation Assistant from here.
2. Next, run the program, and it will check for an update. Follow the on-screen instructions, and it will start updating your Windows 11 PC.

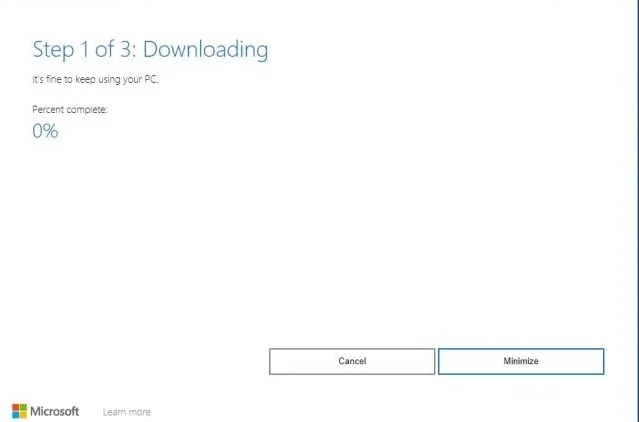
3. After the download is complete, restart your PC and Windows 11 will be updated.

Update Windows 11 on Unsupported Hardware
If your PC does not come with a TPM chip, there is nothing to worry about. You can easily bypass TPM and other requirements to update Windows 11 to the latest 24H2 build, even on unsupported hardware. Flyby11 is a neat app that uses the Windows Server trick to skip all checks including TPM, Secure Boot, etc. and lets you install Windows 11. Here is how you can use it.
1. First of all, download the latest Windows 11 ISO from Microsoft’s official website.
2. Next, download Flyby11 from its GitHub page. Click on “flybyscript.zip” to download it.
3. Next, extract the ZIP file and launch “Flyby11”. You may have to click More info > Run anyway.
4. After that, select the first Native method and click “Mount and Run ISO”. Now, select the Windows 11 ISO that you downloaded.

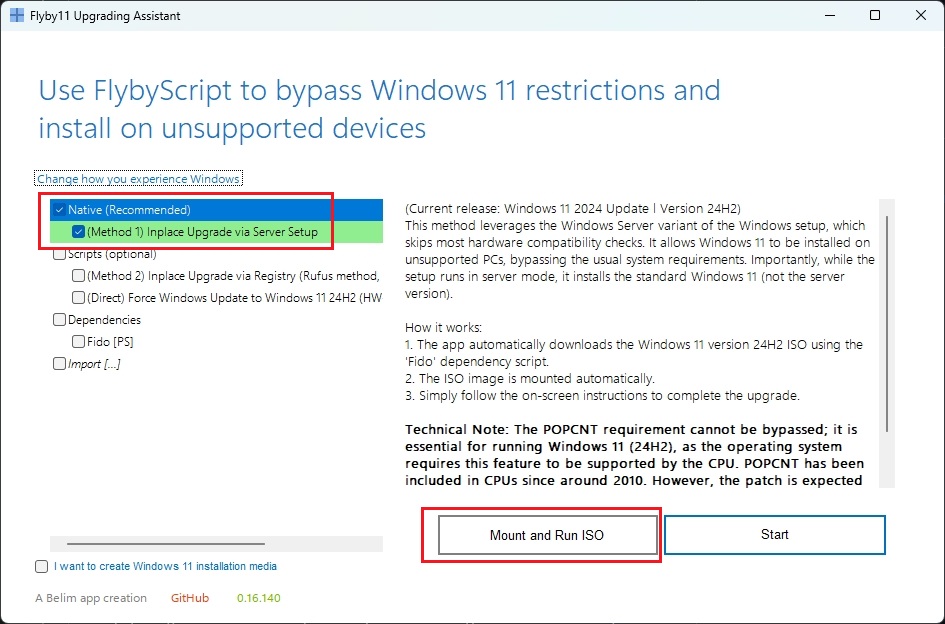
5. Now, simply follow the on-screen instructions and you will have Windows 11 updated to the latest version. Make sure to keep your personal files during the setup process.

Update Windows 11 Manually
You can also manually update Windows 11 by downloading the MSU file. It’s a Windows update file and can be installed like any other EXE program. This method can especially come in handy for users facing the “Undoing changes made to your computer” error on their Windows 11 computer. Here is how to go about it.
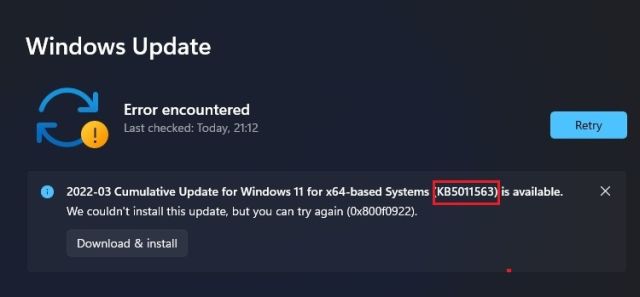
1. First, press “Windows + I” to open the Settings app. Now, move to “Windows Update” from the left sidebar. Here, note down the update pack number that starts with “KB”.

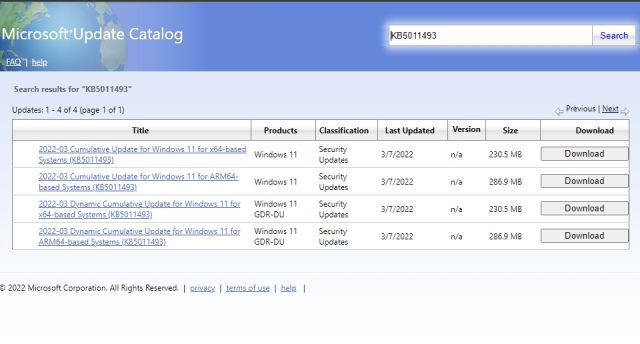
2. Now, open catalog.update.microsoft.com and enter the update pack number that you just noted above into the search field. Then, hit Enter.


3. It will show you all the updates available for the particular update pack. Now, based on the system architecture, whether it’s x64 or ARM-based, download the required update. For a majority of users, it will be x64.

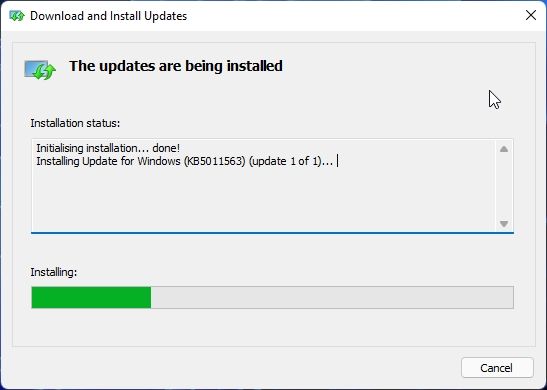
4. After downloading the update, double-click on the MSU file and install the update. Once it’s done, restart your computer, and you will have your Windows 11 PC updated to the latest build. That’s easy, right?

Update to Windows 11 From Windows 10
If you are still using Windows 10 and want to update to Windows 11 without losing your data, you can do so easily. We have already written a detailed guide on how to upgrade to Windows 11 from Windows 10, so follow the instructions in the linked article. Nevertheless, here we are going to briefly demonstrate the steps.
1. Head over to Microsoft’s website and download the Windows 11 Installation Assistant. It’s an all-in-one utility to easily upgrade your Windows 10 PC to Windows 11.
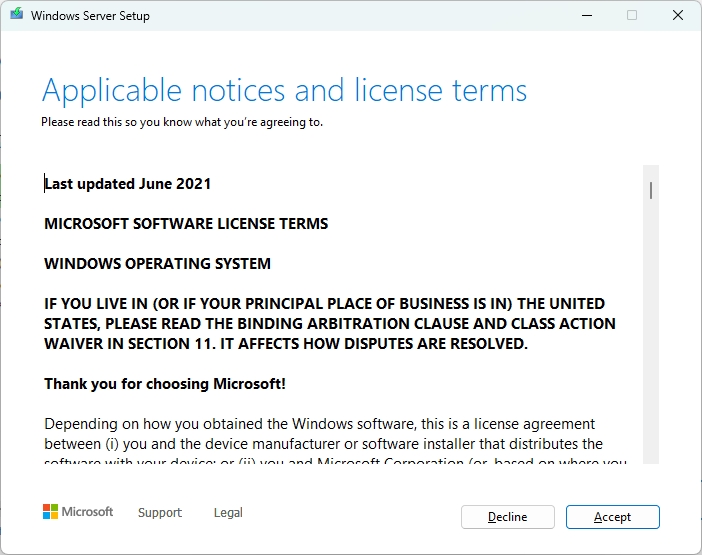
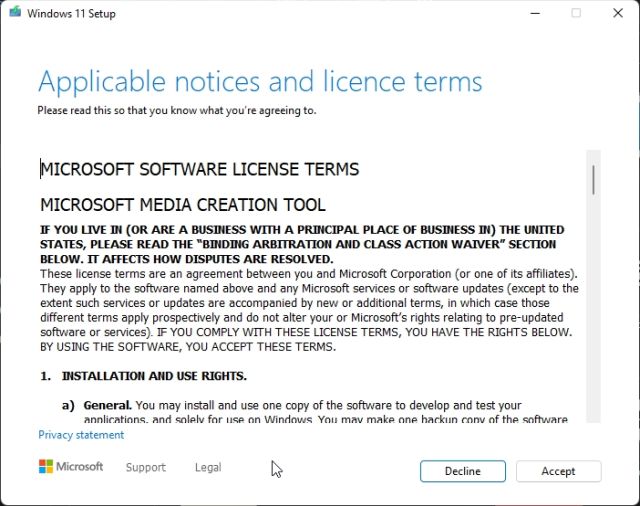
2. Next, run it and accept the terms and conditions. After checking your PC’s status, it will start downloading Windows 11.

3. Once the download process is complete, restart your computer to upgrade your PC to Windows 11 from Windows 10.

So these are the five different methods you can use to update Windows 11 on your computer. For most users, Windows Settings can get things done, but if you don’t want to wait, you can always download the Windows 11 Installation Assistant and upgrade your PC right away.


