
- ChromeOS comes with a built-in automatic clicking functionality in Accessibility settings.
- Once enabled, you can customize it and it should auto-click on the element you move your cursor on.
- If you're quite literally looking for an auto-clicker, you can install the OP Auto Clicker extension from the Chrome Web Store.
Automatic click is one of the most popular accessibility features in Chromebooks. As the name suggests, it automatically clicks on a button, menu, toggle, or basically any actionable UI element. You only need to drag and place your cursor over the button. The feature is helpful for users diagnosed with motor impairments. So if you want to learn how to enable Auto Clicker on a Chromebook, follow our guide below.
How to Enable Auto Clicker for a Chromebook
Automatic clicks is a built-in ChromeOS feature that automatically clicks for you when you drag and keep your cursor on an element on your screen. The term “auto” in the feature is not to be taken literally, as it’s not like auto-clickers found on Windows which can repeat clicks forever, regardless of if you’re moving the cursor or not. Although, there is a Chrome extension that lets you do the same on a Chromebook.
Method 1: Turn On Built-in Auto Clicker for Chromebook
As mentioned earlier, Auto Clicker is a part of Chromebook‘s accessibility features. Therefore, you need to dig into Chromebook settings to enable it.
- Launch the Settings app on your Chromebook.
- Go to Accessibility from the left sidebar and then head over to Cursor and touchpad.

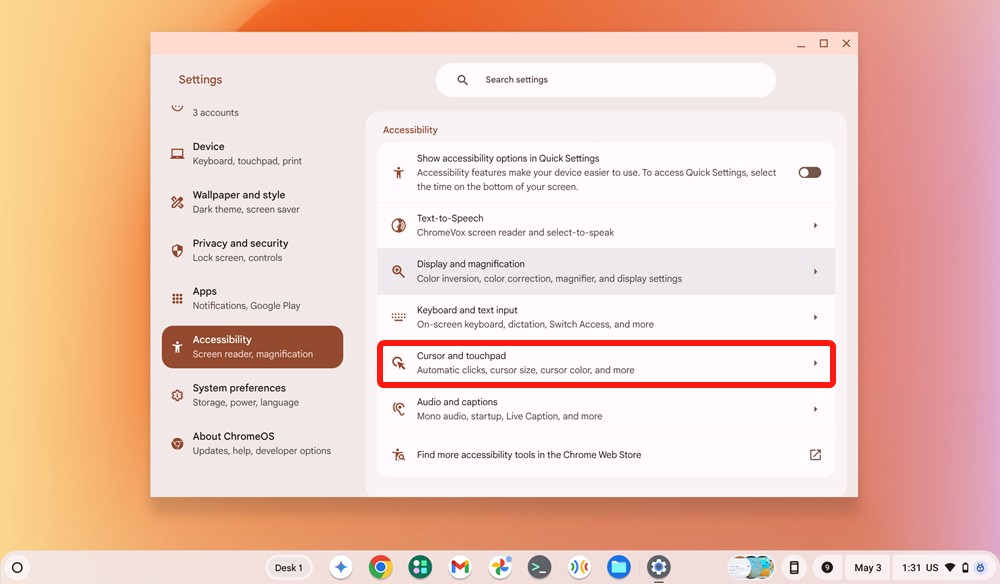
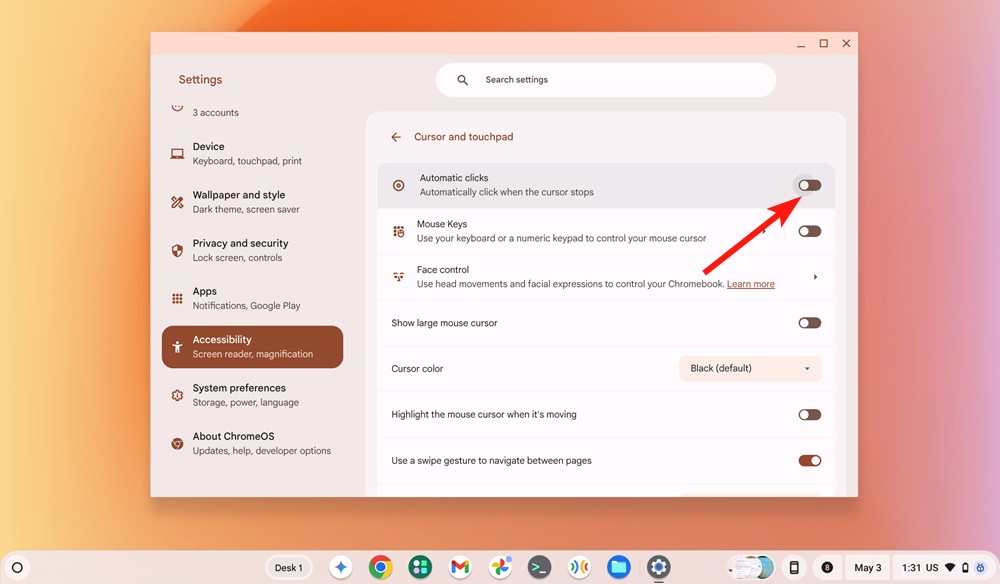
- Here, turn on the Automatic clicks toggle and the automatic clicker should instantly start.
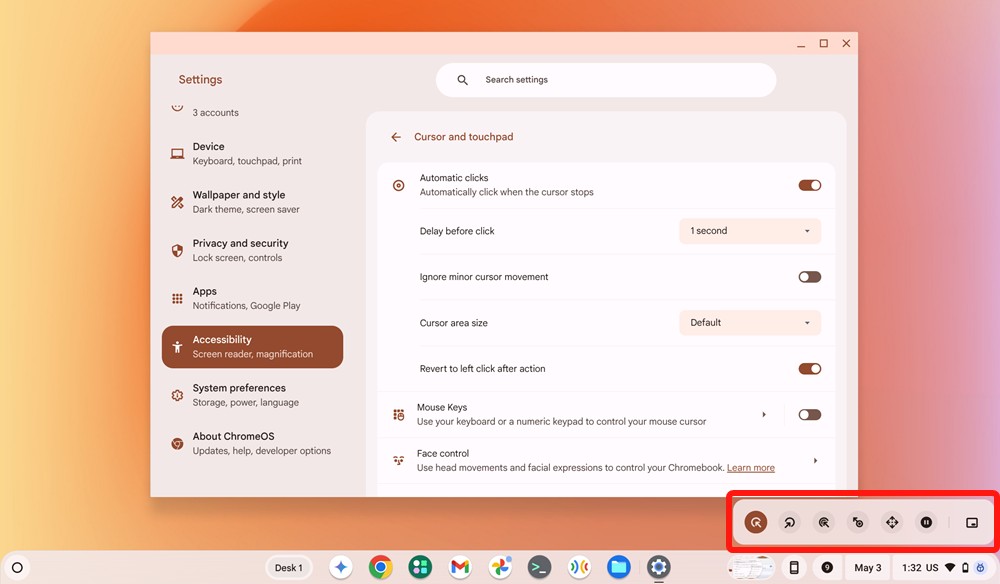
- An overlay will appear on top of the taskbar with different options.
Method 2: Enable Auto Clicker Via OP Extension on Chromebook
If you’re looking for an auto-clicker to get through games in a breeze or keep your current work session active, you can do so via the OP Auto Clicker extension. It’s a great tool, but we suggest you don’t use it in competitive scenarios like when playing Roblox, as that would be cheating.
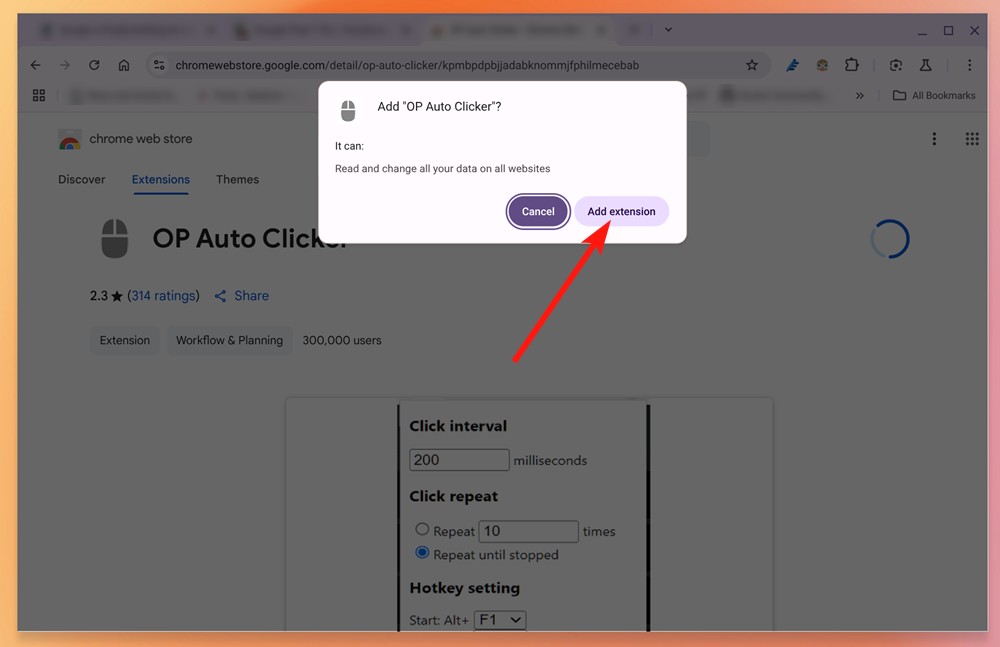
- Head over to OP Auto Clicker extension (website), click on Add to Chrome and then Add extension.

- Launch the Auto clicker extension and set on the click interval box.
- Here, add a value to the Repeat box or select the Repeat until stopped option.
- Assign hotkeys to start and stop the auto clicker inside “Hotkey setting”.
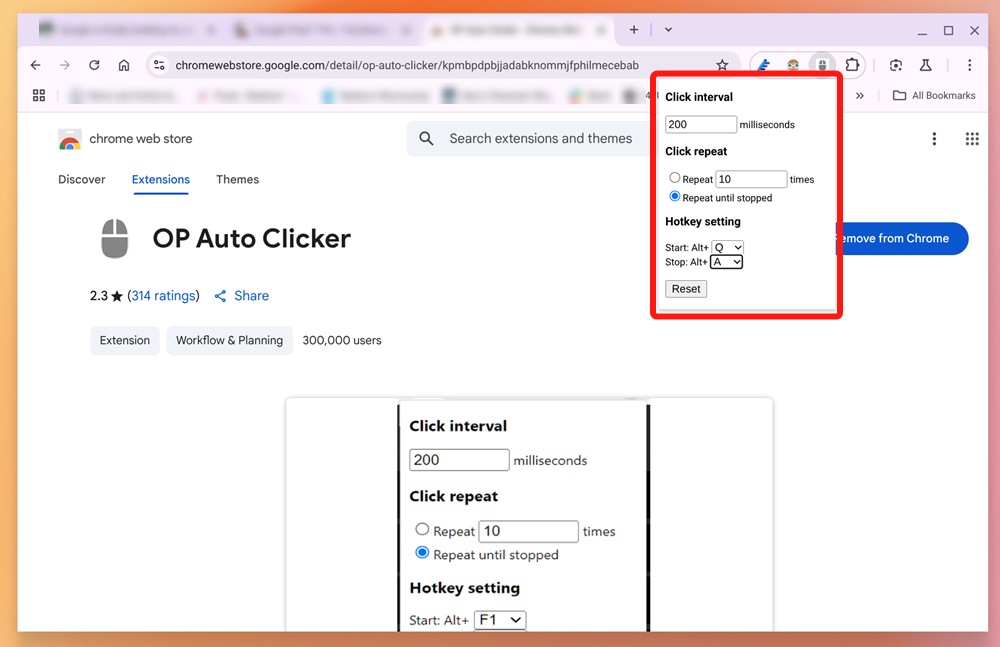
You can now use the hotkeys to start and stop the auto clicker.
How to Customize Auto Clicker for Chromebook
You can choose any of them to change what the auto clicker does. The options include right click, left click, scroll, pause, and double-click. You can also turn on the Ignore minor cursor movement toggle to, well, ignore minor movement.

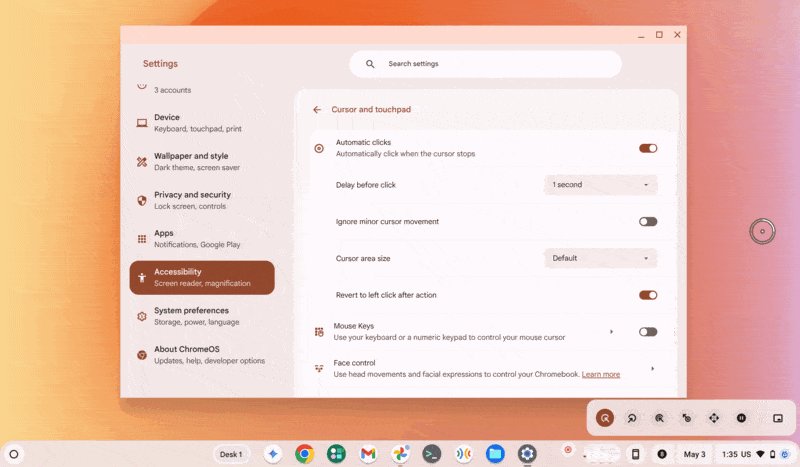
Similarly, you can change the size of the cursor area to suit your needs or even add a delay before each click if you take more time to think.
And that brings us to the end of this guide. It’s always great to see firms coming up with innovative features that benefit differently abled people. One of the other best ChromeOS accessibility features is Face control, which allows you to control your Chromebook with face.
Facing difficulties enabling the automatic clicker function? Let us know in the comments.
Automatic clicking has been on ChromeOS for a long time, so all the old and new Chromebooks ship with this accessibility feature.
Auto clickers on Chrome are generally considered safe, yet it’s advisable to check the privacy policies of the app before installing them. Besides, you can also read the reviews.
In scenarios where you don’t feel like using the mouse, you can use the touch screen if your Chromebook is a convertible, or enable the accessibility feature “Face control.”
Open the Settings page and navigate to Accessibility > Cursor and keyboard and disable “Automatically click when the cursor stops.”
No, the Automatic clicks feature does not support continuous clicking on Chromebooks. However, you can right-click, left-click, drag and drop, and scroll.


