
If you are trying to locate system folders like Temp to delete temporary files and folders from Windows 11, chances are you need to enable hidden files and folders in Windows 11 to make them visible. Similarly, if you wish to modify a file type, you need to show file extensions in Windows 11. This setting is disabled by default, so you need to manually enable it. On that note, let’s go ahead and learn how you can show file extensions in Windows 11. This will show the file type like .zip, .pdf, .mp4, .png, etc., next to each file, and you can open them with a suitable program. So without any delay, let’s jump to the guide.
Show File Extensions in Windows 11 (2022)
In this guide, we have included four methods to view file extensions in Windows 11. You can enable file type for each file from File Explorer, Settings, File Explorer Options, and Command Prompt. Expand the table below to check out the method you find suitable.
Show File Extensions in Windows 11 from File Explorer
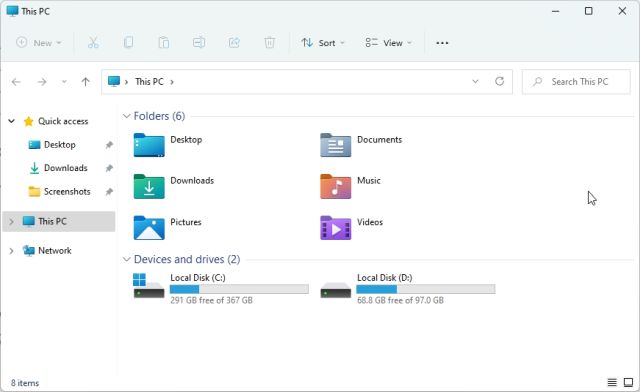
1. First, open File Explorer on Windows 11. You can use the Windows 11 keyboard shortcut “Windows + E” to open the File Explorer instantly.

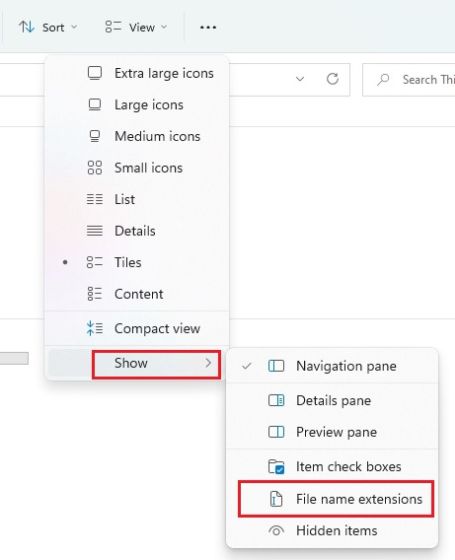
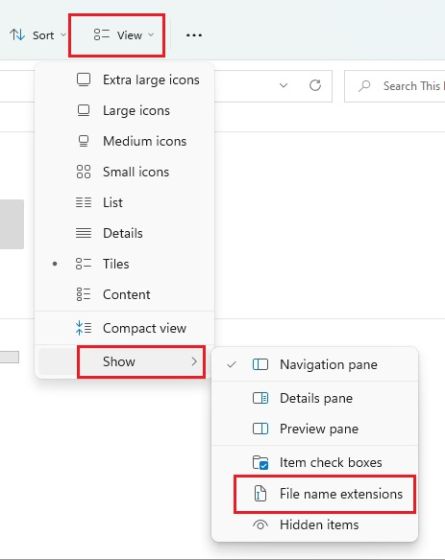
2. Next, click on “View” in the top menu and select “Show“.


3. Next, click to enable “File name extensions“.

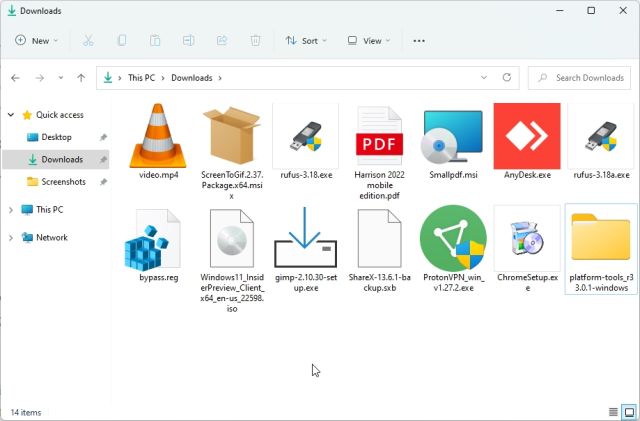
4. This will enable file extensions in Windows 11. Open a folder with various files, and here, you will see the file extensions associated with the particular file type. For example, the ZIP file shows .zip, the PDF file shows .pdf, and more.

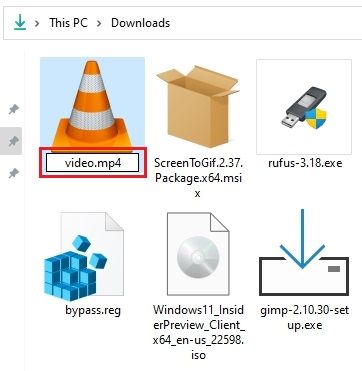
5. If you want to change the file type, you can select the file and hit “F2” to rename the file. Now, change the file extension as you wish.

6. In case you want to hide file extensions in Windows 11, launch File Explorer again and open View -> Show in the top menu. Then, disable “File name extensions,” and you are done.

Show File Extensions in Windows 11 from Folder Options
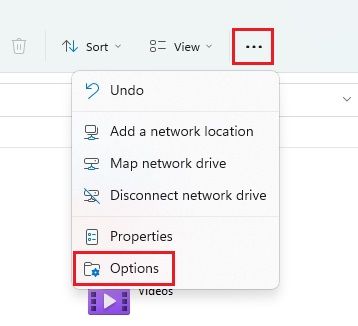
1. You can also enable a simple setting in Folder Options to show file extensions in Windows 11. Open File Explorer and click on the three-dot menu in the top menu. Here, click on “Options“.

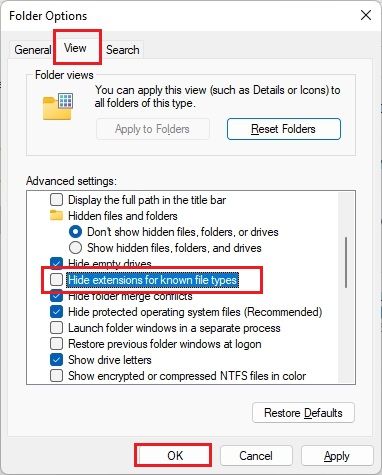
2. Next, switch to the “View” tab in the pop-up window and scroll down. Here, uncheck the checkbox for “Hide extensions for known file types” and click on “OK”.

3. Now, open a folder with various file types, and Windows 11 will show the file extensions next to each file’s name.
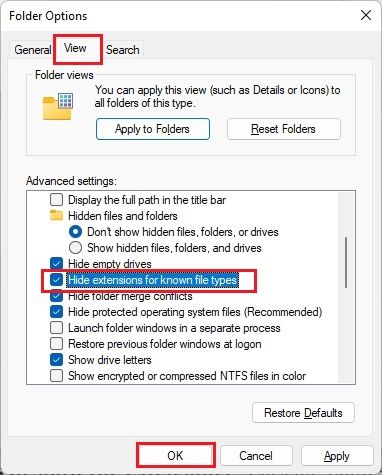
4. To hide file extensions in Windows 11, open Folder Options again and enable the checkbox for “Hide extensions for known file types”. Now, click “OK” to hide the known file type in Windows 11.
Show File Extensions in Windows 11 from Windows Settings
The Settings app also lets you show file types in Windows 11. To enable it, follow the steps below:
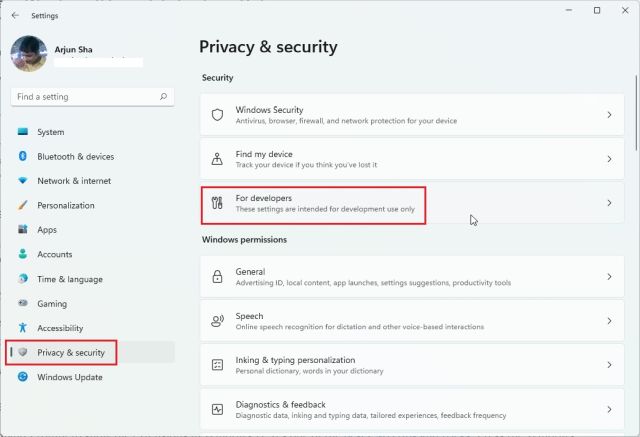
1. First, press “Windows + I” to open the Settings app right away. After that, move to “Privacy & security” from the left sidebar and open the “For developers” section in the right pane.

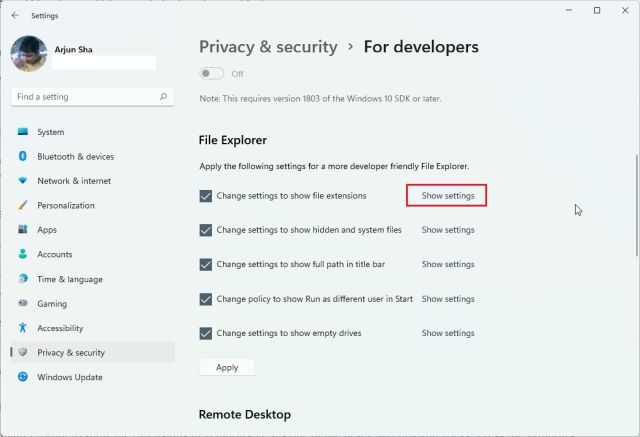
2. Next, scroll down and look for the “Change settings to show file extensions” option under “File Explorer”. Click on “Show settings” next to it.
3. This will open the Folder Options, the same window where we made changes in the above method. Here, disable the checkbox for “Hide extensions for known file types” and click on “OK”.
4. Now, file types will be visible on your Windows 11 PC.
Show File Extensions in Windows 11 Using Command Prompt
Finally, you can use Command Prompt to view file extensions in Windows 11. It’s one of the best CMD tips and tricks we have covered in the past. Here’s how it works:
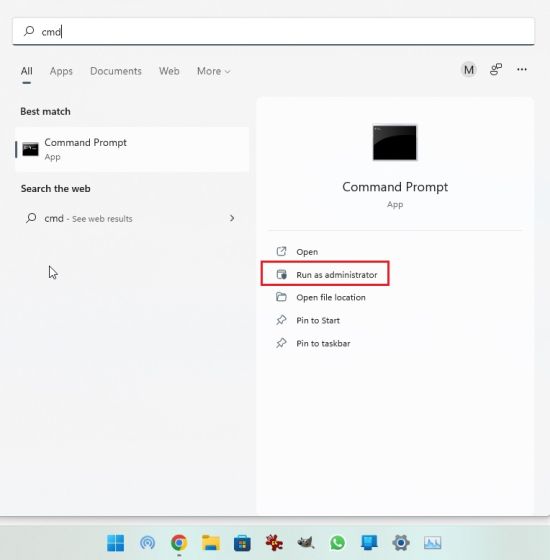
1. Press the Windows key and type “cmd”. Here, click on “Run as Administrator” in the right pane. If you wish to always open apps with admin permission, follow our linked guide.

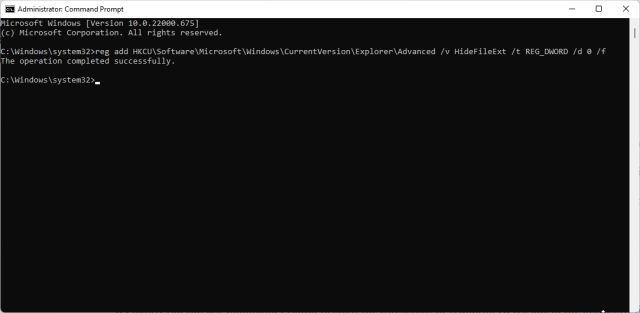
2. Next, paste the below command in the CMD window and hit Enter. This will add the Registry key to show file types in Windows 11. For more such best registry hacks in Windows 11, head over to our article.
reg add HKCU\Software\Microsoft\Windows\CurrentVersion\Explorer\Advanced /v HideFileExt /t REG_DWORD /d 0 /f

3. And there you go! You can now view the file type in Windows 11.
Show File Type in Windows 11 by Default
So that is how you can show the file type in Windows 11 for different file formats. I always keep the file extensions turned on so that I can readily know about the file types and open that particular file format with a dedicated program. Anyway, that is all from us. If you want to learn more about such hidden Windows 11 features, go through our exhaustive article. And to learn about the best Windows 11 apps, head to our curated list. Finally, if you have any questions, let us know in the comment section below.


