Like its predecessors, Windows 11 also offers the option to show hidden system files and folders that are not visible in the File Explorer by default. The easiest way to enable the feature is through the File Explorer itself, but you can also do that via the Control Panel or through Windows Settings. We will show you all the methods to enable this feature and show hidden files and folders in this article.
Show Hidden Files and Folders in Windows 11 (2022)
We will discuss all the ways you can show hidden files in Windows 11, whether it is through the File Explorer, Settings, Control Panel, and even the command prompt and PowerShell. So if you’re one of the people who prefers using the command line as much as possible, we’ve got you covered as well.
As always, you can use the table of contents below to jump ahead to the section that best suits your needs.
Method 1: Show Hidden Files and Folders from File Explorer
The easiest way to show hidden files and folders in Windows 11 is using File Explorer. There are two ways to do that based on whether you are using the File Explorer’s default minimalist view in Windows 11 or the traditional Windows 10 look with the detailed ribbon at the top. Here are both those methods:
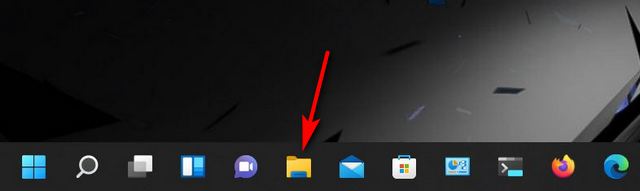
- First, launch File Explorer by clicking its icon on the Taskbar. If you cannot see the File Explorer icon on the Taskbar, search for “File Explorer” (without quotes) in the Windows Search Bar and select the first search result.
Note: You can also open the File Explorer by pressing “Windows key + E” on the keyboard.
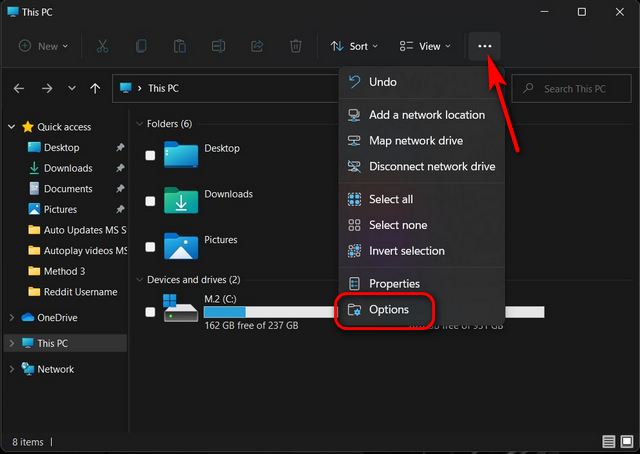
- Now, click on the three dot icon in the top bar, and select ‘Options’ from the drop down menu.
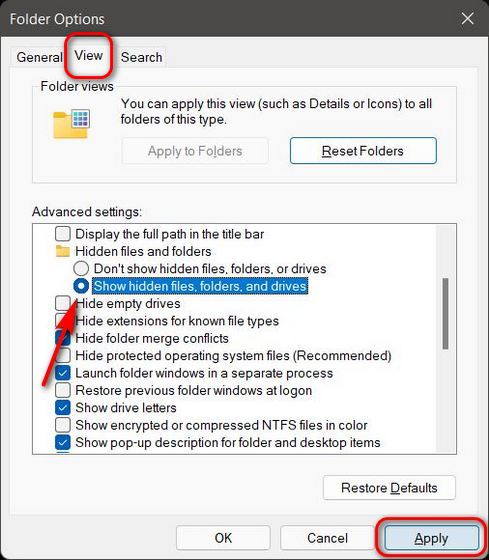
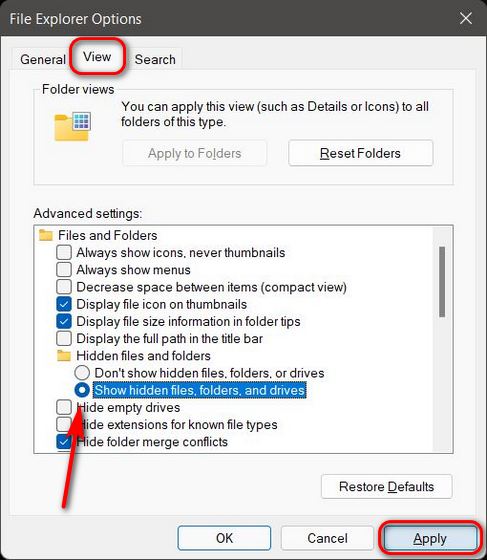
- In the Folder Options pop-up window that opens, navigate to the “View” tab. Then, under Advanced settings, scroll down and select the radio button next to “Show hidden, files, folders, and drives” to enable the feature. Finally, hit ‘OK’ at the bottom of the window to save the change.
Note: You can choose to view all protected operating system files by unchecking the “Hide protected operating system files” checkbox, as seen in the screenshot below.
Note: If you don’t already know, earn how to make Windows 11 look like Windows 10 by customizing the Start Menu, right-click context menu, and file explorer options. You can learn how to enable the old Windows 10 ribbon-style menu options in this article.
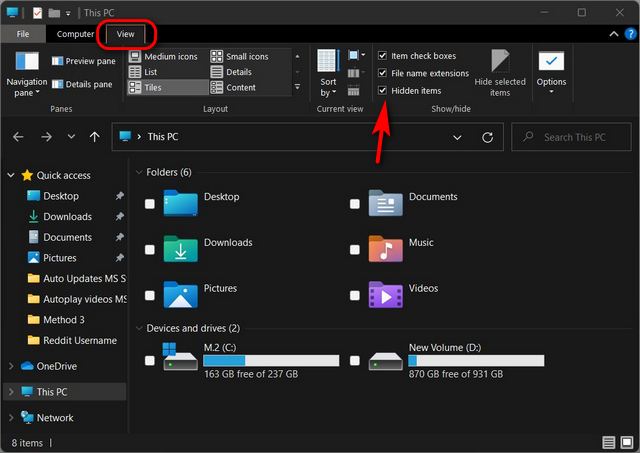
If you’re using the traditional ribbon layout in the File Explorer, here’s what you need to do:
- Navigate to the “View” tab and select the check-box next to “Hidden Items“. That’s it! You do not have to restart File Explorer for the change to come into effect.
Now, whichever File Explorer UI you are using on Windows 11, you will see all hidden files and folders on your PC.
Method 2: Enable the ‘Show Hidden Files’ Option Using Control Panel
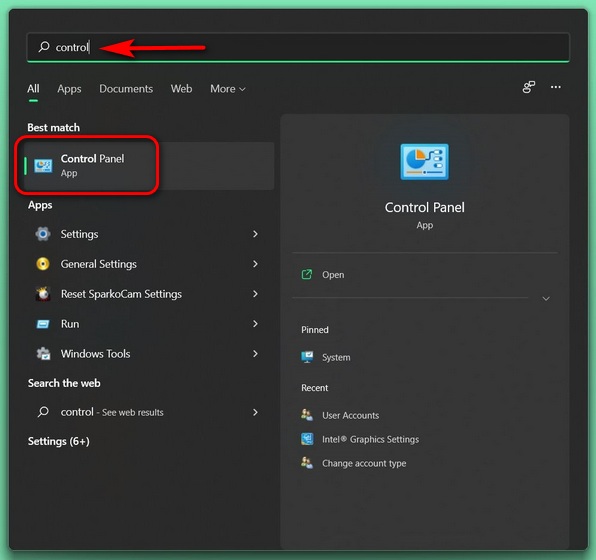
- Open the Control Panel on your Windows 11 computer. To do that, search for “control panel” (without quotes) in the Windows search bar and select “Control Panel” from the results.
- In the Control Panel, make sure you are using the “Icons” view (small or large). Then, select “File Explorer Options“.

- On the File Explorer Options pop-up window, make sure you are on the “View” tab. Now, scroll down and enable “Show hidden files, folders, and drives” using the corresponding radio button. Hit OK to save the changes.
That’s it! The Windows 11 File Explorer will now display all your hidden files and folders.
Method 3: Enable the ‘Show Hidden Files’ Option From Windows 11 Settings
You can also enable the ‘Show hidden files …’ option on Windows 11 using the Settings menu. Here’s how it works:
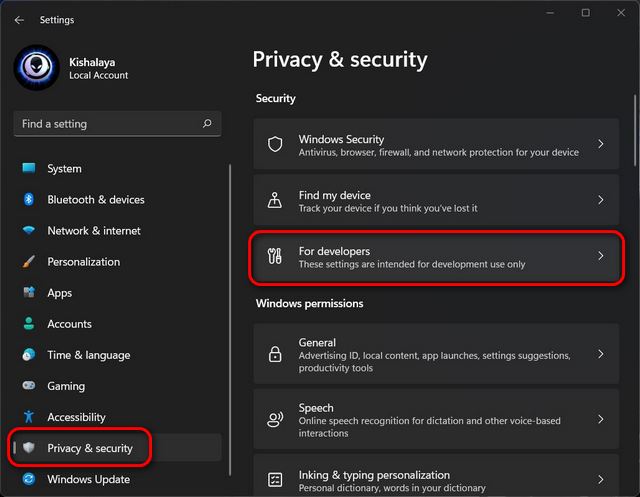
- Open Settings using the Windows 11 keyboard shortcut Windows key + I. Next, select “Privacy & security” on the left sidebar and click “For Developers” on the right pane.
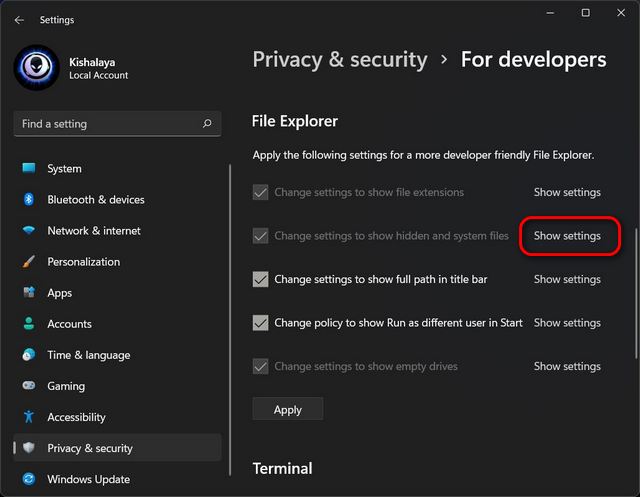
- Now, scroll down on the right pane, and under File Explorer, locate the option to “Change settings to show hidden and system files”. Click on the “Show Settings” button next to it.
You will now once again see the same ‘File Explorer Options’ pop-up window from Method 2. Follow the instructions as detailed above to display hidden files and folders in the Windows 11 File Explorer.
Method 4: View Hidden Files and Folders in Command Prompt
Another way to view a list of hidden files and folders on your Windows 11 computer is using Command Prompt. Here’s how you do that:
- First, open a Command Prompt window in Admin mode. To do that, search for “cmd” (without quotes) in the Windows search bar and click “Run as Administrator“.

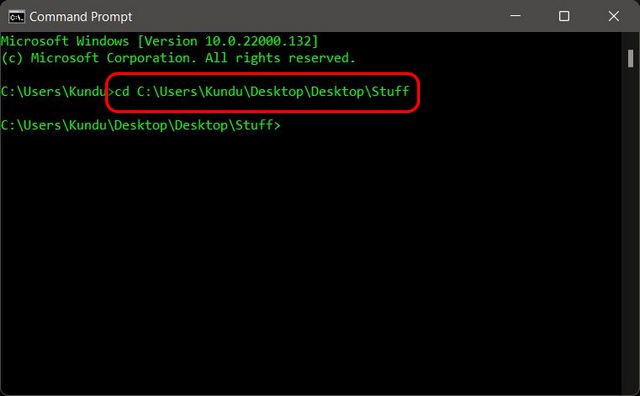
- Now, type
cdfollowed by a space and then copy + paste the full path of the folder where your hidden files are stored. Then, hit Enter. The screenshot below shows how it’d look if the path wasC:\Users\Kundu\Desktop\Desktop\Stuff.
- Now type
dir /ahto view a list of all hidden files and folders within that folder.
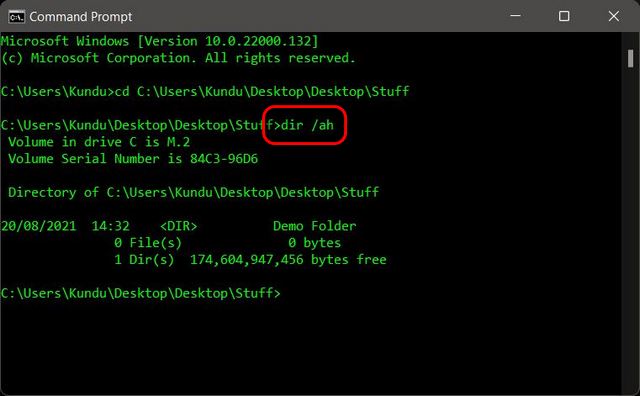
That’s it! The command above will only show any hidden files or folders at any given location. In my case, Demo Folder is a hidden folder created for demonstration purposes.
Note: This method will only show you hidden files or folders within the Command Prompt window. To make hidden items visible every time within File Explorer, you will have to follow one of the three methods above.
Method 5: View Hidden Files in Windows PowerShell
If you really like command-line methods, you can also use Windows PowerShell to see hidden files and folders in Windows 11. Here’s how:
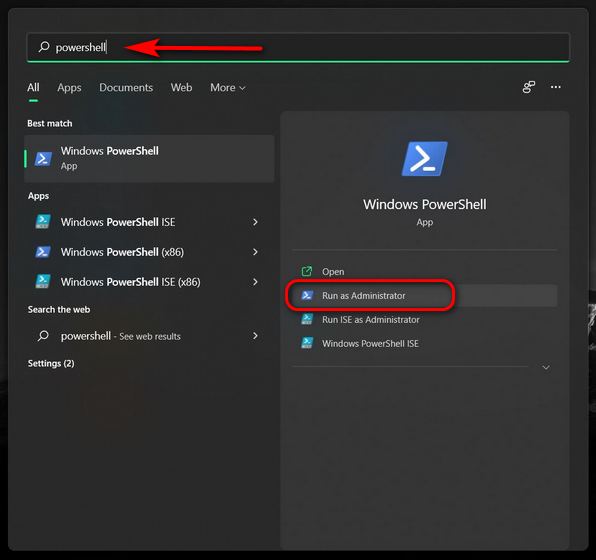
- First, open Windows PowerShell in Admin mode on your PC. To do that, search for “powershell” in the Windows search bar and click Run as Administrator.
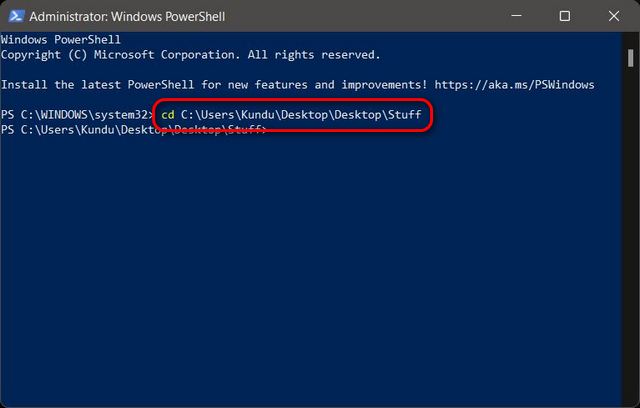
- In the PowerShell window, type
cdfollowed by a space and copy+paste the full path of the folder where the hidden files are located, just like the Command Prompt method. And then, hit Enter.
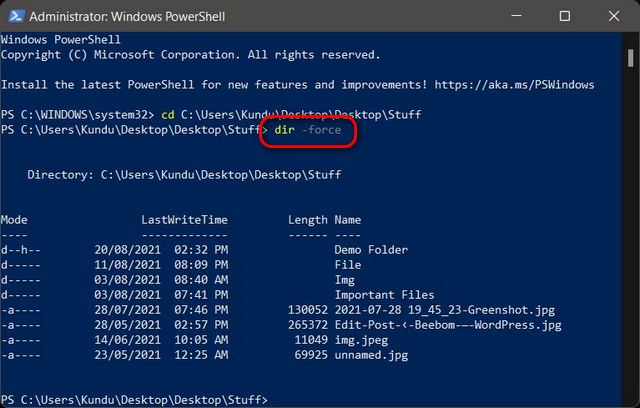
- Finally, to see hidden files in that folder location, type
dir -forceand hit Enter. That’s it. You can now see all your hidden files and folders within the target folder on your Windows 11 PC.
Note: If you are not sure which folder contains the hidden files, enter the full path of the folder whose sub-folders may have hidden files. Then, use the following command: dir -recurse -force
View Hidden Files and Folders on Your Windows 11 Computer
Being able to see hidden files and folders in Windows 11 is really easy, but there’s one note of caution here. Many of these files are used by the operating system and are of critical importance to the proper functioning of your PC. So do not alter them in any way unless you know what you are doing. That said, now that you know how to show hidden files and folders on your PC, check out some of our other Windows 11 tutorials. That includes how to change power mode settings in Windows 11 and how to change administrator in Windows 11.