The new Settings app in Windows 11 now offers a myriad of features, such as a user-facing option to enable DNS over HTTPS or customize touchpad gestures. However, there are certain hidden features on Windows 11 that can only be enabled, or for that matter, disabled via the good old Registry Editor. It lets you restore crucial features that Microsoft has shelved for Windows 11 or has hidden from the general sight. You can also disable resource-hogging services with these best Registry hacks on Windows 11. So to learn more, let us dive right in and find the top Windows 11 Registry tricks.
Top Windows 11 Registry Hacks (2022)
We have added the top Registry hacks that still work on the latest Windows 11 stable build (Build 22000.675, May 10) in this article. From restoring old features to customizing UI elements in Windows 11, we have mentioned all the Registry tricks you should know in 2022. You can expand the table below and move to the desired section. But before that, be sure to create a restore point by following the steps below.
Create a System Restore Point in Windows 11
To be on the safer side, I strongly recommend you create a system restore point on Windows 11 before moving forward. If a Registry change causes any issues on your PC, you can quickly restore your PC to the working state. Here are the steps you need to follow.
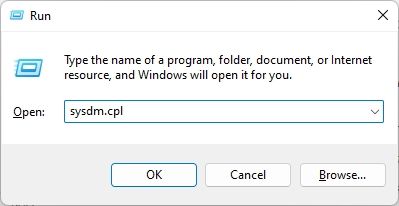
1. Press the Windows 11 keyboard shortcut “Windows + R” to open the Run prompt. Here, type sysdm.cpl and hit Enter.
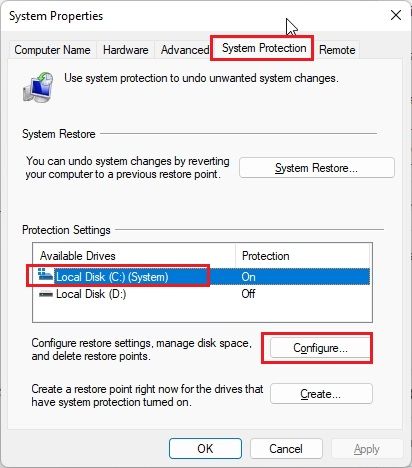
2. Next, move to the “System Protection” tab, choose your C drive and click on “Configure“.
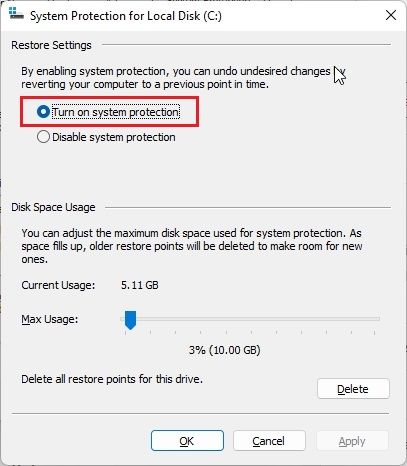
3. After that, select “Turn on system protection” and click on “OK”. Once you have enabled system protection, you can create a restore point on your Windows 11 computer.
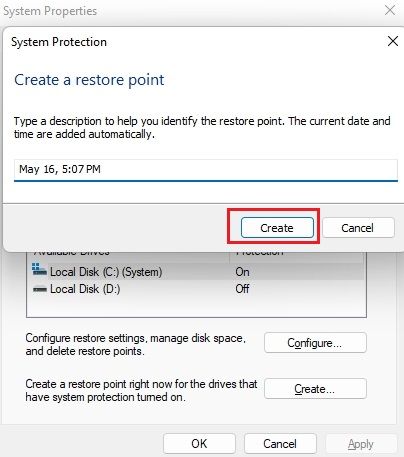
4. Under the “System Protection” tab, click on “Create“.

5. Here, give a name to the restore point. Don’t forget to mention the date and time to remember the restore point correctly. Now, click on “Create“, and you will be done within a few seconds.
1. Enable Windows Photo Viewer in Windows 11
If you are frustrated with the slow and laggy Photos app on Windows 11, worry not. You can still get the trusty Windows Photo Viewer right from Windows 7 to Windows 11. I am sure it will quickly become the best photo viewer on Windows 11 for you. So go ahead and try this best Registry hack on your Windows 11 PC.
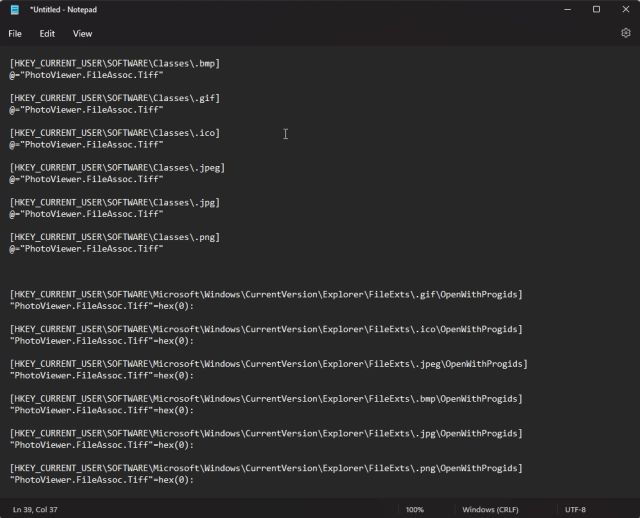
1. First, open Notepad on your PC and copy + paste the below commands into the new document.
Windows Registry Editor Version 5.00

[HKEY_CURRENT_USER\SOFTWARE\Classes\.bmp]
@="PhotoViewer.FileAssoc.Tiff"

[HKEY_CURRENT_USER\SOFTWARE\Classes\.gif]
@="PhotoViewer.FileAssoc.Tiff"

[HKEY_CURRENT_USER\SOFTWARE\Classes\.ico]
@="PhotoViewer.FileAssoc.Tiff"

[HKEY_CURRENT_USER\SOFTWARE\Classes\.jpeg]
@="PhotoViewer.FileAssoc.Tiff"

[HKEY_CURRENT_USER\SOFTWARE\Classes\.jpg]
@="PhotoViewer.FileAssoc.Tiff"

[HKEY_CURRENT_USER\SOFTWARE\Classes\.png]
@="PhotoViewer.FileAssoc.Tiff"

[HKEY_CURRENT_USER\SOFTWARE\Microsoft\Windows\CurrentVersion\Explorer\FileExts\.gif\OpenWithProgids]
"PhotoViewer.FileAssoc.Tiff"=hex(0):

[HKEY_CURRENT_USER\SOFTWARE\Microsoft\Windows\CurrentVersion\Explorer\FileExts\.ico\OpenWithProgids]
"PhotoViewer.FileAssoc.Tiff"=hex(0):

[HKEY_CURRENT_USER\SOFTWARE\Microsoft\Windows\CurrentVersion\Explorer\FileExts\.jpeg\OpenWithProgids]
"PhotoViewer.FileAssoc.Tiff"=hex(0):

[HKEY_CURRENT_USER\SOFTWARE\Microsoft\Windows\CurrentVersion\Explorer\FileExts\.bmp\OpenWithProgids]
"PhotoViewer.FileAssoc.Tiff"=hex(0):

[HKEY_CURRENT_USER\SOFTWARE\Microsoft\Windows\CurrentVersion\Explorer\FileExts\.jpg\OpenWithProgids]
"PhotoViewer.FileAssoc.Tiff"=hex(0):

[HKEY_CURRENT_USER\SOFTWARE\Microsoft\Windows\CurrentVersion\Explorer\FileExts\.png\OpenWithProgids]
"PhotoViewer.FileAssoc.Tiff"=hex(0):
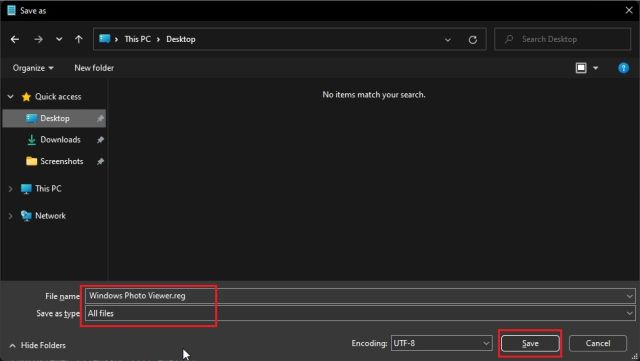
2. Now, click on “File” in the top menu and select “Save as“.

3. Here, choose “All files” from the “Save as type” drop-down menu and give the file name. For example, I used the file name – “Windows Photo Viewer”. Next, add .reg at the end of the file name to create a Registry file. Finally, click on “Save”.
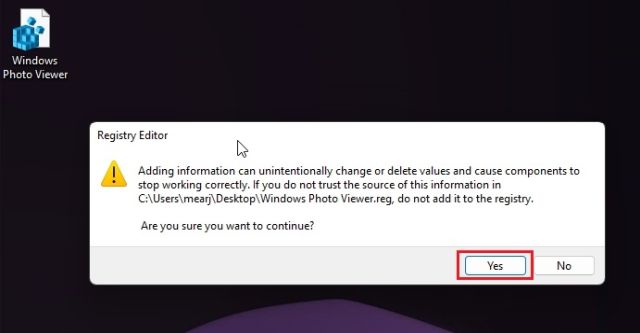
4. Now, move to the location where you have saved the .reg file. Then, double-click on the file to run the registry command and click on “Yes“. This will merge the entries with your Registry.
3. Now, right-click on any image and open it with Windows Photo Viewer. You will find that the Windows Photo Viewer opens images in a jiffy without any lag whatsoever. Enjoy!

2. Add Any Program to Windows 11 Context Menu
If you wish to add your favorite program, such as NotePad or a media player, to the right-click menu on Windows 11, you can do so with this Registry hack. You can simply right-click and open your favorite program without any delay. Keep in mind that these shortcuts are added to the old context menu, so you will have to click on “Show more options” to reach your favorite program. Here is how to set it up.
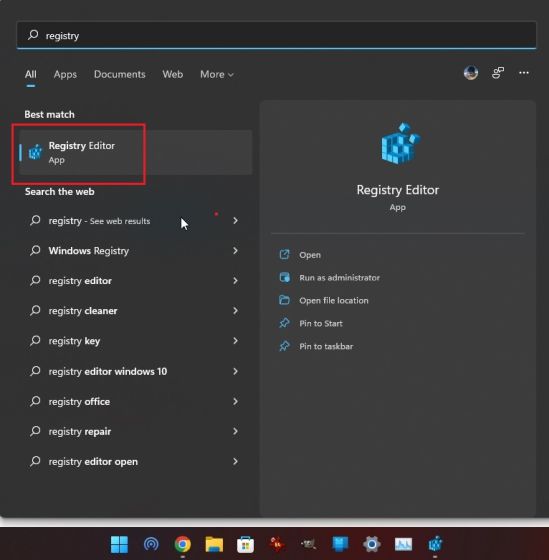
1. Press the Windows key once and type “registry“. Now, open the “Registry Editor”.
2. Here, copy the below path and paste it into Registry Editor’s address bar, and hit Enter.
Computer\HKEY_CLASSES_ROOT\Directory\Background\shell
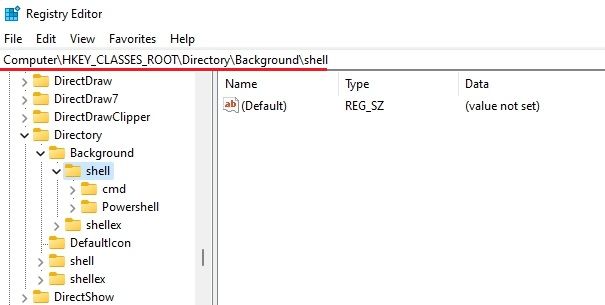
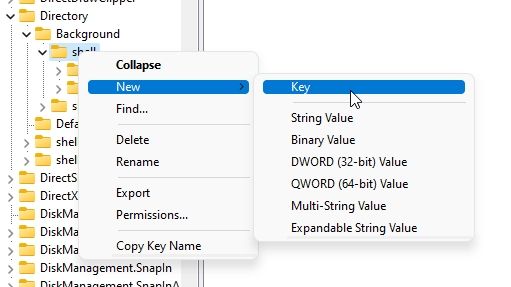
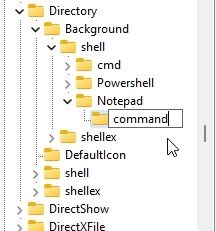
3. Once you are here, right-click on “shell” and choose New -> Key.
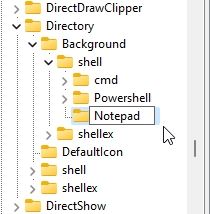
4. After that, name the program you want to open from the context menu. For example, I am adding a Notepad shortcut to the context menu on my PC.
5. Next, right-click 0n the new entry (for me, it’s Notepad) and again choose New -> Key.
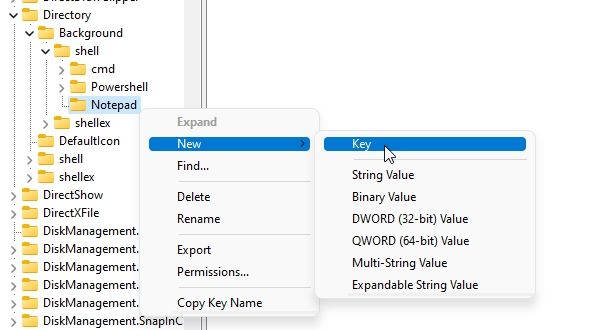
6. Rename the newly created key to command.
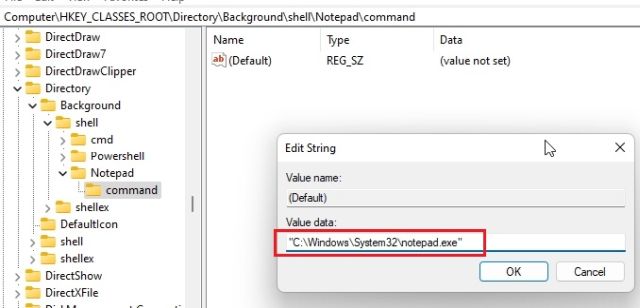
7. Next, open the Default file under “command” and paste the executable path of the program in “Value data”. To find the executable path of a program, follow the next step.
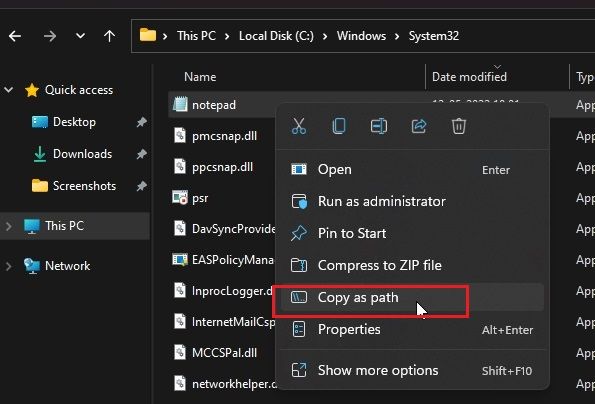
8. You can right-click on any program and open the file location to get the executable address. Right-click on the EXE file and choose the “Copy as path” option.
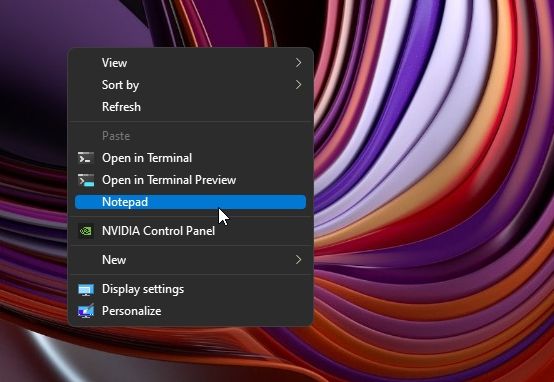
9. Now, close the Registry Editor and right-click on the Desktop. Move to “Show more options“, and you will find that the new program has been added to the Windows 11 context menu, thanks to the Registry hack you just applied.
3. Bypass TPM and CPU Checks to Install Windows 11 Update
If you have somehow upgraded to Windows 11 from Windows 10, but are unable to install new Windows 11 updates as your requirements are not met, do not worry. Microsoft has itself detailed a Registry hack that allows you to install Windows 11 updates even on unsupported hardware. Here is how it works:
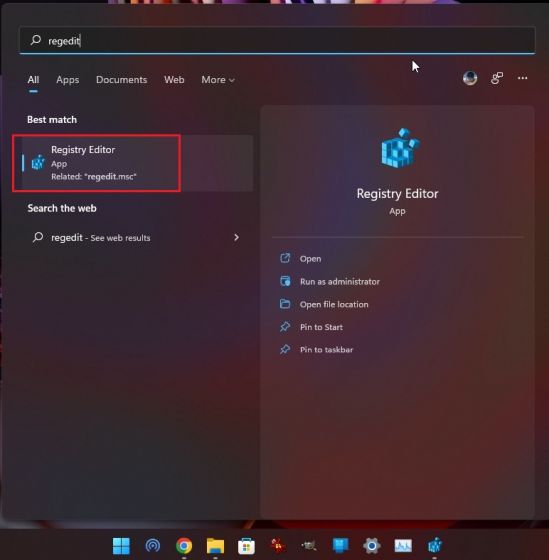
1. Press the Windows key once and type “regedit“. Now, open Registry Editor from the search results.
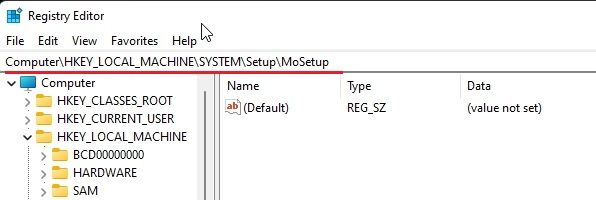
2. Next, move to the below path by copy-pasting it into the address bar in the Registry Editor.
Computer\HKEY_LOCAL_MACHINE\SYSTEM\Setup\MoSetup
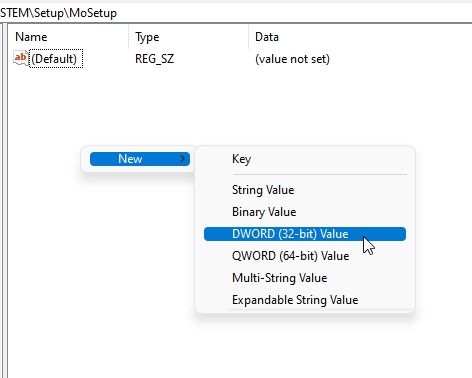
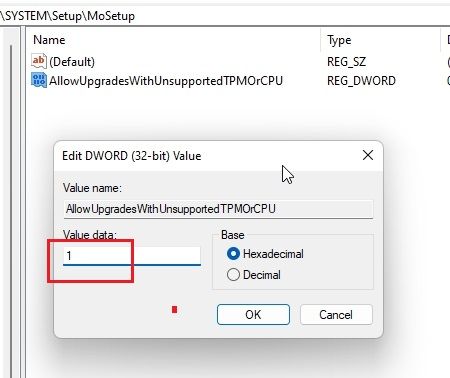
3. Once you are here, right-click on the empty space in the right-pane and choose New -> DWORD (32-bit) Value.
4. After that, name it AllowUpgradesWithUnsupportedTPMOrCPU.
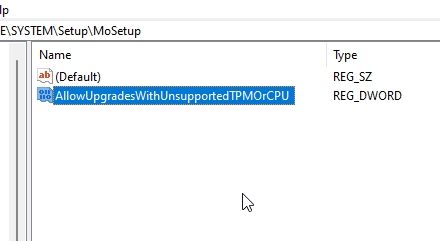
5. Double-click to open it and change the Value data from 0 to 1. Finally, close the Registry Editor and restart your computer. Now, go ahead and update Windows 11. This time, you will not face any TPM or CPU errors.
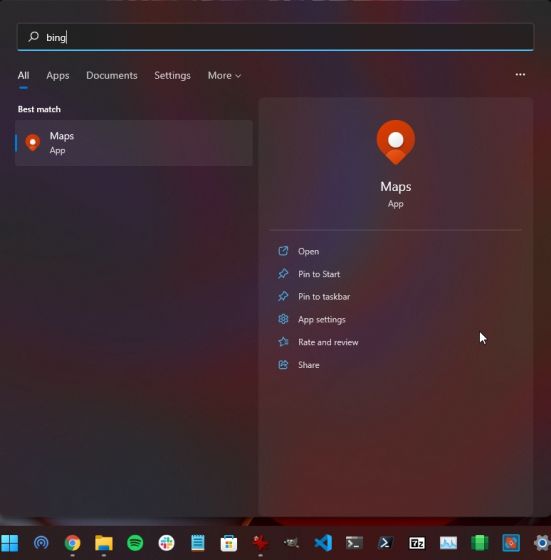
4. Disable Bing Search From Windows 11 Start Menu
While the Windows 11 Start menu has been revamped, I don’t like the fact that whenever I make a local search query, it also pulls results from Bing. It makes the overall search experience slow and frustrating. So if you wish to disable Bing search from the Windows 11 Start menu, you can follow our linked guide for detailed steps. However, we have also added all the Registry changes required to remove Bing search results from the Start menu here. Here’s a brief demonstration of the steps you need to follow.
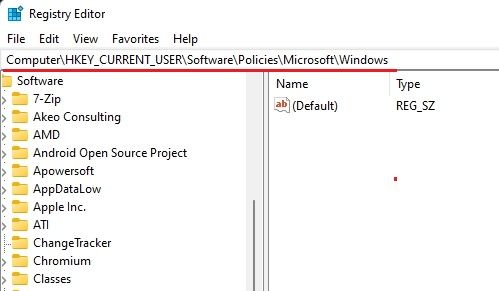
1. Open the Registry Editor and move to the below path.
Computer\HKEY_CURRENT_USER\Software\Policies\Microsoft\Windows
2. Here, create a new key called Explorer. After that, create a new “DWORD (32-bit) value” in the right pane under Explorer and rename it to DisableSearchBoxSuggestions.
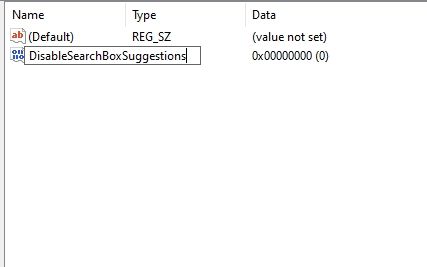
3. Now, double-click to open “DisableSearchBoxSuggestions” and change the “Value data” to 1.

4. Finally, restart your Windows 11 PC, and this Registry hack will altogether remove Bing Search from the Windows 11 Start menu.
5. Get the Old Context Menu on Windows 11
This is one of the most requested and popular Registry hacks for Windows 1 since it lets you restore the old context menu that we dearly loved on Windows 10. We have already shared a detailed tutorial on how to get the old context menu on Windows 11 with all the Registry values. So follow the guide linked here, and you will have the old Windows 10 context menu working on Windows 11 in no time. Here, we have added some key steps so that you get the drift of how it works.
1. Open the Registry Editor and move to the below path.
Computer\HKEY_CURRENT_USER\Software\Classes\CLSID
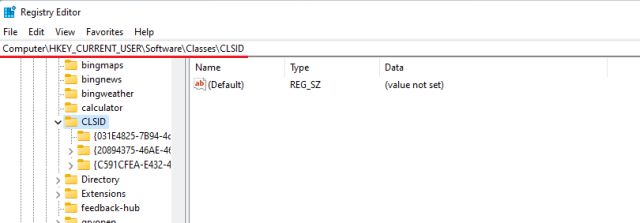
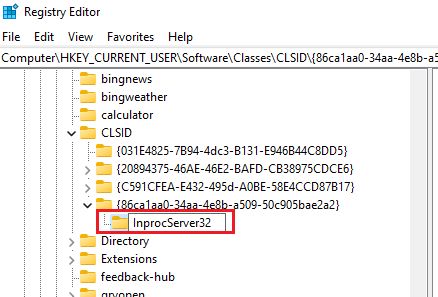
2. Here, right-click on “CLSID” and create a new key in the left sidebar. Then, set the below string as its name. After that, right-click on the said key, create a new key again, and rename it as InprocServer32.
{86ca1aa0-34aa-4e8b-a509-50c905bae2a2}
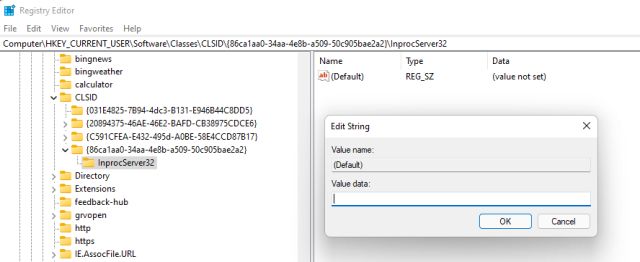
3. Under “InprocServer32”, open the Default file in the right pane and click on “OK”. No need to enter any value.
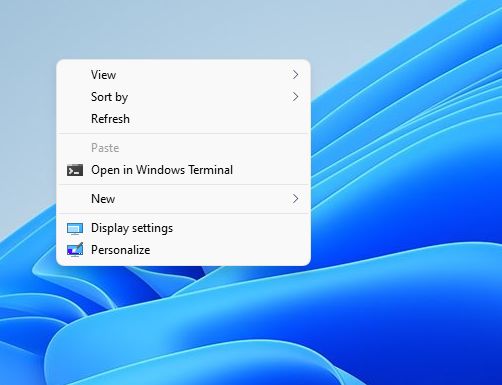
4. Now, close the Registry Editor and open the context menu on the Desktop. Voila! You will find the old context menu is back on your Windows 11 computer.
6. Customize the Windows 11 Taskbar
This Registry hack is for users who want to customize the Windows 11 Taskbar to their liking. With some minor Registry value changes, you can resize the Taskbar and move the Taskbar to the top or side of the screen. These options are not available through the Windows Settings page, but the Registry Editor allows you to make these changes manually. You can follow our linked tutorial and customize the Taskbar on Windows 11 with ease. Here, we have demonstrated the steps to resize the Taskbar through the Registry Editor.
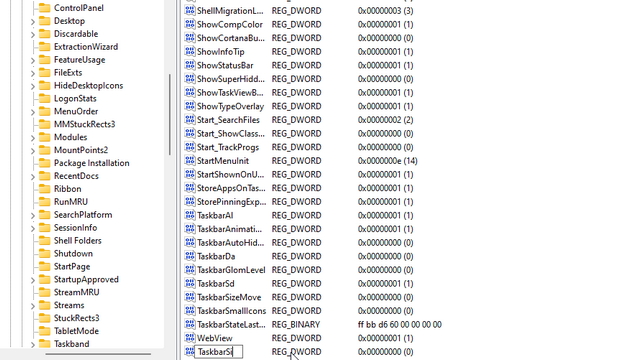
1. Open the Registry Editor and navigate to the below address.
Computer\HKEY_CURRENT_USER\Software\Microsoft\Windows\CurrentVersion\Explorer\Advanced
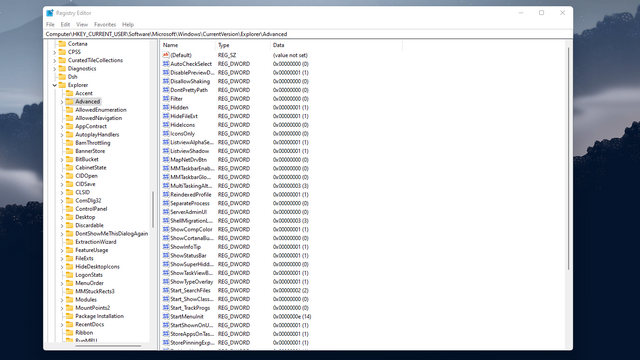
2. Now, right-click on the empty space in the right pane, choose New -> DWORD (32-bit) Value, and rename it to TaskbarSi.
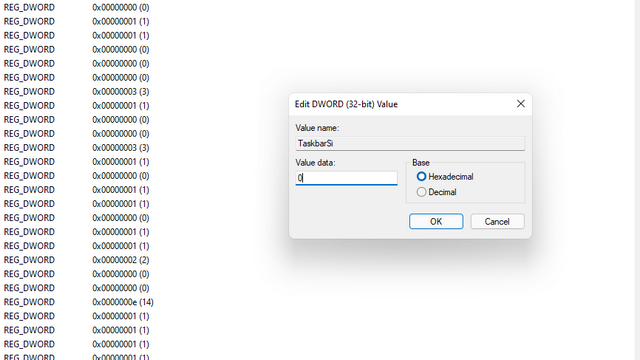
3. Now, open “TaskbarSi” and change the value data according to the below pointers. After that, click “OK” when you are done and close the Registry Editor.
- Small taskbar – TaskbarSi value 0
- Default taskbar – TaskbarSi value 1
- Large taskbar – TaskbarSi value 2
4. Now, restart Windows Explorer from the Task Manager, and the new Taskbar changes will be reflected.

7. Remove the ‘System Requirements Not Met’ Watermark in Windows 11
Recently, Microsoft started adding a “System requirements not met” watermark to PCs that don’t comply with Windows 11’s new minimum system requirements. This has not gone down well with some users, and they want to remove the watermark from the Desktop and Settings app. Thankfully, this Registry hack on Windows 11 lets you easily remove the ‘System requirements not met’ watermark. You can follow our detailed guide linked above or go through the steps below.
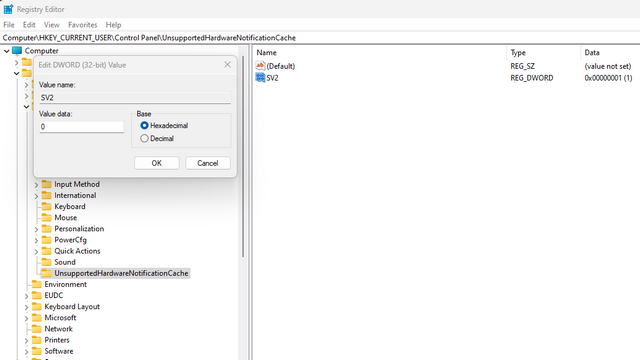
1. Open the Registry Editor and navigate to the below path.
Computer\HKEY_CURRENT_USER\Control Panel\UnsupportedHardwareNotificationCache
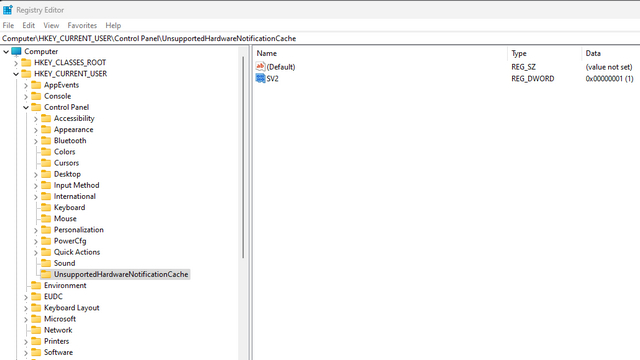
2. Once you reach here, you will find either “SV1” or “SV2” entries in the right pane. Open it and change the value data to 0. That’s it. Now, restart your PC, and the ‘System requirements not met’ watermark will be gone from your Windows 11 computer.
8. Enable or Disable Search Highlights in Windows 11
Microsoft has unveiled a new feature on Windows 11 called Search Highlights to show trending searches and relevant events whenever you open Windows Search. Frankly, I love this feature as it keeps me up to date with everything happening around me. However, in case you’re someone who wants to keep Windows Search as light as possible, you can disable this feature. The Registry Editor lets you enable or disable Search Highlights in Windows 11. So based on whether you like the feature or not, you can make the changes. Here’s how to go about it:
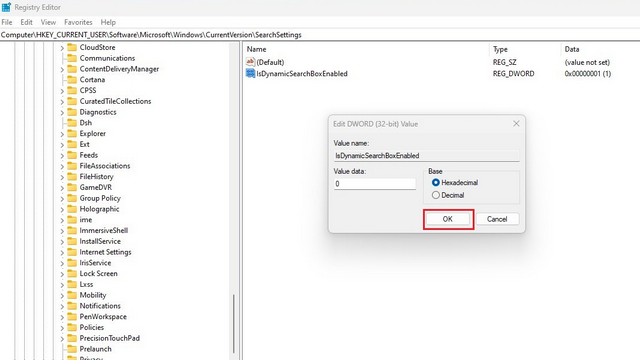
1. Open the Registry Editor and move to the below address. Now, open “IsDynamicSearchBoxEnabled“.
Computer\HKEY_CURRENT_USER\Software\Microsoft\Windows\CurrentVersion\SearchSettings
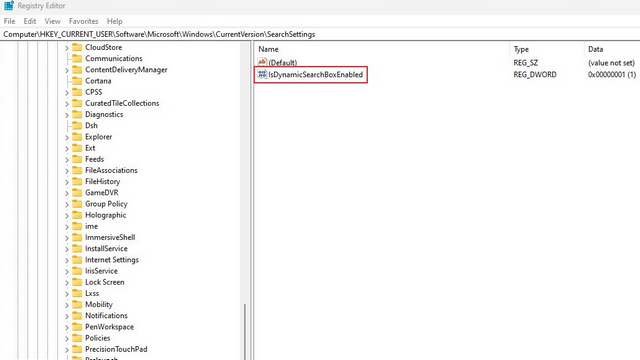
2. Here, change the Value data to 0 if you wish to disable Search Highlights in Windows 11. In case you want to enable Search Highlights, change the Value data to 1.
3. Now, close the Registry Editor and restart Windows Explorer from the Task Manager. Based on changes you have made, the Search Highlights feature will be enabled or disabled in Windows 11.
9. Stop Automatic Updates on Windows 11
Yes, you read that right. This is one of the best Windows 11 Registry hacks that let you disable automatic updates on Windows 11 with some key value changes. If you don’t want to update to large feature updates, you can turn it off and have peace of mind. Here is how to do it with the Registry Editor.
1. First, open the Registry Editor and navigate to the below path.
Computer\HKEY_LOCAL_MACHINE\SOFTWARE\Policies\Microsoft\Windows\WindowsUpdate\AU
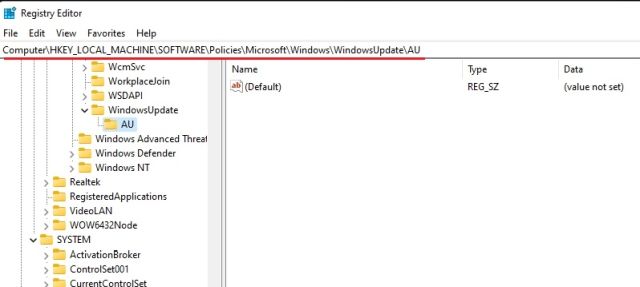
2. Under “AU”, create a new DWORD (32-bit) Value by right-clicking in the right pane and name it NoAutoUpdate.
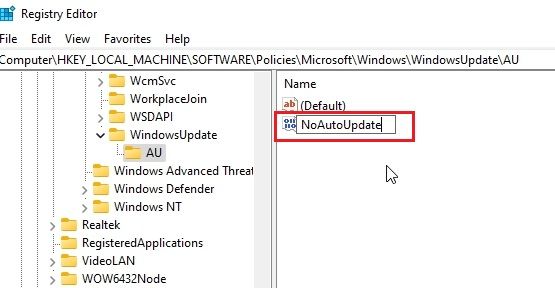
3. Now, open “NoAutoUpdate” and change the value to 1.
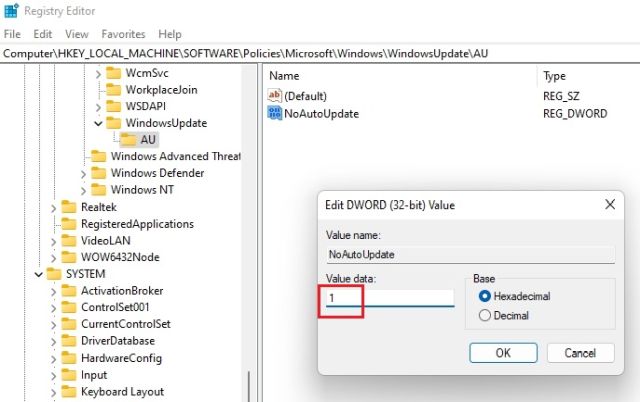
4. After that, close the Registry Editor and restart your PC. Now onwards, your Windows 11 computer will not automatically download updates.
10. Disable Microsoft Defender on Windows 11
If you want to permanently disable Microsoft Defender on Windows 11 and instead use a third-party antivirus program for Windows, you can do so with the Registry Editor. This nifty Registry trick will disable Microsoft Defender on Windows 11, and all the modification will persist even after an update. Also, the policies are not overridden by Microsoft. Here are the steps to follow.
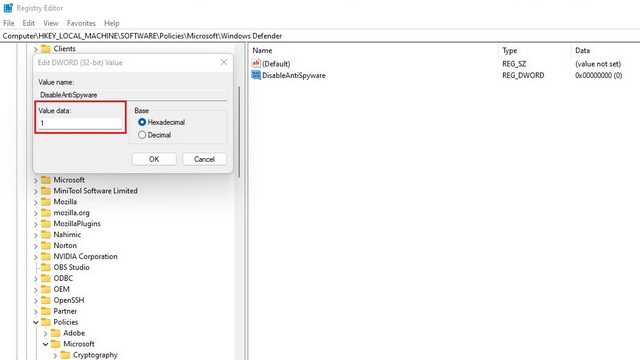
1. Open the Registry Editor and navigate to the below location. Here, right-click on “Windows Defender” and create a new DWORD (32-bit) Value.
Computer\HKEY_LOCAL_MACHINE\SOFTWARE\Policies\Microsoft\Windows Defender

2. Next, name it DisableAntiSpyware and open it. Now change the value data to 1 and click on “OK”.
3. You will have to make four more such changes to fully disable Microsoft Defender, so I suggest following our tutorial linked above for detailed instructions.
BONUS Registry Hack: Disable Cortana on Windows 11
If you don’t find Cortana useful on Windows 11, you can outrightly disable it on Windows 11 with Registry. I always disable Cortana and other such native programs to speed up my Windows 11 PC. With this Registry hack on Windows 11, you can permanently disable Cortana from running its services in the background. Here are the quick steps you can follow.
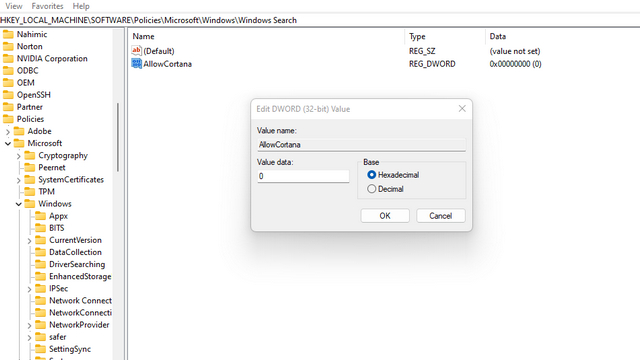
1. Open the Registry Editor and navigate to the below path. Here, right-click in the right pane and create a new DWORD (32-bit) Value.
Computer\HKEY_LOCAL_MACHINE\SOFTWARE\Policies\Microsoft\Windows\Windows Search
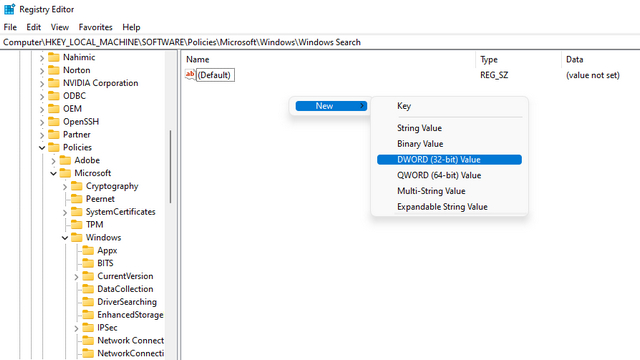
2. Rename it to AllowCortana. Now, change the value data to 0 and click on “OK”. Finally, close the Registry Editor and restart the PC. Cortana will now be disabled on your Windows 11 PC.
Personalize Windows 11 With Various Registry Tricks
So these are the best Registry hacks for Windows 11 that you should know and utilize to get the perfect PC experience. I personally apply most of these Registry changes to disable apps and services that I don’t need. Having said that, make sure to create a restore point before you make any of the changes. Anyway, that is all from us. If you want to learn Command Prompt tips and tricks, follow our linked article. And to customize Windows Terminal with new icons, glyphs, and fonts, we have a handy guide for you. Finally, if you have any questions, let us know in the comments section below.


 Sanmay Chakrabarti


