Facebook Live sessions help you interact and connect with your friends and followers. Starting a live stream on Facebook is effortlessly simple and lets you showcase something to the world. If you are new to Facebook and are not familiar with how the feature works, here’s how to go live on Facebook.
Go Live on Facebook (2022)
How to Go Live on Facebook (Desktop Website)
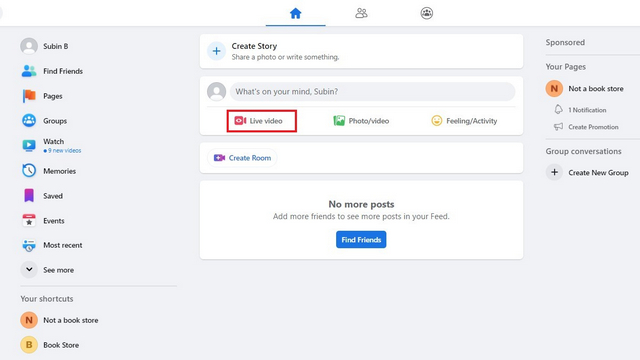
1. Open the Facebook website and click on the “Live video” button in the status update textbox.
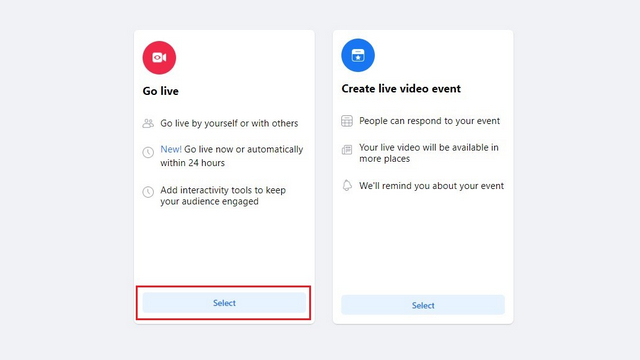
2. From the next page, click on “Select” under “Go live” to start your Facebook live stream.
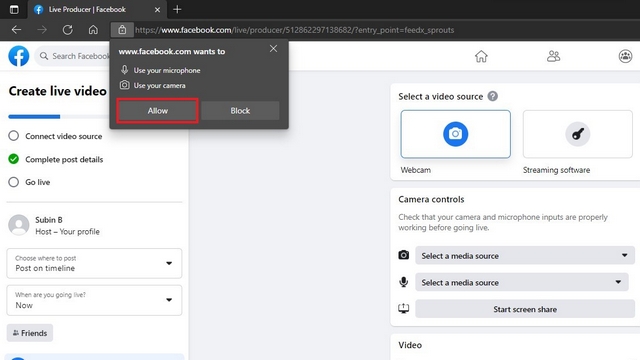
3. If you are live streaming for the first time, your browser will now request camera and microphone access. Allow the permissions to proceed further. You can also set the stream’s privacy to friends or make it public based on your preference.
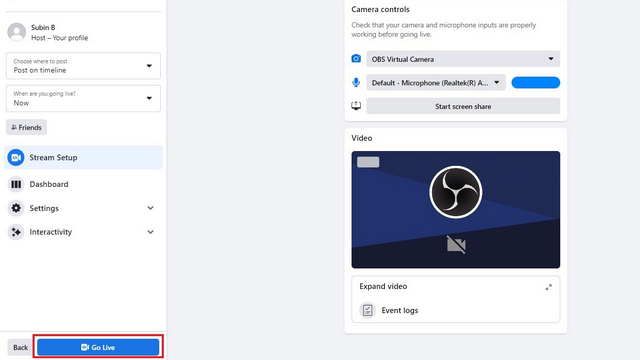
4. You should now pick your desired camera and media source. If you are planning to live stream from an external 4K webcam, now is the time to choose it as the camera source. Once done, click on the “Go Live” button at the bottom-left corner of the screen to stream live on Facebook.
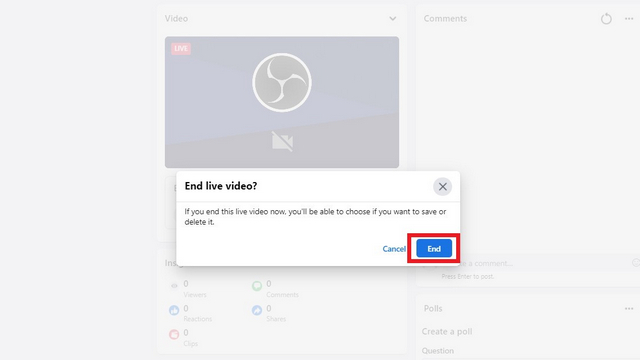
5. You are now live on Facebook. You can see stream metrics and insights like the number of viewers, comments, reactions, and shares in the insights section. To end a live video on Facebook, click on the red “End Live Video” button.

7. From the confirmation prompt that appears, click on “End” to stop streaming live on the Meta-owned social media platform.
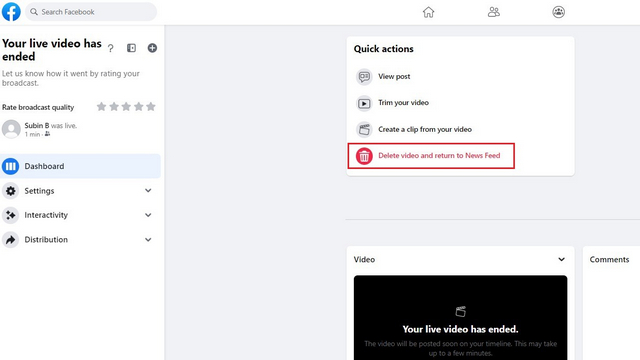
8. You can now choose to share the live video to your feed or permanently delete it. If you are not interested in keeping it, you can click on “Delete video and return to News Feed” to end the stream for good and go back to Facebook.
Live Stream using Facebook Mobile App (Android/ iPhone)
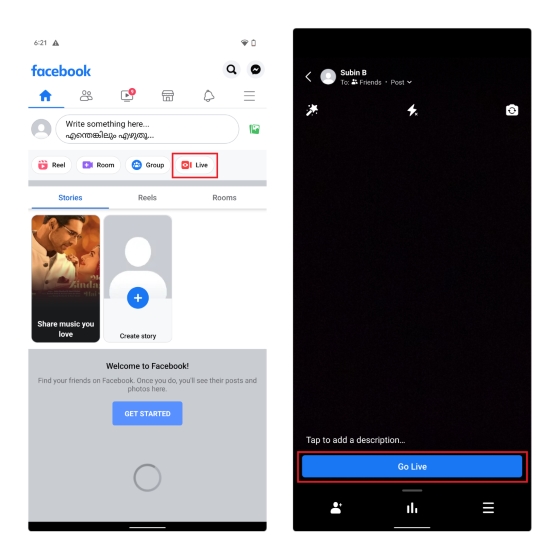
1. Open the Facebook app and tap the “Live” button in the status update box. You can now choose to add a description so that viewers get an idea of what the stream is all about. After adding the description, press the “Go Live” button to start your Facebook live stream.
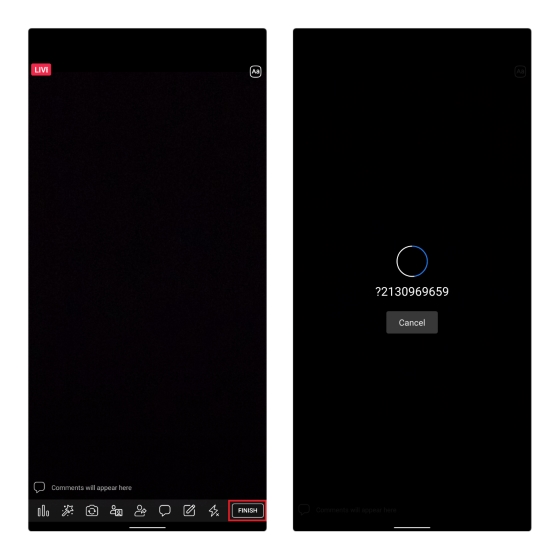
2. To end the live stream, press the “Finish” button at the bottom-right corner of the screen. You will have a few seconds to cancel ending the live stream in case you accidentally tried to stop the live stream.
3. After ending the live video, you have the option to post the video or delete it. Press “Post Now” to share the live video to your feed or press the “Delete” button to permanently delete the video.

Frequently Asked Questions
Q: Why can’t I go live on Facebook?
If you can’t start a live stream on Facebook, chances are that your internet connection is not stable. You can use one of the best speed test websites to check if your internet is reliable. You could also try disabling the adblocker and VPN to live stream on Facebook.
Q: When you go live on Facebook, is it public?
You can change your live stream’s privacy settings on Facebook. This way, you can choose to host a live stream session with just your friends or make it available to all Facebook users.
Q: Can you test Facebook Live without going live?
Facebook used to have a “Publish as a test broadcast” option that you could use to test your live streams. However, it looks like the feature has since been removed.
Easily Stream Live on Facebook
So that’s everything you need to know to stream live on Facebook. Meanwhile, if you are looking to take a break from Facebook, you can log out of Facebook or deactivate your account. For more such tips, do not forget to go through our article on the best Facebook tricks.


