So you got a new PS4 and just couldn’t wait to start playing games on it, that you just went by setting everything to default? Well, there’s a good chance that your PSN profile’s avatar is set to the stock options that were presented to you during the setup. Or maybe it isn’t, but you’re just bored with your current avatar and are filled with the desire to switch to a new one. The Sony PS4 is a great machine, with the only flaw of having a complicated UI with many features hidden underneath the surface. So, if you’re someone who wants to change their PSN Avatar, but just can’t figure out how, here is how you can change your PSN avatar:
Change Your PSN Avatar on PS4
Note: I tried the method on my PS4 Pro, but the process should be pretty much identical on the PS4 Slim and the older PS4.
- Go to your PlayStation 4’s Dashboard and enter the “Profile” option by highlighting it and pressing the X button on your controller.

- You’ll now be presented with your Profile screen. Here, click the 3-dot button to reveal further options. From there, select the “Edit Profile” option.

- You will now be presented with a list of options from where you can select how to edit your profile. Select the option “Avatar” to proceed.
![]()
- You will now get to see Sony’s list of Avatars available. Sony currently offers over 275 avatars to choose from. Unfortunately, Sony only allows users to choose from their officially provided Avatars, which means that users cannot upload their own custom avatars. Once you’ve selected your desired avatar, press the X button to continue. A confirmation screen will come up, select the “Confirm” option to save your changes or select the “Cancel” option to go back.
![]()
- Once you press confirm, press the CIRCLE button on your controller to go back and witness the changes to your profile’s avatar.
![]()
Use Custom Profile Picture on PSN
While Sony limits the users to use only the avatars that they provide officially, users can upload their own custom profile pictures. This is possible with the help of the PlayStation App. To change your profile picture, follow the steps below:
- Firstly, download the PlayStation App for your iOS or Android device, which is available for free. Open the app and login with your PSN Account.
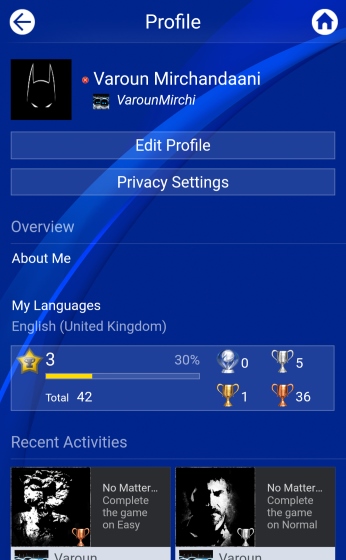
- Next, tap on your profile icon in the top-right to reveal a drop down menu. Select the “Profile” option from it.

- Once you do that, you’ll be presented with a new page that gives an overview of your profile. Here, tap on the “Edit Profile” option to reveal another drop-down menu, and select “Add Profile Picture” from it.

- Now, you can either take a new photo or select an existing photo from your gallery. Select an option that suits your preference, and then align the image in the cropping square. Once you’re done with that, tap on the “OK” button in the top-right corner.

- And that’s it. You’ll now see that your profile picture has been updated.
Do note that this new image is visible to you only. Your public profile will still be your avatar that you selected earlier. But hey, at least it’s something, right?
SEE ALSO: 15 Cool PS4 Tricks You Should Know
Change PSN Avatar With Ease
While Sony does bound you to choose from their official set of Avatars, the collection is still quite good. Alternatively, you can upload a custom profile picture to at least change the look of your profile on your device. So, try it out and if you have any doubts, do let us know in the comments section below, and we’d be happy to assist you.


