Among the many new features in iOS 16 is the new Safety Check feature for your iPhone. This is a major feature designed to help anyone who finds themselves in a precarious situation with their partner, or another person with whom they have close contact. While we hope you are never in a situation where you have to use this feature, if you’re curious about it, and you just want to know what it is and how you can use it, here’s what Safety Check is, and how to use it on iPhone.
What is Safety Check in iOS 16 and Why Does It Matter?
So what is Safety Check in the first place? Well, first, it’s important to know that Apple has always allowed users the ability to revoke sharing their location with apps and people, along with a bunch of other things such as access to their iPhone using Face ID and passcodes. However, Safety Check makes it easier for people at risk of domestic abuse to quickly adjust or completely revoke these permissions from one single place, instead of having to hunt down the various settings scattered around the iPhone.
Safety Check works in two ways:
- Emergency Reset
- Manage Sharing & Access
Below, we are going to discuss both of these Safety Check features in detail.
Tip: When you’re using Safety Check, you can tap on the ‘Quick Exit’ button to instantly close the Safety Check screen and quit the Settings app. This can be helpful if someone asks to see what you’re doing on your iPhone and you don’t want them to know that you’re revoking data sharing and other permissions.
So, now you know what is Safety Check, let’s see how can the feature be helpful to you before we explain how to use Safety Check on your iPhone. Here’s what you can do with the Safety Check feature in iOS 16:
1. Revoke access to your personal information from apps and people.
2. Review and remove untrusted devices that are signed in with your Apple ID.
3. Change your Apple ID password
4. Update Face ID, Touch ID, and device code information.
5. Add or remove emergency contacts.
How to Use Safety Check on Your iPhone
Set up and Use Emergency Reset
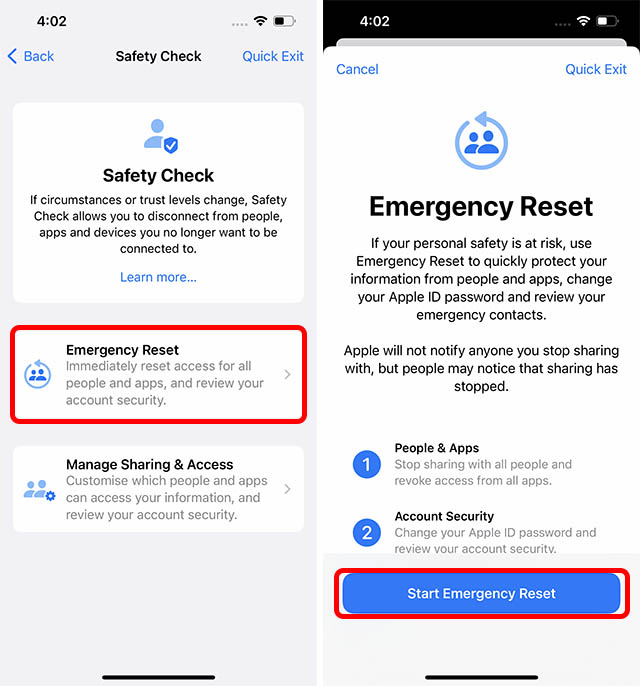
As the name suggests, Emergency Reset is pretty much like the kill-switch to stop sharing any and all access that you may have granted to apps and people in one fell swoop. This is meant to be used in situations where you urgently need to stop sharing data such as your location with anyone (including any apps that might be used to track your whereabouts). Here’s how to use this feature.
- Go to Settings -> Privacy and Security -> Safety Check
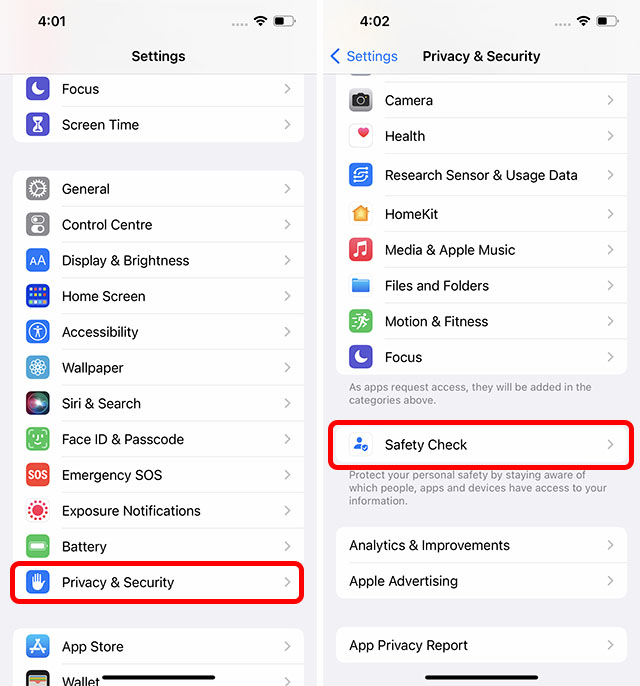
- Here, tap on ‘Emergency Reset’. After verifying your identity with Face ID/Touch ID/Passcode, tap on the button labelled ‘Start Emergency Reset’. Once you do this, there are three steps to the process.
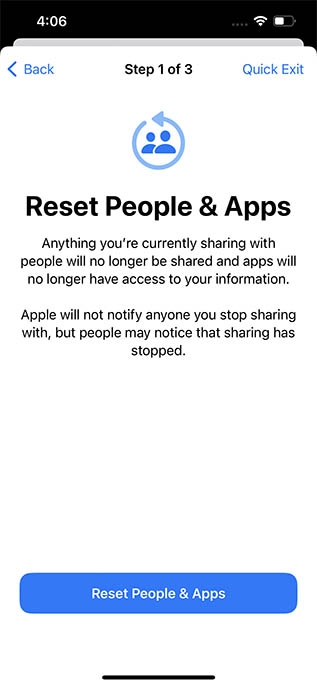
- Step 1: This step will ensure that your iPhone no longer shares any location data, photo libraries, etc, with any people or apps. Simply tap on ‘Reset People & Apps’ to do this. Confirm by tapping on ‘Reset’.
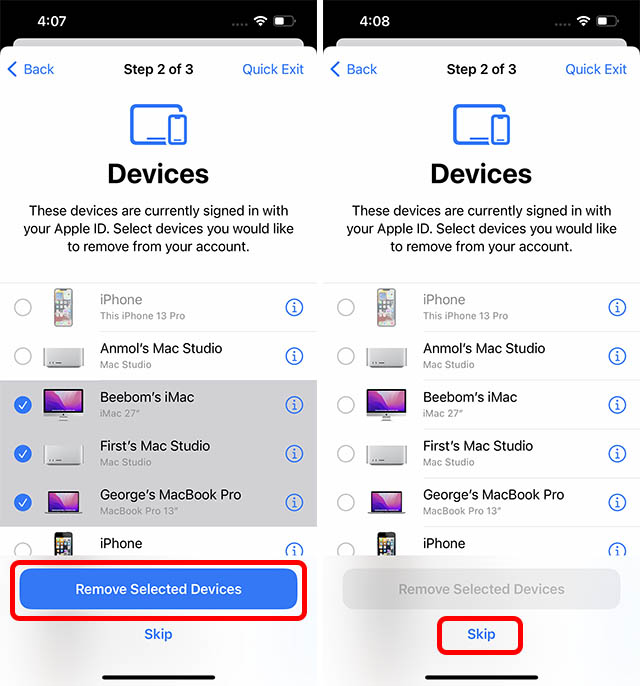
- Step 1.1: Next up, Safety Check will ensure that only your personal devices are signed in to your Apple ID. You can simply select any devices you want to sign out of remotely and remove your Apple ID from them. Once you have selected the devices, tap on ‘Remove Selected Devices’. If there are no such devices, just tap on ‘Skip’.
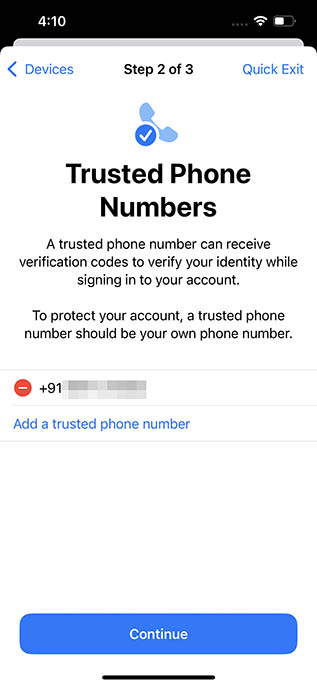
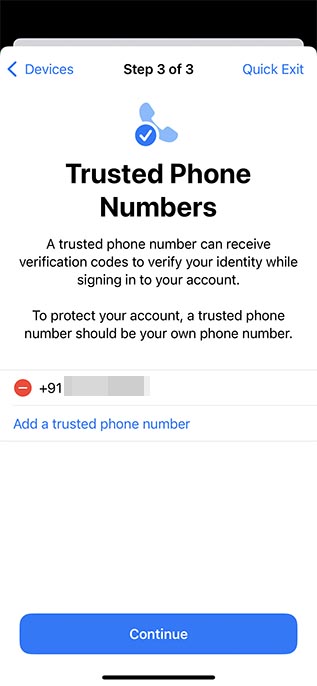
- Step 2: This next step lets you set up (or remove) trusted phone numbers for your account. These phone numbers should be your own. If there are other phone numbers in this list, you can remove them easily, and then tap on ‘Continue’.
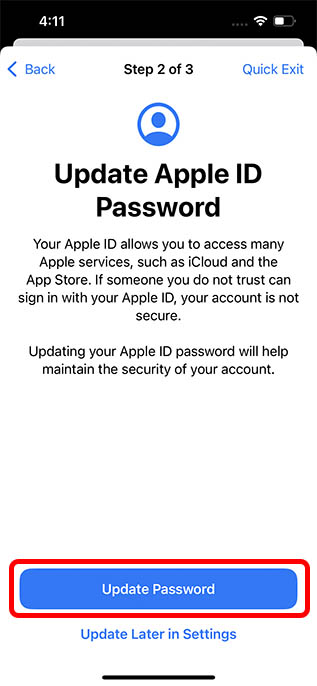
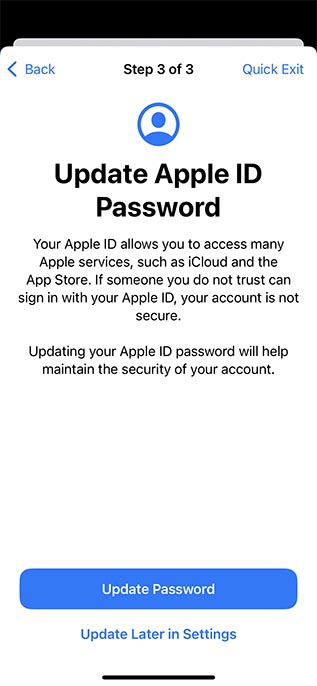
- Step 2.1: Next up, if you have shared your Apple ID password with the person you’re trying to remove yourself from, it’s obviously important to ensure they can’t access your Apple account. In this step, Safety Check will allow you to reset your Apple ID password if needed. You can either update your password using the ‘Update Password’ button, or choose to keep the same password using the ‘Update Later in Settings’ option.
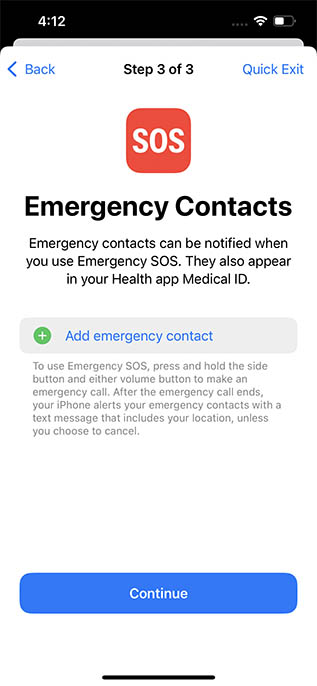
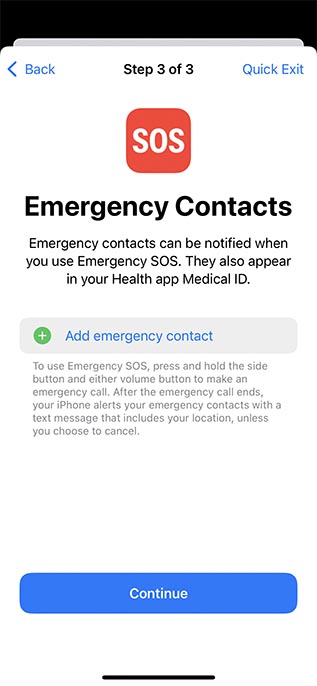
- Step 3: Lastly, it’s important to set up your emergency contacts. These should be trustworthy people, such as family members, or friends you can count on. These contacts will be notified if, god forbid, you’re ever in a situation where you need to use the Emergency SOS feature of your iPhone. You can add contacts here, and then tap on ‘Continue’.
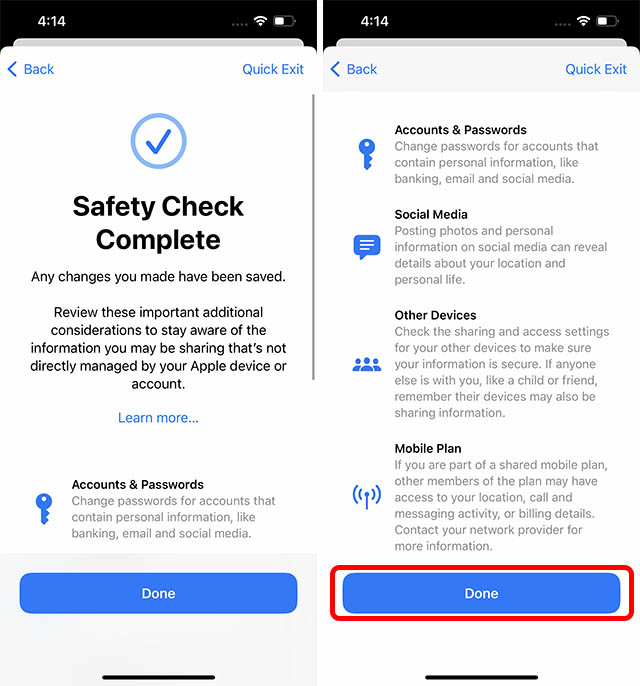
Once all these steps are complete, Safety Check will recommend other actions that you might want to take to further strengthen your personal safety and peace of mind. Once you’ve gone through this list, just tap on ‘Done’.
Manage Sharing & Access
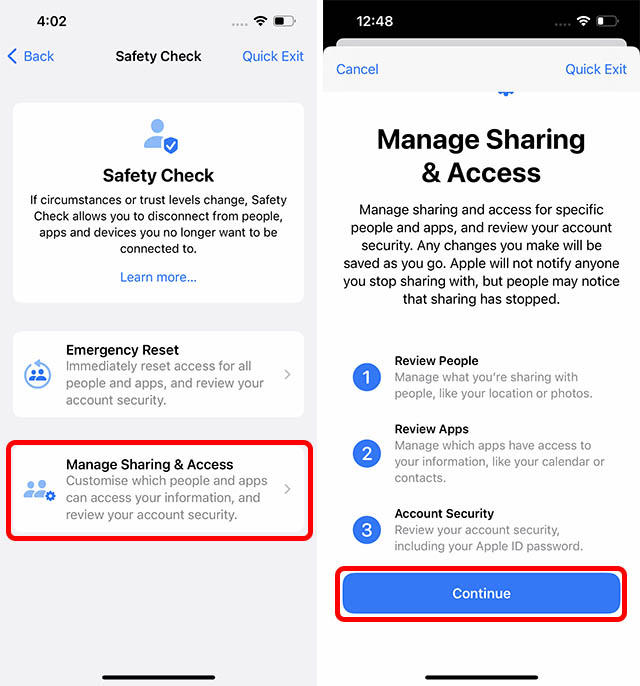
If, on the other hand, you want to remove permissions and sharing settings for particular people, you can use the second option titled ‘Manage Sharing & Access’. Here’s how to use this feature.
- Go to Settings -> Privacy and Security -> Safety Check.
- Here, tap on ‘Manage Sharing & Access’, and then tap on ‘Continue’.
- Now, there are three steps to follow.
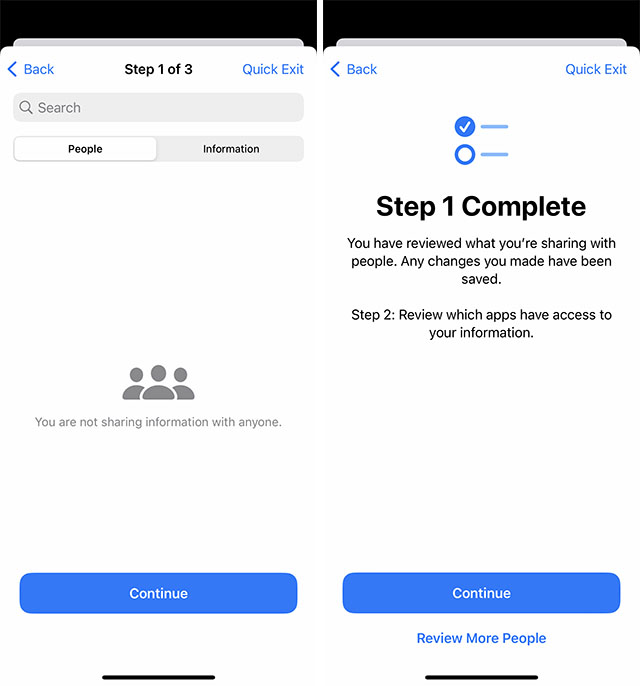
- Step 1: Here, you can see which people you have shared information with, as well as what information you’re sharing. You can use this page to remove people with whom you no longer wish to share information such as your location, iPhone access, etc.
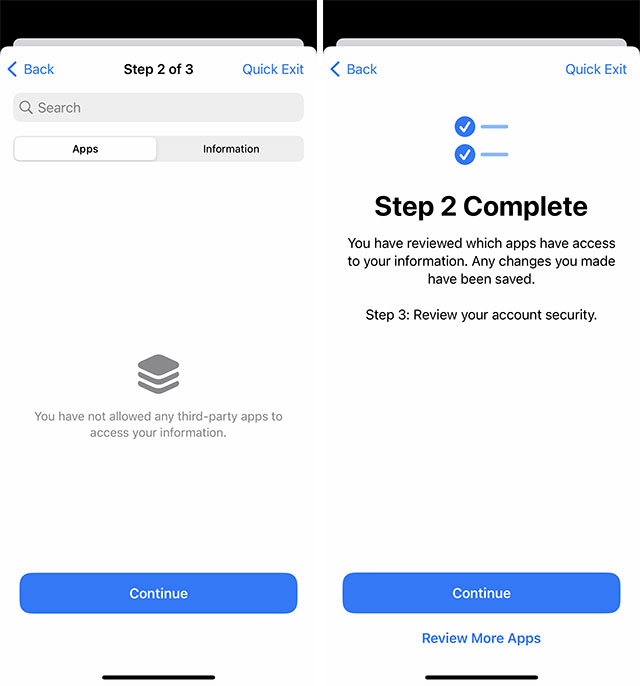
- Step 2: In the next step, you can see which apps have access to your information. You can remove any apps that you haven’t installed yourself, or that you no longer wish to use. Once done, tap on ‘Continue’.
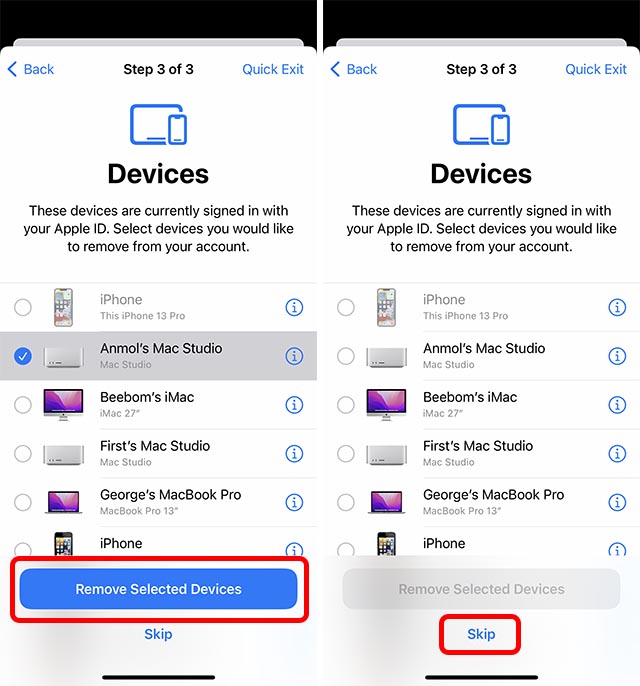
- Step 3: Finally, you will be shown a list of devices where you have logged in with your Apple ID. If you notice any unrecognisable devices here, you should remove them. Further, you can remove any devices that belong to the abuser so that they can not access your Apple ID any longer. If there are no such devices, you can tap ‘Skip’.
- Step 3.1: You can also verify your trusted contacts, remove any that you no longer trust, and add others if needed. Once done, just tap on ‘Continue’.
- Step 3.2: Next, the iPhone will prompt you to update your Apple ID password. This is useful in case the perpetrator of the abusive relationship has your password written down or saved in a password manager. You can quickly update your password and ensure that no one else gets access to your Apple ID.
- Step 3.3: It’s important to set up your emergency contacts. These should be trustworthy people, such as family members, or friends you can count on. These contacts will be notified if, god forbid, you’re ever in a situation where you need to use the Emergency SOS feature of your iPhone. You can add contacts here, and then tap on ‘Continue’.
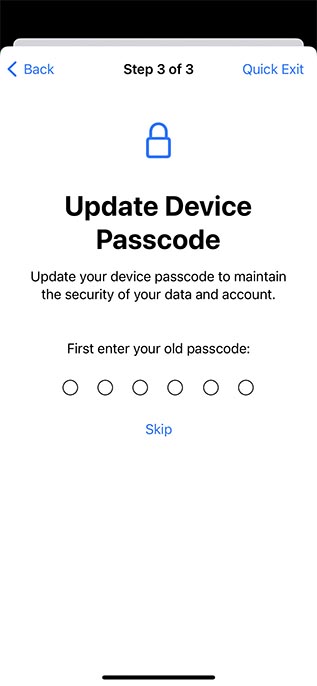
- Step 3.4: Finally, you will be prompted to change your device passcode to ensure the security of your data. You can change your passcode, or you can skip this step if you want.
Once all these steps are complete, Safety Check will recommend other actions that you might want to take to further strengthen your personal safety and peace of mind. Once you’ve gone through this list, just tap on ‘Done’.
Will Apple Notify Anyone About the Security Changes?
To ensure the safety and privacy of its users, Apple will not inform anyone if you stop sharing information, account access, location data, etc., with them. This is to ensure that victims (or those at risk) of domestic abuse can safely restrict the perpetrators from accessing their devices and information without having to worry about them getting notified of the change.
However, do note that it’s possible for other people to notice on their own that your information is no longer accessible. As such, it’s recommended to ensure your safety and have a plan of action before you use Safety Check.
Frequently Asked Questions
Safety Check feature can be found in Settings > Privacy & Security > Safety Check. If you are not able to find the feature, make sure that your iPhone is running iOS 16 or above.
Safety Check is a feature introduced by Apple in iOS 16. Using Safety Check you can quickly stop sharing information from apps and people, add emergency contacts and reset permissions you have granted to apps.