Is your laptop slowing down to a crawl when you open more than a few chrome tabs? Or are you annoyed about the fact that the laptop you are planning to buy has a higher RAM variant but is outside your budget? Well, don’t worry, as we might just have a solution for you. At the outset, you may feel that these issues are unrelated, but the thing is that they are not. One of the premier reasons for a slowdown in modern laptops is the lack of enough RAM. The reason why this happens is that if a laptop doesn’t have enough physical memory, it starts swapping data to other forms of storage namely, a hard drive (HDD) or solid storage drive (SSD), which are many times slower than even the slowest RAM modules. This causes the transfer rate to bog down, which results in a slowdown. So, adding extra RAM to your laptop might give you the performance boost that you need. And as we will see in this guide, the process to install or upgrade RAM in your laptop is rather easy.
Things to Remember Before Installing RAM
Before we start, there are some prerequisites that you have to keep in mind. The first thing you have to be clear about is whether you need the extra RAM or not. While computer slowdown can be caused by low RAM, other factors can lead to similar slowdowns. For example, if you are using an older laptop, the main reason for the slowdown might be storage and not memory. Hard drives tend to degrade over time, and as a result, they are slow to read data. The other thing you should check before you upgrade your RAM is whether your workload even requires an extra amount of RAM. This is an important step because if the problem is not caused by a lack of RAM, the issue will continue to persist even after the upgrade.
Once you are sure that you need extra RAM for the smooth functioning of your laptop, you need to go through the following steps before you install a new RAM kit:
Check for Empty RAM Slots
Firstly, you need to check if you have dedicated slots where you can install RAM sticks. This is a big problem in current times as most thin and light laptops come with soldered RAM, which is directly connected to the motherboard. It can’t be removed or replaced without highly professional tools. A quick search of your laptop’s model name should tell you whether you can go forward with this process. Or if you want to find out available RAM slots on Windows yourself, here are two easy ways:
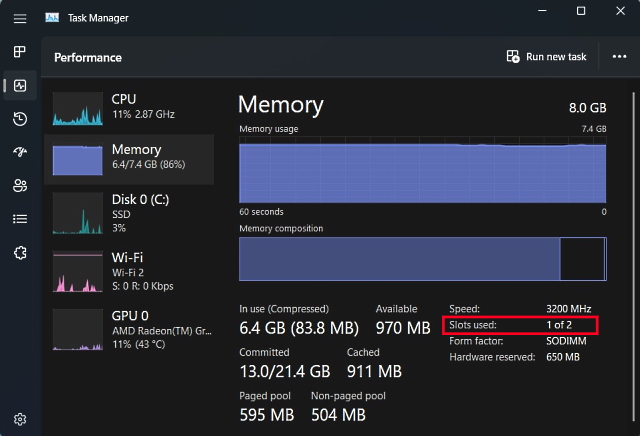
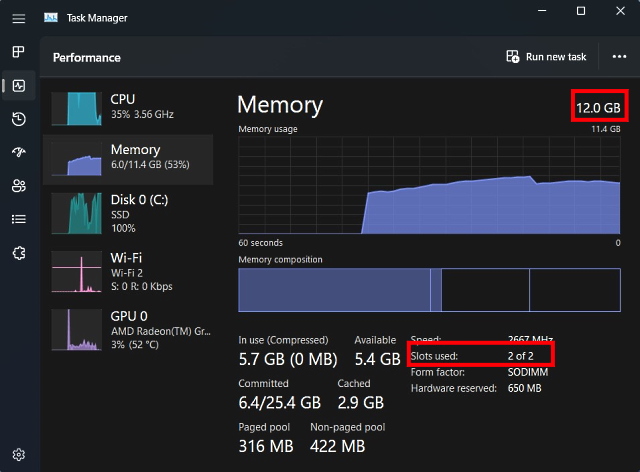
- Open the Task Manager using the Windows 11 keyboard shortcut “Ctrl + Shift + Esc”. Move to the “Performance” tabs, and you will see how many physical memory slots are in use. Thus, you can see how many slots are available in the memory section.
But if you still are not sure about whether your laptop has soldered RAM or not, you can always use a third-party software. Our preferred software to use is Crucial’s System Scanner. It’s an easy-to-use software that reads your motherboard’s details and then shows you all the information you might need. It shows your laptop’s memory configuration, including the number of available slots, maximum supported memory, etc. Here’s how it works:
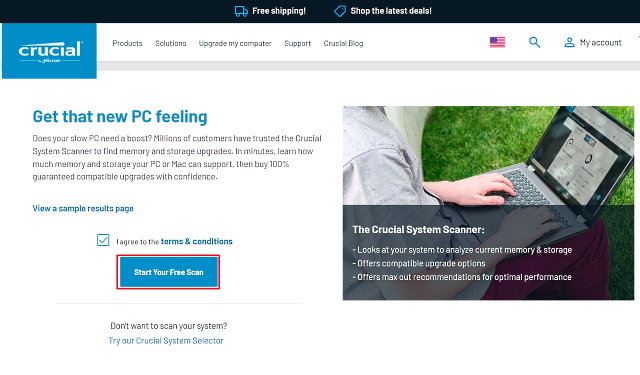
- First, click on the provided link, which will redirect you to Crucial’s website. Once you are on the website click on “Start Your Free Scan” here.
- Clicking on “Start Your Free Scan” will lead to a download prompt, so click on “Allow“. After the software is downloaded, click on it to install.
- When you open the “CrucialScan.exe” file, you will be redirected to a page that gives you the details of your laptop’s memory specs. For example – our laptop has two memory slots. of which only one is occupied.

Check RAM Type and Speed
Now that you have confirmed your laptop has an empty RAM slot or that the RAM is not soldered to the motherboard, you need to find out the RAM type and speed using the following method.
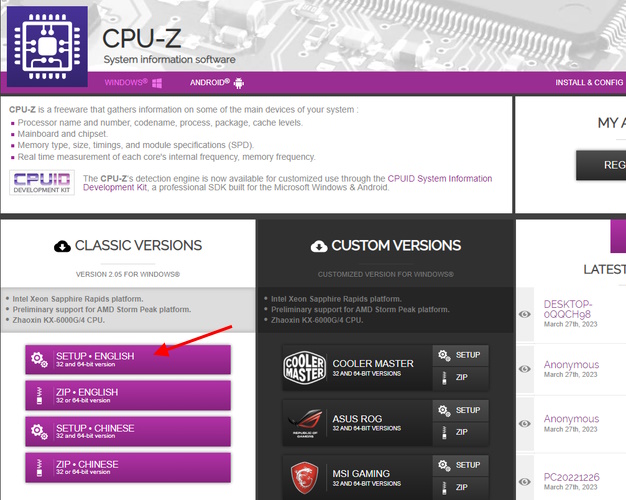
1. First, download a third-party software called CPU-Z (Free) on your Windows laptop. Click on the “Setup •English” button here.
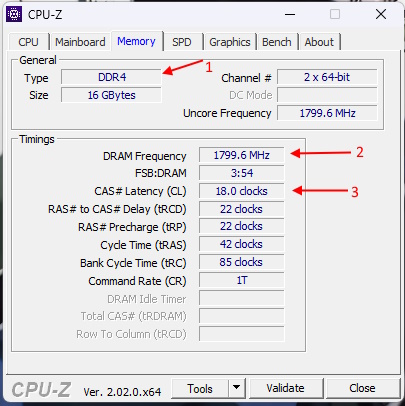
2. Next, install the software using the downloaded setup file. Then, open CPU-Z and move to the “Memory” tab from the top navigation bar. Here, you will find three important details about the memory supported by your laptop:
- RAM Type, which is DDR4 in our case.
- DRAM Frequency here shows the base clock speed of the RAM. DDR, for those unaware, stands for double data rate, so you need to double the base frequency (1800MHz x 2 = 3600MHz, in our case).
- CL Latency, which tells us the RAM timings for the module your laptop is using. If you’re unable to find memory sticks with the same CL number, go for a +1/-1 CL number.
3. Now, you need to keep all these three things in mind – RAM type, frequency, and timings – while buying a new RAM kit to install in your laptop.
Tools Required to Upgrade RAM
Now that you are aware of your laptop’s RAM details, you are finally ready to take on this project. There are a few more items that you need to not only help make the upgrade a reality but also make your life easier along the way. That includes a good screwdriver set with a regular Philips head (and Torx for some Ultrabooks) and a plastic pick to help you pry open your laptop’s back panel. The latter isn’t a necessity, as most laptops’ back panels easily come off easily.
How to Install or Upgrade RAM in Your Laptop
The next step in the process is one that we would argue is the most important of all – physically installing the new RAM stick. So, let’s dive in and see how to upgrade or install a new RAM stick in your laptop.
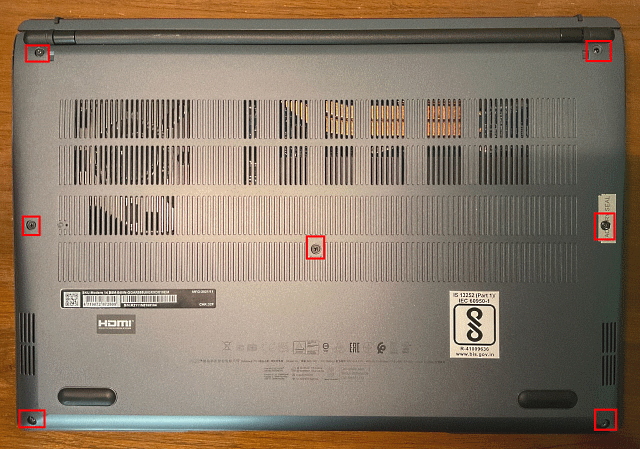
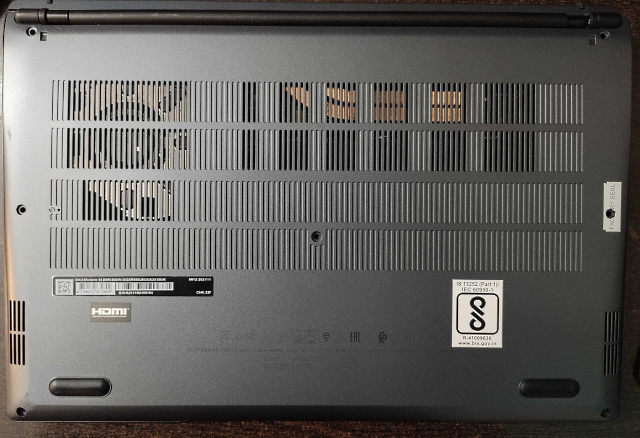
- The first step of the process will be to locate the back panel screws. In our case, our laptop (MSI Modern 14) had 7 standard Philips screw heads.
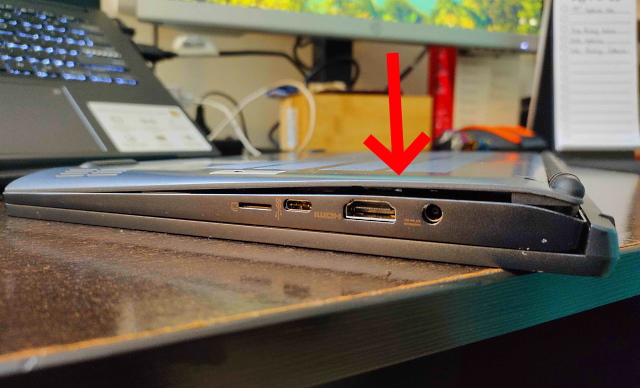
- Once you have located the screws, use your screwdriver to unscrew them one by one. Once you have done that, use the plastic pick/ card to get between the panels and slowly lift it up. Once you have done this, you will hear a pop sound in most cases.

- Now, continue to pry the joints till you have successfully done it for all sides. Once done, it will look something like the image shown below.
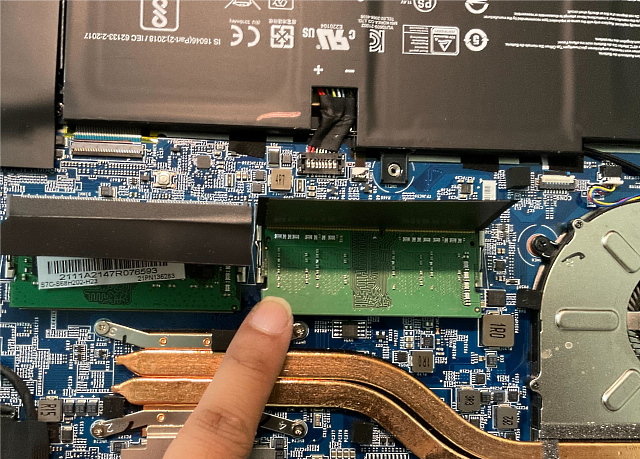
- After that, see if you can remove the back panel and if you still aren’t able to, it means there might still be some clips holding down the back panel. But once it opens, the setup will look something like the picture below. Our memory module was covered by a thin metallic heat spreader, which we pulled up to get access to our RAM stick. If you also have a similar setup, don’t be scared as removing the heat spreader won’t have an impact on your memory performance.

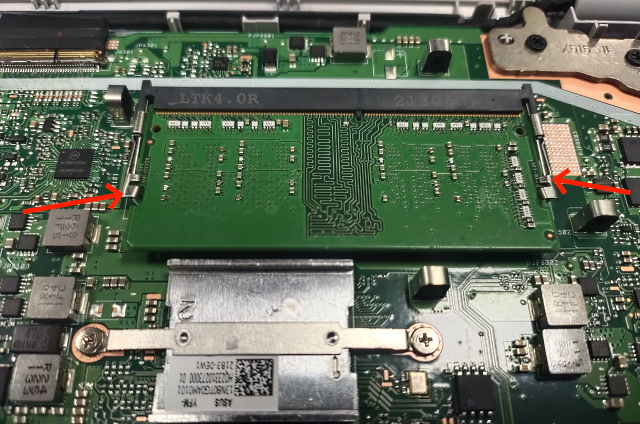
- Once you have access to your existing memory modules, pull the side clips away from the module to release it. Then, take the RAM module out of the slot.
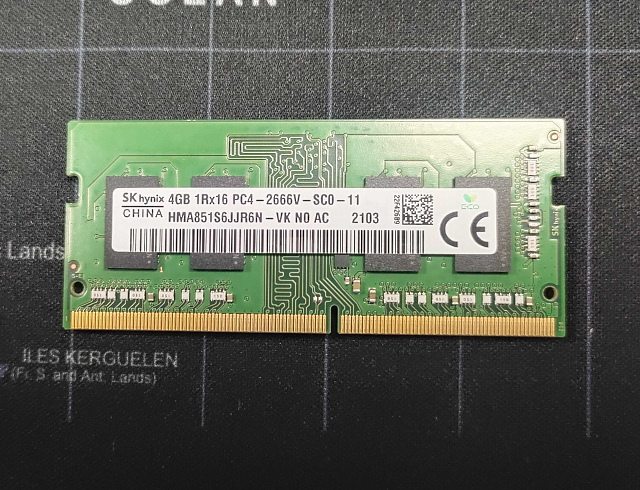
- The RAM that we will be installing in our laptop is a 4GB DDR4 module, which should take our total RAM to 12 GB.
Note:
We will only be adding an extra RAM stick to our system, so in essence, we are upgrading our memory. If you want to replace your memory altogether, make sure to remove the RAM stick that is already in the socket and then continue the process from here.
- Now take the RAM stick, align it with the groove in the RAM slot, and slowly push it into the empty slot. Try to insert the RAM stick at a 45-degree angle, and when it is in the slot, push it down till you hear a click.
- Now that the new memory stick has been installed, close the back panel by doing all the steps in reverse. First, place the back panel on and push it down from all sides till you hear the clicks. Then, put the individual screws in their required places and screw them all in.
Check If Your Laptop RAM Is Installed Correctly
After you have upgraded your laptop RAM or installed a new stick, it’s judgment time. The good news is that if you mess up the installation process, the fruits of your labor will be presented to you right away. As discussed previously in our dedicated motherboard article, RAM is a fundamental aspect of the BOOT process. And if the system figures out there is no RAM, it would not even start. Now, if your laptop refuses to start, repeat the above steps and make sure the new sticks are correctly seated in their socket.
But what if the boot process is a success? Well, all you have to do now is check whether the laptop is reading the extra memory you have installed. To do this, follow the same steps as above and open the Task Manager in Windows 11 to check how much RAM our laptop is consuming and how many slots are in use.
Here, we can see that our upgrade was successful as the amount of available memory has gone from 8 GB to 12 GB. Furthermore, we can also now see that both the RAM slots are being used. If you have gained some confidence and have a PC, you can also learn how to install RAM on your desktop PC here.
And that is it! This is how you can upgrade your laptop’s system memory. That was easy, wasn’t it? It is actually the case with most of the components in our computers. The motherboard and its complex circuitry many a time obfuscate the reality of the process. The computer is both a complex hardware and a simple one. The ways in which it operates could be complicated, but the way in which it is constructed is actually comprehensible.
Just like how we were able to replace our laptop RAM, there are other parts that you can easily install or upgrade such as the CPU on your motherboard and apply thermal paste on the CPU as well. So before you throw away your laptop just because it’s getting slow, think about whether there is a possibility to breathe some new life into it. So have you ever replaced the RAM on your laptop or PC? Let us know in the comments below.
There is no “right” answer to this question, as the concept of the “right” RAM depends on your budget and laptop compatibility. We would suggest that the first thing you do is see the supported memory speeds on your laptop and whether you have DDR4 or DDR5 RAM. You can easily check this using third-party apps like Crucial scanner or CPU-Z, as they will tell you which memory type your laptop supports. After that, make sure that you buy a RAM module that has a similar frequency to that of the current one if you are going to run it in dual-channel. The primary reason for this is that RAM speeds default to a slower frequency for stability. So, if you pair a 3200 MHz memory module with a 2666 Mhz module, the default speed of the entire RAM setup will be 2666 MHz.
This changes on a case-by-case basis. For most, the amount of RAM will be more important, as the size of the system memory is a common bottleneck for most computer users. However, if you’re someone who already has 16 GB of RAM and looking to improve performance in certain video games, you might benefit from some extra memory speed. So at the end of the day, there isn’t a clear catch answer, as everything depends on particular use cases.


