Thermal paste, also known as thermal compound or thermal interface material (TIM), is a crucial component in the PC building process. Without it, your processor may overheat rapidly. To ensure optimal performance, it’s important to apply thermal paste on the CPU before mounting the CPU cooler. Now, there are many things to think about when applying thermal paste on your CPU. The process to install the thermal paste is simple and straightforward, and we have covered various application methods. In this guide, we have explained the steps to properly install thermal paste on an AMD or Intel CPU during your PC build or CPU upgrade.
In this guide, we will help you with the correct amount of thermal paste to apply on your CPU, a step that’s otherwise debated upon quite a lot within the PC building community. That said, we will first look at the reason why it is important to apply thermal paste before we install thermal paste on your PC’s CPU.
Why Do You Need Thermal Paste Between CPU and Heatsink?
Thermal Paste is a cruicial material that is required to be present between the CPU cooler and the CPU itself. There are heat pipes on the CPU cooler’s side, and they rest against the processor’s surface area. Both are designed to dissipate heat efficiently. However, the transfer of heat cannot happen efficiently without a thermal interface material (TIM) between the cooler and the CPU.
Essentially, the CPU cooler’s fans can effectively cool the processor down only when the thermal paste is present. A thermal paste is one of the most effective and popular TIMs. It eliminates the incredibly small air gaps and spaces between the CPU’s cooler and the CPU chip itself. So, when you apply the thermal paste, the cooling efficiency of a CPU cooler is at its best. Without it, the CPU cooler will not be able to make proper contact with the processor, thus, result in overheating.
Things to Remember Before Applying Thermal Paste
Install CPU on the Motherboard
You need to make sure that your CPU is installed on the motherboard before continuing further. If you haven’t done this yet, you should do it now. Before getting ready to put thermal paste on the CPU, use our
Gather the Necessary Tools
Remember to have a good thermal paste at hand before you proceed. Choosing the wrong thermal paste can result in higher temperatures. For recommendations, refer to our guide on the 15 best thermal pastes you can buy in 2024.
You also need two additional things for the application process. One: a 99% Isopropyl Alcohol solution for cleaning the CPU’s surface area, and Second: a microfiber cloth. We don’t recommend taking any shortcuts as it is important that the processor’s surface area is completely clean, with zero residual matter, before we apply thermal paste. Foreign material on the CPU’s surface area is the last thing you want.
How to Apply Thermal Paste on Your CPU
1. First, take the microfiber cloth and pour a small amount of 99% Isopropyl Alcohol Solution on it. Be careful while handling the solution. Now, use the microfiber to scrub and clean the CPU’s surface area.
This will leave you with a completely clean CPU surface. You should check for residual matter, but avoid touching the CPU directly. We cleaned the CPU before installing it on our motherboard, but we recommend you do this step


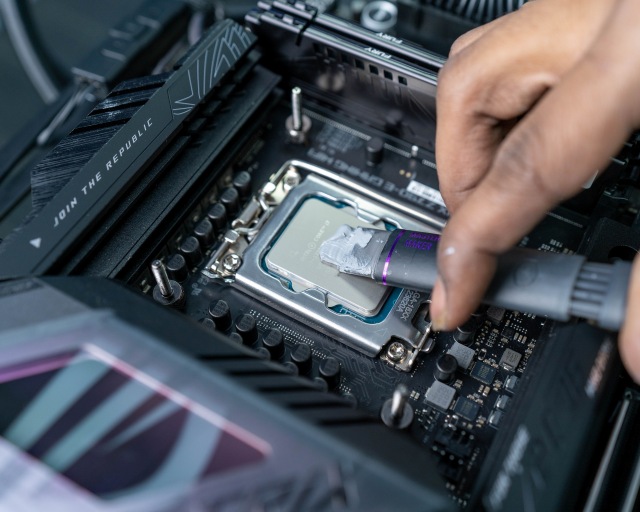
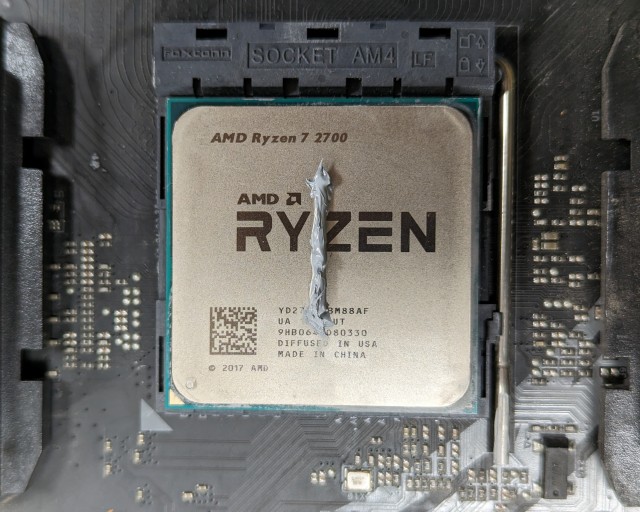
2. Now, apply the thermal paste in the center of the CPU’s top surface. We recommended using a pea-sized amount or think of it as a big blob if your CPU is bigger in size. Basically, if you have the new 13th-Gen Intel Raptor Lake and Ryzen 7000 CPUs, you should put twice as much thermal paste than normal to ensure their larger surface area is covered.
Too little thermal paste is worse than too much, as you will see in our next section, where we compare various thermal paste applications. However, note that the amount shouldn’t be excessive, such that it starts leaking onto the motherboard. If that happens, clean the affected areas with a micro fiber cloth & isopropyl alcohol.
Note:
For AMD Threadripper and Intel Xeon CPUs, the processor’s surface area is massive and several enthusiasts tend to spread the thermal paste all over the CPU as evenly as possible with a thermal paste applicator tool. If you’re doing such a build, do remember to put an adequate amount of thermal paste.
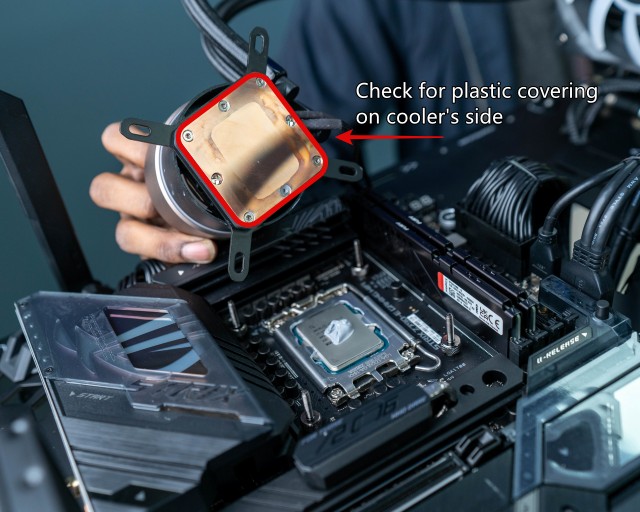
3. Next, check the side of the AIO or Air Cooler that will rest against the CPU’s surface for a protective film. In most cases, you will need to remove the plastic film that protects the air cooler surface before you mount it. This plastic film is present on both AIOs and air coolers, and if you forget about it, there will be a layer of plastic between the CPU and the heatsink. It will cause your CPU to overheat quickly.
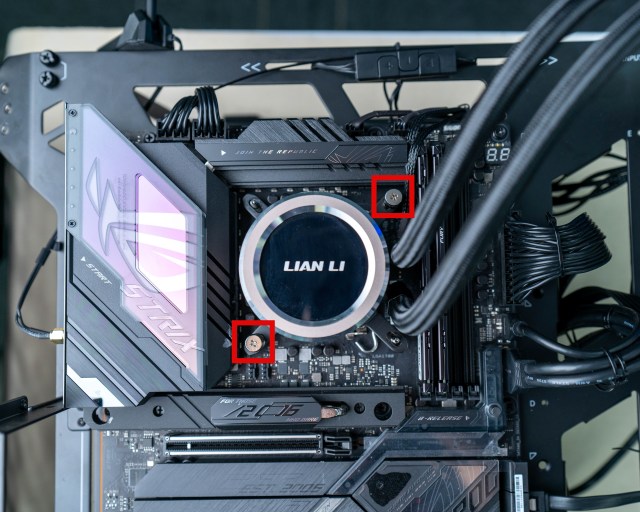
4. Next, proceed with installing the air cooler or AIO on your CPU. To ensure the thermal paste spreads evenly, mount the cooler and start by screwing in one corner, then screwing in the diagonally opposite corner, and so on. You need to repeat the process for the other two corners until the AIO or air cooler is firmly in place. It is good practice to screw diagonally and slowly tighten each screw.
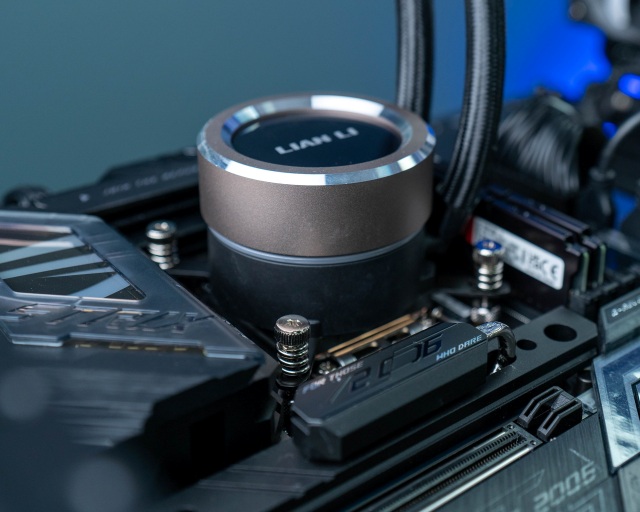
5. And voila! You have successfully applied thermal paste on your CPU. Look around the CPU cooler mount to see if there’s any overflowing thermal paste. If there is, clean it up with your microfiber cloth, and ensure that your thermal compound layer is not too thick either.
While we have completed the installation process, you must also test your CPU for overheating by going through the
Best Way to Apply Thermal Paste on Your CPU
In this section, we aim to show you the results of testing different patterns while applying thermal paste. The patterns we have tested are as follows:
- small dot
- line
- cross
- square
- small rice grain size dot
- spreading thermal paste on CPU
We also tested two additional scenarios focused on quantity, comparing the results of using too much vs too little thermal paste. You can check out the images for the various thermal paste application patterns right here.


For the testing setup, we used the Noctua NT-H1 thermal paste on a Ryzen 2700 overclocked to 3.90GHz@1.35V. This is not the most optimal overclock, but it pushes the CPU beyond its stock power limit, which is what we wanted in this test. Typically, you are better off using PBO for AMD CPUs. We used a Wraith Prism CPU cooler at 100% fan speed in this test. To test the thermal performance, we then ran a 15-minute stress test on our CPU for each thermal paste pattern.
So what did our testing reveal? Our first observation is that the thermal paste pattern does not matter if you are applying an ample amount between the CPU and heatsink. Be it the line, cross, or too much thermal paste (not advised), we saw a maximum temperature of around 77 to 78-degrees Celcius and an average temp of around 75 to 76-degrees Celcius. However, we see that the good ol’ pea-size dot and manually spreading the thermal paste give slightly better results and lower temperatures.
Note: The ‘max’ CPU temperatures that you see in the below demonstration show the temperature reading when the CPU goes through a sudden power consumption spike
However, you must have also spotted the anomaly in the graph by now. We noticed the biggest temperature difference when using too little thermal paste. As shown in the graph below, the max CPU temperature went up to 84.5 degrees Celcius and the average CPU temperature is about 5 degrees Celcius higher than other application methods.

Well, what’s the best way to apply thermal paste? It doesn’t seem to matter too much, but we highly recommend applying a pea-sized dot at the center, adjusting its size accordingly to your CPU’s surface area. In our guide, when installing the Intel Core i9-13900K, we found that we needed to apply a big blob in the center rather than a pea-sized dot to have enough thermal compound and good cooling.
Perform Stress Test to Check CPU Temperature
With the application patterns and process out of the way, you must check the temperatures of your CPU on both idle & load states to ensure the thermal paste application was successful.
First, if you haven’t installed Windows, go into the BIOS on your PC by pressing the relevant key on boot. You can monitor your CPU’s idle temperature here, and it should be around 25 to 45-degrees Celcius.
Note:
After installing the CPU cooler, check if the processor is overheating in the BIOS itself. If the temperatures aren’t right, you must reinstall the CPU cooler and go through the thermal paste application process again. If it still overheats, you might have an insufficient CPU cooling solution, depending on how much your processor is heating up. So check your CPU cooler’s maximum supported TDP and compare it against your processor’s power rating. And replace it with a new one to lower temperatures.
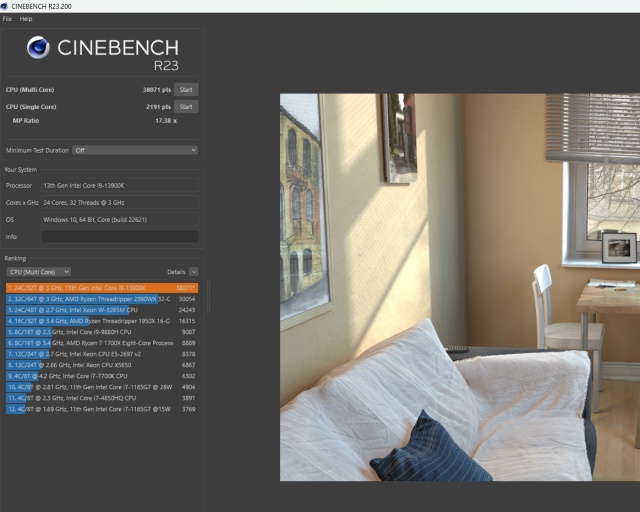
Next, after you install Windows, use a stress-testing application such as Cinebench R23 or Prime95. Run these stress tests and observe the temperatures using any of the methods in our how to check CPU temperature guide. At full load, the maximum acceptable temperature is 95-degrees Celcius. However, the ideal range is around 60 to 70-degrees Celcius. So, the CPU’s temperature should be above the idle temp and below the stress test load temp when playing online games, browsing the web, or doing other general computing tasks.
Note:
CPU temperatures vary highly depending on which processor you are using and also your ambient temperature. Manufacturers design their CPUs around a thermal limit, after which they start to throttle. Throttling usually starts happening at the 95° C mark and often during extended loads. While the 95° C limit is generally applicable on most processors used in laptops or desktops, the new Intel Raptor Lake processors, such as the Core i9-13900K, have a limit of 100° C instead.
You must look out for the temperatures under both idle and load scenarios. Are they in line with your CPU cooler’s capabilities? If not, the CPU cooler is not cooling the processor effectively.
How Often Should You Replace Thermal Paste
As a general rule of thumb, you should replace the thermal paste between your CPU and cooler every year. However, if you are an intensive user, your CPU might see an increase in temperature sooner than expected. You can use the methods listed in our dedicated guide to check CPU temperatures in Windows 11.
An increase in temperatures indicates that it’s the best time to clean the internals from dust built up over months of usage. So keep an eye on CPU temperatures after 4 to 6 months of use. If the CPU’s average operating temperature has increased, it’s time to replace the thermal compound.
You have now learned how to apply thermal paste on your processor and confirmed via stress-testing that its installation was successful. To help you choose the best thermal paste for your CPU on the market, we already have a guide for you. But remember that while the thermal paste is essential, a capable cooler that can handle your CPU’s TDP (power consumption) is also a major factor in ensuring your PC will run in a stable manner. For that, here are the best CPU coolers to buy for your PC build. Finally, if you still have any doubts, let us know in the comments below, and we will help you.
A pea-sized amount or a small line of thermal paste is enough for most processors. Use twice as much thermal compound for the 13th-Gen Intel and Ryzen 7000 processors because their surface area is larger. And if you’re using an Intel Xeon or AMD Threadripper CPU, with an even larger surface area, you need to use plenty of thermal paste. Do ensure to spread it evenly to maintain CPU temperatures.
No. Do not reuse older thermal paste. You need to remove its traces from the CPU with 99% Isopropyl Alcohol solution before reapplying a fresh coat of thermal paste. If you detach the CPU cooler from the processor, make sure to reapply the thermal paste.
You must go into the BIOS and check for the CPU’s idle temperature (ideally 25-45-degrees Celcius). Also, run a stress test such as Prime95 in Windows and check the CPU temperature. At load, the temperature shouldn’t exceed 95-degrees Celcius. But if it goes above 95-degrees Celcius, the CPU will automatically start to thermal throttle. New CPUs from Intel throttle at around 100-degrees Celcius instead.
Many have tested putting various patterns, such as an ‘X’ or ‘star’ on the CPU. Users have also tried putting too much and too little thermal paste. Now, some tests were surprisingly fine, while others were disastrous. So what is the correct way to apply thermal paste? The answer is simple. An adequate amount in the center, depending on the surface area of the CPU.
You can clean up the residual matter left by the thermal paste on the CPU. Use 99% Isopropyl Alcohol Solution and a microfiber cloth. Do clean up any traces of thermal paste before changing CPU coolers.


