Password protecting a user account is, in general, a good practice. It protects your account from unauthorized access, and keeps your personal data safe. However, if you ever end up forgetting your password, that layer of protection can quickly become a bane. You might be thinking that a complete reformat of your Mac is the only way to get past such a situation, but, fortunately, there’s a relatively easy way to reset your Mac’s password. The best part? This method can be used to change passwords for admin accounts, as well. So, if you’ve forgotten the password to your account, here’s how to reset a Mac password:
Note: I’m demonstrating this on a MacBook Air running macOS Sierra 10.12.4 developer beta. This article is primarily aimed at Macs running any version of macOS Sierra.
How to Reset Mac Password: Reset Password Utility
If you’ve forgotten the password to your account in macOS Sierra, you can reset it easily by following the steps given below:
- Restart your Mac. When you hear the “boot up chime”, press and hold “command + R” until you see the Apple logo. This will start your Mac in recovery mode.
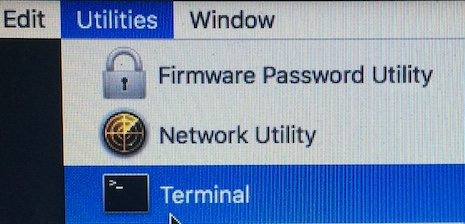
- Now, click on “Utilities“, and select “Terminal“.
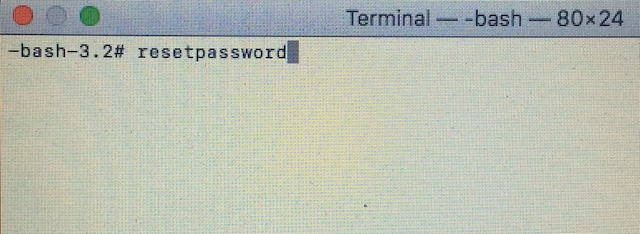
- Type the command “resetpassword” into the Terminal, and hit Enter.
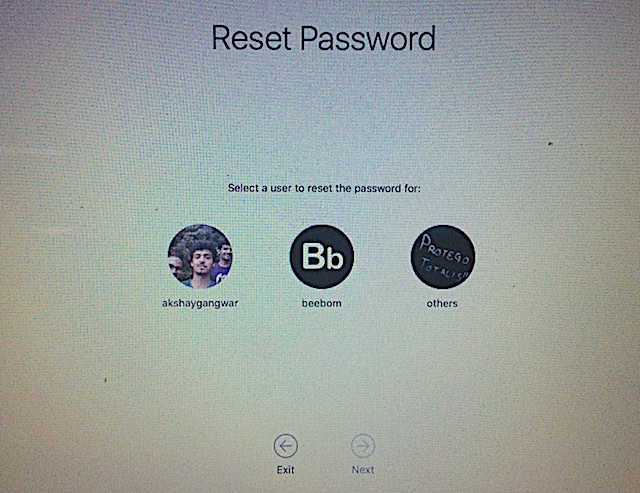
- The Reset Password Utility will open up, displaying all the accounts that are present on the Mac. Select the account you want to change the password for, and click on “Next“.
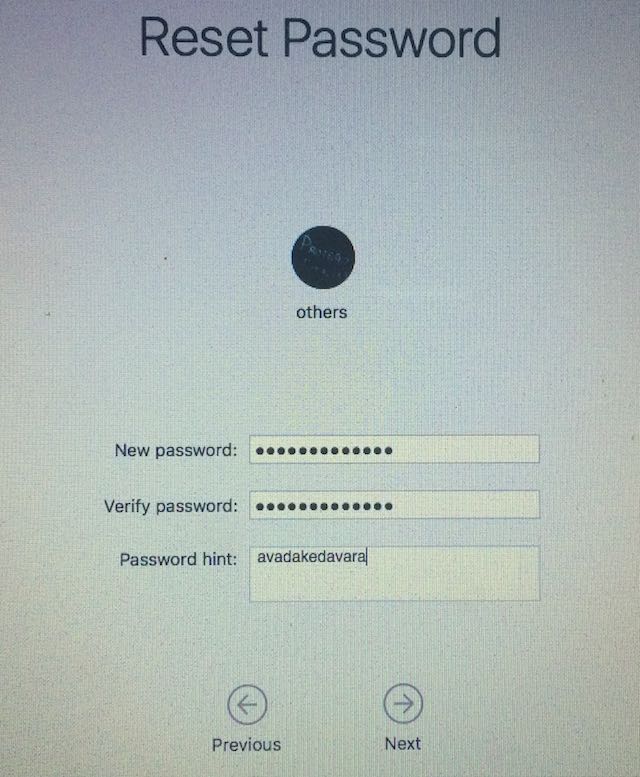
- Your Mac will ask you for the new password, along with a password hint (recommended). Fill this up, and click “Next“.
- You can now restart your Mac, and sign in to your user account with the new password.
How to Reset Mac Password: Older Versions of macOS
If you’re not using macOS Sierra, and you need to reset your Mac’s password, you’ll be happy to know that you can do that easily, as well. Simply follow the steps below:
Note: I have not tried this method out, however, there’s no reason why it wouldn’t work. Feel free to give it a shot, and let me know about the results.
1. Remove the applesetupdone File
- Restart your Mac, and when you hear the boot up chime, press and hold “command + S“. This will take you into Single User Mode, and you’ll get access to a Terminal.
- Here, type the command “fsck -fy“, and hit Enter. This will basically check the filesystem on your Mac, and make sure that everything is okay, before we proceed.
- Next, type the command “mount -uw /“. This command basically mounts your entire hard drive, and makes it writeable. This will ensure that any changes you make will persist through the reboot.
- Now, type the command “rm /var/db/.applesetupdone“, and hit Enter.
Note: This command will remove the file called “applesetupdone” from your Mac, basically fooling your Mac into thinking that it hasn’t set up any users, yet.
2. Create a New User Account
You can now restart your Mac. It will take you through all the steps that one would go through when setting up a brand new Mac.
- Simply create a new user account, and ensure that the account name is different from the account you want to recover the password for.
- Log in with this user account (which will be an admin account).
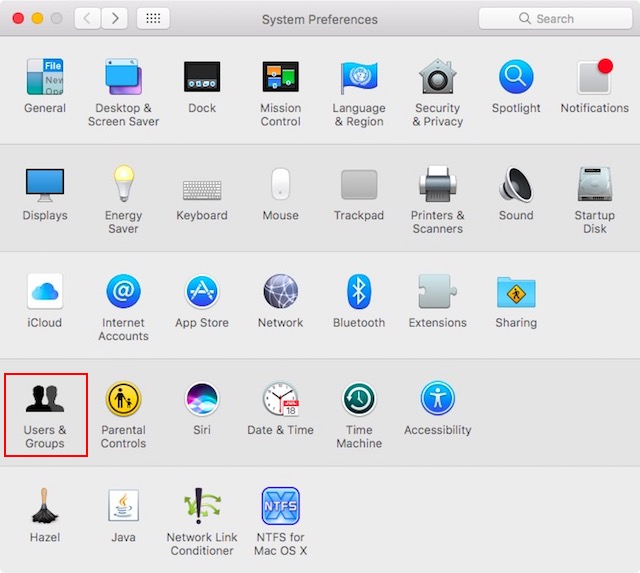
- Then, you can simply go to System Preferences -> Users & Groups.
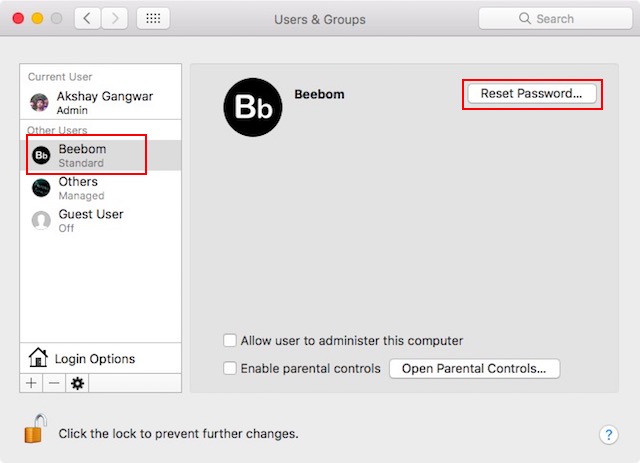
- Here, just select the account you want to reset the password for, and click on “Reset Password“.
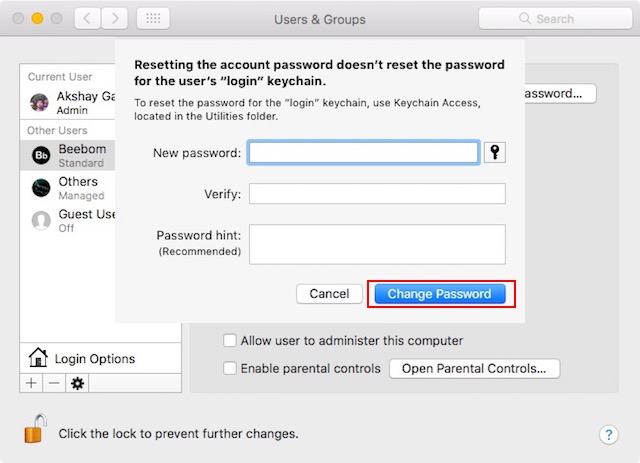
- Enter the new password, and you’re done. You can now log in to your original account with the new password you just set up.
Bonus: Protecting Your Account
The ease of use that this method provides, is highly appreciated. However, the fact remains that this method can be used by anyone (who has physical access to your Mac) to reset your password. That’s a serious security issue. So, if you’re worried about your Mac password being reset by someone without your knowledge, there are a couple of things you can do, to keep your data protected.
1. FileVault
FileVault is the built-in encryption utility that Apple ships with Macs. It’s a very powerful tool, and can quickly encrypt all the data on your Mac, and seal it with a password (and a recovery key). Anytime you log in to your account, you will have to unlock your encrypted hard disk, by providing the FileVault password.
You may be wondering how this will help. Well, think of it this way, even if someone resets your Mac’s password, they will still need to unlock your hard drive, before they can do anything even remotely nefarious on your Mac. Then, you can simply use the Recovery Mode to unlock your hard drive, and reset your password again. Simple as that.
2. Firmware Passwords
If disk encryption just doesn’t cut it for you, and you need a really high level of security, you can actually lock your Mac at the firmware level. To do this, you will have to go into Recovery Mode, and choose “Firmware Password Utility” from the Utilities menu. Firmware passwords are not required for logging into your Mac in the traditional way. However, if someone attempts to boot into Recovery Mode, or Single User Mode, or tries to use your Mac in Target Disk Mode for transferring data, your Mac will prompt them for the Firmware password.
Resetting a Firmware password is not easily done, and is exactly why it should only be used if absolutely necessary. If you forget your firmware password, you will have to contact Apple, and they can try and sort it out for you. However, this strong level of security is why Firmware passwords are the best way to go, if you’re in a high-risk environment, and want to keep your data as safe as you can.
SEE ALSO: How to Lock/Unlock Mac or PC with USB Drive
Use These Methods to Reset Mac Passwords Easily
Booting a Mac into Recovery Mode, and using the Reset Password Utility is the best way to reset a forgotten password. It’s easy to perform, and is quick enough that you can get back to work in no time. Do bear in mind, that this method can be used by people to change your Mac password without your knowledge, which is something I’m sure you wouldn’t want. So, have you ever forgotten your Mac’s password? What did you do? Also, if you know of another (preferably easier) method to reset a Mac password, do let us know about it in the comments section below.


