- You can create a locally hosted dedicated server for up to 32 players in Palworld.
- To create a dedicated server, you need to install the Palworld dedicated server tool or SteamCMD.
- Join the server using the Join multiplayer game option and the host IP address and port number.
No multiplayer game is fun if there is no option to play with your favorite bunch of people. Keeping that in mind, Palworld offers the option to play with friends using an invite code or by setting up a dedicated server privately or publicly. As buying dedicated servers can be expensive, it is better to learn how to set one up yourself. Follow the methods below if you want to host or join a dedicated server in Palworld.
Note:
Palworld does not have a dedicated server option for Xbox users as of now. This guide is only for PC users, including Windows and Linux. The minimum requirements to run a server is a 4-core CPU and 16GB RAM.
Setup a Dedicated Server in Steam
Setting up a dedicated server through Steam is straightforward. Nonetheless, you must follow some steps to create a server before entering the game with friends. Palworld does not include an add new server option inside the game. So, follow the steps below to learn how to host a dedicated server in Palworld through Steam.
Install the Palworld Dedicated Server
- To begin the installation, run Steam and go to the library.
- Now, look for the Games dropdown on the top left and select Tools.
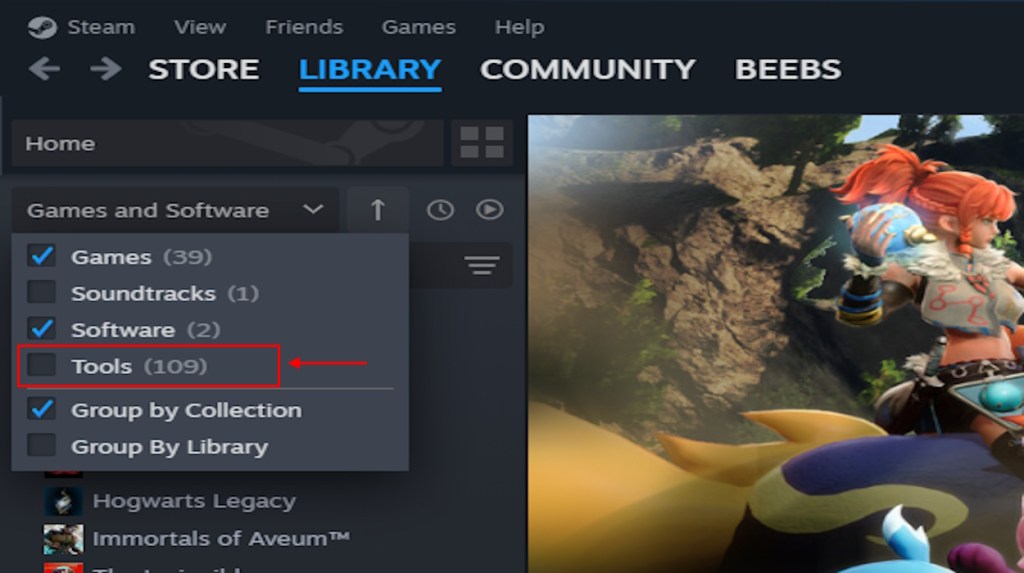
- Now, you will notice the Palworld Dedicated Server under Palworld in your library.
- Install this tool for the next step. This will also create a Palserver folder.

Change Required Settings
- Once you have installed the Palworld Dedicated Server tool, run it once.
- Now, close it and right-click on the tool, then go to Manage -> Browse local files.
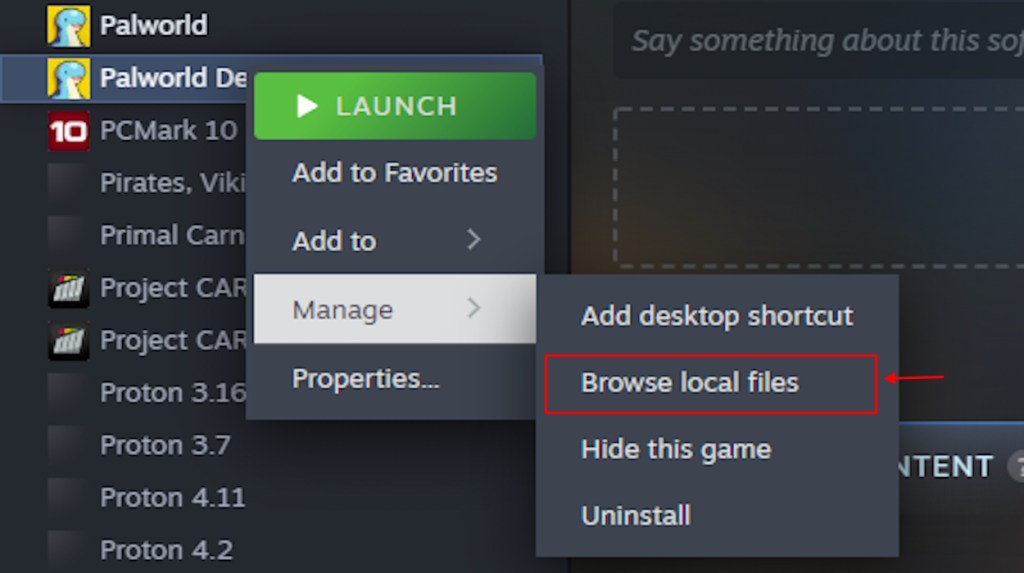
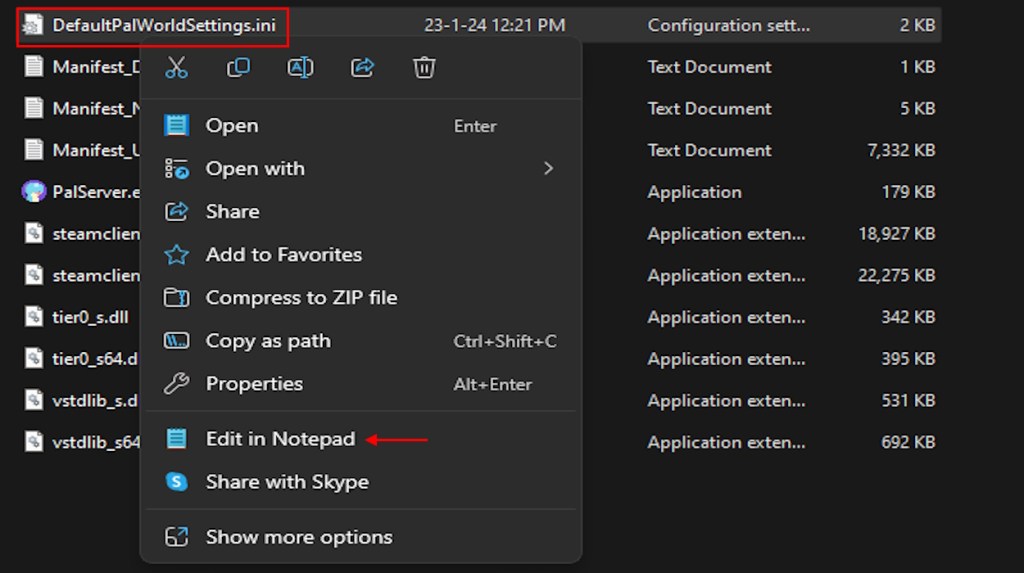
- Once there, find DefaultPalWorldSettings.ini and edit it in Notepad.
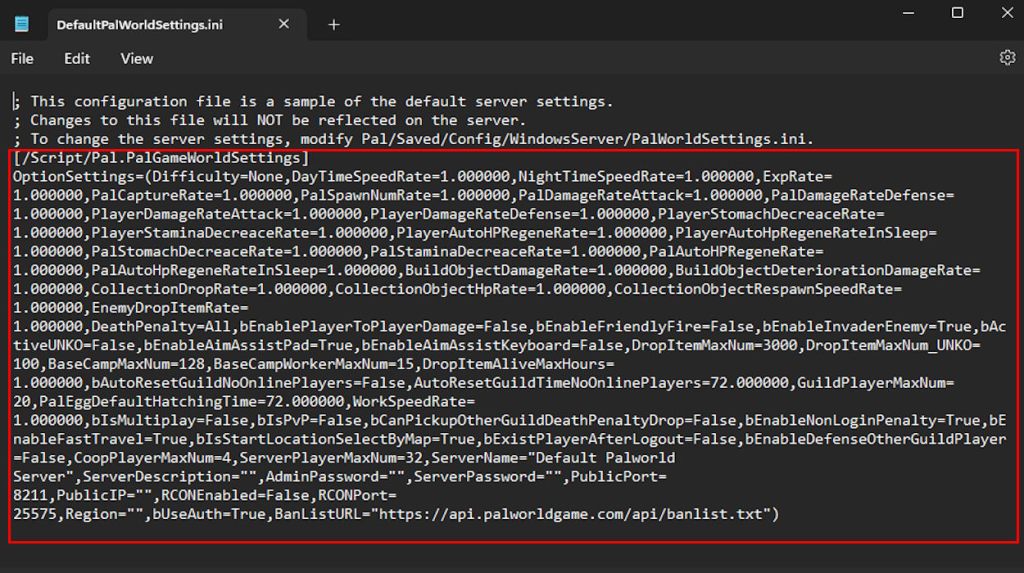
- After you access the file with Notepad, look for [/Script/Pal.PalGameWorldSettings] and copy the text from there to the end. (check the image below for reference)
- Now, go back to the Palserver folder and go to the Pal\Saved\Config\WindowsServer location.
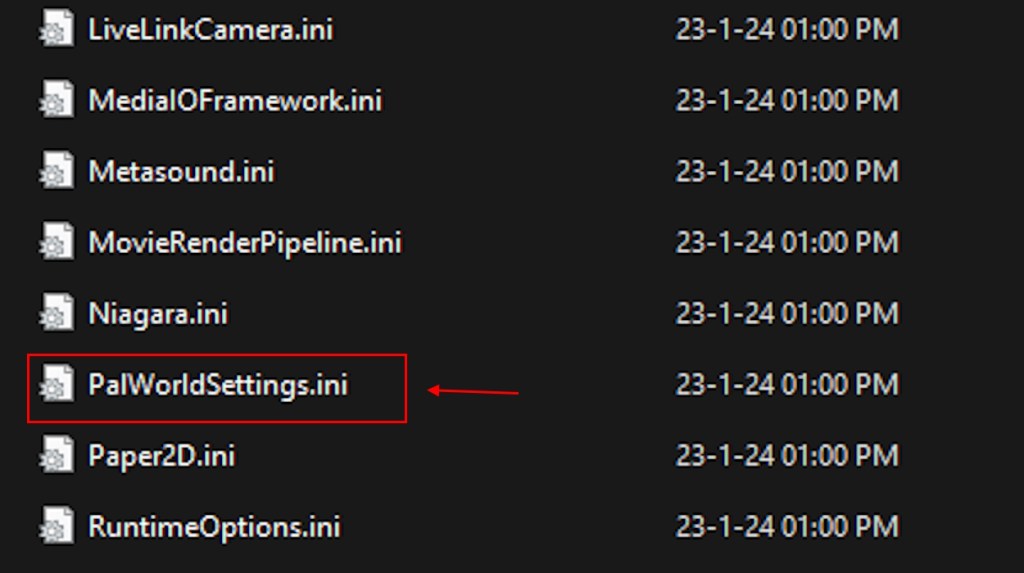
- Once there, look for PalWorldSettings.ini and edit it in Notepad.
- After that, paste the copied text from before in the Notepad and close it.
Note:
In the Settings file, you can change the Servername, AdminPassword, ServerPassword, and PublicPort by changing their values. Most of the settings in this file are self explanatory so changing them will be easy. You can change maximum server players by changing value of ServerPlayerMaxNum.
Run the Palworld Dedicated Server
- Once you have set up the settings file, go to Steam and launch the Palworld Dedicated Server tool.
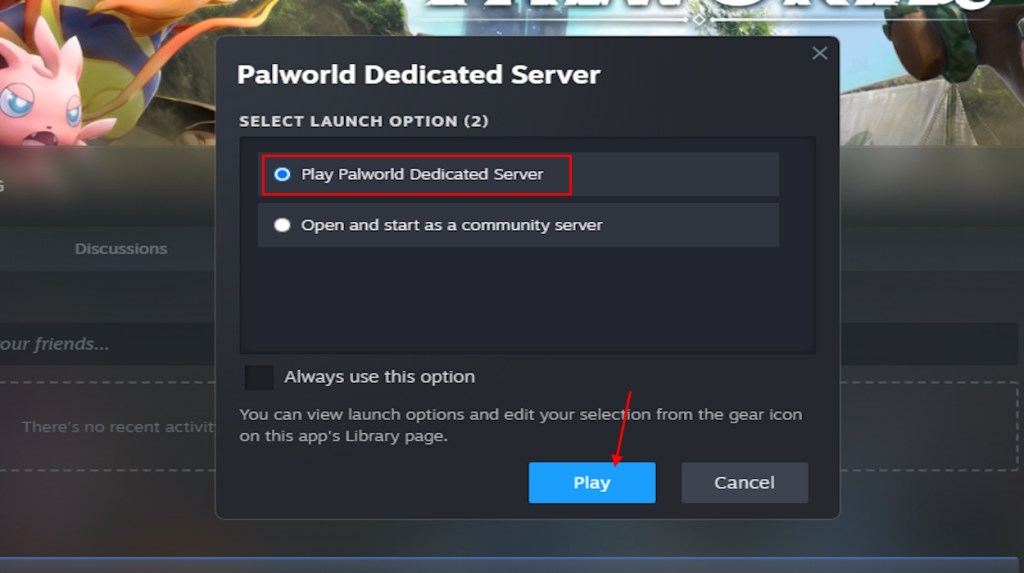
- In the pop-up, select the Play Palworld Dedicated Server option and click the Play button.
- If you see a command prompt window, the server has been successfully hosted.
Use SteamCMD to Host Server (Windows)
Another method you can use to set up a dedicated server in Palworld is through the SteamCMD. In case you are a SteamCMD user or want to use SteamCMD, follow the steps below:
Download & Run SteamCMD
- To start the process, download SteamCMD using the link here.
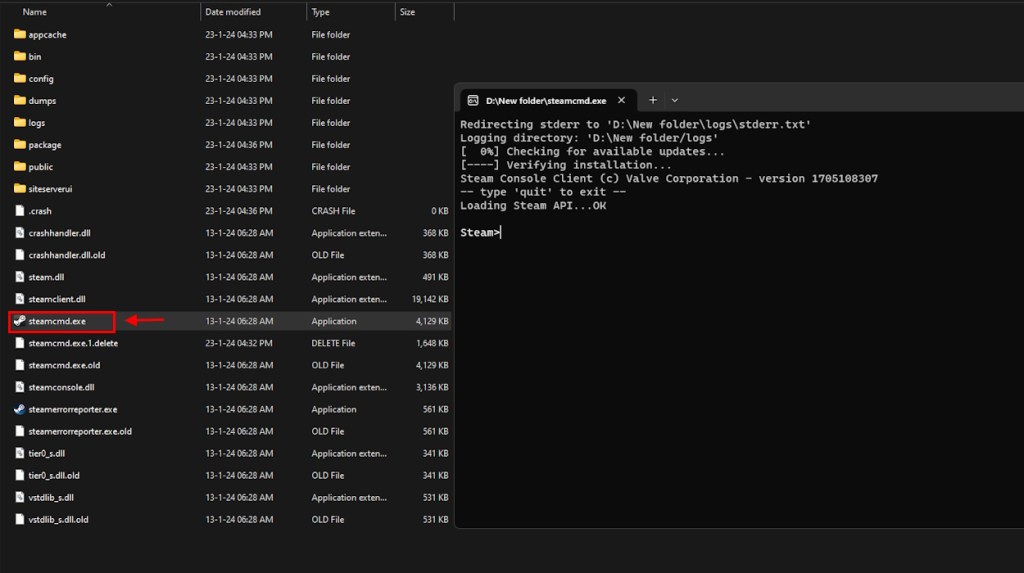
- Now, extract the files in a dedicated library and run SteamCMD.
Install the Dedicated Server & Launch Palserver
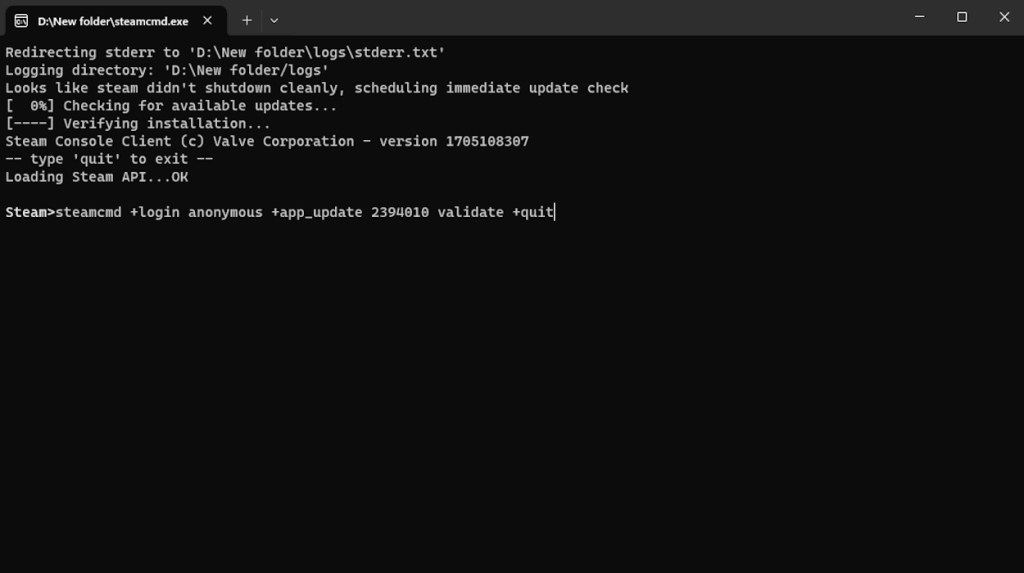
- Once the SteamCMD starts, run the steamcmd +login anonymous +app_update 2394010 validate +quit command in the command prompt.
- Once the server installs, run the cd .\steamapps\common\PalServer command.
- Finally, type ‘PalServer.exe’ and press enter to run the dedicated server.
Note:
You can change server settings through the SteamCMD commands. I.E.: If you want to change the port, type ‘port=8211’ and replace 8211 with a different number.
Use SteamCMD to Host Server (Linux)
With Linux getting its recognition through a clean run of Palworld, Pocketpair ensured they also got the option of hosting servers. Although it requires you to get the SteamCMD to do so, the method is straightforward. Follow the steps below to host a server in Palworld if you are using a Linux device.
Install SteamCMD & Login to Steam
- In a fresh Debian server up and running with SSH access, update and upgrade everything using the command:
apt update && apt dist-upgrade- Now, install SteamCMD using the following command:
apt install software-properties-common
apt-add-repository non-free
dpkg --add-architecture i386
apt update
apt install steamcmd- Once you have the SteamCMD prepared, run the following commands to create an account on Steam:
apt install sudo
useradd -m
steampasswd steam- After that, log into your Steam account by using the command:
sudo -u steam -s
cd /home/steam
Install Dedicated Server & Launch Script
- Once you have SteamCMD ready with a Steam account, run the following command to install the dedicated server of Palworld in Linux:
/usr/games/steamcmd +login anonymous +app_update 2394010 validate +quit- Now, run the installed server by running the script with this command:./PalServer.sh
Join a Dedicated Server in Palworld
What is the point of creating a server if you do not know how to join it, right? Here is how you can join a dedicated server in Palworld:
Open Palworld & Go to Multiplayer
- To join a dedicated server, first launch Palworld.
- Now, click on the Join multiplayer game option.

Connect with the IP Address & Port
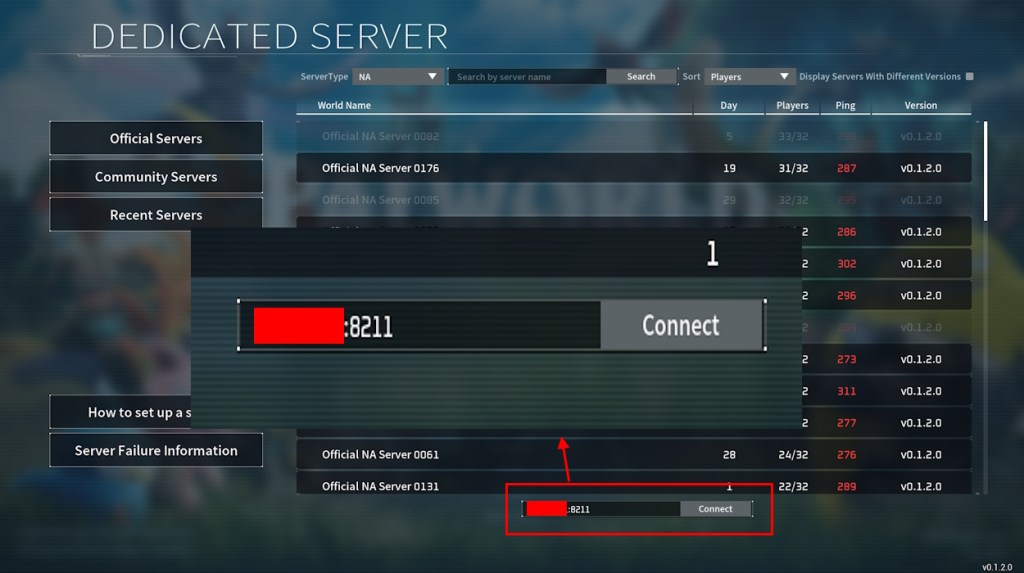
- Once in the servers list, look for a blank space beside the connect button.
- Type in your IP address with the port and click Connect to join the dedicated server.
Warning:
Do not share your IP with any random person as it will connect them to your network. Only share the host IP with those you trust. You can change the port value from the settings mentioned previously.
How to Close a Server in Palworld
In Windows, closing the server is as simple as stopping the dedicated server console. However, if you do not want to get into any saved files or other errors, use the admin commands to save your files.
You can do so by running the /AdminPassword command in the game chat while you are in the game. Once you type the correct password you have set during the server setup, you will get admin access.
Now, use the /Save command to save the world settings and your progress. Once done, you can type the /Shutdown command in the game chat and enter to close the server safely. Linux users can run a dedicated command to close the server: service palworld stop
How to Fix Dedicated Server Password Issue
If you are using passwords in your dedicated server, then you might encounter the “no password has been entered” bug. Pocketpair has already confirmed this bug will be fixed in upcoming patches. But for now, you do one little trick to fix this error.
While joining servers, select community servers from the list. Now, select a community server with a lock icon by their side. Once it requires a password, enter the server password from your host server. Then, go back and try connecting to your dedicated server by using the IP and port. This will fix the error bug, and you will be able to connect to your world.
And that was how you can host or join a dedicated server in Palworld. If you still have any queries regarding this multiplayer feature, let us know in the comments.
Currently, the Palworld Xbox version does not have a server hosting feature. You will notice the Join multiplayer mode option is missing in the Xbox version of the game.


