As you might already know, Minecraft Java Edition is the most powerful version of the game. You can customize it, upgrade it, and modify it using the best Minecraft mods as per your desires – offline and online alike. But, that also makes it vulnerable to a variety of errors. One of the most common and dreadful series of errors is the JNI errors. Fortunately, it’s super easy to solve this Java error affecting Minecraft in no time, thanks to a couple of easy fixes. So, let’s check out how to fix “A JNI error has occurred” in Minecraft.
Fix JNI Error in Minecraft (2022)
We have first covered why the JNI error occurs while setting up a Minecraft server or opening the Minecraft launcher on your PC. However, you can use the table below to directly skip to the solution and fix your game.
What Causes the JNI Error in Minecraft
Minecraft Java and all its features depend upon the Java libraries on your computer to function properly. So, if you are using a Minecraft server, mods, or a feature that the library in your system doesn’t support, the game might end up facing an error. Such errors fall into the class of JNI or Java Native Interface errors.
These errors usually occur when the Java files are too new or the Java version of your device is outdated. Sometimes these errors also occur when the installation path of the Java files is broken. In other words, you just need to make sure your Java file and your system’s Java libraries are up to date and compatible with the version of Minecraft mod or server you have installed. Doing so will immediately fix the problem.
How to Fix JNI Error in Minecraft
There are four ways to remove the JNI errors in Minecraft Java Edition. So let’s first explain what these methods are and then learn how to fix them:
- Compatible Libraries: If you know which version of Java is required by the file showing an error, you can just install that particular version of Java libraries on your device. Then the JNI error should resolve itself.
- Install Latest Java Update: All newer versions of Java come with backward compatibility. That means a particular version of Java supports all files that require any previous version of Java. So, you just need to install the latest version of Java to fix the JNI error without a second thought.
- Reset Java Path: In certain situations, your software or Java file might check the wrong Java installation path. If that happens, the updated version of Java won’t be detected, thus, failing to load and causing the “A JNI error has occurred” in Minecraft. So, you can reset the Java path in your system’s memory to point toward the latest Java installation.
- Update JDK in Terminal: Some Linux operating systems don’t allow users to download the Java updates via downloaded third-party files. Then, you have to use the built-in terminal to run commands that can install and update Java.
Update And Install Latest Java Version (Windows, Mac, and Linux)
As you might have guessed, the second option to fix JNI errors in Minecraft is the easiest and most reliable one. You don’t need to do any manual research and only have to update your system’s Java version to fix the error. Here’s how to do it:
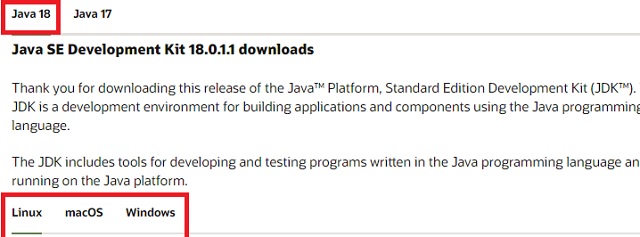
1. First, go to Oracle’s official website and look for your system’s OS under the latest section. We are installing Java for Windows, but you can use the same steps for Linux and macOS.
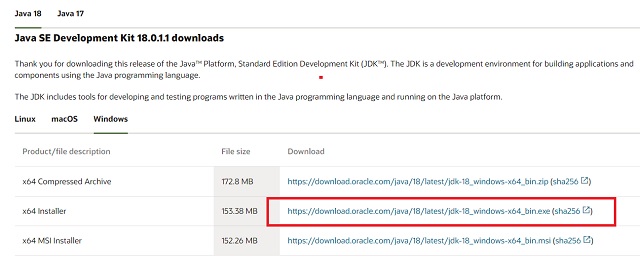
2. Then, download the Java installer file by clicking on its download link. You might have to check for compatibility of the installer on a Linux-based OS.
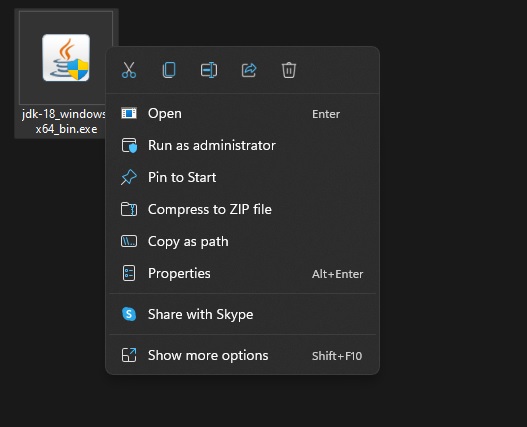
3. Once the download is complete, open the setup file and follow the step-by-step installation instructions.
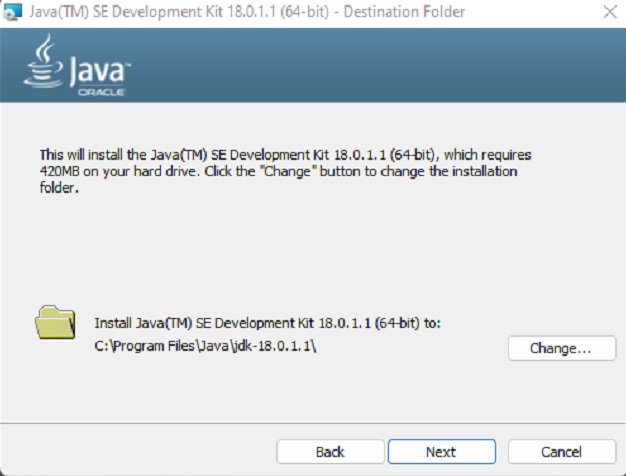
4. You can change the folder’s location where you are installing the new version of Java. But we suggest you do not do that as many games and software look for Java in the default directory.
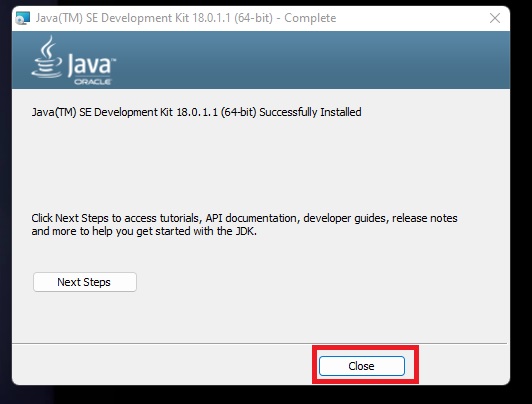
5. When the installation is complete, click the “Close” button to exit the installer. Then, you can run your Java files and features, including Minecraft Java Edition, without any JNI errors.
Reset Java Path to Fix Minecraft JNI Error (Windows Only)
If installing the latest update doesn’t fix JNI errors in Minecraft, your path variable for Java might be outdated or incorrect. In that case, follow these steps to reset the path variable of Java:
1. First, use the Win Key + R Windows 11 keyboard shortcut to open the run dialog box. Here, type “sysdm.cpl” and press the Enter key. This will open the system properties of your device.

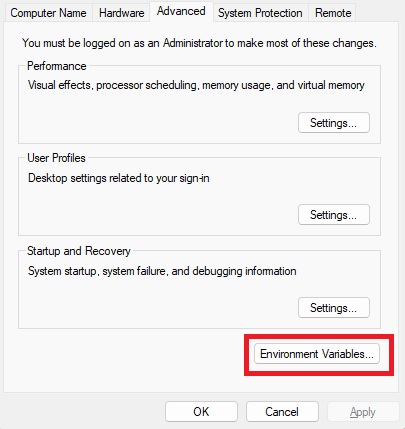
2. In the system properties window, go to the “Advanced” tab and click the “Environment Variables” button.
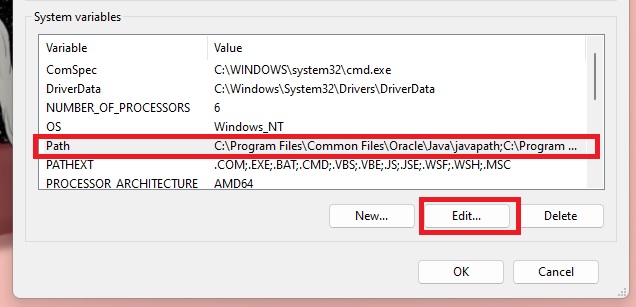
3. Next, look under the “System variables” section and select the “Path” variable. Then, click on the “Edit” button.
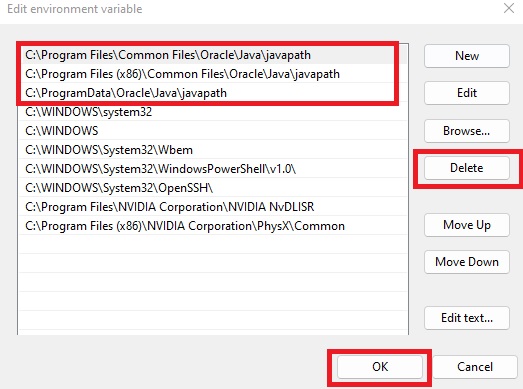
4. Finally, use the “Delete” button to remove the corrupted Java variable paths and restart your PC. If you are not sure about which variable to delete, you can delete all of them and reinstall Java using the steps in the previous section.
Install Java on Linux to Fix Minecraft Errors
To manually install Jave on your Linux operating system, open the terminal app and use the following commands:
sudo apt-get update
sudo apt install openjdk-18-jdk
Remember to use one command at a time for them to function properly. But make sure to replace the digit “18” with the latest version of Java at the moment. You can do a quick search to find it.
Uninstall Old Versions of Java on Your PC (Optional)
You can run Minecraft or any other software without any JNI errors if you have the latest version of Java, and they are not affected by any previous versions of Java installed on your system. But if you want, you can uninstall them anyways to save up some space and be sure that Minecraft uses the latest installation. Here’s how.
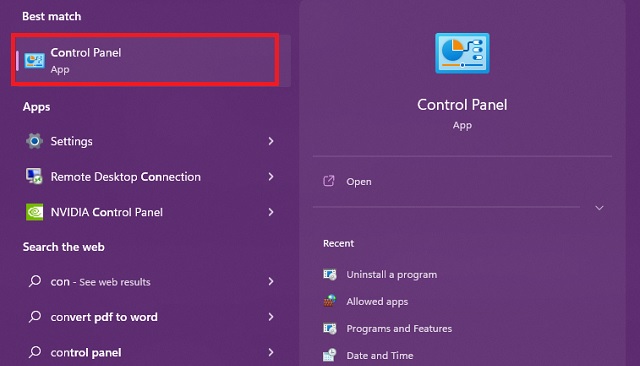
1. First, press the Windows key and search for Control Panel. Click to open the Control Panel from the search results.
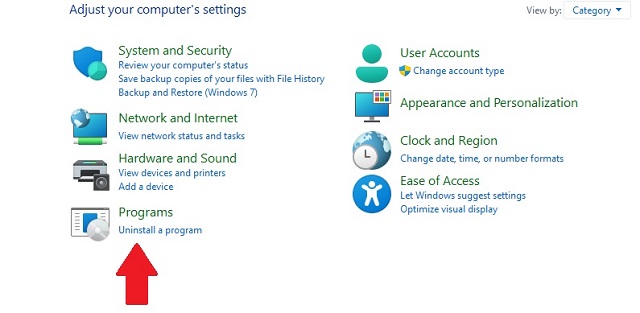
2. Then, go to the “Uninstall a program” option under the “Programs” section.
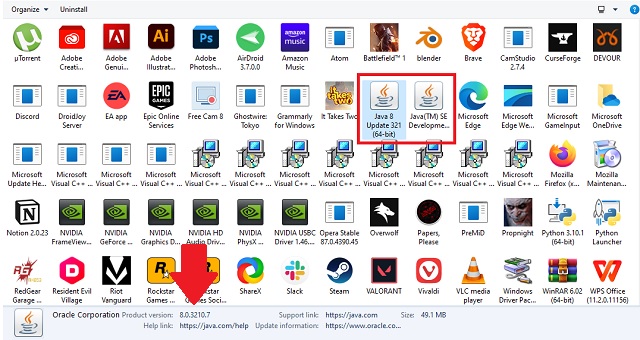
3. Here, you can find all versions of Java on your system. You can click on them to check their version number and double-click to uninstall it.
Solve “JNI Error Has Occurred” in Minecraft
Thanks to newer versions of the game, JNI errors are uncommon nowadays. But even if you somehow stumble upon one, now you have the power to resolve JNI errors in Minecraft. And it’s bound to help you while trying to make your own Minecraft Java server. Other than that, you can also use the method to reduce errors while you use the best Minecraft mods. With that said, if you still have JNI or similar errors in Minecraft, please feel free to reach out. You can drop your queries in the comments section, and someone from our team will help you out.


 Bipradeep Biswas


