
If you are someone who tinkers with different versions of operating systems, not just limited to Windows, a virtual machine platform is an extremely crucial feature for you. Hyper-V is a native hypervisor built by Microsoft that enables this feature on Windows, but sadly, it’s not available on the Home edition of Windows 11. Yeah, there are several third-party tools, but Hyper-V performs much better and is easier to use. Having said that, we have found a neat workaround to enable Hyper-V in Windows 11 Home, similar to how we had enabled Hyper-V in Windows 10 Home. So without any delay, let’s get started.
Enable Hyper-V in Windows 11 Home (2022)
In this tutorial, we have included instructions to install Hyper-V in Windows 11 Home, along with steps on how to create a virtual machine in Hyper-V. You can expand the table below and move to your desired section.
What is Hyper-V?
Hyper-V is a hardware-based hypervisor developed by Microsoft. It allows users to run multiple instances of different operating systems on top of the Windows OS. Currently, Hyper-V supports Windows, Ubuntu, and other Linux distros as well. Since the tool has been developed by Microsoft itself, the performance while running a Windows VM through Hyper-V is impressive in comparison to other third-party tools.
In terms of customization, Hyper-V is not as feature-rich as other hypervisors, but again, it’s fast. The reason is that most of the drivers run independently from the hardware layer, resulting in less overhead in maintaining the virtual machine. Other than that, you can also assign storage, cores, and provide internet access through the default switch. In case you want to quickly create a virtual machine, you have that option too.
How to Install Hyper-V in Windows 11 Home
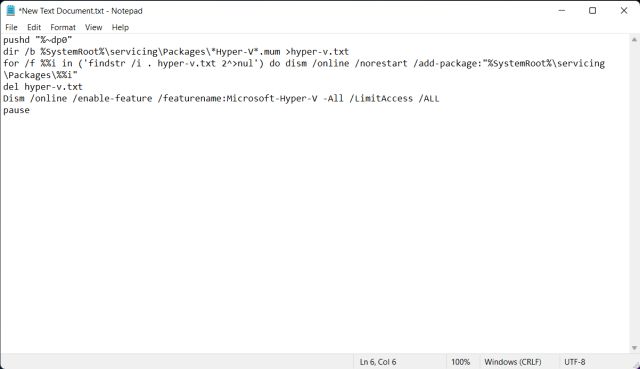
1. First, open a new Notepad file on your PC. You can do that by searching for Notepad after pressing the Windows key or using the Win + R Windows 11 keyboard shortcut to open the Run prompt. You need to type notepad and hit Enter to open it. Now, copy the below script and paste it into the Notepad file.
pushd "%~dp0"
dir /b %SystemRoot%\servicing\Packages\*Hyper-V*.mum >hyper-v.txt
for /f %%i in ('findstr /i . hyper-v.txt 2^>nul') do dism /online /norestart /add-package:"%SystemRoot%\servicing\Packages\%%i"
del hyper-v.txt
Dism /online /enable-feature /featurename:Microsoft-Hyper-V -All /LimitAccess /ALL
pause

2. Next, click on “File” in the menu bar and choose “Save as”.

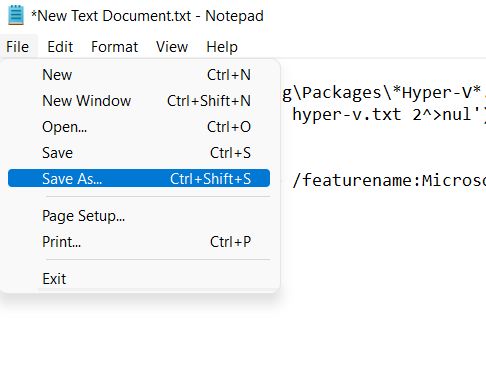
3. On the next prompt, select “All files(*.*)” in the “Save as type” drop-down menu. After that, give a name to the file. For example, I have renamed the file to “HyperV”. Then, add the.bat extension at the end to save it as a batch file. Make sure there is no .txt or other file extension appended at the end. Finally, click on “Save”.


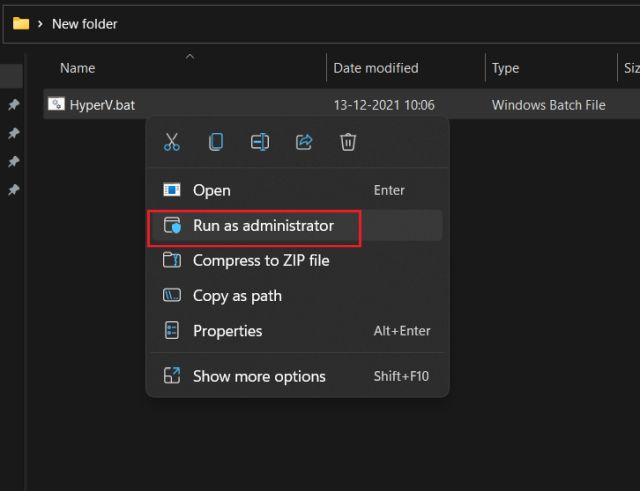
2. Now, to enable Hyper-V in Windows 11 Home, right-click on the batch file you just saved and select “Run as administrator“.

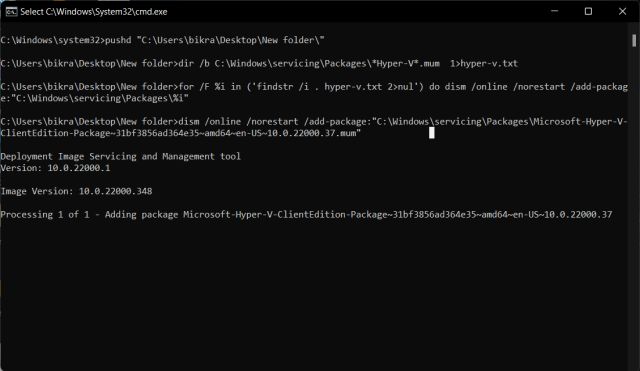
3. Once you do that, it will open a Command Prompt/ PowerShell window and start installing Hyper-V on Windows 11 Home. Keep in mind that you need to be connected to the internet to enable this feature. Moreover, if the CMD window seems stuck, press the “Enter” key.

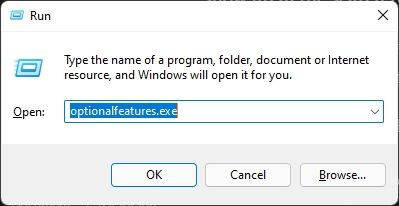
4. Once the Hyper-V installation is complete, restart your Windows 11 computer. Now, press Windows and R keys at once to open the Run prompt. Here, type optionalfeatures.exe and hit Enter.

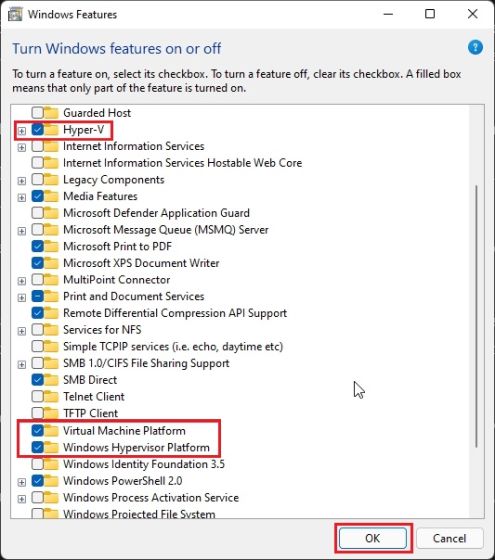
5. A Windows Features window will now open up. Scroll down and enable Hyper-V, Virtual Machine Platform, and Windows Hypervisor Platform checkboxes. Finally, hit the OK button. It will start installing the necessary packages and ask you to restart the computer once the installation is done.

6. Finally, Hyper-V will be enabled on your computer running Windows 11 Home. Press the Windows key once and search for “Hyper-V”. It will show up in the search results, and you can open it.


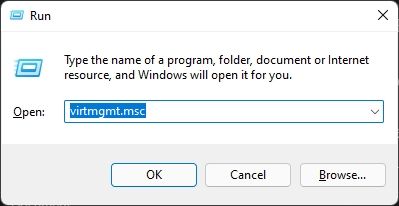
7. If Hyper-V is not showing up in the search result, open the Run window using the Windows+R shortcut. After that, input virtmgmt.msc and hit Enter.
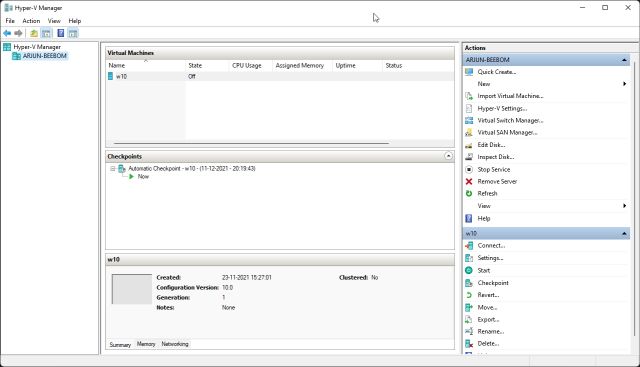
8. It will directly open the Hyper-V Manager on your Windows 11 Home PC.

Create a Virtual Machine with Hyper-V in Windows 11 Home
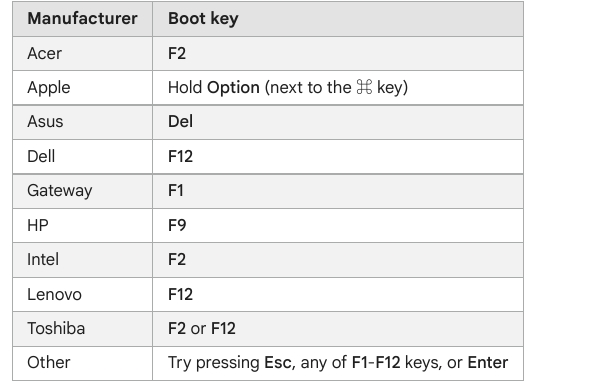
1. Once you have installed Hyper-V in Windows 11 Home, restart your computer and boot into BIOS or UEFI. Usually, the boot key is F10 or F9, but it can vary based on your PC manufacturer. So if you are not sure, look for it on the internet or use the handy list attached below.

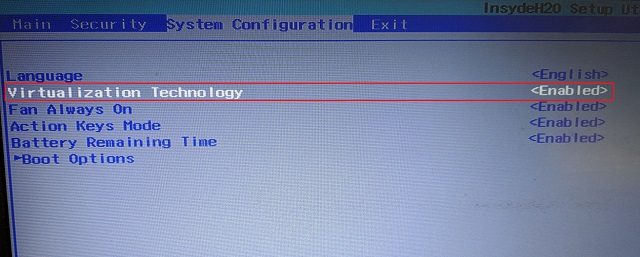
2. Generally, you would find the “Virtualization” option in the System Configuration or Advanced tab. All you have to do now is enable it and save the changes by pressing the F10 key. After that, restart your computer, and virtualization will be enabled.

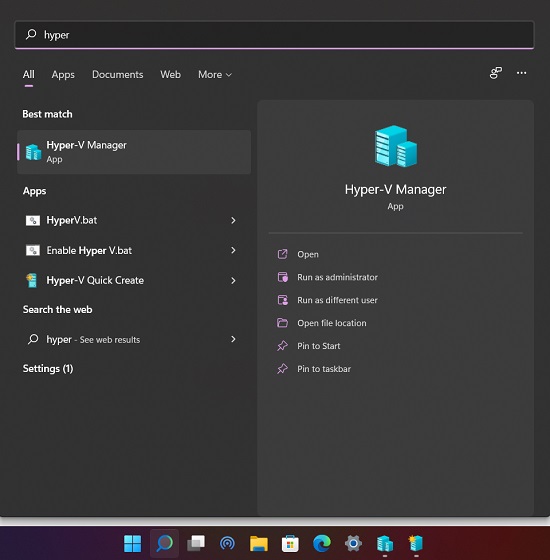
3. Now, launch Hyper-V by pressing the Windows key once and searching for it using Windows Search.
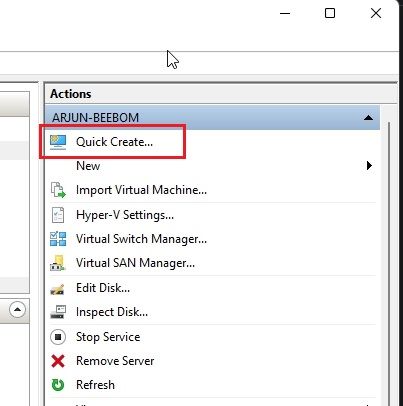
4. Click on the “Quick Create” option on the right panel. It lets you set up things pretty fast.

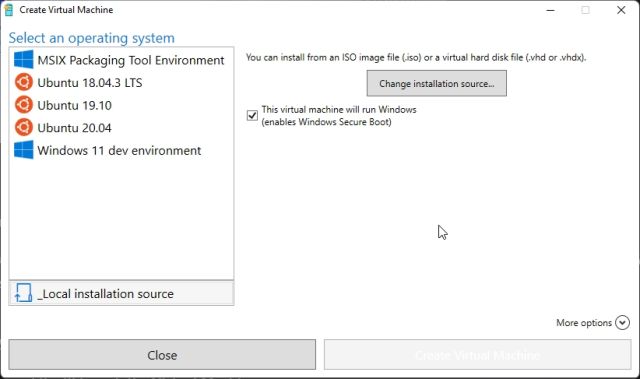
5. Now, choose the operating system for which you want to create a virtual machine on Windows 11. The great thing here is that Hyper-V also supports Linux (Ubuntu) out of the box. Apart from that, you can also choose a local Windows ISO image if you have already downloaded it.

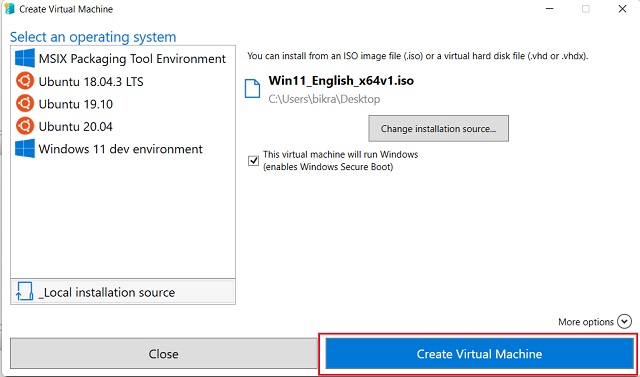
6. Now, hit the “Create Virtual Machine” button and wait for the process to complete.

7. Next, click on the “Connect” button, and it will launch the virtual machine you just created.

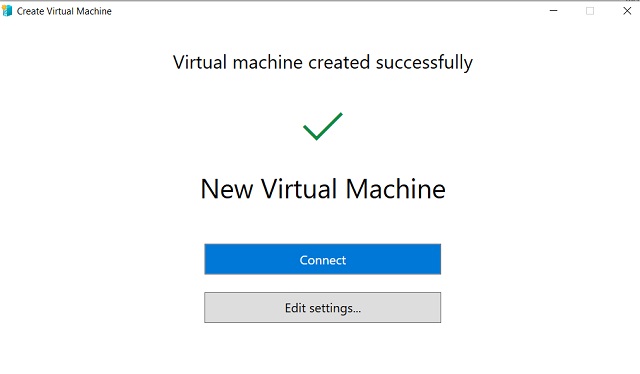
8. Finally, the virtual machine is ready in Hyper-V, and you can go through the installation process as usual.


Install Hyper-V in Windows 11 Home with Ease
So that is how you can enable and run Hyper-V in Windows 11. In our comparison between Windows 11 Home vs Windows 11 Pro, we had noted that the Home edition lacks a built-in hypervisor. However, through our workaround, you can enable it on your Home edition PC as well. Not to mention, there are several third-party virtualization programs like VirtualBox and VMware you can use on Windows 11 Home. Anyway, that is all from us. If you face any issues, do let us know in the comment section below.

