Users who have been using Windows 10 for years are well aware that the available disk space of the OS drive reduces over time for no apparent reason. It becomes even worse if you are using your computer for a longer time without any maintenance. The culprit that you are looking for is the WinSxS folder sitting inside the OS drive. Microsoft calls it “Windows Side By Side” or loosely the component store. The folder contains all sorts of system files that are used to fix various issues on your Windows PC. However, the folder size keeps eating the crucial space and that is the pain point of most users. So in this article, I will share an easy way to delete the WinSxS folder without affecting your PC’s stability. Now having said that, let’s get started.
What Exactly is WinSxS Folder?
Before moving forward, let’s go through some crucial points. First of all, you can’t delete the WinSxS Folder entirely, but you can definitely reduce its size. The reason is that the WinSxS folder contains many important libraries and components of the operating system which are required to resolve OS related issues. So, in a way, one should not touch the WinSxS folder as it’s there to keep our PC safe and sound.
However, the point is that the WinSxS folder keeps getting larger over time and if you are using a machine for years then the folder would take around 40% of your OS drive which is completely insane. So, what exactly is happening in that folder? Actually, besides OS components, Windows also keeps update files in the WinSxS folder. So, whenever you get a new update, files are downloaded and stored in case you encounter an issue in the future and want to roll back to an earlier build. Basically, every time you get an update, the files are accumulated in that folder resulting in an incredibly higher size of the OS drive.
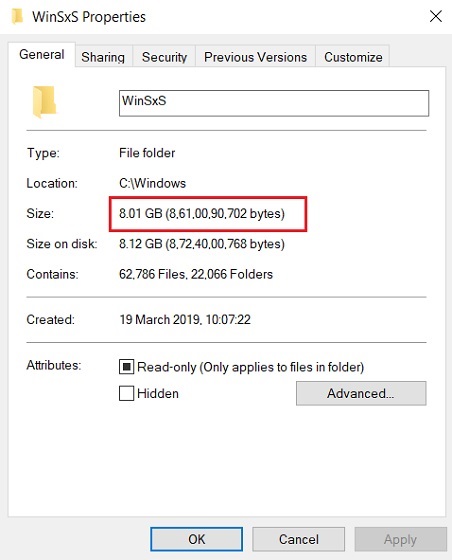
It would be wrong to say that Microsoft didn’t try to fix the issue. Currently, Windows 10 comes with an automated maintenance service that cleans up files that have been superseded after a month. However, users report that it does not work as intended so there is that. Anyway, now that we have understood the issue at hand, we will go through the steps to reduce the size of the folder in a way it does not hamper your system’s stability.
Steps to Clean Up WinSxS Folder
We will go through a two-step process to complete this task. First, we will use an internal tool and then move to a manual cleanup method. Now having said that, let’s begin.
-
Reduce Folder Size Using the DISM Tool
We are going to use the DISM Tool (Deployment Image Servicing and Management) to clean up the folder. DISM tool is used to keep the Windows image intact and prepare for recovery environments.
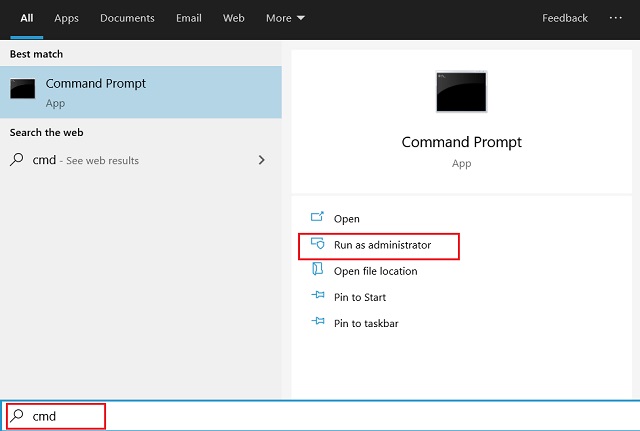
1. Press Windows key once and type “cmd” in the search box. After that, click on “Run as Administrator” in the sub-menu.
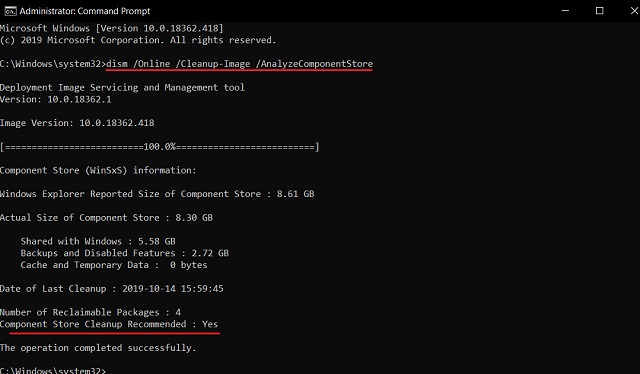
2. Once the Command Prompt window is open, execute the below command to check if redundant files are available in the folder. If it says cleanup recommended at the bottom then move to the next step.
dism /Online /Cleanup-Image /AnalyzeComponentStore
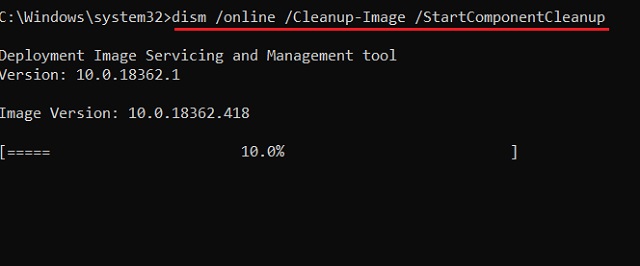
3. Now, execute the second command to finally start the cleanup process. After the process is completed, you are done. The WinSxS folder should free up considerably.
Note: The process may take some time so keep patience.
dism /online /Cleanup-Image /StartComponentCleanup
-
Delete Update Files Using Disk Cleanup
1. Right-click on the OS drive (generally, C drive) and open “Properties”. Here, click on “Disk Cleanup”.
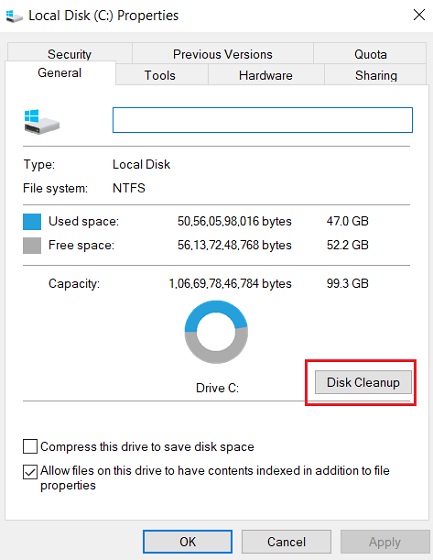
2. Next, click on the “Clean up system files” button at the bottom-left.
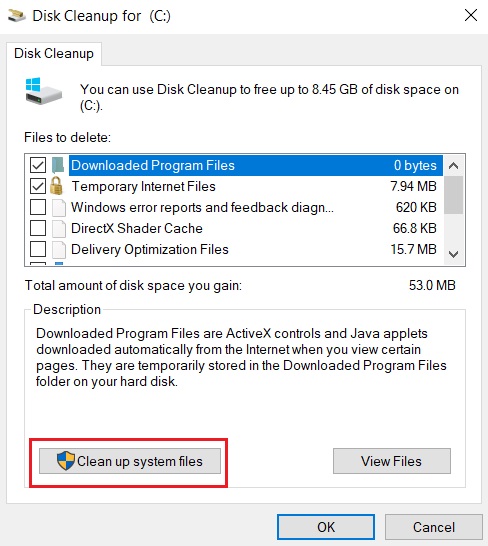
3. Now, uncheck all the boxes and select “Windows Update Cleanup” at the top. After that, click on the “OK” button. Voila, a huge amount of update files in the WinSxS folder will be deleted instantly. Now, restart your PC and you will find the OS drive taking less space.
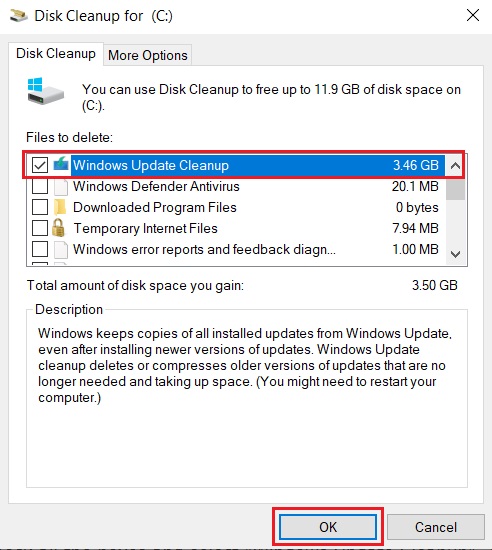
This should sufficiently release storage on your Windows machine and make it faster. One thing to note here is that sometimes if the PC is too old, it’s better to just reset Windows 10 to get a clean start. Do remember to take a backup of your Windows 10 PC before you go through the resetting process.
Delete WinSxS Folder and Regain Space
So that was our guide on how to delete the WinSxS folder and free up the OS drive. The reason Windows slows down after years of usage is because of these files clogging the crucial memory space. So, if you want to speed up your computer, reducing the WinSxS folder would also make a huge difference in performance. Anyway, that is all from us. If you want to learn more about Windows 10 then do comment down below and let us know.





I am just trying. Thank you.