- Screenshots on Windows are saved in the default directory C:\Users\<Username>\Pictures\Screenshots.
- You can designate the Screenshots folder to other directories by going to the folder's properties.
- Besides, you can also change the default save locations app-wise by going to app settings.
One basic operation most of us do in Windows 11 is taking screenshots. If you recently learned how to take screenshots on Windows 11, you might be wondering where they’re saved by default. Similarly, you might want to change where the screenshots are saved to make accessing them much easier. Therefore, here’s where screenshots go on Windows and how you can change it to save at other locations.
Where Do Screenshots Go on Windows 11?
If you’re using the Windows + Print Screen shortcut, the screenshots are saved in Pictures > Screenshots folder on Windows 11. You can access the Screenshots folder using the File Explorer and going to the directory C:\Users\<Username>\Pictures\Screenshots.
There are multiple ways to take screenshots on Windows 11, and each method saves the screenshot a bit differently. While the Windows + Print Screen keyboard shortcut is more common, users also use the Print Screen key, which copies the screenshot to the clipboard. You can then use the Snipping Tool or paste the image to any image editor to save it.
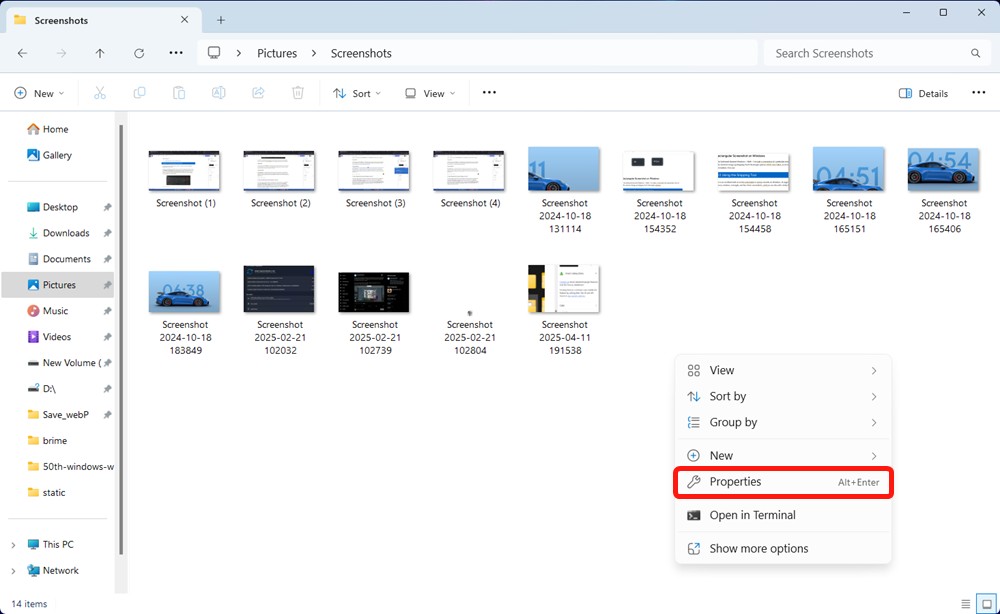
How to Change Screenshot Folder Location on Windows 11
Considering how deeply buried the default screenshot folder is in the Windows file system, you might naturally want to change it. Now, we can all agree the best location is Desktop or a folder on the Desktop, which makes screenshots more accessible. Here’s how you can change where screenshots are saved in Windows 11.
- Go to This PC > Pictures > Screenshots and go to Properties by right-clicking on the folder.
- Go to the Location tab and click Move to start moving both the current screenshots and future screenshots to another location.

- In the new window that pops up, navigate to the new folder you’re planning to use for screenshots and choose Select Folder.

- After picking the new destination for screenshots, click on OK or Apply to confirm the changes.

- Windows will now prompt you to move all the screenshots from the old folder to the new one. This is optional.

How to Change Default Save Location for Windows Snipping Tool
Snipping tool is the default screenshot utility on Windows. While transferring the Screenshots folder to Desktop is one of the ways to change the default screenshot location on Windows, it applies to the entire system. If you have multiple screenshot utilities that use the Screenshot folder, dumping all screenshots at one place could make it hard to differentiate. Therefore, you might want to change the default screenshot location per app to avoid any confusion.
- Launch the Snipping Tool utility and click on the 3-dots icon at the top right.

- Then go to Settings and select Change.

- Select the folder you want the Snipping Tool to start saving the screenshots in, and click on Select Folder.

While Snipping Tool or other tools might consider the default save location as the Screenshots folder, screenshot tools like ShareX tend to create an entirely new folder in the Documents directory or any other directory. Fortunately, like Snipping Tool, you can change the default screenshot location in them via in-app Settings.
And that’s where screenshots go on Windows and how you can change the default directory. Changing your screenshots folder gives you the flexibility to organize all your screenshots in one place for faster access. If your work or use case involves taking a lot of screenshots, changing the folder location is a neat strategy to effortlessly group all your screenshots to relevant folders.


