- To quickly take a screenshot on Windows 11, press the Windows + PrtScr keys at the same time.
- To take a screenshot of an active window, use the Windows + Alt + PrtScr key combination.
- If you want annotation support for screenshots, use third-party tools like ShareX and Flameshot.
Thanks to the built-in screenshot tool and third-party software, there are several easy ways to take screenshots on Windows 11. While the built-in screenshot tool in Windows 11 might be sufficient for a lot of users, most third-party tools offer lots of convenient saving, editing, and annotation features. They also offer several features that are otherwise not available in the default screenshot tool such as scrolling screenshots. Hence, here are the best ways to take screenshots on Windows 11.
Note:
This article depicts multiple ways to take screenshots in Windows 11. All the methods mentioned in this article, unless mentioned otherwise, work perfectly on Windows 10 as well. If you are yet to upgrade to Windows 11 from Windows 10, you can check out our in-depth guide on how to take screenshots in Windows 10 for more details.
1. Print Screen Key: Copy the Screenshot
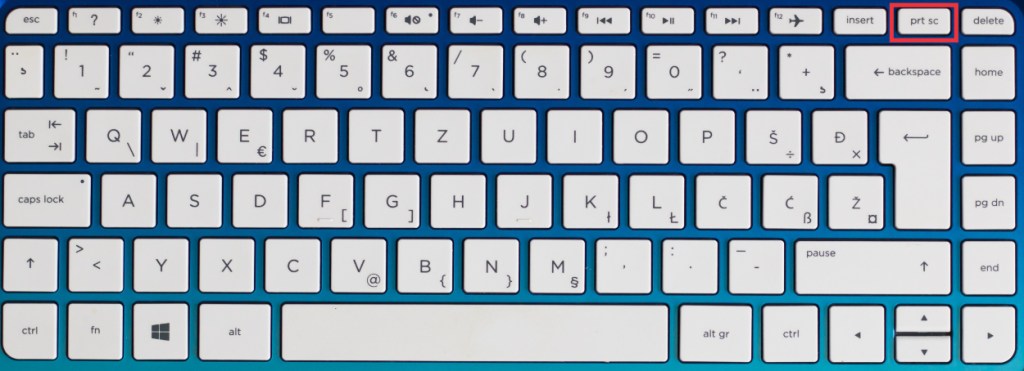
The easiest way to take a screenshot on your Windows 11 PC is by pressing the “Print Screen” key (often labeled as PrtScr or PrtScrn).
- Locate the Print Screen key on your keyboard. It’s usually located at the top-right portion of the keyboard (usually next to the F12 key).
- Press the Print Screen and Windows keys together to take a screenshot of the entire screen.
The screenshot will be saved to the clipboard. You can then paste the screenshot from the clipboard anywhere you like. In case you want to edit it, you can open Paint, paste it there, edit the image, and save it.
2. Windows + Print Screen: Auto-save Screenshot
If you want to take and save the screenshot automatically on your Windows 11 PC, here’s how to do it:
Press and hold the Windows key, and while doing so, press the Print Screen key on your keyboard. The screen will dim for a second, and that’s how you know the screenshot has been captured.
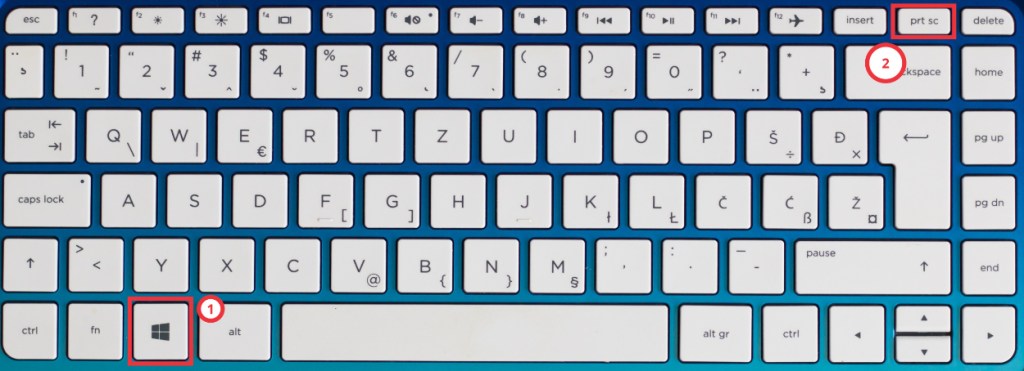
As for where to find the image, the screenshots captured this way are automatically saved to the “Screenshots” folder inside the “Pictures” folder on your Windows 11 desktop or laptop.
Note:
In some laptops, you can only activate the Print Screen button after pressing the Function key. If you have such a laptop, you will have to use the “Windows key + Function (Fn) + Print Screen” shortcut to take a screenshot. If you think it’s a hassle, you can always remap the Screenshot key, which we’ll look into later in the article.
3. Alt + Print Screen: Screenshot an Active Window
The two methods above enable you to take screenshots of the entire desktop. However, if you want to capture just the active window instead of the entire desktop in Windows 11, here’s how you can do it.
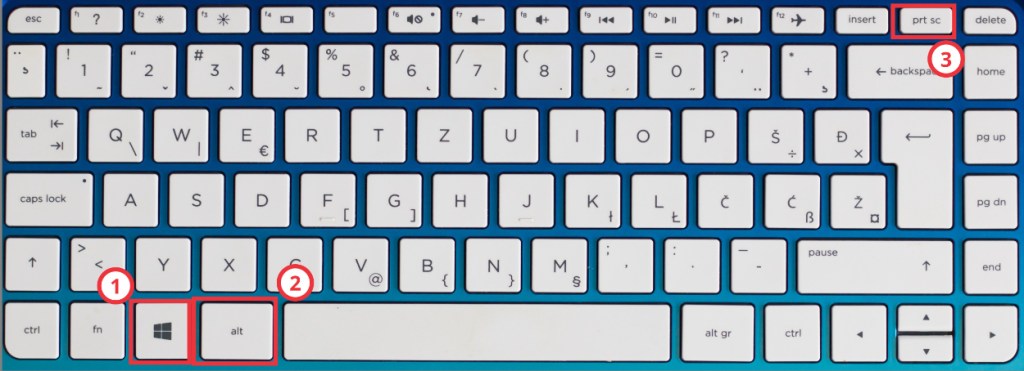
Press and hold the Alt key and then press the Print Screen key. Now, the screenshot of the active window will be captured and copied to your clipboard.

You can then paste the screenshot directly where you want to post it or into Paint for edits and save it in a format of your choice.
If you don’t wish to copy the image and directly save it to your computer, pressing the Windows + Alt + PrntScr keys together does the trick. It saves a screenshot of the active window in Windows 11’s photos directory.
The command is similar to Windows + Print Screen that we mentioned above, which screenshots the entire screen and saves it in the directory.
4. Use the Built-in Snipping Tool in Windows 11
The Snipping Tool is another great tool to capture screenshots on your Windows 11 PC. It’s the best option if you want a basic screen utility alongside a few options to annotate.
It doesn’t offer as many features as some of the third-party utilities mentioned below, but it gets the work done. Here’s how to use it:
- Click on the Windows Start Menu, start typing Snipping Tool, and click the app to open it.
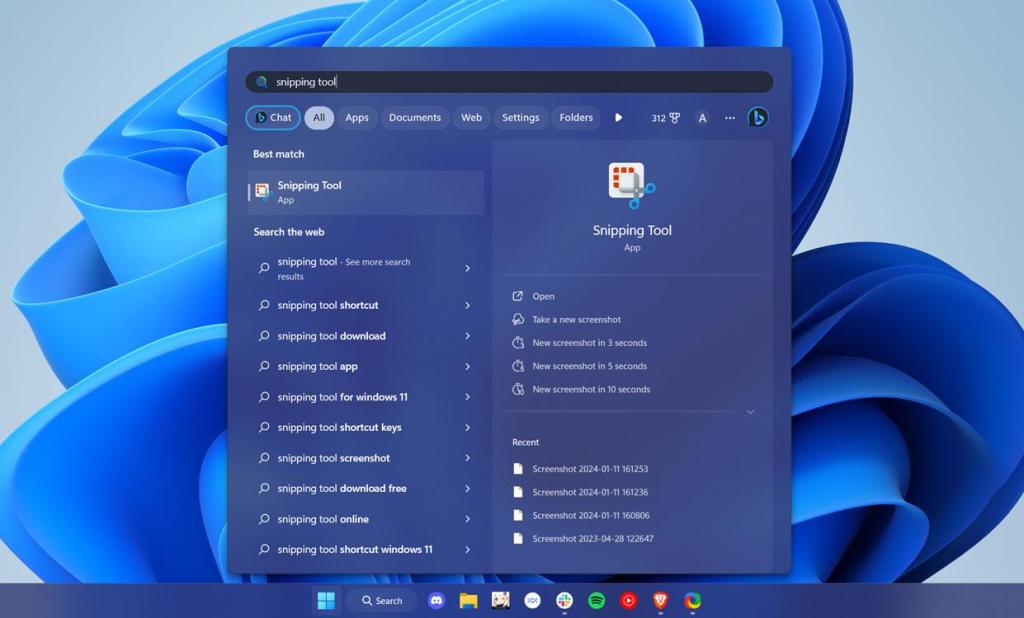
- Select the kind of screenshot you want to take. There are four options — Rectangle, Window, Fullscreen, and Free form, all pretty self-explanatory.
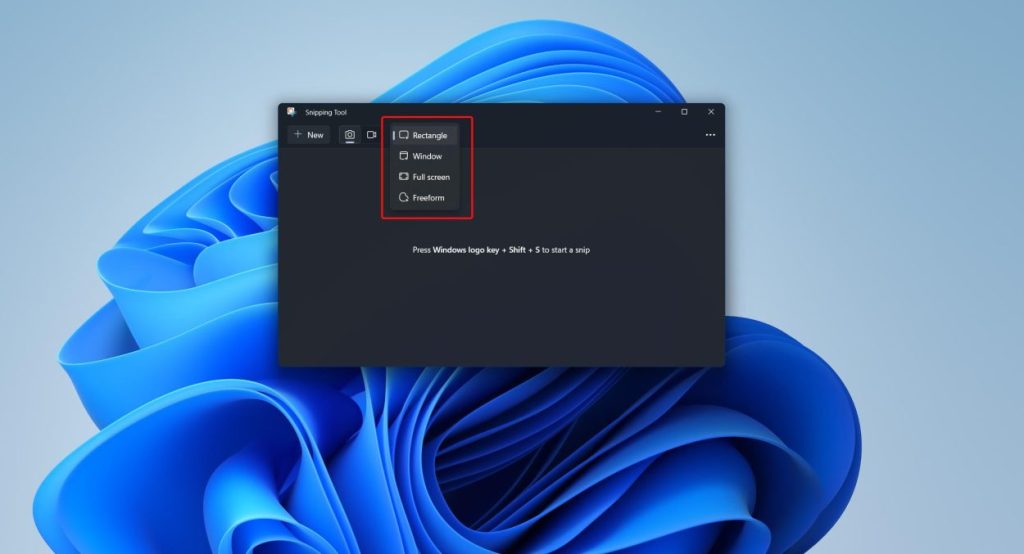
- Click the “New” button to start capturing your screen.
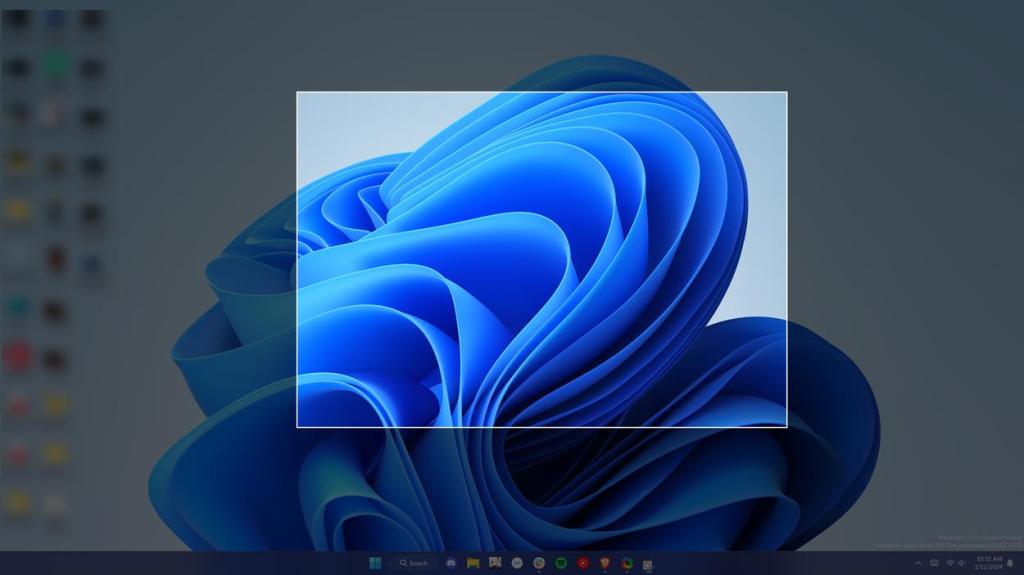
- Drag the cursor or select a window and release it to take a screenshot.
- The screenshot will then pop up in the Snipping Tool window. Make the necessary changes and click the Floppy icon to save it.
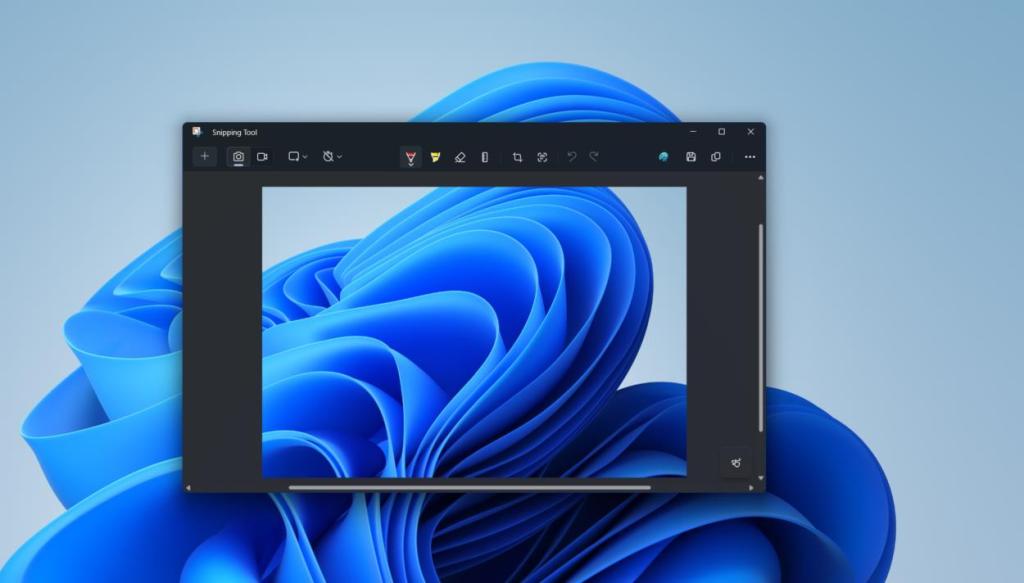
Snipping Tool allows you to highlight content, annotate, crop, and erase. The latest version of the same on Windows also allows you to recognize and copy text from screenshots.
Other features include a “Delay” option that allows you to set a screenshot timer or countdown, which can come in handy when you want to capture something that only appears when you hover your cursor over it.
Note:
Microsoft’s original plan was to deprecate Snipping Tool in favor of “Snip and Sketch,” but the plan was revised, and Snip and Sketch, which could then be accessed using Win + Shift + S, was mergerd into the Snipping Tool.
6. Game Bar: Record Gameplay on Windows 11
The Xbox Game Bar is yet another way of taking screenshots in Windows 11. Besides providing tools for gaming, it allows you to capture the on-screen gameplay action on your PC. Here’s how to use it.
1. Press the “Windows key + G” keyboard shortcut on Windows 11. By default, you will see three small windows stacked on top of one another.

2. In the capture floating window at the top-left corner, you’ll see four buttons. The first from right takes a screenshot while the third from right records your gameplay.
One of the drawbacks of taking screenshots with this method is that you can only take a screenshot of the active window. The Camera icon you see in the game bar is hardwired to the Windows + Alt + PrntScr shortcut we mentioned earlier.
All screenshots captured this way will be automatically saved to the directory Videos -> Captures. You can now edit or annotate it with the image editor of your choice.
7. ShareX: Use Third-Party Screenshot App
ShareX is hands down the most comprehensive screenshot and screen recording tool for Windows users on the internet. From capturing screenshots to tons of annotation and image editing tools, the ShareX app has you covered. It can also do scrolling screenshots, screen recording, screen recording to GIF, and more.
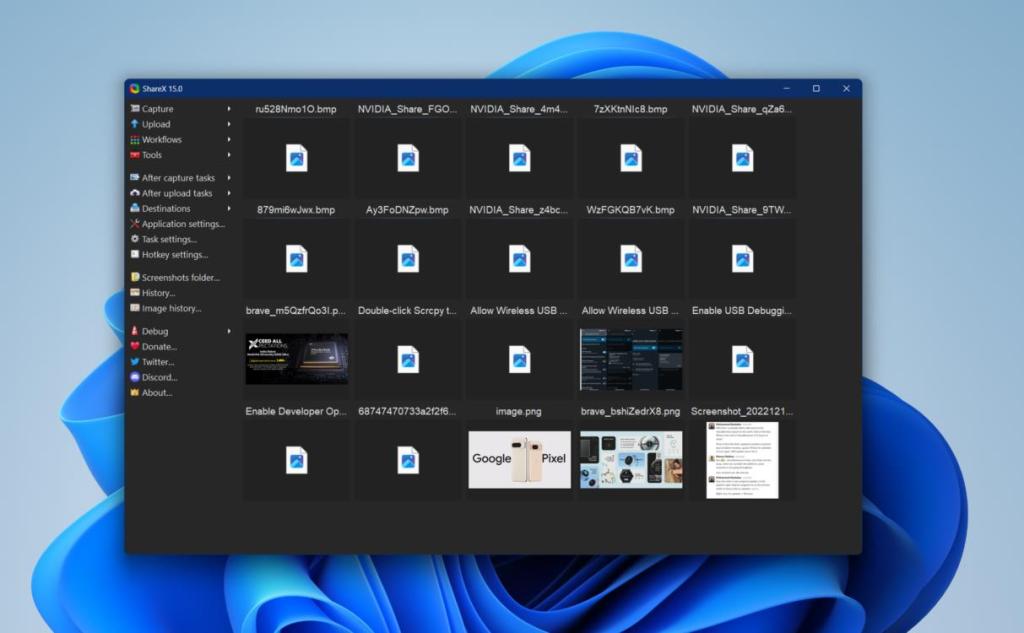
We are heavy ShareX users, and it more than gets the job done. It’s heavily customizable, feature-rich, and more importantly, open-source and free to use. One of its standout features is the ability to directly upload them to platforms such as Imgur. Overall, it’s one of the best third-party screenshot tools on Windows 11.
The ways to take screenshots in Windows 11 have not changed much from Windows 10. If we had to pick a screenshot tool besides the built-in tools, ShareX would be our first choice. Although if you’re running an older PC with limited system resources, Flameshot and Greenshot are worth trying.
Furthermore, if you wish to take scrolling screenshots on Windows, we have a dedicated guide ready for you. And if you think we’ve missed out on any screenshot tools that are worth mentioning, let us know in the comments section below.
The easiest way to take screenshots in Windows 11 is to simultaneously press the “Windows + Print Screen” keys on your keyboard. The screenshot is saved in the Pictures -> Screenshots folder on your computer.
Yes, of course! You can use the easy method, including the Snip and Sketch tool or the ShareX app, to take a screenshot on your Windows 11 desktop.