Windows groups all your downloaded files and stores them in a “Downloads” folder. If you have downloaded any file from the internet, you must be familiar with the Downloads folder. While most people don’t change the default location of the downloads folder, Windows offers you an option to do that. In this article, we have detailed how you can change the default download location in Windows 11.
Change Downloads Folder Location in Windows 11 (2022)
What is the Default Downloads Folder Location in Windows 11?
When you download a file from the internet, Windows stores them in a “Downloads” folder. By default, you will find all your downloaded files in the following path:
C:\Users\<username>\Downloads
If you want to change the default folder for downloads in Windows 11, follow the instructions detailed below:
Set Custom Location for Downloads in Windows 11
1. Open File Explorer using the Windows 11 keyboard shortcut Win+E, right-click on the Downloads folder from the quick access panel, and choose “Properties”.

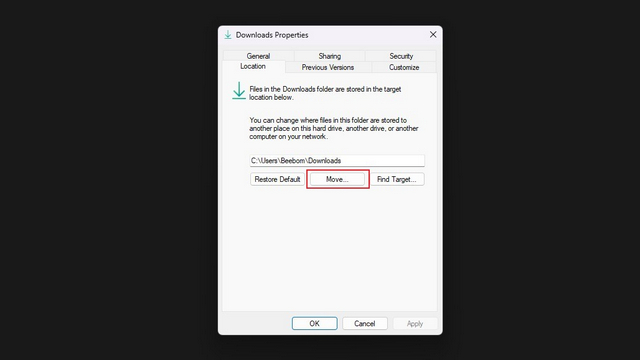
2. Switch to the “Location” tab and click on the “Move” button to pick a path for saving all your new downloads.
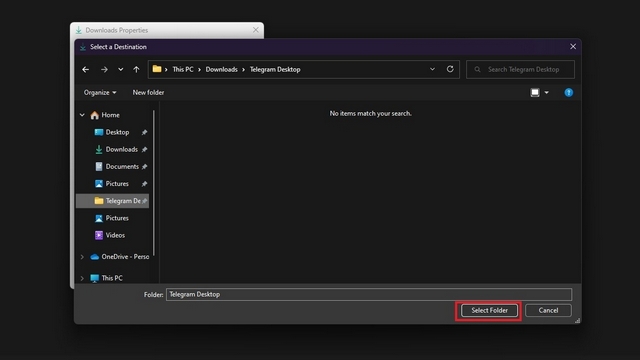
3. From the file picker interface, navigate to the new folder for downloads and click on “Select Folder”.
4. Up next, click on “Apply” to confirm the changes. Going forward, you will find your new downloads in the folder you just picked.

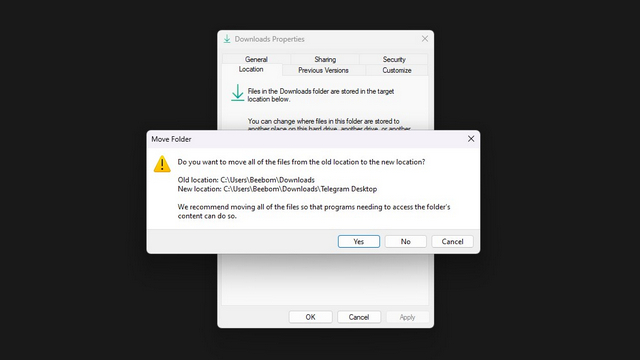
5. Windows will now urge you to move all downloaded files to the new downloads folder. If you want all your downloads in one place, click on “Yes”. You can also choose to skip this and start fresh in the new folder.
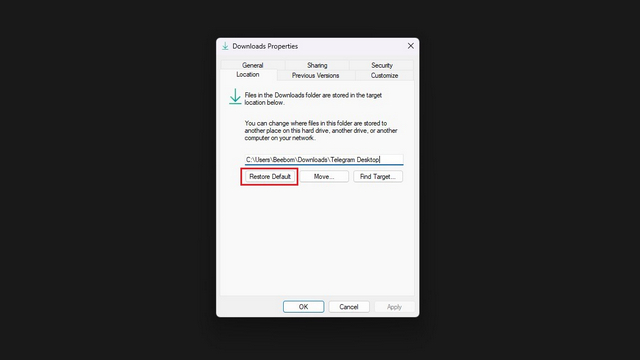
6. To restore the old location for downloads, you can click on the “Restore default” button and use “<username>\Downloads” as the default download location in Windows 11.
Change Downloads Location For Microsoft Store Apps
If you want to change the download location for apps you download via Microsoft Store, you can do that too. Use the steps below:
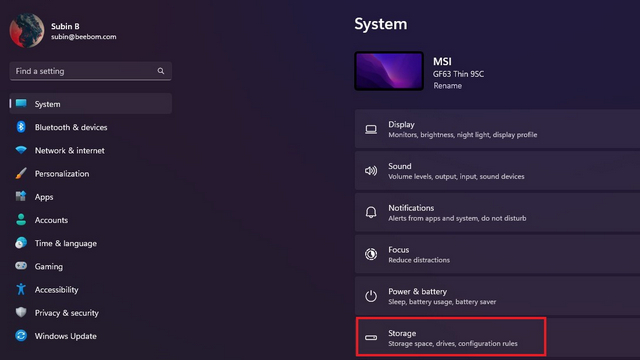
1. Open the Settings app and click on “Storage” under “System” to view storage-related settings.
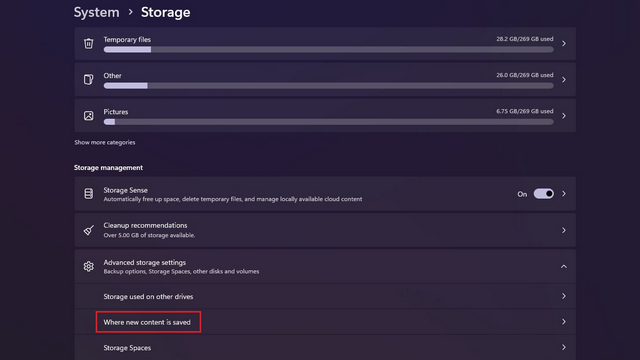
2. Under the “Storage management” section, expand “Advanced storage settings” and click on “Where new content is saved”.
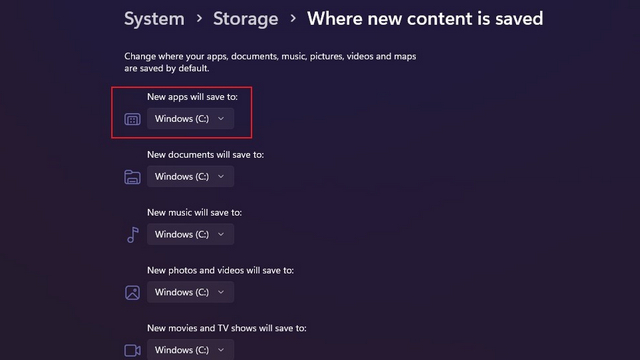
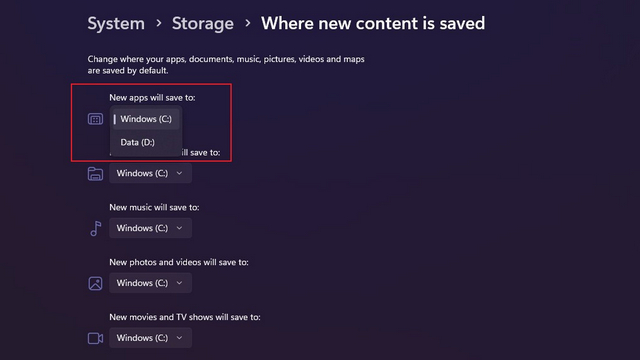
3. You will now see a section that says – “New apps will save to”. Click on the dropdown list below the header to pick a new location for storing apps.
4. You can now choose another drive on your PC for saving apps downloaded via Microsoft Store.
Choose Downloads Folder in Windows 11
So, those are the steps involved to pick the folder of your choice for saving downloads in Windows 11. You can also change the screenshot folder location in Windows 11. Meanwhile, if you want an early glimpse of what’s coming soon to Windows 11, take a look at our list of the upcoming Windows 11 features.