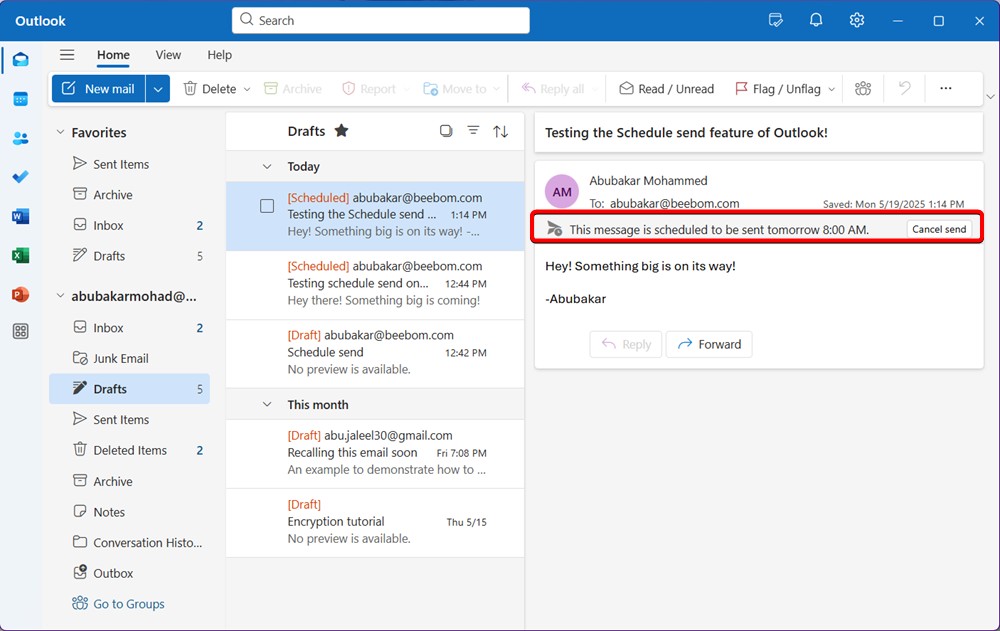
- To schedule an email in Outlook, click the arrow icon next to the 'Send' option and click 'Schedule send'.
- The process is similar on Windows, Mac, and the web version.
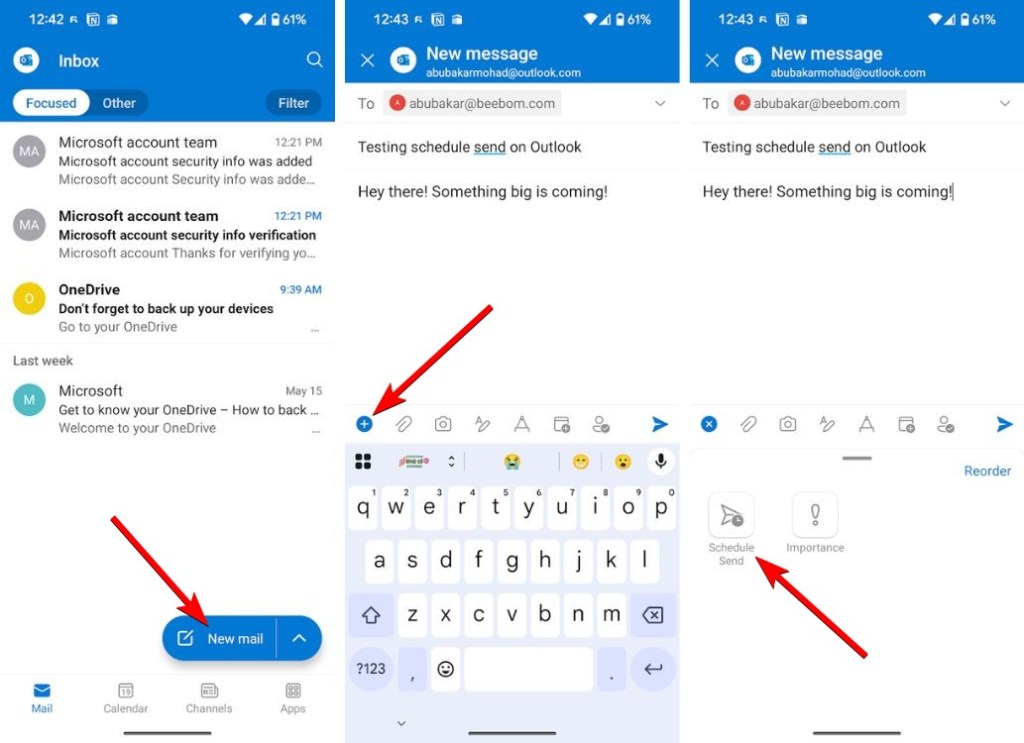
- On Android, click the + icon in the toolbar above the keyboard and tap Schedule send.
Scheduling emails in Outlook is a handy feature as it gives you control over when the message is delivered. This way, you can reach a potential client at the perfect time and get a response. So in this guide, we have explained the steps to schedule an email in Outlook. Be it the desktop Outlook app or mobile app, we have a detailed tutorial ready for you.
How to Schedule Emails in Outlook on Windows, macOS, and Web
The process to schedule emails in Outlook is pretty similar on Windows, macOS, and the web version. Here are the steps to follow.
- Launch the Outlook app and click on New mail to open a new draft.
- Compose your email and then click the little arrow beside the Send option.
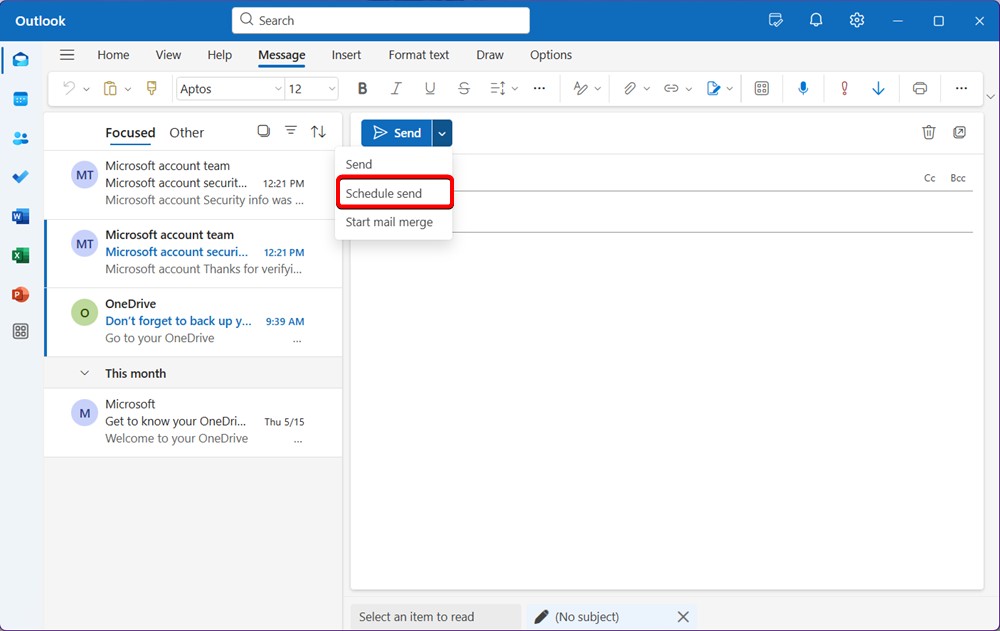
- Click Schedule send, and a new pop-up should appear with predefined time cards.
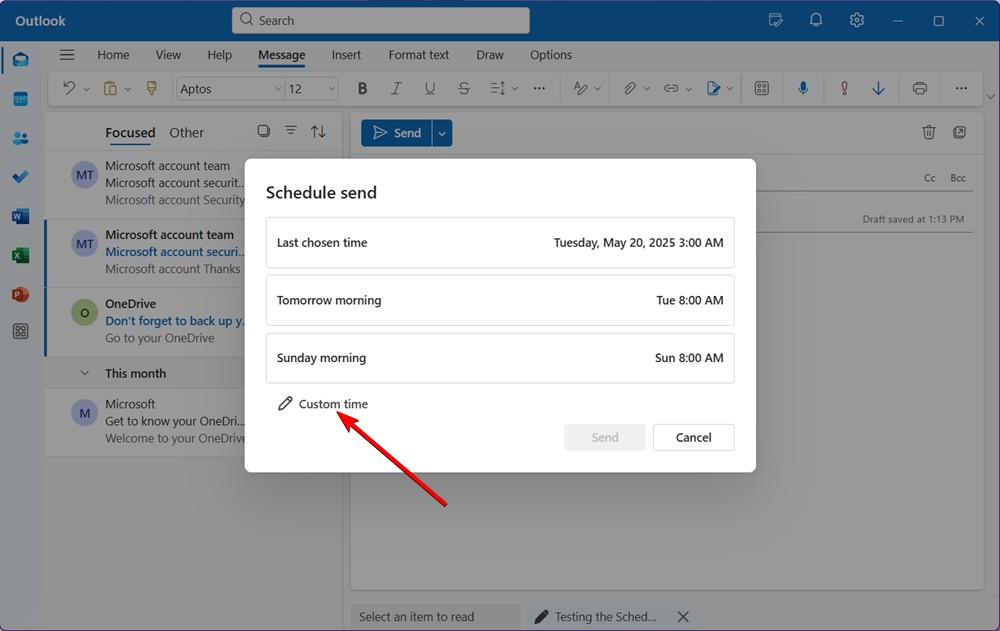
- Click Custom time and choose the date and time you want to send the message on.
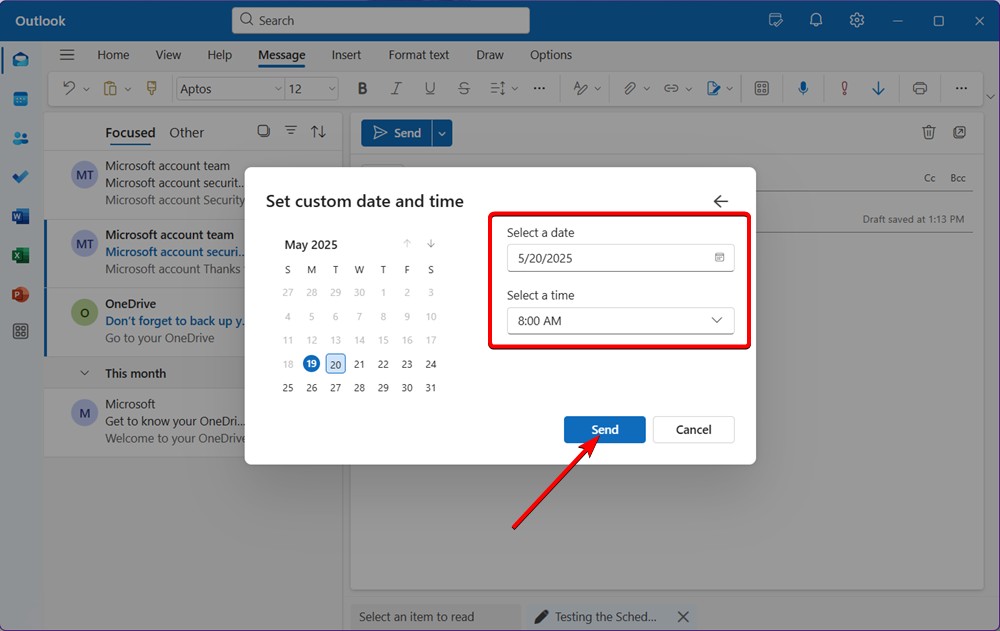
- Once done, click Send, and the Outlook email should be scheduled.
How to Schedule Emails in the Outlook App on Android
You can schedule emails on the Android version of the Outlook app, however, the iOS version no longer shows the scheduling option. If you are an Android user, here is how it’s done.
- Get the Outlook app from the Google Play Store (Free) and launch it.
- Sign into your account and tap New mail.
- Compose the email, add the recipient’s address, and the subject, and tap the + icon.
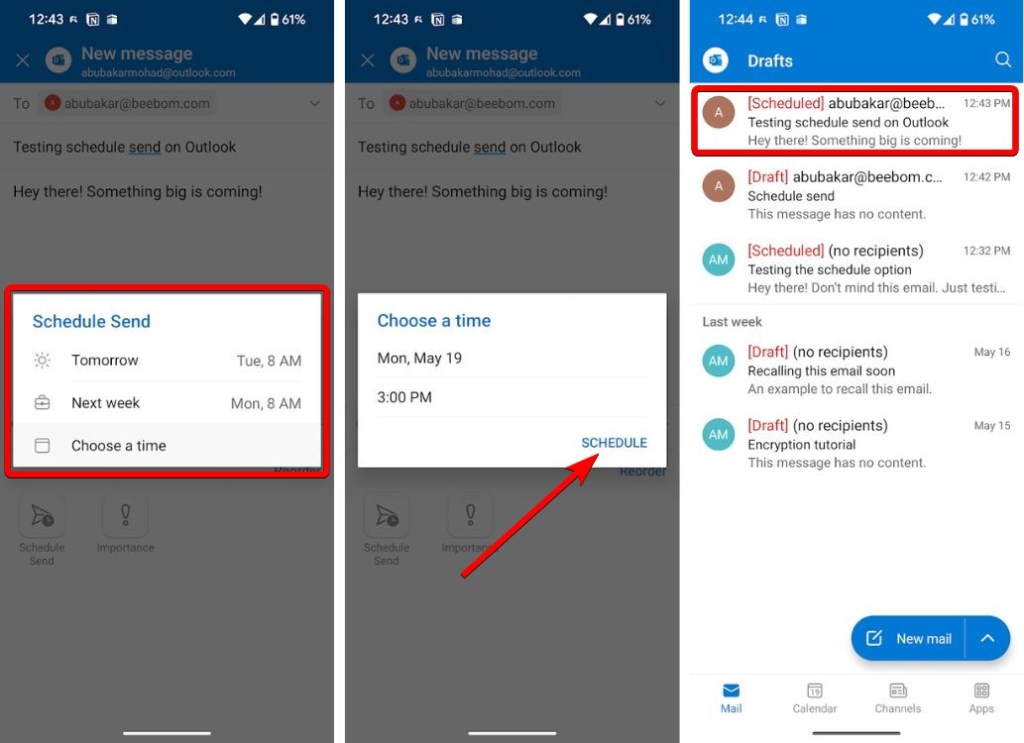
- Now, tap Schedule Send and choose a time.
5. Select the date and time and tap Schedule.
That wraps up our guide on how to schedule emails in Outlook on Windows, Mac, Web, and Android. Outlook is one of the best email clients out there, and using the scheduling feature, you can communicate effectively across different time zones. If you have any questions, do let us know in the comments section.
Yes, popular email services like Gmail, Microsoft Outlook, Apple Mail, and Proton Mail offer you the email scheduling facility natively. You will generally find the option to schedule emails in the send section.
Yes. Since Outlook is connected to the cloud and synced with Microsoft 365, it will schedule and send your email even if your computer is off and you are away.
Scheduling emails is a great way to reach your client at the perfect time. And if your clients live in different time zones, email scheduling can help you communicate with them at a suitable time.
To check the status of your scheduled Outlook emails, simply head over to the Drafts section. All scheduled emails stay there till they are delivered.