


These days, smart assistants are taking the tech world by storm. Amazon’s Alexa and Google’s Assistant are now being embedded within every device, be it car devices, showers, or practically almost everything that was unveiled at CES 2018. But despite all that, the most selling devices sporting these assistants are the company’s own products, that is, the Amazon Echo and the Google Home.
While both the smart speakers are great by themselves, wouldn’t it be great to have the power of them both on one device? Well, now you can. We, at Beebom, have created our own guide of how to create your own smart speaker having the capabilities of both Google Assistant and Amazon Alexa. So without any further ado, let’s get right into it.
Note: The following project has been created with the help of a GitHub project.
Things You Need:
- Raspberry Pi 3 (link)
- microSD Card 32GB (link)
- USB Wall Charger (link)
- 3-port USB Hub (link)
- USB-A to microUSB Cable (link)
- USB Microphone (link)
- Portable Speaker with AUX input (link)
- Keyboard and Mouse (link)
- Display with HDMI port (link)
- HDMI Cable (link)

Steps to Build Smart Speaker:
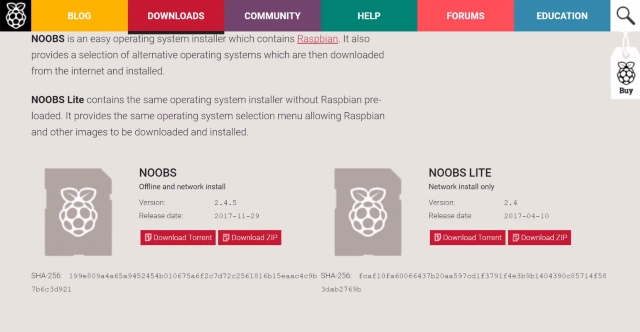
1. To start off, you’ll first need to set up your Raspberry Pi. To do so, simply download the NOOBS package, extract it to your microSD card and plug it into your Raspberry Pi. Hook up the USB Keyboard, Mouse, Mic and the Speaker to the Pi and turn it on. You will now get a first time setup. Simply select Debian and install to start the installation of Debian on your Raspberry Pi.
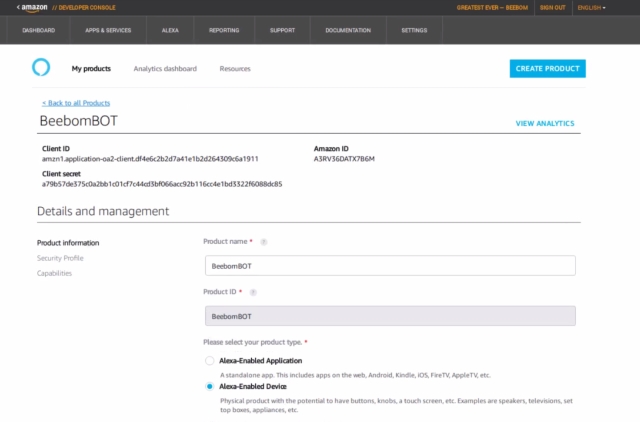
2. Now, you need to create your Amazon Developer Account and create a security profile. You can follow the GitHub project instructions as well. Once done, note down your Amazon account’s credentials.
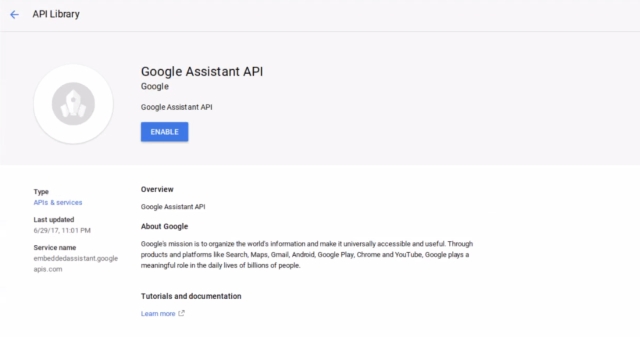
Next up, create a Google Developer Account and enable the Google Assistant API. Once you’re through with that, download the credentials.json file of your Google Product to /home/pi and rename it to assistant.json.
3. Now, run the following commands one by one to clone the GitHub project and make the installer files executable:
git clone https://github.com/shivasiddharth/Assistants-Pi
sudo chmod +x /home/pi/Assistants-Pi/prep-system.sh
sudo chmod +x /home/pi/Assistants-Pi/audio-test.sh
sudo chmod +x /home/pi/Assistants-Pi/installer.sh
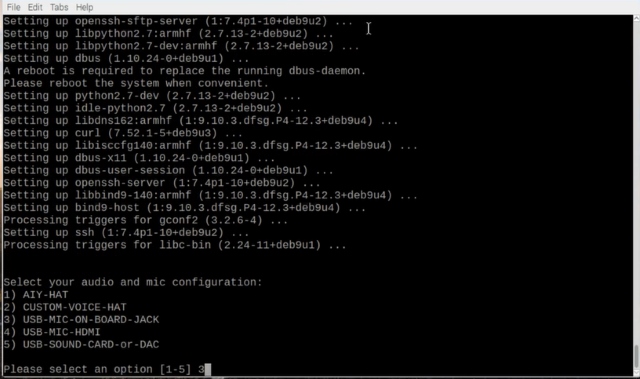
sudo /home/pi/Assistants-Pi/prep-system.sh
First, OS will be updated and upgraded. Thereafter, you will be prompted to select the audio setup. Select “3” from the options. Now, restart the Raspberry Pi.
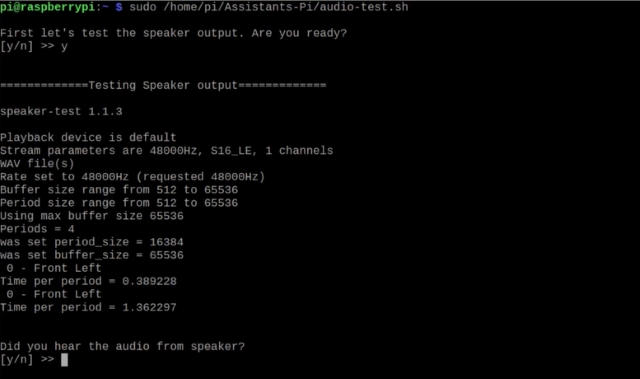
4. Upon reboot, first, check your audio setup by
sudo /home/pi/Assistants-Pi/audio-test.shThe script is interactive, just press “y” if you hear the audio, or “n” if you don’t. In case you don’t hear the audio, you need to check the wires.
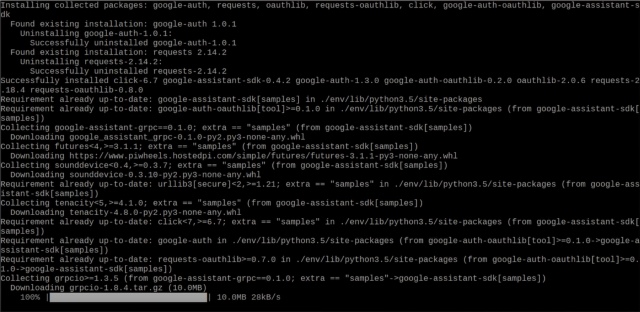
5. Now that your system is ready, run the following command to start the installer:
sudo /home/pi/Assistants-Pi/installer.sh
The script will now execute. It is a pretty straightforward script, simply follow the on-screen instructions.
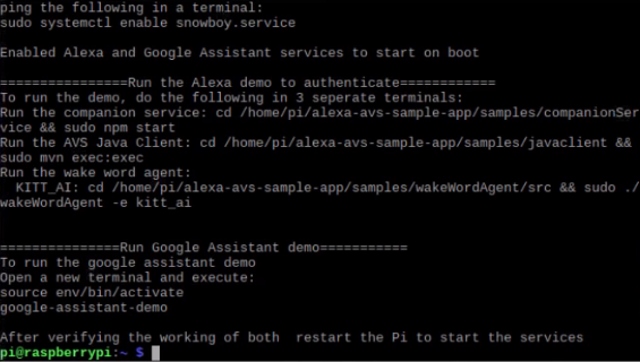
6. Once both the assistants have been installed, you’ll be shown a screen as below. Run the commands one by one to authenticate Alexa. Once you’re through with that, make the changes in the README file located at /home/pi/Assistants-Pi to start the assistants on boot.
And that’s it. Your 2-in-1 smart speaker is ready. Also, while you can use the entire setup barebones, we decided to wrap things up inside a nice little cardboard box and apply a black chart paper while Beebom-ify-ing things up. You can also check out our video of the same below, to see our speaker in action:
SEE ALSO: Google Home vs Amazon Echo: Google Assistant Takes on Alexa
The DIY Smart Speaker: Best of Both Worlds
Well, I know that you can buy your own Amazon Echo Dot and the Google Home Mini, but you might also be aware that those products aren’t available everywhere. What’s more is that with the above guide, you can create a speaker that gives you the power of both the voice assistants combined into a single device. Oh, and aren’t DIY projects always fun? I know I enjoyed a lot making my own smart speaker, and the end result was more than satisfactory. But what about you? Do share with us your experience of building your own smart speaker in the comments down below.


 Abubakar Mohammed
 Abubakar Mohammed
Abubakar Mohammed
Abubakar Mohammed

 Kanika Gogia
 Abubakar Mohammed
 Kanika Gogia

 Sagnik Das Gupta

can i use a arduino instead of raspberry pi 3
Yeah u can but that would be a heck of a workload and might not function properly.
No it does not has the ability of computation arduino is just a micro controller
I have reached the point of cloning at github. I have created an account, detail left out, but on the first command I am getting the error— remote: Repository not found. I am not familiar with github and it’s commands. What am I missing.
I have started building my Alexa Pi, update you soon….
I am able to run Google Assistant, but can not play songs from google music, it just says ‘looking for songs by artist xxxx’ and then ‘No match found’ and then restarts.
I dont have paid subscription for google music, is that the reason?. I have my playlists saved in google music.
Please help.
When I connected raspberry pi it’s not showing anything as connected in laptop
it cannot be directly connect to laptop . check out the other videos ….based on VNC
Can we do it with laptop without using external
keyboard and mouse
sir 32 gb only?
I have connected raspberry pi 3 with my laptop ,but there is no option to install debian on raspberry pi
help me!!!please
I’m not shure what you are doing. But If you hooked up your raspberry with your laptop through usb or something in the hope to install an OS. Nothing is going to happen. You need to install an OS like debian (for Raspberry pi — Raspbian) on an SD card or connect a monitor, keybord, mouse etc to your raspberry and install it through Noobs.
More info:
https://www.raspberrypi.org/documentation/installation/
first of all thanks for answering Wilbert, but i followed the above instructions which you are you telling for connecting raspberry pi to computer by installing noobs/raspberian os in sd card and plug into my raspberry pi .
Now there my problem arises after extracting os in my sd card and plug into my pi ,but after that when i connect my pi to monitor there is nothing happening on screen (means no setup showing)……
so can you help me on that where i am doing wrong.
Dear Bhavesh, Not sure what is going wrong. Can be a faulty sdcard or wrong format. Use the formattool to format the card FAT32 not NTFS. Check out the forum at: https://www.raspberrypi.org/forums/viewtopic.php?f=91&t=4751.
They have excellent help!
You have to connect it on an external display with the file on your sd card plugged in to the raspberry pi
You have to extract the debian on micro sd card and then insert the sd card in pi
Thanks for the great work on this smart speaker! I got GoogleAssistent running 100%. I only have a problem with Alexa. When I start the raspberry Pi I here “Hello” and when I use the wakeword “Ok Alexa” it gives the short tone. After that it stays quite. No answers or reactions to the wake word. When I reboot the raspberry I hear again “Hello” and I can can a reaction one time. It is just as If it cannot login/connect to amazon.
I guess that the “ProductID” asked for during the installation is the same “Product ID” as I entered at product information page at amazon and not some complex code as in Client ID
Found what I was doing wrong. I used raspbian lite (no desktop) and installed everything trough ssh. That want work for the authenticating process. Tried it with desktop version and that works ok for Alexa. But ….. now Gassist refuses. I cant start it manually “source env/bin/activate” gives me the error “no such file or directory”. When I check there is no directory “env” in /home/pi.” /home/pi/env/bin/python -u /home/pi/GasssistPi/src/main.py –project_id ‘xxxx’ –device_model_id ‘xxxxxx’” same problem. What Am I missing?
After All Setup , what changes has to do IN README FILE.
Maybe a silly question but where do I download the credentials.json file. I’ve been searching and searching on my google developer site but I can’t find it….
Found it..
This helps emensly…. NOT! So where did you find it. Just for those with the same error.
I entered the command as mentioned in the readme file for raspberry pi 3b and it says no file or directory named “gassistpi –whatever”.
What to do?
In audio test , inm unable to listen the sound and it is asking to check the sound.conf and asoundrc files but nothing helped me.. Plzz help me
i have a project on this on tuesday
i tried this process on raspian. i tried installing noobs but i m facing problems . And this process failed in raspian . can anyone help
I’m getting this err when I try running “/home/pi/env/bin/python -u /home/pi/GasssistPi/src/main.py –project_id ‘xxxx’ –device_model_id ‘xxxxxx’
File “/home/pi/GassistPi/src/main.py”, line 25, in
import psutil
“import error no module named ‘psutil’
please help.
Alexa is working fine and it start up correctly during bootup.
how did you get the access token?
Dear Sir, I “build” a Google Assistant on a Raspberry Pi 3 B. I want to use the broadcast command in view to send a message to 3 devices, one Google Home mini and 2 RPi devices. In Google Home on Android the genuine Google Home can be assigned to a room. The RPi it is seen as virtual device and cannot be assigned to a room. How I can do that? Have you an idea about that? Thank you for any advice. Cezar
what is the model id???
What is the device model id??
Hey, i have the same question. Did you find it? Please help me by letting me know
After running the first code (i.e. git clone https://github.com/shivasiddharth/Assistants-Pi)
its asking for a username
.
Please Help
It won’t ask… It’s just a folder that is getting copied.
Alexa Works on boot up of Raspberry pi3 but Google Assistant does not work . I made changes according to readme file located at directory. If i manually run the command “source env/bin/activate” “google-assistant-demo” then it works. Whats exactly i am missing can you tell please?
Can we use Bluetooth speaker with the mic or separately we should buy USB mic and speaker?
The setup of Raspberry Pi 3 has been completed. Then I have also installed the Google Assistant API. After that what is the next step to continue to make assistant?
#ASK BEEBOM?
is it possible to use microsd 4gb, 8gb or 16gb?
Sadly, much space is needed for the software, so atleast 32gb is needed.
a 16GB card should work fine.
a 4GB card will definitely not work.
an 8GB card might or might not work, considering it has a decent amount of storage space available but was not tested by us at the time of building the smart assistant.
I AM Using *GB MicroSD Card And It Ca Be Possible It Works Fine ! Also You Should Have Minimum Of 8GB MicroSD Card
can i use it as a normal bluetooth with my android or i phone?
You’ll have to manually switch modes between the AUX input and the Bluetooth input, the toggle for which is present on the rear side of the speaker we’ve used.
If I want to install Google Assistant or Alexa only , Can I press 1 or 2 in installation section?
#AskBeebom
Yes, you can.
#BeebomAnswers 😉
How can I start it in boot also how to connect to wifi automatically
And Beebom Thanks for Everything
Once you’ve installed Debian using the NOOBS package, connect to WiFi on the first boot by heading over to settings or the quick launch tray.
As for making the assistant startup on boot, simply follow the steps mentioned in the README file.