These days, smart assistants are taking the tech world by storm. Amazon’s Alexa and Google’s Assistant are now being embedded within every device, be it car devices, showers, or practically almost everything that was unveiled at CES 2018. But despite all that, the most selling devices sporting these assistants are the company’s own products, that is, the Amazon Echo and the Google Home.
While both the smart speakers are great by themselves, wouldn’t it be great to have the power of them both on one device? Well, now you can. We, at Beebom, have created our own guide of how to create your own smart speaker having the capabilities of both Google Assistant and Amazon Alexa. So without any further ado, let’s get right into it.
Note: The following project has been created with the help of a GitHub project.
Things You Need:
- Raspberry Pi 3 (link)
- microSD Card 32GB (link)
- USB Wall Charger (link)
- 3-port USB Hub (link)
- USB-A to microUSB Cable (link)
- USB Microphone (link)
- Portable Speaker with AUX input (link)
- Keyboard and Mouse (link)
- Display with HDMI port (link)
- HDMI Cable (link)
Steps to Build Smart Speaker:
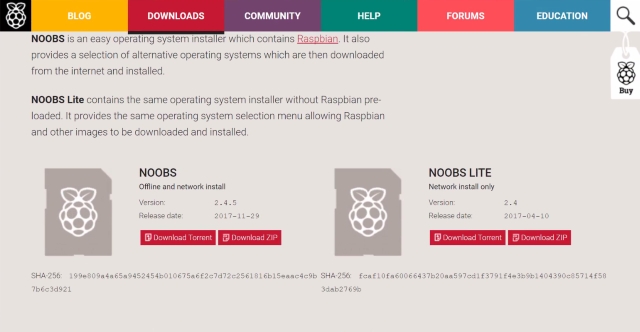
1. To start off, you’ll first need to set up your Raspberry Pi. To do so, simply download the NOOBS package, extract it to your microSD card and plug it into your Raspberry Pi. Hook up the USB Keyboard, Mouse, Mic and the Speaker to the Pi and turn it on. You will now get a first time setup. Simply select Debian and install to start the installation of Debian on your Raspberry Pi.
2. Now, you need to create your Amazon Developer Account and create a security profile. You can follow the GitHub project instructions as well. Once done, note down your Amazon account’s credentials.
Next up, create a Google Developer Account and enable the Google Assistant API. Once you’re through with that, download the credentials.json file of your Google Product to /home/pi and rename it to assistant.json.
3. Now, run the following commands one by one to clone the GitHub project and make the installer files executable:
git clone https://github.com/shivasiddharth/Assistants-Pi
sudo chmod +x /home/pi/Assistants-Pi/prep-system.sh
sudo chmod +x /home/pi/Assistants-Pi/audio-test.sh
sudo chmod +x /home/pi/Assistants-Pi/installer.sh
sudo /home/pi/Assistants-Pi/prep-system.sh
First, OS will be updated and upgraded. Thereafter, you will be prompted to select the audio setup. Select “3” from the options. Now, restart the Raspberry Pi.
4. Upon reboot, first, check your audio setup by
sudo /home/pi/Assistants-Pi/audio-test.sh
The script is interactive, just press “y” if you hear the audio, or “n” if you don’t. In case you don’t hear the audio, you need to check the wires.
5. Now that your system is ready, run the following command to start the installer:
sudo /home/pi/Assistants-Pi/installer.sh
The script will now execute. It is a pretty straightforward script, simply follow the on-screen instructions.
6. Once both the assistants have been installed, you’ll be shown a screen as below. Run the commands one by one to authenticate Alexa. Once you’re through with that, make the changes in the README file located at /home/pi/Assistants-Pi to start the assistants on boot.
And that’s it. Your 2-in-1 smart speaker is ready. Also, while you can use the entire setup barebones, we decided to wrap things up inside a nice little cardboard box and apply a black chart paper while Beebom-ify-ing things up. You can also check out our video of the same below, to see our speaker in action:
SEE ALSO: Google Home vs Amazon Echo: Google Assistant Takes on Alexa
The DIY Smart Speaker: Best of Both Worlds
Well, I know that you can buy your own Amazon Echo Dot and the Google Home Mini, but you might also be aware that those products aren’t available everywhere. What’s more is that with the above guide, you can create a speaker that gives you the power of both the voice assistants combined into a single device. Oh, and aren’t DIY projects always fun? I know I enjoyed a lot making my own smart speaker, and the end result was more than satisfactory. But what about you? Do share with us your experience of building your own smart speaker in the comments down below.
Please pray for me I am starting to do this project I hope that I will not encounter any mistakes.
hi! may I ask if we can change the name? instead of alexa/google we want to use fairi. can we do this? how?
Can I run this on a raspberry pi Zero W?
Not working ☹️ I have done but the Alexa doesn’t respond
Same problems have you any solution?
For this process we need to on hospot are not
ENTERED THE COMMAND : /home/pi/env/bin/python -u /home/pi/GassistPi/src/main.py –device_model_id ‘ ENTERED MODEL ID ‘
AND GOT THIS…..
Traceback (most recent call last):
File “/home/pi/GassistPi/src/main.py”, line 33, in
import psutil
File “/home/pi/GassistPi/src/psutil/__init__.py”, line 96, in
from . import _pslinux as _psplatform
File “/home/pi/GassistPi/src/psutil/_pslinux.py”, line 26, in
from . import _psutil_linux as cext
ImportError: cannot import name ‘_psutil_linux’ from ‘psutil’ (/home/pi/GassistPi/src/psutil/__init__.py)
PLZ KINDLY HELP ME OUT WITH THIS..!!
sudo /home/pi/Assistants-Pi/installer.sh getting error saying command not found
Please help I had figured out the rest of the scripts by adding /scripts after /Assistants-Pi/scripts
Please help
same
hello
thank you i was stuck on the same part and then you told me about the /scripts part and that worked for me
maybe you are typing in the wrong command
thanks,
Akash
can the assistants increase/decrease the volume??
it will showing thee summ python error how to fix it brooooo
Can we use arduino if yes please tell procedure
no
aurdino is a microCONTROLLER
it does not have the computation power to do that
no
aurdino is a microCONTROLLER
it does not have the computation power to do that
yon need a microPROCESSOR to do these things
Hi I’m being asked for a user name and password.please help
Hi after entering first line of instruction I’m being asked for a user name and password.please help
It’s working!!!!!!!
‘AVM file not running’ error is showing up when I run tests for Alexa and ‘No command found’ for Google Assistant. What should I do?
Do a proper video of installation because many things are going on the right way with us. And I m not able to understand the last 9 step on the readme file.
So I can run my smart gadgets that are connected to google assistant and Alexa ?
thnks beebom for such tech ur teaching us
in public for free
i am so greatfull to be ur youtube subscriber
hey getting this error not hearing the voice i am using the mic given in the link please help stuck from days
=============Recording Mic Audio Sample=============
Recording WAVE ‘/home/pi/mic-test.wav’ : Signed 16 bit Little Endian, Rate 16000 Hz, Mono
Warning: rate is not accurate (requested = 16000Hz, got = 44100Hz)
please, try the plug plugin
Finished recording the samples.
Playing back the recorded audio sample……
Playing WAVE ‘/home/pi/mic-test.wav’ : Signed 16 bit Little Endian, Rate 44100 Hz, Mono
Did you hear the recorded audio sample?
[y/n] >>
reset your pi and then do all the things again
Show the assembly part of the speaker in the box please
After installing both Assistants to run the alexa in three different terminals… I’m getting a error called JAVA_HOME environment variable is not set.. plz help me with this error!! Beebom help me
Same error here as well.
I have commented for help about a month ago… no one responded from beebom! hence I assumed that beebom is not useful at all and a waste of time following that.
This Error Is Quite Easy To Solve On Windows So If You Use Windows Then Just Search For Environment Variables In The Start Menu And Open The First Search Result. Locate The Path Where You Java Is Installed And Go To “Bin” Subfolder And Then Copy The Path And Paste It There And Name It As “JAVA_HOME”. And Restart The PC. And As For Linux Users, Just Search Google For How To Add Environment Variables In Linux.
Is the Alexa in AssistantsPi a recent version from the SDK? Does it have the drop-in and announce feature?
Also, Does anyone know how to get it ti work with the google AIY v1.0 voice hat?
I am able to run Google Assistant, but can not play songs from google music, it just says ‘looking for songs by artist xxxx’ and then ‘No match found’ and then restarts.
I dont have paid subscription for google music, is that the reason?. I have my playlists saved in google music.
Please help.
So what happened ? You fixed it ?
Hello, It Is Asking For Username & Password For Cloning The GitHub Project What Should I Enter ?
can i use a arduino instead of raspberry pi 3
Yeah u can but that would be a heck of a workload and might not function properly.
No it does not has the ability of computation arduino is just a micro controller
I have reached the point of cloning at github. I have created an account, detail left out, but on the first command I am getting the error— remote: Repository not found. I am not familiar with github and it’s commands. What am I missing.
I have started building my Alexa Pi, update you soon….
I am able to run Google Assistant, but can not play songs from google music, it just says ‘looking for songs by artist xxxx’ and then ‘No match found’ and then restarts.
I dont have paid subscription for google music, is that the reason?. I have my playlists saved in google music.
Please help.
When I connected raspberry pi it’s not showing anything as connected in laptop
it cannot be directly connect to laptop . check out the other videos ….based on VNC
Can we do it with laptop without using external
keyboard and mouse
sir 32 gb only?
I have connected raspberry pi 3 with my laptop ,but there is no option to install debian on raspberry pi
help me!!!please
I’m not shure what you are doing. But If you hooked up your raspberry with your laptop through usb or something in the hope to install an OS. Nothing is going to happen. You need to install an OS like debian (for Raspberry pi — Raspbian) on an SD card or connect a monitor, keybord, mouse etc to your raspberry and install it through Noobs.
More info:
https://www.raspberrypi.org/documentation/installation/
first of all thanks for answering Wilbert, but i followed the above instructions which you are you telling for connecting raspberry pi to computer by installing noobs/raspberian os in sd card and plug into my raspberry pi .
Now there my problem arises after extracting os in my sd card and plug into my pi ,but after that when i connect my pi to monitor there is nothing happening on screen (means no setup showing)……
so can you help me on that where i am doing wrong.
Dear Bhavesh, Not sure what is going wrong. Can be a faulty sdcard or wrong format. Use the formattool to format the card FAT32 not NTFS. Check out the forum at: https://www.raspberrypi.org/forums/viewtopic.php?f=91&t=4751.
They have excellent help!
You have to connect it on an external display with the file on your sd card plugged in to the raspberry pi
You have to extract the debian on micro sd card and then insert the sd card in pi
Thanks for the great work on this smart speaker! I got GoogleAssistent running 100%. I only have a problem with Alexa. When I start the raspberry Pi I here “Hello” and when I use the wakeword “Ok Alexa” it gives the short tone. After that it stays quite. No answers or reactions to the wake word. When I reboot the raspberry I hear again “Hello” and I can can a reaction one time. It is just as If it cannot login/connect to amazon.
I guess that the “ProductID” asked for during the installation is the same “Product ID” as I entered at product information page at amazon and not some complex code as in Client ID
Found what I was doing wrong. I used raspbian lite (no desktop) and installed everything trough ssh. That want work for the authenticating process. Tried it with desktop version and that works ok for Alexa. But ….. now Gassist refuses. I cant start it manually “source env/bin/activate” gives me the error “no such file or directory”. When I check there is no directory “env” in /home/pi.” /home/pi/env/bin/python -u /home/pi/GasssistPi/src/main.py –project_id ‘xxxx’ –device_model_id ‘xxxxxx’” same problem. What Am I missing?
After All Setup , what changes has to do IN README FILE.
Maybe a silly question but where do I download the credentials.json file. I’ve been searching and searching on my google developer site but I can’t find it….
Found it..
This helps emensly…. NOT! So where did you find it. Just for those with the same error.
I entered the command as mentioned in the readme file for raspberry pi 3b and it says no file or directory named “gassistpi –whatever”.
What to do?
In audio test , inm unable to listen the sound and it is asking to check the sound.conf and asoundrc files but nothing helped me.. Plzz help me
i have a project on this on tuesday
i tried this process on raspian. i tried installing noobs but i m facing problems . And this process failed in raspian . can anyone help
I’m getting this err when I try running “/home/pi/env/bin/python -u /home/pi/GasssistPi/src/main.py –project_id ‘xxxx’ –device_model_id ‘xxxxxx’
File “/home/pi/GassistPi/src/main.py”, line 25, in
import psutil
“import error no module named ‘psutil’
please help.
Alexa is working fine and it start up correctly during bootup.
how did you get the access token?
Dear Sir, I “build” a Google Assistant on a Raspberry Pi 3 B. I want to use the broadcast command in view to send a message to 3 devices, one Google Home mini and 2 RPi devices. In Google Home on Android the genuine Google Home can be assigned to a room. The RPi it is seen as virtual device and cannot be assigned to a room. How I can do that? Have you an idea about that? Thank you for any advice. Cezar
what is the model id???
What is the device model id??
Hey, i have the same question. Did you find it? Please help me by letting me know
After running the first code (i.e. git clone https://github.com/shivasiddharth/Assistants-Pi)
its asking for a username
.
Please Help
It won’t ask… It’s just a folder that is getting copied.
Alexa Works on boot up of Raspberry pi3 but Google Assistant does not work . I made changes according to readme file located at directory. If i manually run the command “source env/bin/activate” “google-assistant-demo” then it works. Whats exactly i am missing can you tell please?
Can we use Bluetooth speaker with the mic or separately we should buy USB mic and speaker?
The setup of Raspberry Pi 3 has been completed. Then I have also installed the Google Assistant API. After that what is the next step to continue to make assistant?
#ASK BEEBOM?
is it possible to use microsd 4gb, 8gb or 16gb?
Sadly, much space is needed for the software, so atleast 32gb is needed.
a 16GB card should work fine.
a 4GB card will definitely not work.
an 8GB card might or might not work, considering it has a decent amount of storage space available but was not tested by us at the time of building the smart assistant.
I AM Using *GB MicroSD Card And It Ca Be Possible It Works Fine ! Also You Should Have Minimum Of 8GB MicroSD Card
can i use it as a normal bluetooth with my android or i phone?
You’ll have to manually switch modes between the AUX input and the Bluetooth input, the toggle for which is present on the rear side of the speaker we’ve used.
If I want to install Google Assistant or Alexa only , Can I press 1 or 2 in installation section?
#AskBeebom
Yes, you can.
#BeebomAnswers 😉
How can I start it in boot also how to connect to wifi automatically
And Beebom Thanks for Everything
Once you’ve installed Debian using the NOOBS package, connect to WiFi on the first boot by heading over to settings or the quick launch tray.
As for making the assistant startup on boot, simply follow the steps mentioned in the README file.
I am in grade 9. Can you please explain to me how to do the assistant with the laptop Dell intel core i5?
If the beebom is the best, then beebom will explain me briefly
Your question is a little unclear, but from what I can make out, it seems as if you’re trying to ask how to set up the assistant using just your laptop. If that is the case, while you can use the laptop for installing Debian on the Raspberry Pi 3 using the NOOBS package as mentioned in the tutorial above, you’ll still need a USB Keyboard, Mouse, and HDMI compatible screen to continue the setup on the Raspberry Pi.
Hope that helps. Do feel free to comment back in order to allow us to assist you better.
What are the changes to be done in Read me file please answer.
Thanks for all the help you have been providing. I have successfully created a Alexa powered smart speaker and it is working exceedingly well and got connected to the Alexa app too. But when I ask it to play some music, it says that Amazon music is not supported on this device and says the same for Saavn too. I can just play through TuneIn. How to resolve this issue?
In the Alexa app, there should be a way to log in via Spotify. Alternatively, you can purchase a membership for Amazon Music and play songs locally as well.
There isn’t one in mine and doesn’t give me the option to activate prime music either.It says it is not supported on this device
How can i connect the assistant to a Bluetooth speaker or any speaker by an aux cable
Plz reply
Connection to Bluetooth speakers is not possible at the moment. You can, however, connect any speaker via the aux cable into the 3.5mm jack on the Raspberry Pi.
when i run the audio test and i m unable to hear the sound and it is asking to check soundconf and .asoundrc files . plzz hlp me
bro , i want to connect a home theater to that instead of a portable speaker , so definitely i will have to power that to a switch board ,now the issue is:
if there is a power cut in my house will the program in the raspberry pi run again automatically once the power comes or should i do any thing to start it again.
Just make sure you are able to carry out the installation and setup process without any power cuts. Once you’re through with that, Alexa and Google Assistant will be set-up in order to start automatically at the time of booting. So even in the case of a power failure, whenever the power comes back on and the Raspberry Pi boots up, Alexa and Google Assistant will start simultaneously without fail.
I just setup my speaker for Alexa and not for Google assistant. How to make Alexa bootup automatically on start?
In the README file, you’ll find a couple of commands that need to be added to the Raspbian’s system in order to make Alexa’s script executable on boot.
what is it ? plss helpp meee
Can I directly use my laptop instead of keyboard, mouse and monitor?? If no then can I use my T.V. with HDMI port instead of monitor??
You cannot use your laptop. However, you can easily use your TV via HDMI as a monitor alternative.
Why do we need a usb hub
Reply
A USB Hub is used simply to supply power to both the speaker and the Raspberry Pi at the same time. If you want, you can choose to use separate wall chargers for both.
Thank you
Can i use a bluetooth speaker having an in-built microphone instead of using wireless mic as you have done?
Bluetooth speakers are currently not supported by both Alexa and Google Assistant, and neither would you get an option for it within the script. You’ll have to rely on a wired 3.5mm speaker for it.
then can I output audio through the 3.5mm port to headphones and for audio input use a speaker having mike (connect it to the USB port)?
What about Bixby. Can we add Bixby somehow to this??
Bixby, Cortana, and Siri are all closed AIs, so as of now there is no way to add either of them.
Google and Amazon provide open-source APIs for Assistant and Alexa respectively, hence this project includes both of them.
Will this work on a Raspberry Pi 2 or a raspberry Pi 0W ?
For Pi 2, you’ll have to buy a WiFi Adapter to connect it to the internet. Other than that, it’ll work just fine.
Hey, what changes do I have to make according to the readme file? It says enter project id and model ID but I am confused which of the following: client id, client secret and product ID do I have to enter there. Also, can I use the mic inbuilt in my speaker?Please reply
the ” client id, client secret and product ID” are related to your Amazon account.
on the other hand, “project id and model ID” are you google account details.
Basically, your project id = What you named your product as while creating it in the google page
the model id = your raspberry Pi’s model, ie, Pi3
But I just setup my speaker for Alexa and not for Google assistant. How to make Alexa bootup automatically on start?
Hey, what changes do I have to make according to the readme file? It says enter project id and model ID but I am confused which of the following: client id, client secret and product ID do I have to enter there. Also, can I use the mic inbuilt in my speaker?
Do i need the display after setting up the raspberry pi
No
How it is connected to the Internet?
Once you’ve installed Debian on your pi using the NOOBS Package, you can connect it to the WiFI during the first run.
Cam u plz send the picture of the wiring
a.chiraanth@gmail.com
Can any speaker work with the pi?
Any speaker that can be connected via the 3.5mm jack.
is we use it for home automation?
by linking it to a server ?
You can use it for home automation the same way you would use the standard Amazon Echo or the Google Home, by simply pairing them up with the smart device.
After making the device how should you connect it to the app
If not how to interact with it
For Alexa, download the Alexa app on Android/iOS and login with your Amazon Developer Account.
For Google, download the Google Home app on Android/iOS and login with your Google Account.
While the speaker should automatically show up within the Alexa app, you’ll be required to search for the speaker using the nearby feature in the Google Home app.
Can I use a bluetooth mouse and speaker connected to my laptop
A bluetooth mouse might work if the manufacturer of your mouse supports Linux distros, since Raspbian is based on Debian which is a Linux distro.
As for the speaker, you’ll be required to make use of a wired 3.5mm speaker only. As you can see in the screenshot of Step 3, the script currently does not support bluetooth speakers or mics.
Wat ABT a bluetooth keyboard
Will a Bluetooth mouse “Logitech M170 ” work?
What about building a smart android tv box using raspberry pi 3 that would be an amazing project and I request all of you awesome guys to put a tutorial on it.
No plz answer my question
I love this project
Can u giv a tutorial for that also
Can I do this without a pc. I mean, I’ve Android phone. Can we do this on my phone?
You can run the commands using JuiceSSH on your Android phone. However, you’d still be needing a PC for setting up the microSD card for the Raspberry Pi in the first place.
Can i use a usb sound card & a headphone instead of usb mic…
Yes, you can. In the audio setup, press “5” instead of 3 as described in the above method.
Instead of keyboard, mouse and monitor can we use a pc or computer? ??? Plz rply
You’ll need the keyboard, mouse and monitor for the initial setup. Later on, you can simply run the scripts using SSH or VNC.
Alternatively, you can also install Raspbian on your Raspberry Pi in CUI (console) mode, and then connect it using SSH. However, you’ll still be requiring a PC for setting up the microSD card in the first place.
once everything is setup, would we need to keep the keyboard monitor and mouse plugged in?
Nope, no need for that.
What if i want to use a speaker with inbuilt mic and bluetooth? I’m specifically talking about jbl flip 3. Please help which option to choose to get the mic working with the raspberry.
the mic won’t work in that case. the reason for that is that the 3.5mm jack on the Raspberry Pi is for output only and not input. Furthermore, Bluetooth can’t be used as a mode of communication for this. You’ll have to rely on a speaker that connects with the 3.5mm jack and a USB Mic.