Once you have the accessories you need to get your photography hobby off the ground, you’ll likely want to expand your arsenal and upgrade a few of the things you have. If you’re not sure what to get next, or don’t even know what’s out there, these eight DSLR accessories will prove very helpful in your quest to become a better photographer.
8 DSLR Accessories for Intermediate Photographers
Prime Lens
It was tough not including this in the beginners’ DSLR accessories article, as a prime lens is one of the things that will improve your photography skills the most. Prime lenses are the opposite of zoom lenses: they have a single focal length. This means you’ll have to do a lot of repositioning to get the angle and composition you want, which is great for developing your photographic eye.

There are a number of different prime lens options, but 50mm is generally the one recommended as the most versatile. A lens of this size is usually rather inexpensive compared to other lenses—the Nikon Nikkor AF FX 50mm lens, for example, is $132. A similar 50mm lens from Canon is $125.
You can also get third-party lenses that are even more inexpensive, though you’ll sacrifice glass quality and lens speed, making it less of a good deal. However, if money is an issue, a lens like the Yongnuo EF YN 50mm for Canon Rebel cameras can be found for $54, and other similar lenses are available for other cameras.
Wide Angle Lens
Although they’re significantly more expensive than prime lenses, wide angles are a great investment for an intermediate photographer, especially if you enjoy photographing landscapes: they allow you to capture a lot more of the scene, making for impressive views. They can also be used to great effect in urban photography.
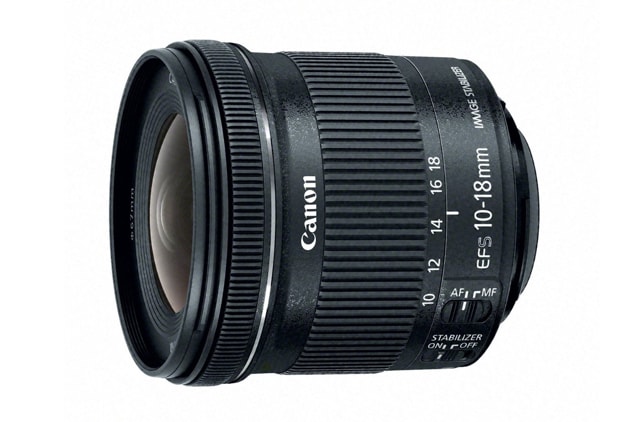
Even a basic wide angle lens can be hundreds of dollars: Canon’s EF-S 10-18mm lens runs $300, and the Rokinon 14mm prime wide angle for Nikon cameras is a full $400. There are less expensive options, but many of them are clearly very low-quality lenses, and you should probably plan on spending at least $250 on a wide angle lens.
If you’re not willing to drop that much money on a wide angle lens, consider looking on eBay, Craigslist, or another re-selling site. There’s often a thriving trade in used camera lenses, and if you can even save 20%, it will make a big difference in your budget.
External Flash
The built-in flash on most DSLRs isn’t very powerful—in general, they’re not really made to light up a scene, but rather to fill in minor shadows if your lighting isn’t great. An external flash will not only fill in more shadows, but it can also provide more light in a low-light setting. The light that it provides is also of a higher quality, and will have a big positive impact on your photography.
As you might expect, there are a lot of different kinds of flashes that you can add to your camera. A quick search on Amazon for “hot shoe flash” (the hot shoe is where the flash attaches to your camera) brings up thousands of results. To find the right one for you, you’ll want to first search for “[your camera brand] hot shoe flash.”

You’ll notice that there can be quite a big difference in the prices of external flashes—the first thing that will contribute to the difference in whether the flash is manual or TTL controlled. A manual flash requires you to adjust the settings on the flash and the camera to get proper exposure. A TTL flash will make these adjustments automatically.
For an inexpensive flash to get started, the AP-UNV1 Speedlite bundle ($40) is a great option. It’s a manual flash, so you’ll have to learn how the flash affects the exposure on your camera, but it includes a number of useful accessories, like a stand and a remote. For $50 more, the Altura Professional Flash Kit ($90) gives you TTL control, a more powerful flash, and even more accessories. For even higher-quality flashes with more durability, check out the options from the manufacturer of your camera.
Remote Flash
You may notice that some of the external flashes come with stands and cords for remote operation—this can be hugely useful for lighting a subject from different angles. And while you can use your external flash for this purpose, it can be very helpful to have a second flash to use as a remote, helping you fill in or create shadows from two different directions.

As with hot shoe flashes, remote flashes come in a variety of options and prices; the Neewer 5500k 2.4G wireless flash ($60), for example, includes an adjustable flash diffuser and a charger for an external power pack so you don’t have to plug the flash in to keep it powered. Its high-sensitivity trigger also ensures that the flash goes off at the proper time.
If you’re interested in getting an external flash for your camera as well as a remote flash, you may want to consider the Altura Studio Pro kit ($150), which includes two of everything you need: flashes, remotes, remote control cables, and diffusers.
Flash Diffuser
Most external flashes come with diffusers, but even if you decide not to buy an external flash, using something to bounce the harsh light around the area instead of directly off of your subject will come in handy. It’s especially good for bouncing light off the ceiling when you’re taking pictures indoors, where light from the flash can be especially bright.

A diffuser for your built-in flash can be as simple as this $7 one from Movo, which simply slips onto your camera and places a translucent white screen in front of the pop-up flash. If you decide to use an external flash, though—which I recommend—you’ll need something a bit more complicated.

There are some model-specific diffusers, but it’ll probably be better to go with a general one, like the Neewer 8″ x 6″ Softbox ($9). The cloth diffuser fits on many different models of external flash, and is secured with velcro. It’s easy to put on, take off, and use. If you’d like one that works with a specific model of flash, just search for “[model of your flash] flash diffuser.”
Monopod
A tripod is definitely a must-have accessory for your camera, but you may find that it’s too bulky to walk around with. If you like to bring your camera with on hikes, for example, bringing a tripod could be an inconvenience. That’s where a monopod comes in handy.

A monopod is like a tripod, but instead of having three legs, it only has one. This means you still have to stabilize it with your hands, but you’ll get a bit more camera-shake-reducing stability than you would just holding your camera. You can use longer exposures without having to carry a tripod around.
Just like tripods, monopods vary greatly in price, from this $15 Dolica model to this $100 carbon fiber one from SIRUI. As with any other camera accessory, you get what you pay for. A cheaper model will work just fine, though it may not have the durability of a more expensive heavy-duty option.
Battery Grip
In my previous DSLR accessories for beginners article, I recommended getting an extra battery for your camera to make sure that you never accidentally go out into the field with a dead battery. If you’re willing to spend a bit more money, you can invest in a battery grip, which will extend the battery life of your camera to about 200% of its current capacity.

A battery grip is a large attachment that will significantly change the shape and weight of your camera, but it can also make for easier vertical shooting. As you can see in the image above, a battery grip will make a non-full-frame camera about the same size as a standard full-frame one.
As with other items that are specific to different camera models, just searching for “[your model camera] battery grip” will get you a list on Amazon. In general, it’s not too hard to find an affordable third-party model: this Neewer vertical grip with room for two batteries and a vertical shutter button for my own camera is only $26. This Andoer grip without a shutter button is only $17. Both of these options are significantly cheaper than the $270 official Nikon battery grip.
Filter Set
In the DSLR accessories for beginners article, I recommended a screw-on polarizing filter. If you’re looking to step up to the next level in filters, a graduated neutral-density filter set will give you a lot of great options. These filters are absolutely indispensable for landscape photography, as they help you get equal exposure on a bright sky and a darker foreground.

A high-quality set of graduated filters, including a lens adapter, from Cokin, a respected manufacturer, will run you $57, which is very reasonable for the amount of versatility you’ll get from the three different filters included. Cokin is an industry standard, and many filters from other companies will fit the Cokin adapters, which is nice. If you’re looking for a more affordable option, Goja makes an adapter kit with three graduated filters and three non-graduated filters for $20.
SEE ALSO: 9 Best Entry-Level DSLR Cameras of 2016
Ready for Action
With even a few of these accessories, you’ll be much better outfitted for your photography hobby. Whether you get a flash diffuser to take better portraits indoors, a set of filters for landscape photography, an external flash for every kind of picture you’d want to take, a monopod for a little additional stability, or any of the other accessories listed here, you’ll be well on your way to increasing the quality of your photography.