Microsoft released Windows 11 last year with a long list of system requirements. Of the listed ones, two controversial requirements were the supported CPUs and TPM. As a result, several users ended up modifying the Registry files to install Windows 11 on unsupported PCs. In the recent update, Microsoft has now started adding a watermark to the desktop and Settings app for those using Windows 11 on PCs that don’t meet the official system requirements. In this article, we have detailed the steps for how you can remove the “system requirements not met” watermark in Windows 11.
Remove ‘System Requirements Not Met’ Watermark in Windows 11 (2022)
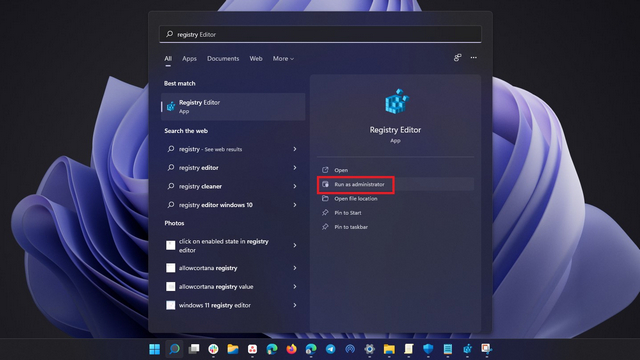
1. To get started, press the Windows key and search for “Registry Editor” or “Regedit” in Windows Search. When the search results appear, click on “Run as administrator” to open the Registry Editor in Windows 11.
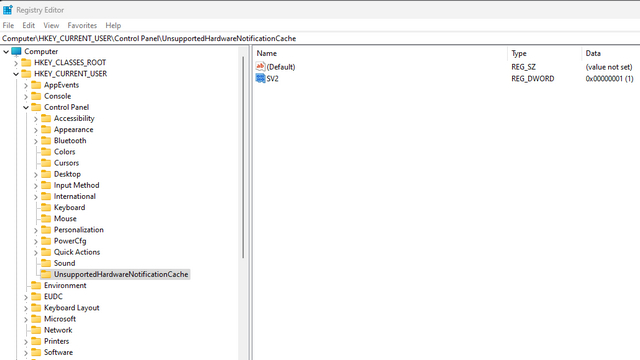
2. When the Registry Editor opens, navigate to the following path. In case the UnsupportedHardwareNotificationCache key is not present in your PC’s Registry Editor, we have a dedicated section below to create one.
Computer\HKEY_CURRENT_USER\Control Panel\UnsupportedHardwareNotificationCache
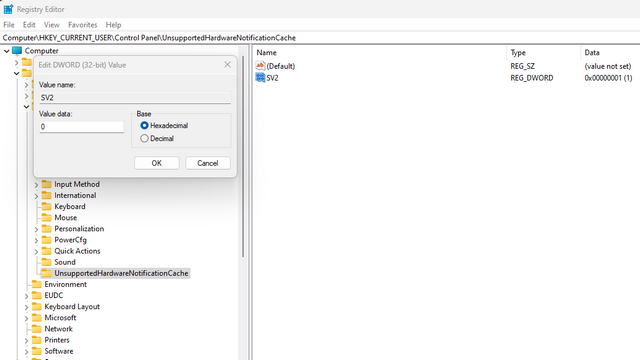
4. Now, double-click on “SV2” in the right pane and enter “0” as its value data. Keep in mind that SV2 (Sun Valley 2) refers to Windows 11 Insider Dev builds (22557 and newer). You should use “SV1” as the DWORD value if you are on Windows 11 22000.x series builds on the Beta and Release Preview channels. Restart your Windows 11 PC to apply the changes, and you will no longer see the ‘System Requirements Not Met’ watermark in Windows 11.
Can’t Find UnsupportedHardwareNotificationCache? Create the Key in Registry
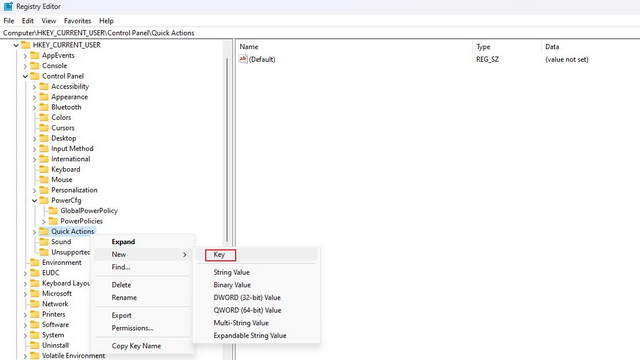
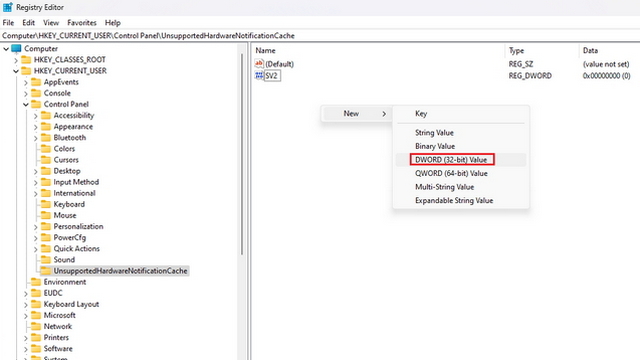
1. In case the UnsupportedHardwareNotificationCache key isn’t available, you can manually create it to disable the ‘System Requirements Not Met’ watermark in Windows 11. To do that, right-click “Quick Actions” and choose New -> Key. Set the newly created key’s name as “UnsupportedHardwareNotificationCache”.
2. Once you have done that, you will have to use New -> DWORD (32-bit Value) and name it SV1 (stable, Beta, or Release Preview builds) or SV2 (Insider builds). Now that you have the DWORD value, you can follow the steps above to change its value to 0 in order to get rid of the watermark.
Get Rid of the Unsupported System Watermark in Windows 11
So, those are the steps you need to follow to remove the “system requirements not met” watermark on your Windows 11 computer. If you have any queries about this process, let us know in the comments, and we will help you out. Meanwhile, if you have installed Windows 11 just recently, go through our linked articles to learn how to update drivers on Windows 11 and the upcoming Windows 11 features you can look forward to.