To be frank, I like the new context menu on Windows 11. It is a good mix of old and modern UI elements and offers you a new “Copy as Path” option as well. Having said that, there are users who want the Windows 10 context menu on Windows 11 because of the multiple other options it has to offer. So if you are one of those users who want to disable “Show more options” and get back the old full-size context menu on their Windows 11 PC, follow this tutorial and restore it in seconds. Besides, you can also learn how to make Windows 11 look like Windows 10.
The Difference Between New and Old Context Menu
With Windows 11, Microsoft added a new context menu that follows the refreshed Fluent design language. It comes in a minimal design, has rounded corners, transparent UI, and design elements that follow the mobile interface. What’s noteworthy is that Microsoft has gone ahead and removed some of the traditional options from the right-click menu. For example, if you right-click on a file or folder, you won’t see the option to adjust the advanced sharing option or the option to create a shortcut right away.

The problem gets worse when you want to use an action from a third-party app. For example, the new context menu does not show any action from apps like WinZip or 7-Zip. You need to click on “Show more options” to see the old context menu and then perform any custom 7-Zip actions, which takes too many clicks and defeats the purpose.
Not to mention, Microsoft has also removed basic options like cut, copy, paste, etc., and moved them to the top of the context menu. So, users now need to take a design cue (basically, relearn) to understand what each button means and does. While most users will get used to the new context menu, I think elderly users will have a tough time performing actions with the new right-click menu.
So if you want to get back the trusty old context menu from Windows 10, follow our guide below.
Windows 11 “Show More Options” By Default
The quickest way to get Windows 11 to show more options by default is by simply using the command prompt.
- Open the command prompt as administrator and paste in the following code
reg add HKCU\Software\Classes\CLSID\{86ca1aa0-34aa-4e8b-a509-50c905bae2a2}\InprocServer32 /ve /d "" /fThis is basically the same thing as we have explained in the registry edit method later in this article. However, using this command on the command prompt makes the entire process much simpler and faster.
Bring Back Old Context Menu on Windows 11
Without getting your hands dirty, you can bring back the old context menu on Windows 11 with a third-party app called Winaero Tweaker. The popular program has added a Windows 11 tweaking section, and as always, it works like a charm. I tested this software on both stable (22000.194) and Dev builds of Windows 11, and I didn’t face any issues. So follow the steps below to get back the old right-click menu:
1. First, go ahead and download Winaero Tweaker (Free). After that, extract the ZIP file and run the EXE file. Now, install the program just like you install other apps.
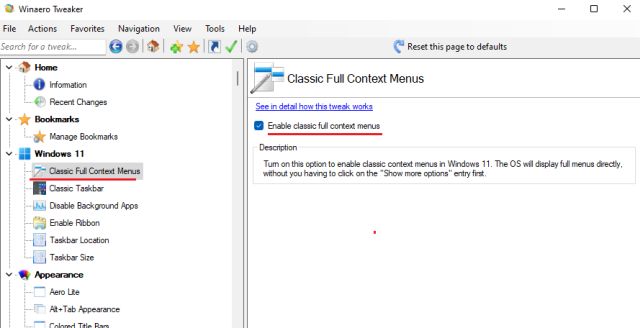
2. Next, open the program and move to the “Windows 11” section on the left pane. Then, jump to “Classic Full Context Menus” under the Windows 11 section and enable the checkbox on the right pane.
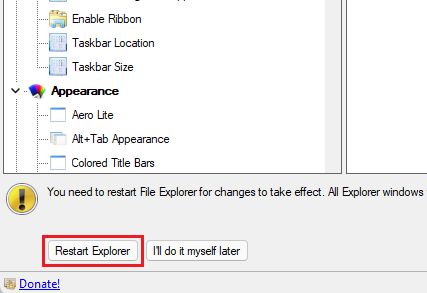
3. After enabling the checkbox, you will see a “Restart Explorer” option at the bottom. Click on it.
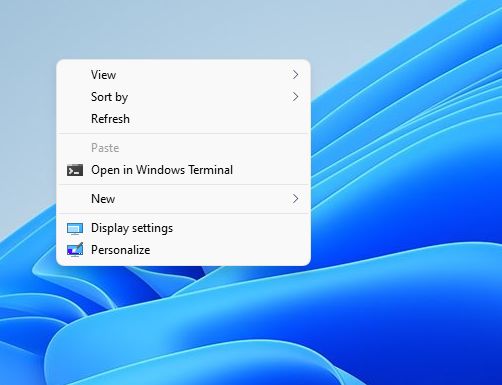
4. Now, go ahead and right-click on your desktop or any file and folder. You will find that the old context menu from Windows 10 is back on Windows 11. That’s super easy, right?

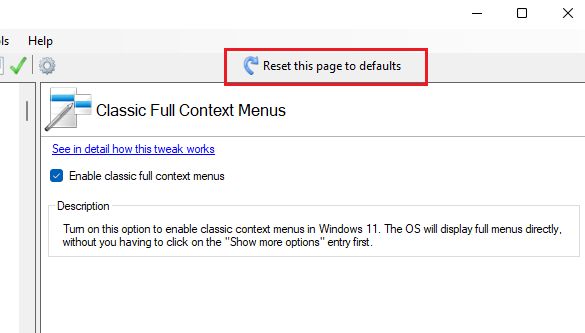
5. Now, if you ever want to revert to Windows 11’s new right-click menu, click the “Reset this page to defaults” option at the top and restart the Explorer. You will get back the rounded corner UI and “Show more options” button.
If you want a simpler tool, a one-click solution to switch back to the old context menu on Windows 11, go ahead and download this app called Windows 11 Classic Context Menu (Free). It removes the “Show more options” button and restores the classic, full-size Windows 10-style context menu on Windows 11.
Restore Old Context Menu on Windows 11 (Registry Method)
If you are someone who likes to manually tweak stuff on your Windows computer, this method is for you. You can restore the old right-click menu on Windows 11 by adding some values to the Registry. Here is how to go about it.
1. Press the Windows 11 keyboard shortcut “Windows + R” to open a Run window. Here, type regedit and hit Enter.

2. Next, go ahead and paste the below address in the Registry Editor. It will take you to the CLSID entry.
Computer\HKEY_CURRENT_USER\Software\Classes\CLSID
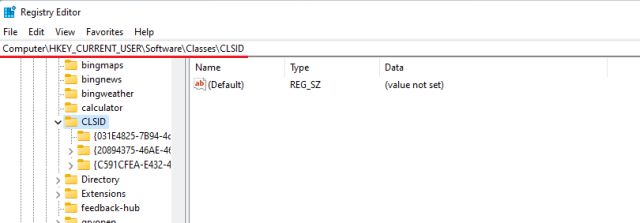
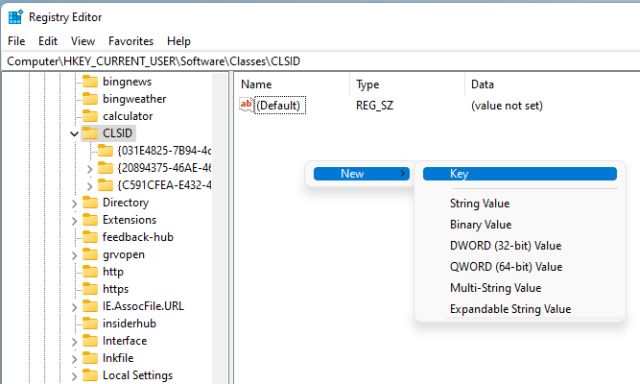
3. Under the CLSID folder, right-click on the empty space in the right pane and select New -> Key.
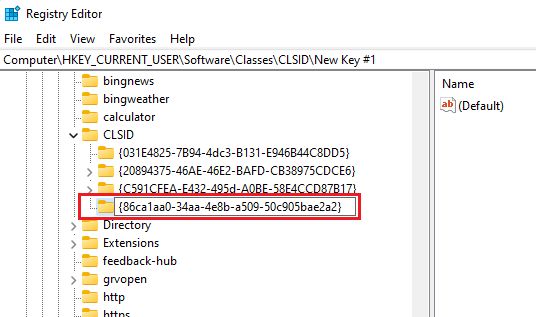
4. After that, copy the below string and rename the new key.
{86ca1aa0-34aa-4e8b-a509-50c905bae2a2}
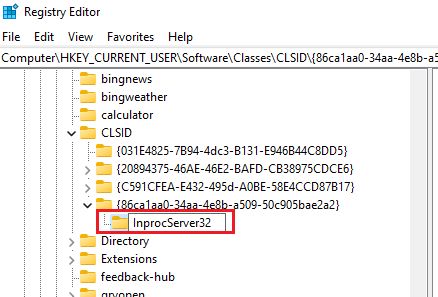
5. Next, right-click on the new entry on the left pane and choose New -> Key.
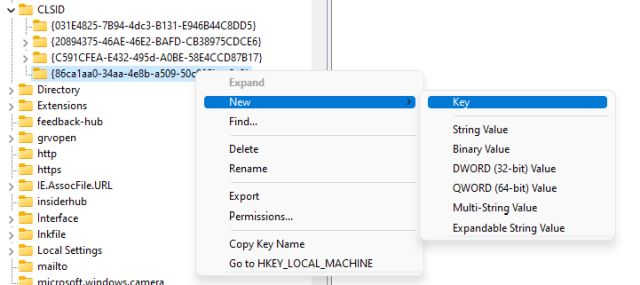
6. Rename it to InprocServer32 and hit Enter.
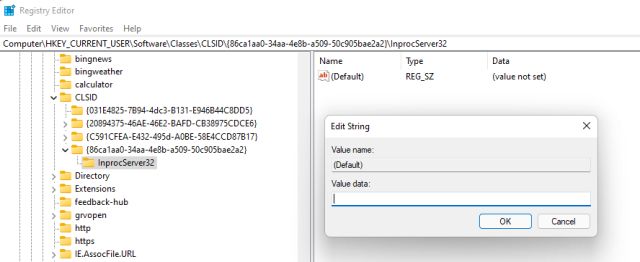
7. Now, move to the “InprocServer32” folder and double-click on “Default” on the right pane. After that, click on “OK” without changing any values.
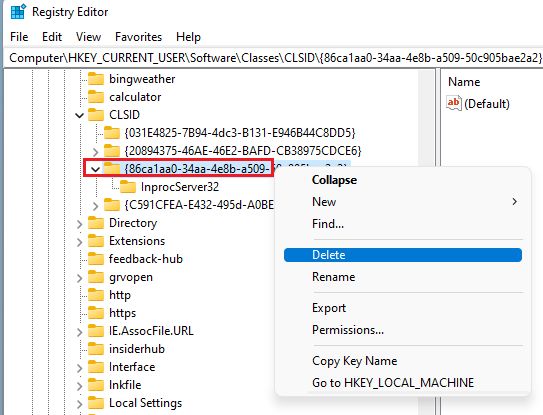
8. Now, close the Registry Editor and restart Windows Explorer from the Task Manager. Or, you can simply restart your PC. Finally, you will see that the old context menu is back on Windows 11. Enjoy!
9. If you ever want to restore the new Windows 11 context menu, delete the new Registry key and reboot your computer. That’s it.