Artificial Intelligence has truly come a long way since its inception. A big part of this has been attributed to ChatGPT and its meteoric rise on the Internet. However, AI isn’t just restricted to text. Going about your day, you might have chanced upon a service called Midjourney and how it is used to create full-scale AI images from scratch using text inputs. If you have heard about it but feels complex to use, you do not need to worry. We have compiled a dedicated guide on how to go about using Midjourney to create AI art easily. So, boot up your PC and open Discord, as we break it all down for you here.
Step 1: Join the Midjourney Discord Server
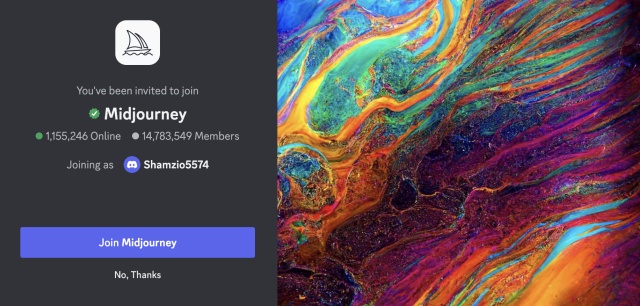
The Midjourney AI art creation project exclusively operates through Discord for now. As such, you will need to join its server to begin the AI image creation journey. It’s not too hard, but we have linked a dedicated guide for the same below.
Step 2: Buy a Midjourney Subscription
There was a time when Midjourney offered free trials of up to 25 images. However, with several viral AI images (including ones with Pope wearing a puffer jacket, Trump being arrested, and many more) circulating on the internet and overwhelming server demand, Midjourney no longer offers free trials.
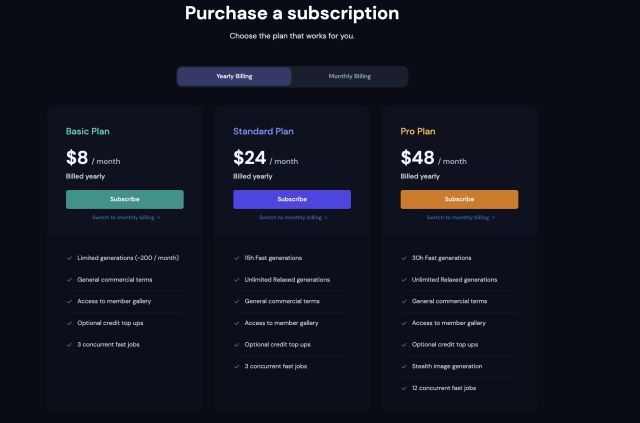
You will need to get a Midjourney paid plan to begin generating AI art. We have a dedicated guide to help fulfill both requirements, i.e. joining the Midjourney Discord server and buying a Midjourney subscription. Navigate to the link to get started.
Step 3: Join the Newbies Text Channel
Once you have joined the Discord server and got yourself a Midjourney subscription, you’re set to become a digital Picasso and make your first AI art piece. Here’s your first step towards that:
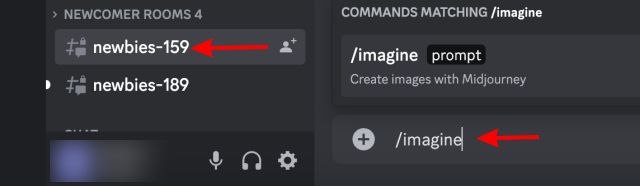
- Once you’re in the Midjourney channel, type “/imagine” in the message box.
Step 4: Enter Your Midjourney Art Prompt
- Now, type out the text prompt for the image you wish to generate using Midjourney. Make sure to make the input as detailed as possible for the best output. This is because Midjourney needs to understand every specific thing to create AI art. You can add commas (,) after each word for specificity. Once done, press Enter.

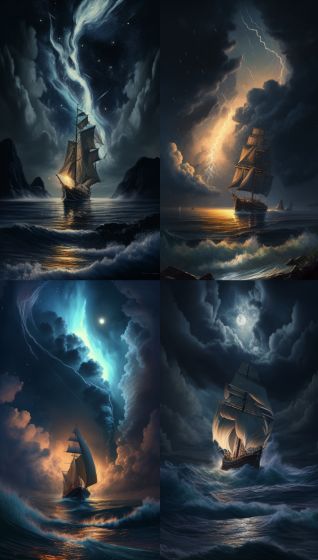
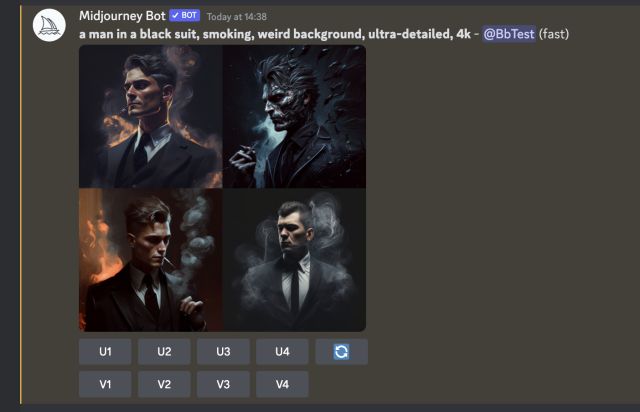
- Within a second, Midjourney will begin creating AI art. You can see the process in real time as the images become clearer. In a minute or two, Midjourney will fully create your chosen AI art with four different variations. You will also see some buttons titled U and V under the images. These are customization options that we have discussed below.


- And that’s how easy it is to use Midjourney to make beautiful AI art. You can repeat the above steps with as many prompts. By default, Midjourney uses the default V4 engine for image generation. However, the latest V5 engine has now been released and comes with many notable improvements.
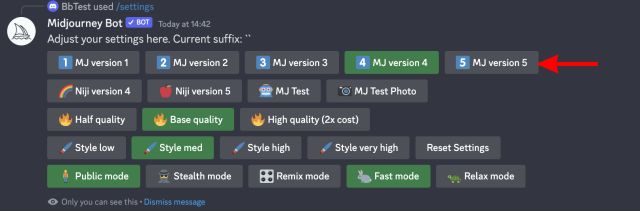
- This includes drawing fingers accurately, better color and detail profiles, and lots more. To use the latest version, learn how to enable Midjourney V5 using our dedicated guide, and then come back here for more options.
Step 5: Customize Your Midjourney AI Art
While Midjourney generates extremely good images by default, there are a few customization options you can play around with to ensure even better output. Let’s discuss them right here:
1. Upscaling and Redo Options
Below the images, you might have seen four buttons titled “U1, U2, U3 & U4“. These are upscaling options provided by Midjourney to enhance the quality and resolution of the image.

The numbers correspond to the images in the grid provided. Once chosen, Midjourney upscales the image and adds more details to make it larger. The final output is a good improvement over the default one. The 🔄 (re-roll) button re-runs an image creation job to give you a new grid of images.


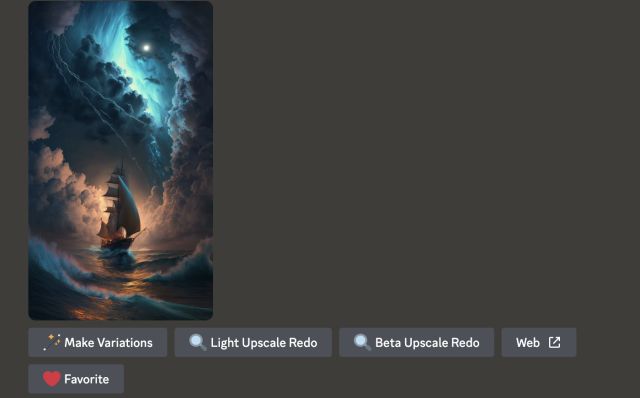
Moreover, Midjourney uses the default upscaler that improves details and generates a bigger image. However, once you upscale images, you get even more options, which are:
- Make Variations: Generates new variations of the upscaled image in a newly created grid model
- Light/Beta Upscale Redo: Performs upscaling using different upscaling models
- Web: Opens the image in the user’s Midjourney gallery
- Remaster: Upscales an image using test and creative parameters by blending the composition of the original image with details of the new one. The option appears when you use the Beta upscale option
- Favorite: Adds the image to your list of favorite images
Currently, Midjourney offers a variety of different image models, including Detail, light, anime, max, and more. The different models support different resolution sizes and as such might take a longer time to output your upscaled image. However, even if you use the default upscale buttons, the final output is pretty good.
2. Aspect Ratio
The aspect ratio is the width-to-height ratio of an image; expressed through numbers (2:3). By default, Midjourney generates images with an aspect ratio of 1:1, which means it has the size width and height. However, Midjourney allows users to easily change the aspect ratio of their image by adding a command in the prompt.
Each Midjourney model supports a different max aspect ratio. While Midjourney V3 supports 5:2 to 2:5, the V4 model has AR options of 1:2 to 2:1. To change the aspect ratio of your image, you need to add the “–ar” parameter at the end of your text prompt. An example of this is – imagine/ prompt car on the highway –ar 7:4
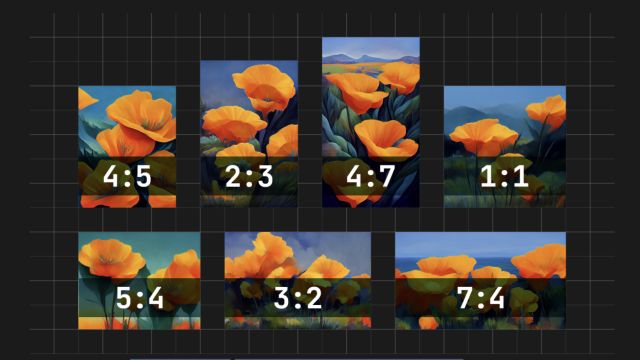
Some of the common aspect ratios in Midjourney options are as follows:
- –aspect 1:1 – Default aspect ratio
- –aspect 5:4 Common frame and print ratio
- –aspect 3:2 Common in print photography
- –aspect 7:4 Close to HD TV screens and smartphone screens
You can either use the –ar (value) command or the –aspect (value) command, and the result will be the same. Use this command the next time you want to change the aspect ratio of your output image.
3. Image Variations
Even though Midjourney has given these four variations of your prompt, it doesn’t mean there aren’t more. For those interested in more variety, the AI art generator provides more variation options. Use “V1, V2, V3, and V4“, the variation buttons to create slight variations of the chosen image.

However, Midjourney creates an entirely new image grid similar to the chosen image’s overall style and composition. As before, Midjourney creates an excellent output variation of the chosen image.

You can choose to mix and match with different images for that perfect combination. Variation is perfect for those who aren’t satisfied with their default options and want more.
4. Info Command
As mentioned above, using Midjourney isn’t free and requires a paid subscription plan. However, it can be difficult to keep a track of your remaining image generations or fast hours.
For all those times and more, the Info command comes to your rescue. The information command shows the user their exact Midjourney profile stats, including details like subscription tier, visibility, remaining fast hours, lifetime usage, and more. It also includes a button to go to your feed which leads to your official Midjourney profile.
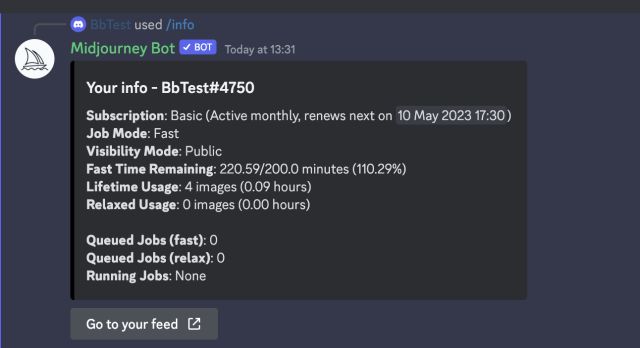
To use the info command, go to a newbie channel, type “/info” in the message box, and press Enter. You will see your stats immediately and can monitor them time and again using this option.
5. Fast and Relaxed Mode
For AI image generation, Midjourney uses Graphics Processing Units (GPUs) to fully process each text prompt. When users purchase a Midjourney subscription, they essentially buy time on these GPUs. Midjourney’s Fast Mode generates images quickly but comes with a specified time limit. This limit is used whenever you generate images on the default Basic plan or choose it on other plans.
By contrast, the Relaxed mode provides unlimited image generations but your requests are placed in a queue behind other users. Depending on your position, it might take some time before Midjourney creates AI art for you. Furthermore, Midjourney’s Relax Mode is only available on the Standard and Pro plan and not on the basic one.
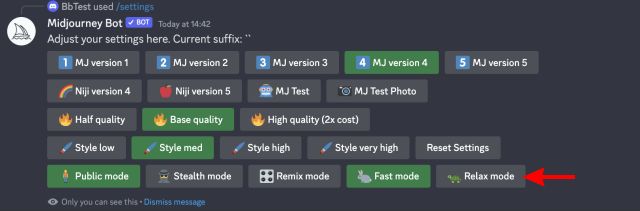
To quickly switch between Fast and Relax modes, you need to type “/settings” on the main server’s text box or the bot’s DM and enter it. Instantly, Midjourney will come up with different settings; wherein you can click on either fast or relax mode options.
How to Add Midjourney to Your Own Discord Server
By default, users have to visit the official Midjourney Discord server to generate AI images. However, did you know that you can actually add the AI image generator to your own server for convenience? Those looking for that keep reading as I show you exactly how to do that. However, if you don’t have one then first learn how to create a Discord server here and then come back.
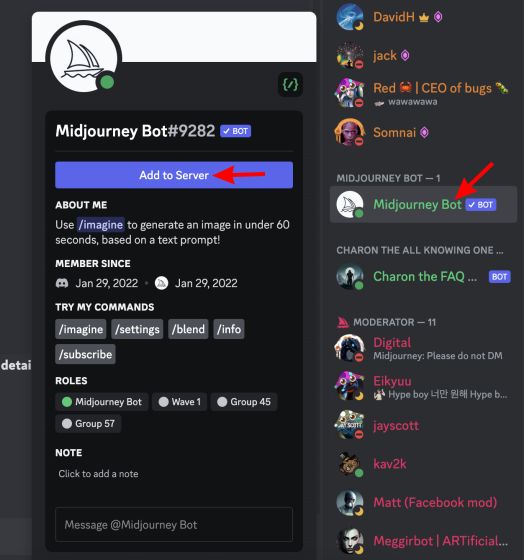
1. From the top right of Midjourney’s Discord server, click on the “Show Member List” button. This will reveal the members, including the official Midjourney bot.

2. From the list that appears, click on the Midjourney bot and then click on the “Add to Server” button.
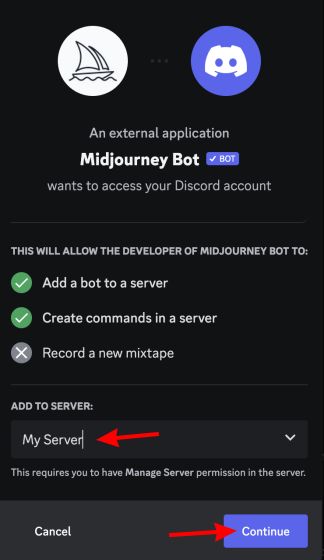
3. Discord will now ask you to select the server you want to add Midjourney to. From the drop-down menu, select your server and then click on “Continue” to proceed.
4. Finally, click on the “Authorize” button to grant all the necessary permissions.
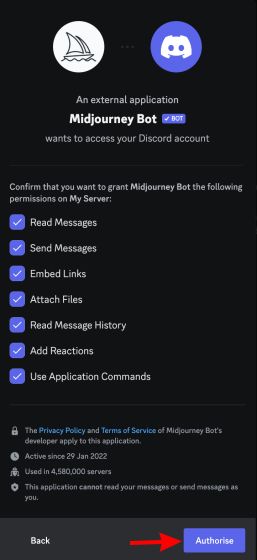
5. And that’s it! Midjourney has now been added to your Discord server, and you can begin generating images just like you would on its own server. Just type “/imagine” and get started.
How to Get Midjourney to DM Generated Photos to You
While talking to Midjourney on its server or even your own might be nice, you can even have it directly message you the generated images. To do that, follow the steps below:
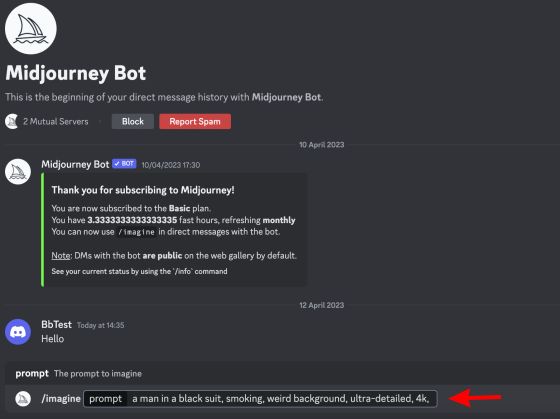
1. Get to the Midjourney bot using the steps above. However, this time, click the text field at the bottom to send a personal message to the Midjourney bot. Just type anything and send it.

2. This will open up your chat with Midjourney. To generate images directly in DMs, simply type “/imagine” followed by your prompt and send the message across.
3. As before, Midjourney will begin the image generation right away and slowly render out an output for your use. Just like on Midjourney’s server, you can easily use the upscaling and variation options. You can even use other commands to change your aspect ratio and more.
And that’s how you can get Midjourney to DM generated AI images to you. With Midjourney right at your doorstep and accessible privately, perhaps it’s time to learn how to delete a Discord server and remove the one you made for the bot.
We hope our dedicated guide on Midjourney AI art helps you create some fantastic masterpieces. However, do note that the potential with Midjourney is almost limitless, so you can go on experimenting with the service to create even more works of art. However, if you are bored with AI images, then check out the best ChatGPT prompts and use the AI chatbot to have some fun. The bot’s not working? Check out these best ChatGPT alternatives in that case. So what’s your opinion on using Midjourney for AI art? Drop your thoughts in the comments below.
Frequently Asked Questions
You most certainly can. The artificial intelligence landscape is chock full of the best AI art generators that can easily create all kinds of art. All you need to do is enter simple prompts for some fantastic-looking outputs.
To generate AI-generated art for free, you can follow our dedicated guide linked above and check out some of the best AI art generators. Some of the options are free to use with a minor usage cap.
It is difficult to crown a single service as the best AI art creator. However, there are a lot of services that come close to being the best. Midjourney is definitely one of our favorites with options like DALL-E and Jasper a close second. However, it will ultimately depend on the user and their experience with these services.
While Midjourney initially did have a free trial of 25 images, it has now become fully paid. The company claims this is due to an overwhelming demand for its services. However, it’s quite easy and affordable to buy a basic subscription. Learn how to buy a Midjourney subscription above and then get started.
Users with a Midjourney’s Basic plan and onwards can use its art commercially. If you were previously part of a free trial and generated some images, you cannot use them for commercial purposes. So it’s best to buy a paid plan and use them.


