The much-awaited feature has arrived! We know it has taken this long, but you can finally set multiple timers on an iPhone. Yes, you’ve heard it right. The latest iOS 17 lets you have multiple timers running simultaneously on your iPhone. Since I tend to do multiple tasks at once, I found multiple timers one of the best new features of iOS 17. It’s a handy way to track time-bound activities for better time management. So, if you’re also a multitasker, just go ahead and set more than one timer on your iPhone. Let’s see how to do that.
With iOS 17, you can set more than one timer on an iPhone using the Clock app or do it hands-free using Siri. We’ve discussed both in this article. Let’s check them out.
Set Multiple timers on iPhone using Clock app
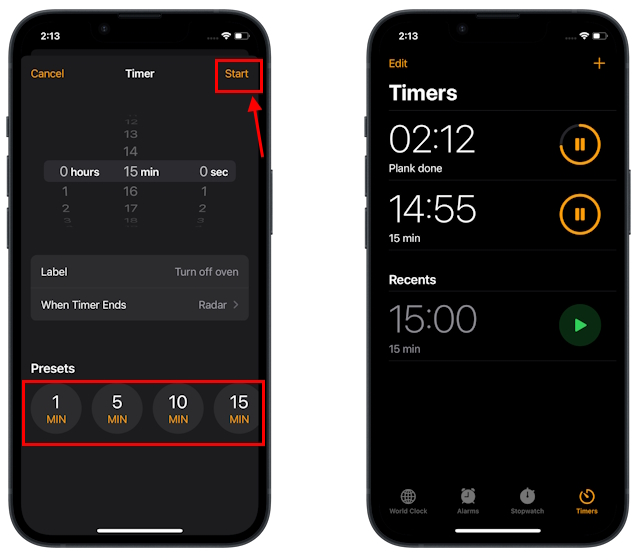
- Open the Clock app on your iPhone and tap on the Timer tab from the bottom-right corner.
- Now, set the hours, minutes, and seconds.
- You can use the Label and When Timer Ends options to set a name for your timer and a preferred tone when your timer completes. This will help you differentiate between the timers.
- Once you’re done, hit the Start button.
- Then, tap the “+” icon from the top-right corner.

- Now, repeat the above steps to set more than one timer on your iPhone.
- You can also browse through the Preset section to quickly set multiple timers. It offers presets from 1 minute to 35 minutes.
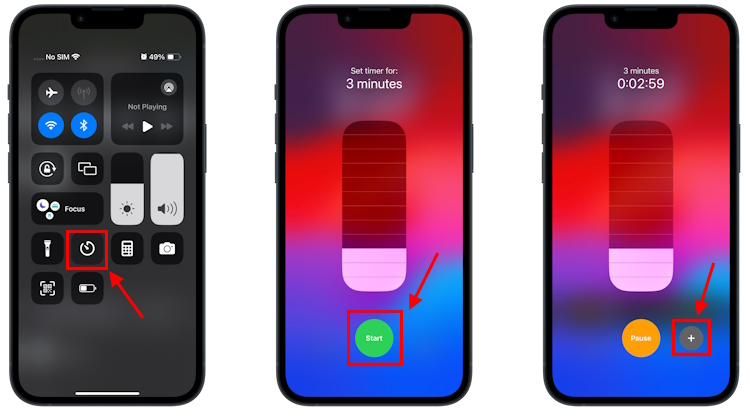
Quick tip: You can also head to the Control Center, long-press the Clock icon, and hit the Start button to quickly set your first timer on the iPhone. Then, tap the “+” icon to set multiple timers on your iPhone.
Set Multiple timers on iPhone using Siri
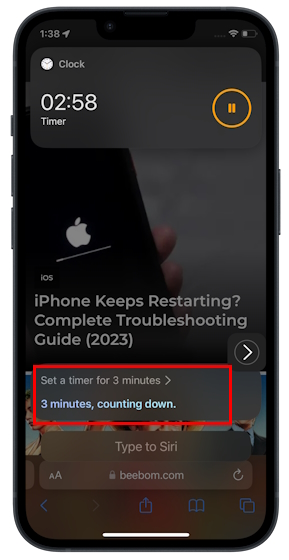
- Simply say “Siri, Set a Timer for 5 minutes” or “Start the timer for 5 minutes“. With iOS 17, you can skip the prefix “Hey” to invoke Siri.
- Alternatively, press and hold the side button on your iPhone to invoke Siri and then say/type “Set a timer for 5 minutes“.
- Siri will instantly set a timer for you.
- Repeat the above steps to allow Siri to set multiple timers at once on your iPhone.
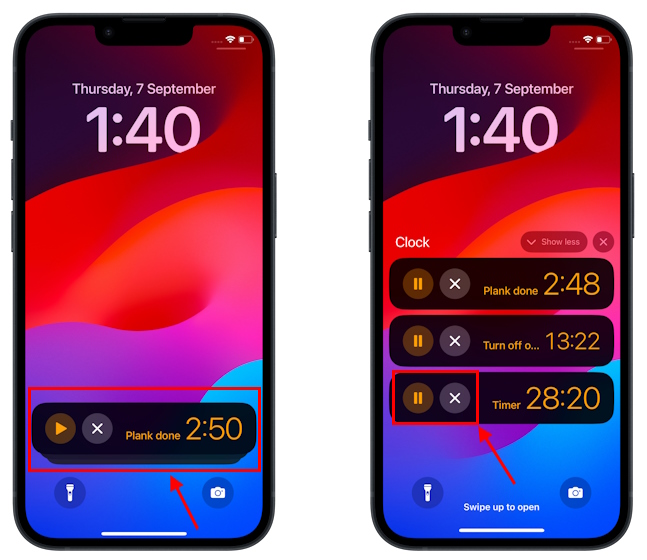
You’ll find all your timers on the lock screen and under the Notification Center as Live Activities. You can also ask Siri to show you the timers on your iPhone. From there, you can easily manage and track multiple timers at once on iPhone. Let’s see how to do it.
How to pause, resume, and delete multiple timers on iPhone
There are several ways to pause, resume, track, and delete multiple timers running on your iPhone. You can go to the Clock app or access them via the lock screen or the Notification Center. Not to forget, Siri is always there to help you manage your timers. Let’s discuss them one at a time.
Using the Clock app
- Open the Clock app and navigate to the Timer tab.
- To pause a timer, tap on the Pause button.
- To resume a timer, tap on the Play button.
- To delete a timer, swipe it from right to left and hit the Delete button.
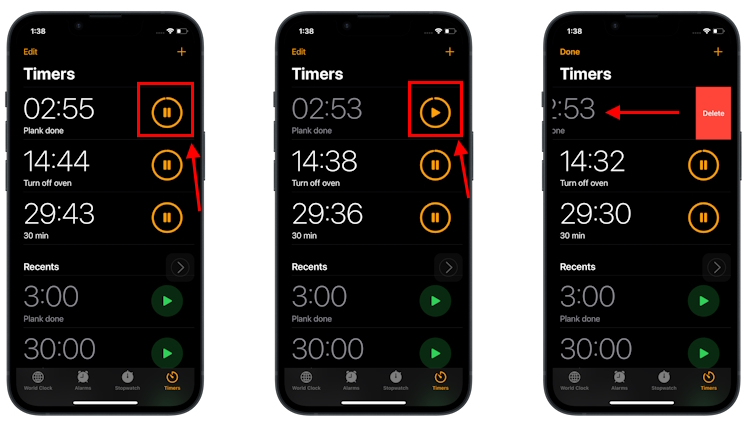
- You can also tap on the timer to see Pause, Resume, and Cancel (delete) options.
Using Live Activities
- When your iPhone is locked, tap on the screen, and then tap on the grouped timers to see all the timers running on your iPhone.
- Here, hit the Pause button to pause your timer. You can hit the Play button to resume it anytime.
- To delete or cancel the timer, simply tap on the “X” button.
Using Siri
- Say “Siri, show timers”. Alternatively, you can invoke Siri and say/type “Show timers”. From here, you can pause or resume a timer.
- You can also say “Siri, pause the timer”. It will show you the list of all the timers set on your iPhone, simply tap on the timer you want to cancel.
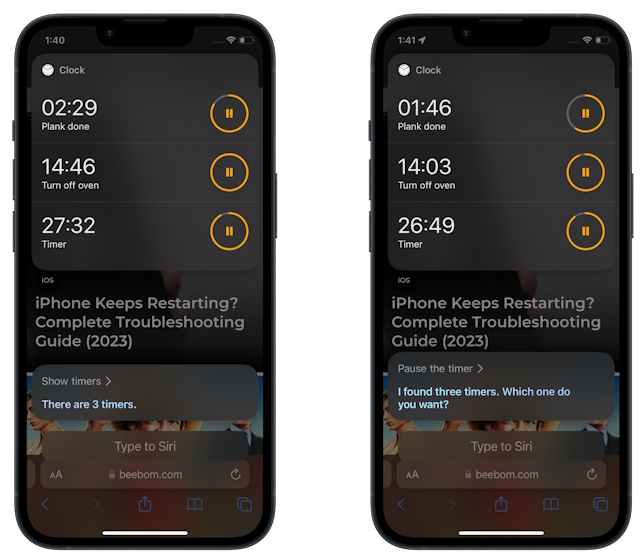
- You can follow this to resume or delete timers on your iPhone using Siri.
So you see, it’s that easy to set, track, and manage multiple timers at once on an iPhone.


