Frankly, I love Windows 11 for a number of great features, fresh design language, and fluid UI. However, Windows 11 has a few issues that remind us of Windows 10 days. For instance, Windows 11 shows a black screen after an update at times, which makes the experience bitter, especially for those who are upgrading to Windows 11 from Windows 10. Now, there is another set of RAM-related problems on Windows 11, making users regret their decision to move to Windows 11. Memory problems like high RAM usage, memory leaks, and low memory are plaguing Windows 11 users. So here’s a one-stop guide to fix memory problems on Windows 11. If you are facing any kind of RAM issues on Windows 11, follow our tutorial below.
Fix Memory Problems on Windows 11 (2022)
In this tutorial, we have included fixes to multiple RAM issues on Windows 11. From memory leaks on Windows 11 to faulty RAM detection, we have included all the fixes and tools to better understand the memory problem. You can expand the table below and move to any section you want.
How to Check Memory Leak on Windows 11
While the memory leak issue arising from File Explorer on Windows 11 has been fixed by Microsoft, you can confirm whether you are still affected and follow the fix below if you are still facing the problem. Here is how to check memory leaks on Windows 11.
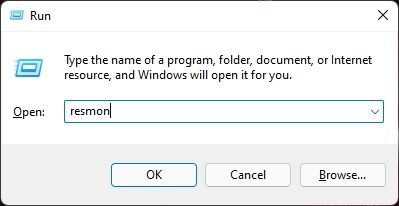
1. Press the Windows 11 keyboard shortcut “Windows + R” to open the Run window. Here, type resmon and hit Enter. This will open the Resource Monitor.
2. Now, move to the “Memory” tab and take a look at the “Standby” memory. Make sure to close all the apps and windows. With no apps running and File Explorer closed, the Standby memory should free up, and the memory usage should come down. If the Standby memory still seems high and Windows 11 is not releasing the memory, it means you are having a memory leak issue on Windows 11.

Close File Explorer to Fix Memory Leak
Till now, the File Explorer on Windows 11 has been known to cause the memory leak issue. So, we need to perform some basic steps first in order to release the memory held by the system. Here are the steps to follow.
1. To fix the memory leak issue on Windows 11, close all the windows of File Explorer. Simply right-click on the File Explorer icon in the Taskbar and click on “Close all windows”.

2. Next, press “Ctrl + Shift + Esc” to open the Task Manager. Then, under the “Processes” tab, look for “Windows Explorer“. Right-click on it and click on “Restart”. This will restart Windows Explorer, which should further free up RAM on Windows 11.

Modify File Explorer Folder Options
Some users have reported that opening folder windows in a separate process help fix the memory leak issue on Windows 11. Try the steps below and see if this resolves the problem.
1. Press “Windows + E” to open the File Explorer. Click on the 3-dot menu on the top menu bar and open “Options“.

2. Here, move to the “View” tab and scroll down under the “Advanced settings”. Now, enable the checkbox for “Launch folder windows in a separate process“.

3. Finally, hit “OK” and restart your PC. Now onwards, Windows 11 should not reserve an unusual amount of memory for File Explorer.

Disable Startup Programs
In our article on how to speed up Windows 11, we have noted that disabling unnecessary startup programs significantly frees up resources on boot and prevents high RAM usage on Windows 11. For better maintenance, you should always disable unnecessary startup programs. Here is how to do it.
1. Press “Ctrl + Shift + Esc” to open the Task Manager. Now, move to the “Startup” tab.

2. Here, look for the programs that are not needed after login. Right-click on the program and disable them right away. If there is an unidentified program, make sure to disable it. Now, restart your PC, and a huge amount of RAM should free up.

Increase Virtual Memory
If you have low physical memory, you can increase the size of virtual memory, also known as “swap”. Basically, Windows 11 will use some sectors of the hard disk as RAM when your PC is low on memory. This will significantly help you combat high RAM usage on Windows 11. Here’s how to set it up
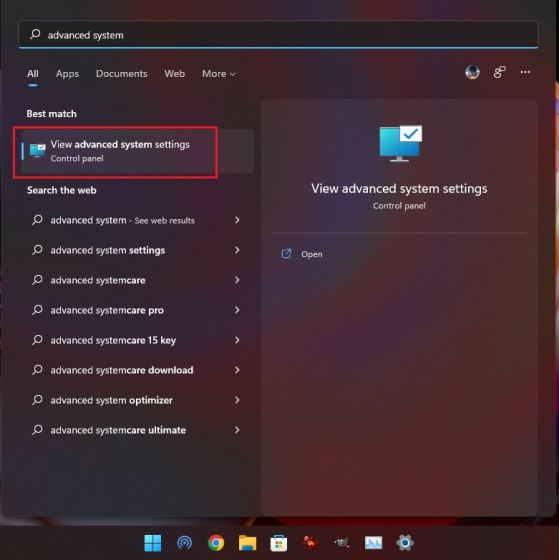
1. First, press the Windows key once and search for “advanced system”. Now, open “View advanced system settings“.
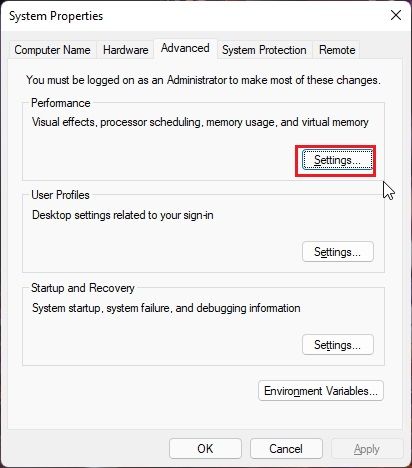
2. In the “System Properties” window, click on “Settings” under the “Performance” section.
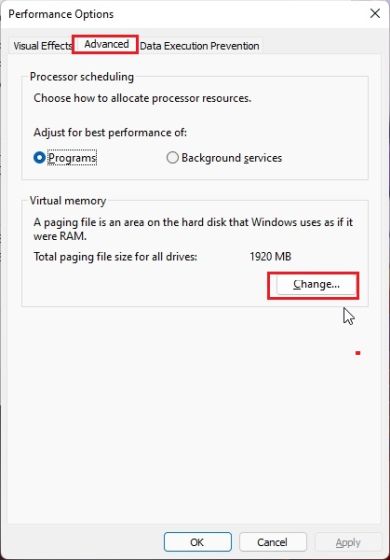
3. In the next window, move to the “Advanced” tab and click on “Change” under “Virtual memory”.
4. Uncheck the “Automatically manage paging file size for all drives” checkbox on the top and click on “Custom size”. Under the “Initial size” field, enter what is recommended below. For example, I have set “1912” as the initial size. As for the “Maximum size”, enter 4096. This will provide 4GB of additional virtual memory to your Windows 11 PC. Now, click on Set -> OK.
Note: You can set the Maximum size up to 3 times the physical memory. So if you have a PC with 8GB of physical RAM, you can set up to 24GB (24576MB) of virtual memory.

5. Finally, restart the PC, and the low RAM issue should be fixed on Windows 11.
Diagnose Memory Issues on Windows 11
If Windows 11 is crashing or freezing due to unexplainable reasons, it’s most likely the faulty RAM on your PC. Windows 11 comes with a built-in Windows Memory Diagnostic tool that performs several basic and advanced tests to check the reliability of the RAM. We’re going to use this tool to find possible memory issues.
1. Press the Windows key once and search for “tools“. Now, open “Windows Tools” from the search result.

2. Next, open the “Windows Memory Diagnostic” tool.

3. It will ask you to restart your PC to check for RAM problems on Windows 11. Click on “Restart now“.

4. You will now enter the Windows Memory Diagnostics Tool screen, and it will automatically start the Standard test, which checks for all the BASIC tests, including INVC, MATS+, SCHCKR (cache enabled), LRAND, Stride6 (cache enabled), CHCKR3, and more.

5. In case you want to perform a more advanced test for RAM called Extended, you can press the “F1” key and choose the desired test. Use the “Tab” key to move between options and “F10” to apply the changes.

6. After the memory test is done, your PC will automatically restart. Log in to your PC to view the test results. Press the Windows key once and search for “Event Viewer“. Now, open it.

7. Here, expand “Windows Logs” and then open “System” logs. Now, scroll down and look for “MemoryDiagnostics-Results“.

8. Open it and review the result. If it says your memory does not have any errors, you should look at other sources for the root cause. And in case the tool detects an error, you might have to replace the RAM.

9. If you are not satisfied with the native Windows Memory Diagnostic Tool, go for the MemTest86 app (Free), which is the number #1 contender in our list of best tools to stress test RAM. It offers more than 13 algorithms and looks for all possible hardware errors in RAM.

Fix RAM Issues on Windows 11 Right Away
So these are the ways to fix memory problems on Windows 11. If you have a high RAM usage issue, it might have to do with a memory leak or background programs eating up an unusual amount of RAM. We have included multiple solutions for this issue, so just follow the guide above for a suitable solution. Anyway, that is all from us. If you are facing high disk usage on Windows 11, follow our tutorial to fix the said issue. And to access God mode on Windows 11, we have a handy guide in place for you. Finally, if you have any queries, let us know in the comments section below.