
- Secure Boot on Windows machines prevents unauthorized programs from running on boot.
- The only way to enable Secure Boot is from BIOS settings, by going to Secure Boot options.
- Once enabled, you can check if its enabled by going to System Information and checking Secure Boot State.
With Windows 10 fast approaching End of Life, you might want to upgrade to Windows 11 on your existing PC or Laptop. However, if you remember, one of the prerequisites needed to install Windows 11 is Secure Boot, besides TPM 2.0. Besides, Secure Boot also helps protect your computer from unauthorized software and drivers from loading during startup. Therefore, if you want to enable it, here’s how to enable Secure Boot on Windows 11.
How to Enable Secure Boot on Windows 11
There’s only one way to enable Secure Boot on Windows 11, and that is by entering the BIOS options. Now, accessing BIOS options is different for different manufacturers, and for that you can refer our BIOS/UEFI guide. Once in, it’s pretty easy to enable Secure Boot or check if it’s enabled.
- Head over to your computer’s BIOS menu. This menu looks the same for different computers.
- Here, go to Settings and select an option that reads Security or OS Configuration.

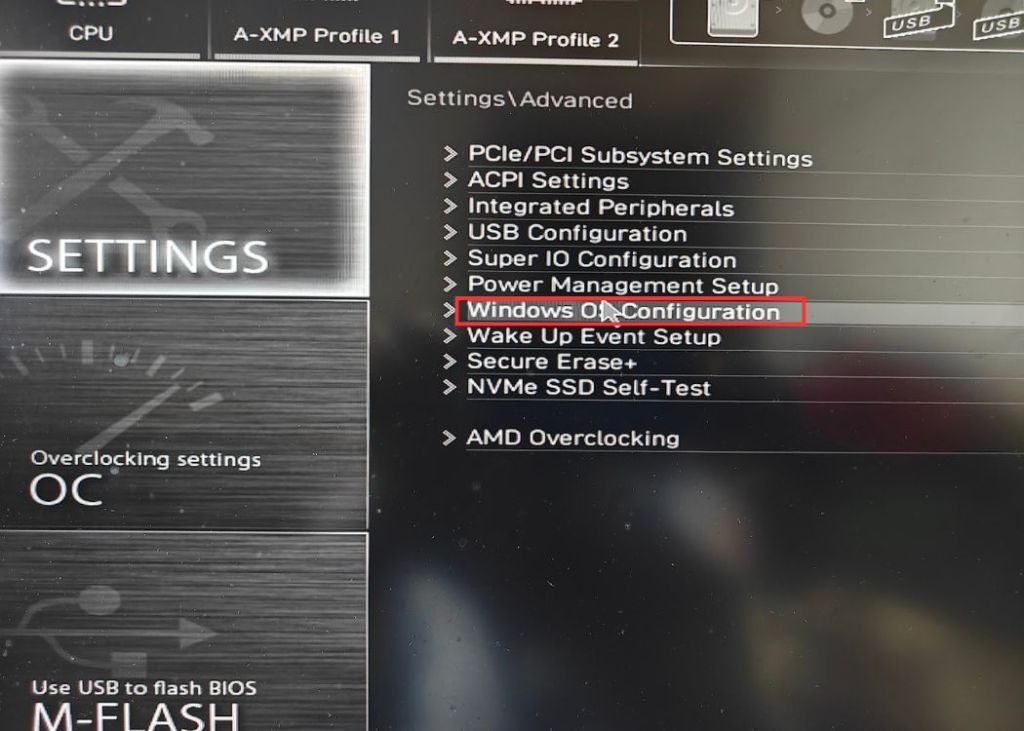
- Click on the Secure Boot option to bring up more options related to it. In this, you should find one to enable or disable secure boot.
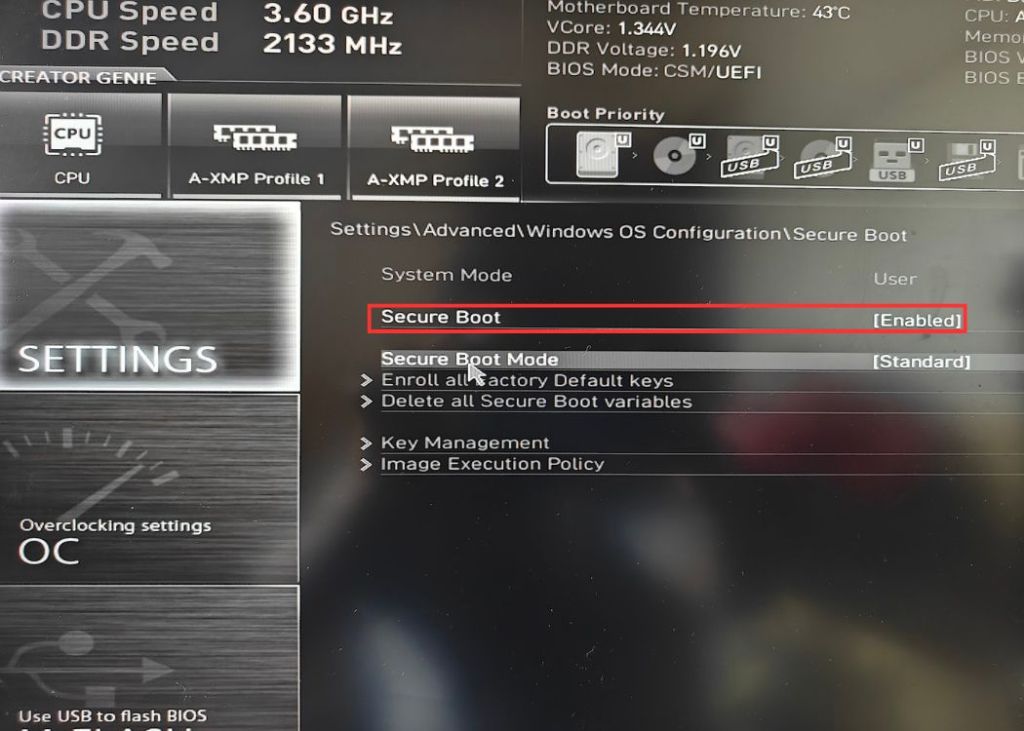
- If the value reads “disabled”, Secure Boot is disabled. Click on this value and select Enabled.
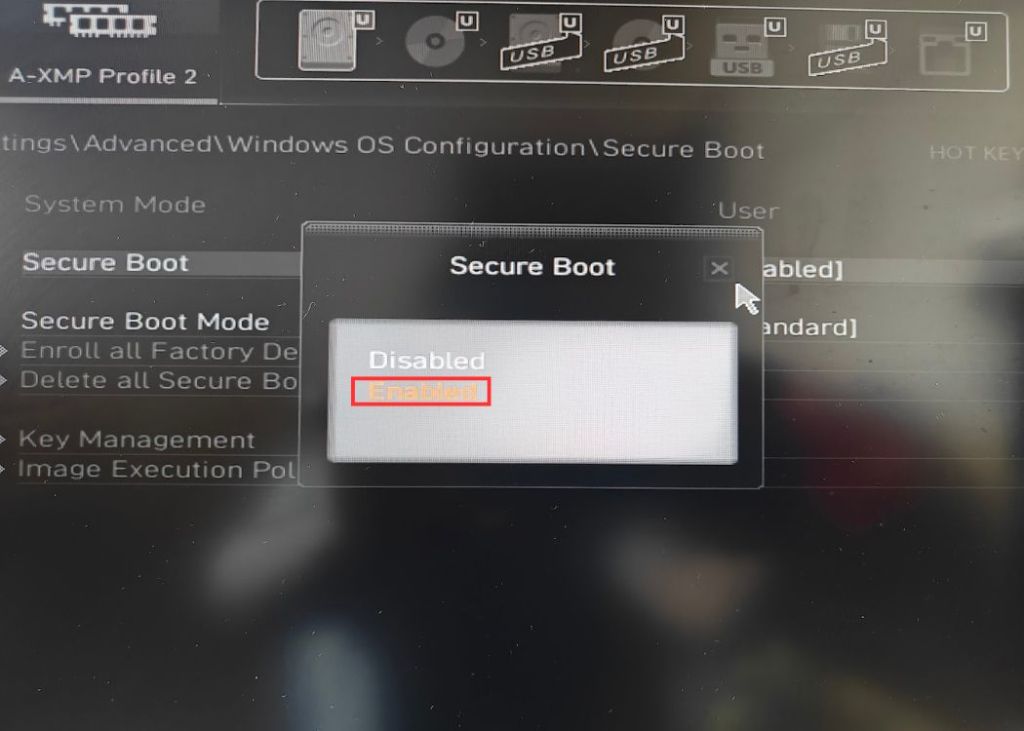
- Once done, exit the BIOS and click on Save settings if it asks you to save before leaving.
How to Check if Secure Boot is Enabled on Windows 11
Once you enable Secure Boot and boot into Windows, you can check if Secure Boot has been enabled by following these steps:
- Now, to ensure Secure Boot has been enabled, search for “system information” inside the Start menu and select System Information from the search results.
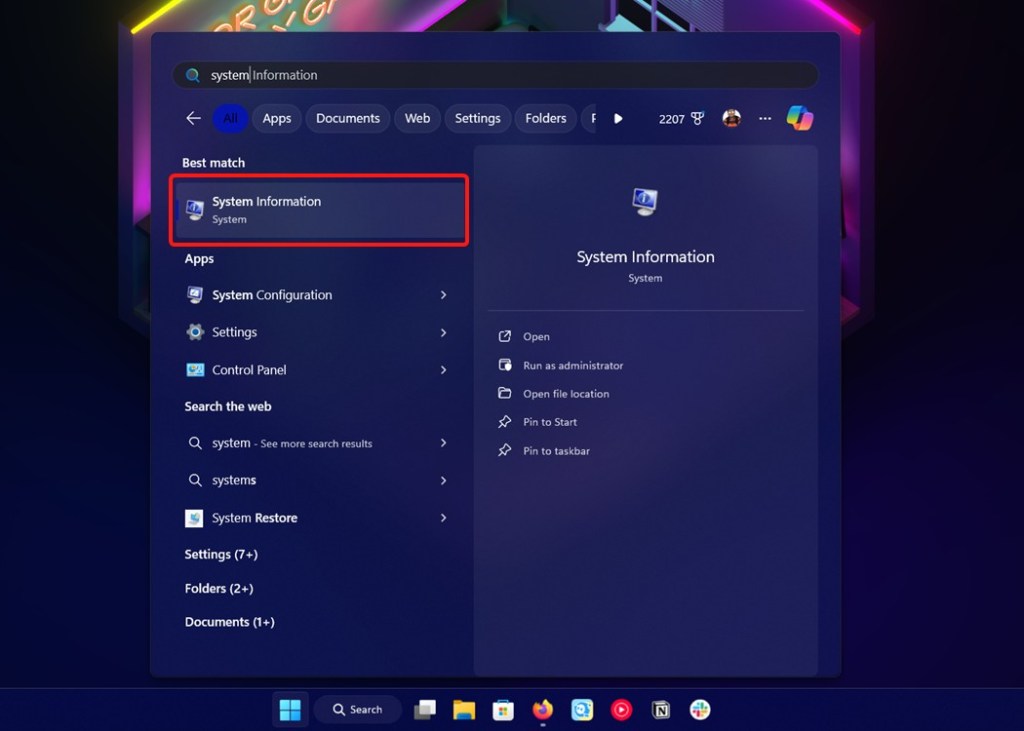
- Here, check if Secure Boot is enabled. If it reads “On” then that’s great news.


And that’s how to enable secure boot on a Windows 11 PC. If you are serious about protecting your PC from tampered bootloaders and unauthorized people, you should keep secure boot enabled. And if you wish to enable the other key security setting on your PC, enable TPM on Windows 11. It will safeguard all the credentials on your computer, further enhancing your privacy on Windows 11. Finally, if you have any questions, let us know in the comments section below.
Yes, accessing Secure Boot requires you to set your BIOS to UEFI mode, after which you can find it in the Settings.
This could happen if your BIOS is set to Legacy mode. One of the other reasons is that you just can’t find it because it’s hidden very deep. In which case, you can use the search feature, if your BIOS has one.
This could happen if your computer doesn’t support TPM 2.0 or if TPM is disabled. To enable it, head over to the BIOS again.
You should be using Secure Boot on Windows, no questions asked. It will protect you from any maligned program that may try to start during the startup.


