- You can turn on Memory Integrity from the Windows Security app on your Windows 11 PC.
- To enable Memory Integrity, go to Device Security -> Core Isolation, and turn on the Memory Integrity toggle.
- If the option is greyed out, uninstall incompatible drivers, update them, or enable hardware virtualization to fix the issue.
Of late, Microsoft has been doubling down on improving the security of Windows 11. It has deployed many new security features to prevent malicious programs from hijacking your computer. That said, the new security and privacy features are not enabled by default. A case in point is Memory Integrity (HVCI) on Windows 11, and it is disabled for most users. It creates an isolated environment by using hardware virtualization for kernel-level processes and performs integrity checks. So if you want to enable Core Isolation’s Memory Integrity feature on Windows 11, read on.
Step to Enable Memory Integrity on Windows 11
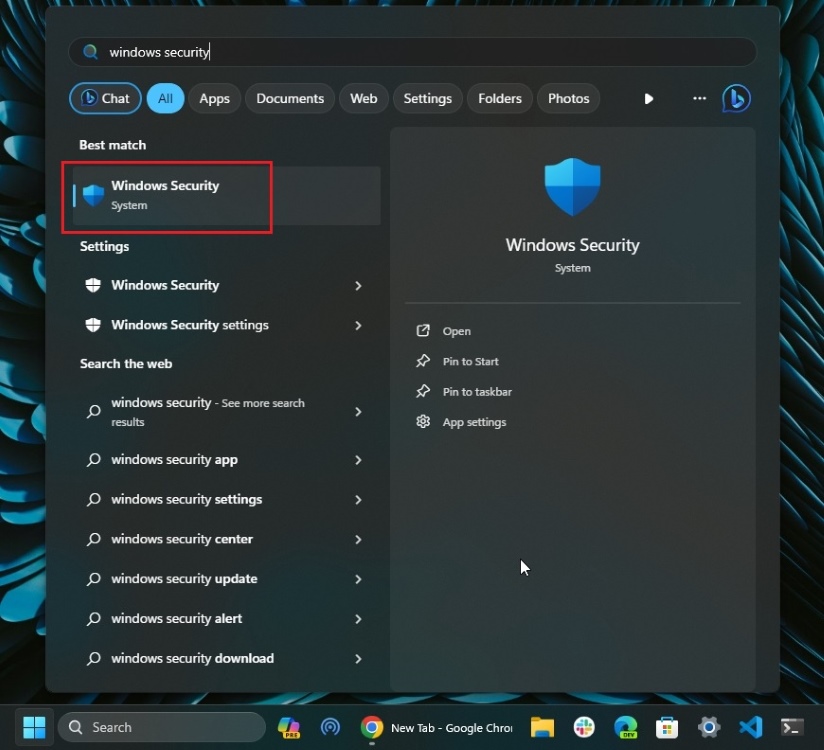
- Open the Start menu and search for “Windows Security” here. Click to open it.
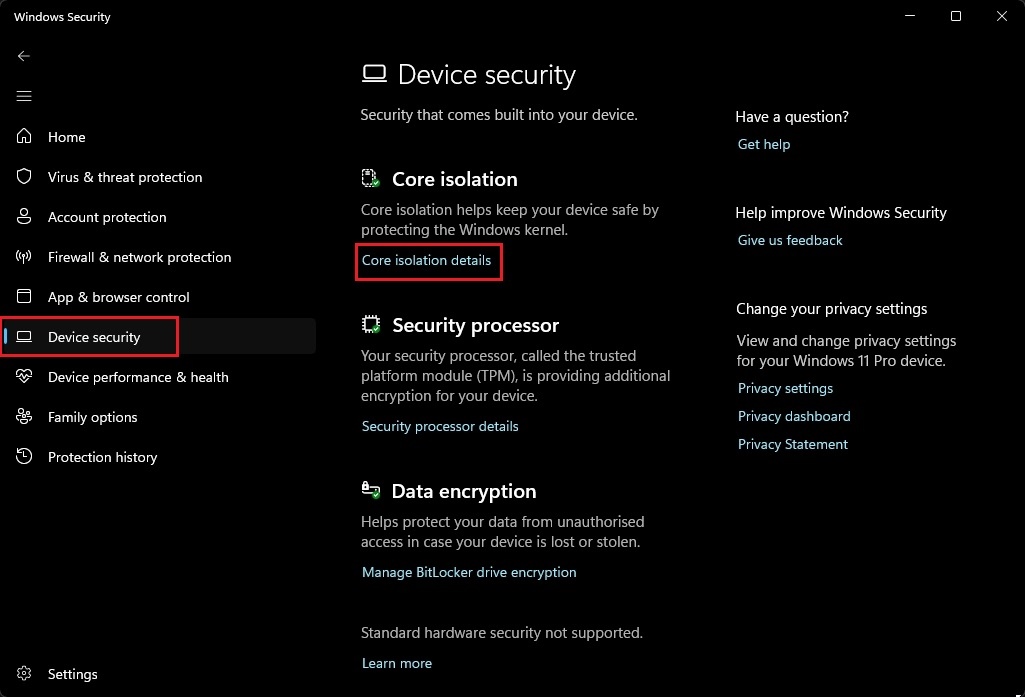
- Next, move to the “Device security” section via the left sidebar.
- On the right, click on “Core Isolation details“.
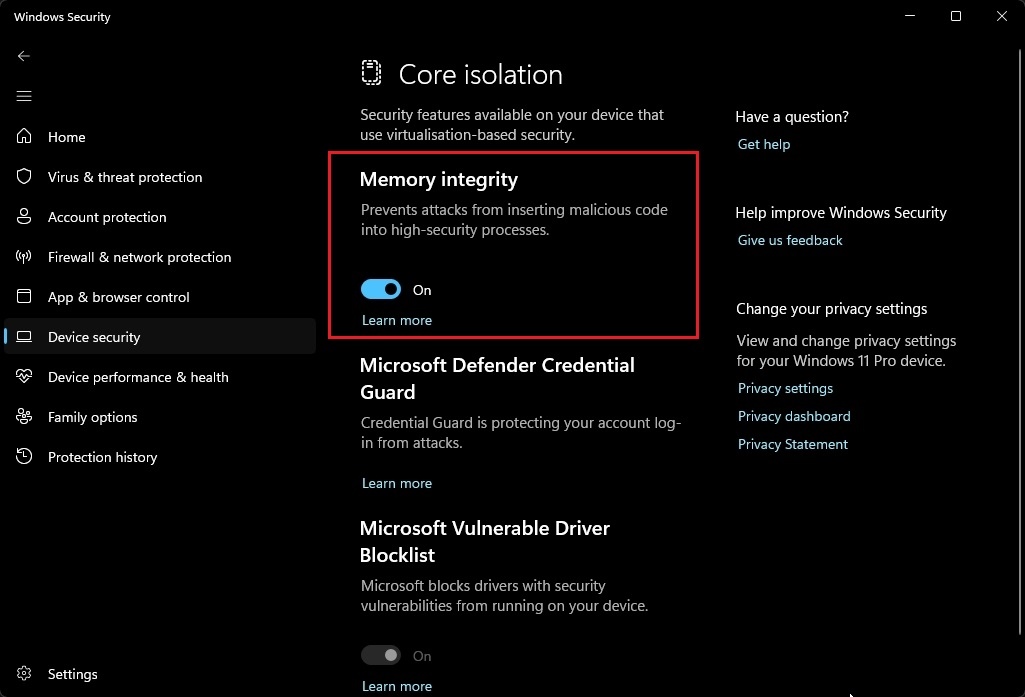
- Finally, turn on the “Memory integrity” toggle.
- You will now be asked to restart your Windows 11 PC. Once rebooted, the Memory Integrity feature will be turned on.
Memory Integrity Can’t Be Turned On? How to Fix
If Core Isolation’s Memory Integrity feature is greyed out on Windows 11, you can try the below fixes to enable it.
1. Uninstall Incompatible Drivers
Most often, users are unable to enable Core Isolation’s Memory Integrity feature due to driver incompatibilities. Microsoft has made it easier to spot these errors and fix them. Under Core Isolation in Windows Security, you will find a “Scan” button to check for outdated drivers.
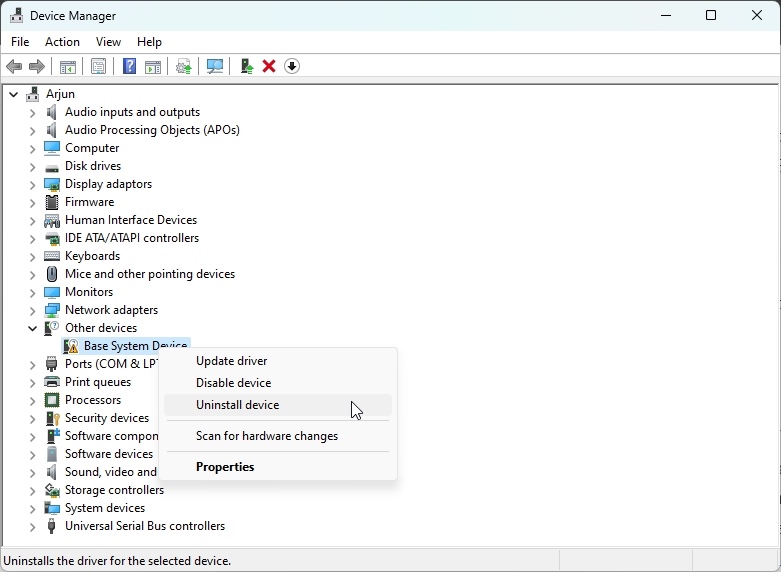
Once it shows the conflicting driver, go ahead and update or remove it through Device Manager. You can follow our step-by-step tutorial on how to uninstall device drivers on Windows 11.
2. Update Drivers via Windows Update
Microsoft now delivers driver updates through Windows Updates. So it’s strongly recommended to check for updates from the Windows Settings page. Here is how to do it.
- Press “Windows + I” to open the Settings app.
- Then, click on “Windows Update” in the left menu.
- Go to “Advanced options -> Optional updates” on the right.

- Now, expand the “Driver updates” section.
- Select the driver that might be causing issues with the Memory Integrity feature.
- Finally, click on the “Download & install” button.

- Now, restart your PC, and go ahead and turn on Core Isolation’s Memory Integrity feature.
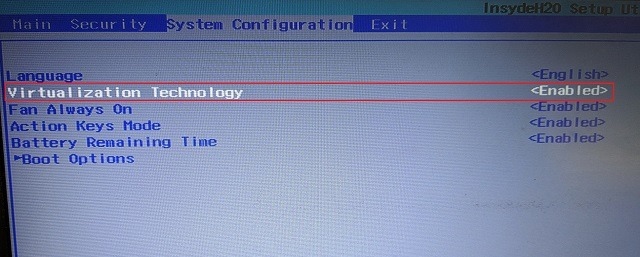
3. Enable Hardware Virtualization
If you still can’t turn on the memory integrity feature in Windows 11, you may need to enable hardware virtualization from BIOS/ UEFI. Here are the instructions to follow:
- Follow our tutorial and enter the BIOS/ UEFI on Windows 11.
- Now, look for the “Hardware Virtualization” option and enable it. Along with that, I would recommend enabling TPM and Secure Boot as well.
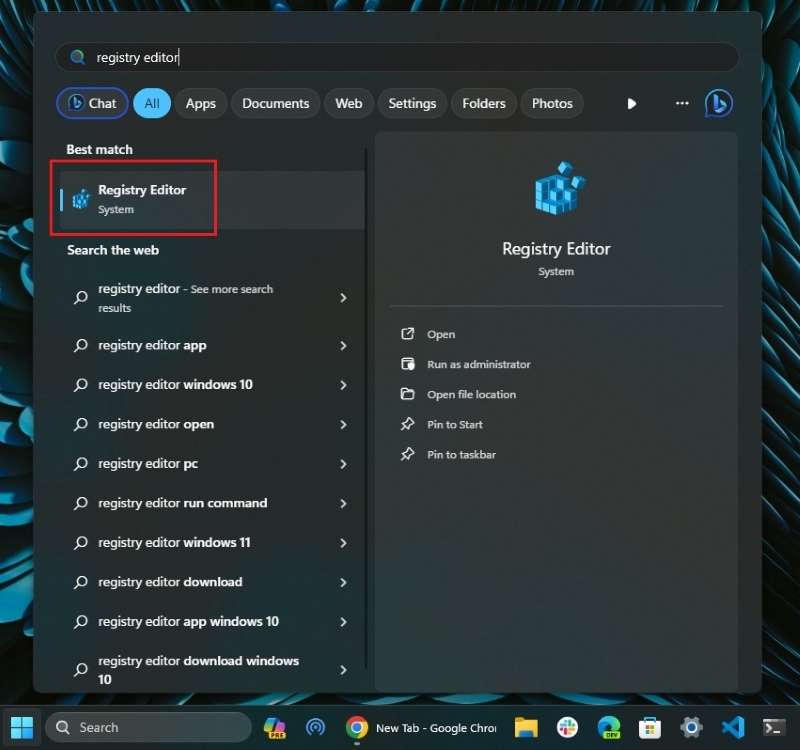
4. Force Enable Memory Integrity on Windows 11
As a last resort, you can force enable the memory integrity feature through the Registry Editor. You simply need to change a value, and that’s it.
- Open the Start menu and search for “Registry Editor” to open it.
- Now, copy the below path and paste it into the Registry Editor’s address bar.
Computer\HKEY_LOCAL_MACHINE\SYSTEM\CurrentControlSet\Control\DeviceGuard\Scenarios\HypervisorEnforcedCodeIntegrity
- Hit Enter, and it will directly take you to the appropriate entry.
- Double-click on “Enabled” in the right pane and change the “Value data” to
1.
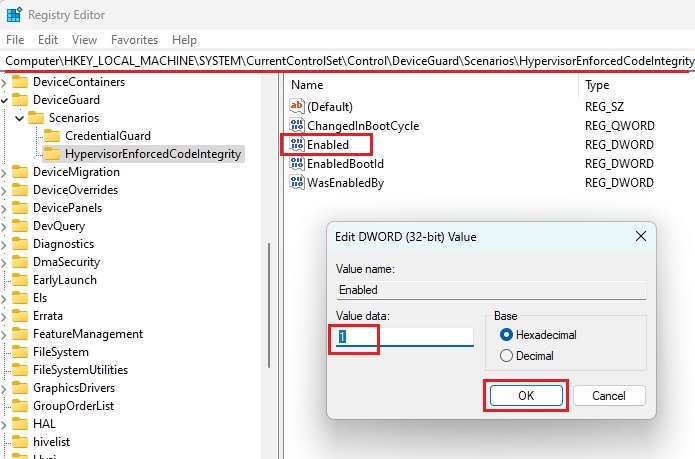
- Click on OK and close the Registry Editor. Now, restart your Windows 11 PC and check if memory integrity has been enabled on Windows 11 or not.
So this is how you can turn on Core Isolation’s Memory Integrity feature on Windows 11. For many users, the feature is disabled or greyed out due to some system issues. We have included key fixes if you run into one of those problems.
In case you’re still having issues, you may have to perform a clean install of Windows 11. And if you have any questions, let us know in the comments section below.


