Is the “This Device is Disabled” Code 22 error in Device Manager stopping you from using a new or old device on your PC? Fret not, as we are here to help you resolve this problem. The code 22 error means that the device has been disabled manually, and sometimes enabling it back doesn’t help. Whatever may be the cause, here are 10 ways to fix the “This Device is Disabled” Code 22 error on your Windows 10/ 11 PC and make that hardware work again.
1. Unplug and Replug New Hardware
The new hardware which you have plugged into your PC might simply start working again after a quick removal and reinstallation. So, if it was a device that plugs in via USB, go ahead and unplug it. Then, wait a few seconds and plug it back again. Now, check if the device shows up in Device Manager without the error code.

If it is hardware that is installed in your desktop PC’s internal motherboard slots, you have to do the same by opening it up and performing the uninstallation and reinstallation of that device.
2. Renable Hardware in Device Manager
If you haven’t tried this fix already, we recommend you check if the device has been accidentally disabled. You need to enable it if that’s the case. So, follow the steps below:
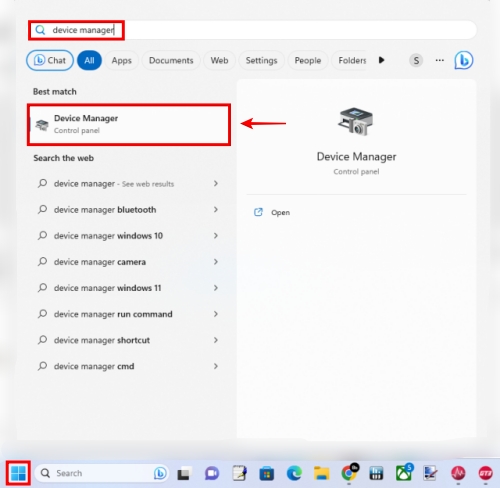
1. First, use the ‘Windows + S’ keyboard shortcut in Windows 11/10 to launch the search and open the Device Manager.
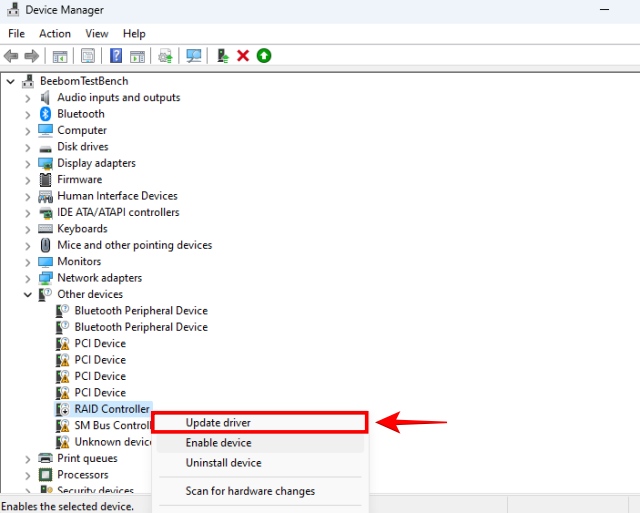
2. Next, right-click on the device that is having the issue, and click on Enable Device.

3. Update Your Device
Another common reason why you might be experiencing the Code 22 error might be due to outdated drivers. We have a dedicated guide on how to update drivers in Windows 10/11, which includes both native and third-party tools to download newer drivers. Windows Update too has a repository of drivers for most drivers, so simply updating the driver in Device Manager could work.
1. Again, use the Windows + S shortcut to launch the search and open the Device Manager.
2. When in Device Manager, right-click on the device that’s suffering the Code 22 error. Now, click on Update driver.
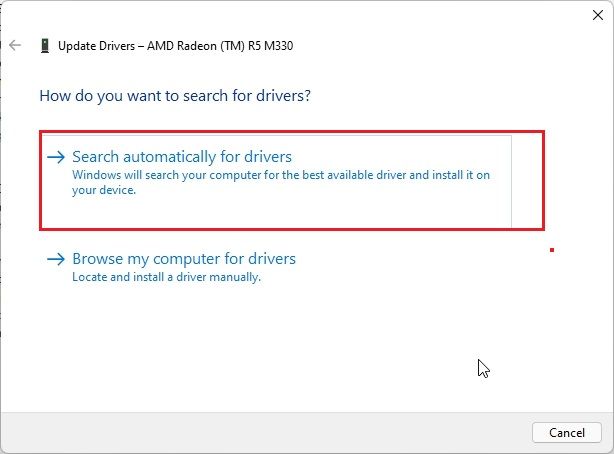
3. Next, click on Search automatically for drivers.
4. Then, click on Search for Updated Drivers using Windows Update.
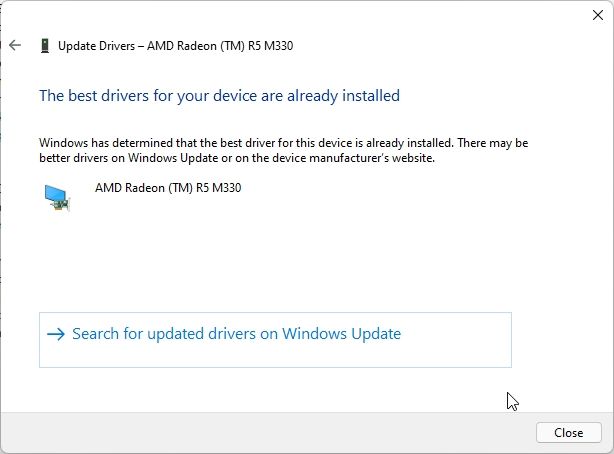
4. Windows will automatically download the latest, stable version of the driver for your hardware. This will hopefully fix the “This Device is Disabled” Code 22 error on Windows 10/11.
4. Restart your PC
Restarting your PC might be a mandatory step while setting up your new device, so go ahead and attempt this now. You can restart your PC by clicking on the start menu and then clicking on the power button. Here, click on ‘Restart‘. Simply turning the PC off and then on is also fine.

5. Uninstall Device Driver Completely
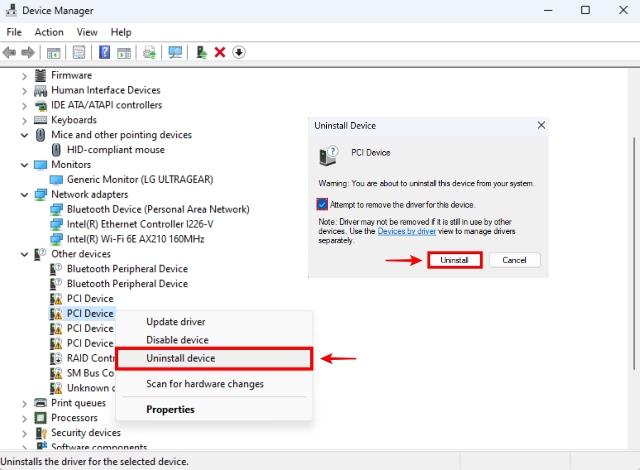
1. Once again, open the Device Manager on your Windows 10/11 PC.
2. Next, right-click on the device which is showing the Code 22 error. Then, click on ‘Uninstall device‘.
3. Also, you might get an option for removing the drivers completely for that device. Ensure that this particular tickbox is checked.
6. Install Older Drivers
There is a chance that the updated driver might be causing the issue, making it the culprit rather than the solution. So, rolling back to an earlier version of the driver might fix the “This Device is Disabled” Code 22 error for you. This is especially true if the device was working fine before, but is now exhibiting error for some reason.
1. To roll back your driver, you need to find the manufacturer’s webpage, which has the list of drivers released for your particular hardware.
2. Once you find this, find an older driver (by a few months or weeks depending on when you started facing the issue) and download it from the manufacturer’s website.

2. Use the previous fix (fifth one) to uninstall your device driver completely, before proceeding to the next step. After uninstalling, do not update the driver.
3. Go to the location where you downloaded the older device driver and then open the installation package. You might have to extract the compressed (.zip) file on Windows to access it. Follow the on-screen instructions and install the old driver.
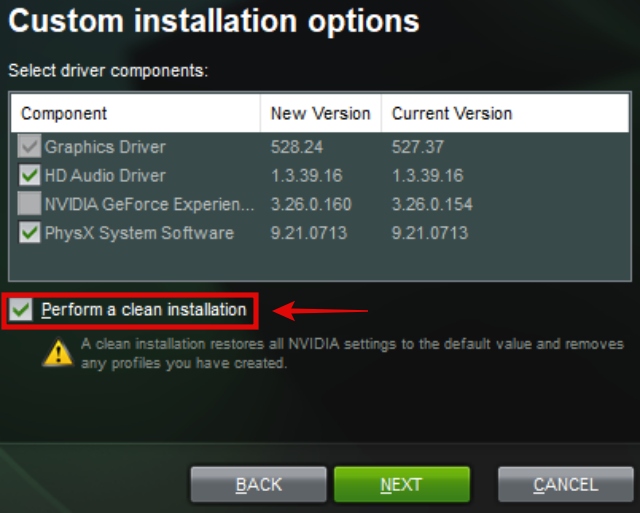
Note: By the way, if it was a GPU driver that was having Code 22 errors, ensure that you click on the tickbox next to “Perform a clean installation.” When done, check if your device has started functioning optimally.
7. Perform a System Restore
If the “This Device is Disabled” Code 22 error started happening recently, and your device was functioning well before, then performing a system restore can probably fix the problem. To do the system restore, you need to have a restore point already and if you don’t remember making one, doing this step can still be possible because Windows & other programs tend to create restore points before making changes to your system.
1. Launch Windows search with the keyboard shortcut Windows + S. Then, type the word ‘restore‘.
2. When the suggested result ‘Create a restore point‘ pops up, click on it.

3. Next, click on ‘System Restore‘. When the System Restore window pops up, click on ‘Next‘.


4. Find a restore point with a suitable date and time, somewhere near the timeframe of when you were not having any issues with a device showing Code 22 errors. When you find a suitable one, click on it, and then click on ‘Next‘. On the final screen, it will ask you to confirm your restore point. Click on ‘Finish‘.


5. Windows will now perform the System Restore, which may take some time. After that, the This Device is Disabled Code 22 error will go away, as long as the issue wasn’t happening at the specific time when your restore point was made.
6. If you do not have any system restore points whatsoever, you’ll need to reset your PC. This involves either factory resetting your PC from the Windows settings, or performing a clean install of Windows 11 using the Media Creation tool or a USB drive. This is the only alternative if you don’t have a system restore point
8. Update your BIOS
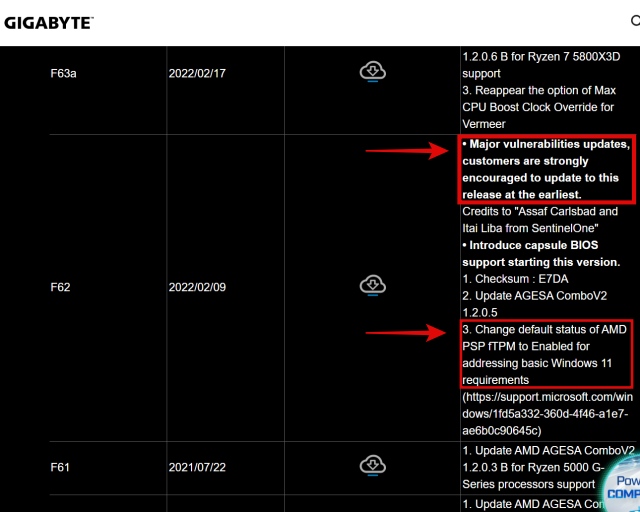
Updating your BIOS/UEFI to the latest revision is optional in most situations but in some cases, the latest BIOS update contains necessary vulnerability patches, firmware updates, and hotfixes for your hardware. So, update your BIOS by following the recommended instructions suggested by your manufacturer. We also have a guide on how to update BIOS if you’d like detailed instructions.
9. Reset BIOS Settings
Resetting the BIOS settings to default can definitely help with the Code 22 error, especially if a recent change in the settings has caused the issue. So, enter the BIOS by pressing F2/Delete when your PC boots up (here are more methods for entering your BIOS/EUFI in Windows PCs) and then navigate to the last menu.
In most cases, that’s where you will find the option to ‘Reset BIOS Settings to Default‘. In our case (ROG Z790-E Motherboard) it was called ‘Load Optimized Defaults‘. When you find this setting in your PC’s BIOS, go ahead and select it. After your BIOS has been reset, your PC will restart. Refer to the official instructions manual to reset the BIOS if needed.

10. Replace the Device
If all else fails, then you might have to replace the device with a new one to solve the This Device is Disabled Code 22 error in Windows 10 or 11. If your device has a manufacturer’s warranty, you can submit it for service under warranty. Once the new device comes, you will no longer have the issue.


