There are countless number of things that you can do on a Windows computer. In fact, if you are willing to dig deeper into the Windows settings, you can customize your computer to the extent of your imagination. One of the most basic such things that you can do is change the default font. Even if you haven’t ever had a thought about it, think about it now. Would you want to make your computer more personalized with a font that you choose? Well, if you are willing to do so, then here is how to change the default font in Windows 10:
Change Windows 10 Default Font Using Registry Editor
The default font that you get on Windows 10 is “Segoe UI”. Given that this has been the default font since many past versions of Windows, I won’t be surprised if you are already bored of it. If you are looking to change it, then doing it through Registry Editor is the way to go. Read the steps mentioned below to find out how:
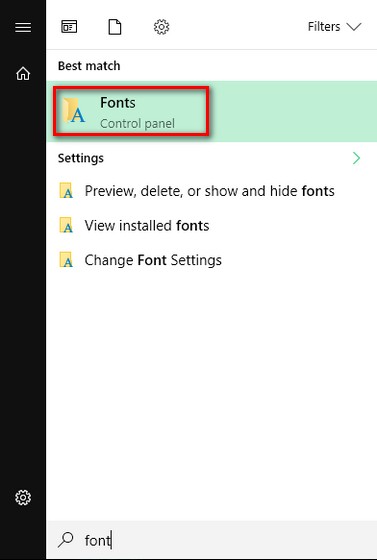
- Open the Start menu and search for “Font”. You’ll see a “Control panel” folder named “Fonts” as a suggestion. Click on it to open it.

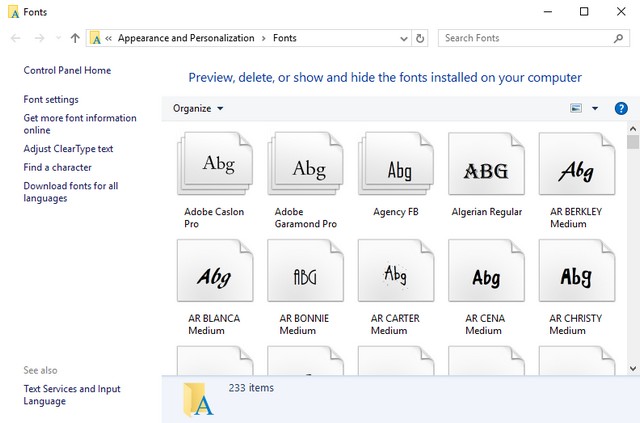
- This opens the Fonts folder. Here, find the font that you want to use and note carefully how it’s spelt as this is very important.

- Now open a blank Notepad file and paste the following lines in it:
Windows Registry Editor Version 5.00
[HKEY_LOCAL_MACHINE\SOFTWARE\Microsoft\Windows NT\CurrentVersion\Fonts]
“Segoe UI (TrueType)”=””
“Segoe UI (TrueType)”=””
“Segoe UI Black (TrueType)”=””
“Segoe UI Black Italic (TrueType)”=””
“Segoe UI Bold (TrueType)”=””
“Segoe UI Bold Italic (TrueType)”=””
“Segoe UI Historic (TrueType)”=””
“Segoe UI Italic (TrueType)”=””
“Segoe UI Light (TrueType)”=””
“Segoe UI Light Italic (TrueType)”=””
“Segoe UI Semibold (TrueType)”=””
“Segoe UI Semibold Italic (TrueType)”=””
“Segoe UI Semilight (TrueType)”=””
“Segoe UI Semilight Italic (TrueType)”=””
[HKEY_LOCAL_MACHINE\SOFTWARE\Microsoft\Windows NT\CurrentVersion\FontSubstitutes]
“Segoe UI”=”Arial”
Note: I wanted to change the default font on my computer to “Arial”. If you want some other font, simply change the font in the last line accordingly. For example, if you were to choose “Times New Roman”, the last would be “Segoe UI”=”Times New Roman”.
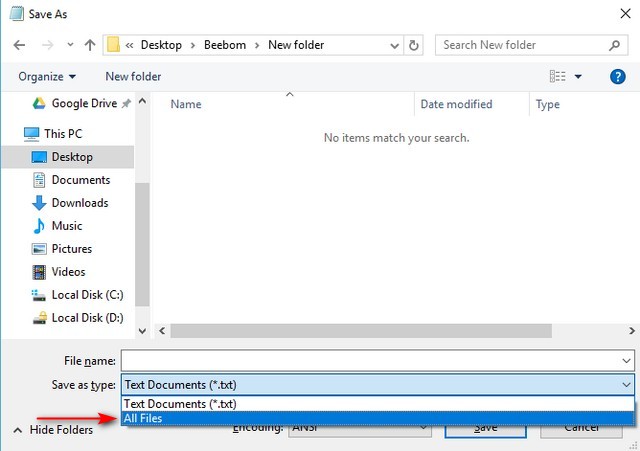
- Now save the Notepad file by pressing Ctrl + S on your keyboard. In the Save As window, change the “Save as type” to “All Files”.

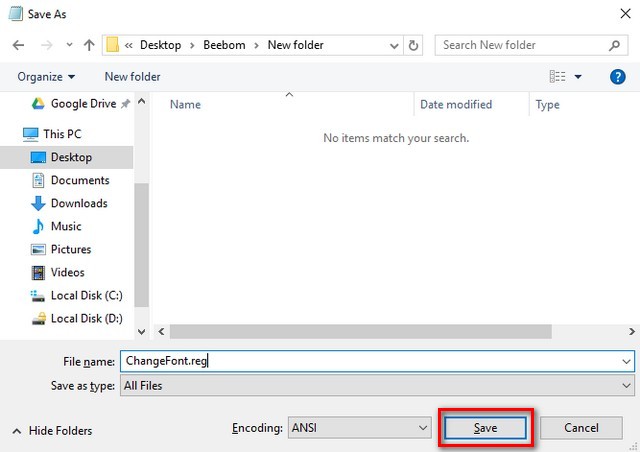
- Next, name the file to anything you want and then save it. The important thing to remember here is to save it with the “.reg” extension. I gave it the name “ChangeFont.reg”.

- Now double-click on this saved file and click on “Yes” when asked for confirmation.

- You should now see a message that tells you that the registry entry has been successfully added. Click on “OK” to finish.

Now for the changes to take effect, you’ll have to restart your computer. In case you ever want to revert back to the default Windows font, simply open the file in Notepad again and change the last line to the following:
“Segoe UI”=-
Now repeat the same steps to save the file and add it to the registry, and then restart your computer to reset the default font.
SEE ALSO: How to Force Delete Undeletable Files in Windows 10
Go Ahead and Change Font in Windows 10
Now that you know how to change the default font in Windows 10, you can go ahead and start experimenting with different fonts. This will make your computer truly yours as it will stand out from most other Windows computers. So which font did you swap the default one for? I would love to here from you in the comments section below.


