Making 2D animations is common for Procreate users. However, with the Procreate 5.2 update, you can not only paint over 3D objects but animate them right on your iPad as well. These animated objects can then be exported as animated images and video files with ease. The 3D painting and animation feature works on most iPads, including the M1 iPad Pro and the new iPad mini 6. So, for 3D enthusiasts or artists excited to learn how to use this feature, let’s dive right in and figure out how to animate 3D objects in Procreate.
Animate 3D Objects in Procreate (2021)
Animating 3D objects in Procreate isn’t as powerful as other popular 3D modeling CAD tools or game engines. Even with 3D capabilities, Procreate is still an artistic tool at its core. So, you can only expect some basic animations out of it and nothing beyond that.
What are the Animation Effects for 3D Objects in Procreate
In Procreate, the animation options are provided while exporting 3D objects. These are only there for presentation purposes, and for now, hold no practical use. Let’s quickly learn about the default options before learning how to animate 3D objects and export them.
Animated Rotate
As the name suggests, this effect makes the 3D object rotate around a certain point. The rotation works like a zoom effect too with the object changing its distance from the camera. If you place multiple light sources in Procreate, you can see their light reflect against the 3D object when it rotates. Rotation is a great way for you to present your models from all sides.
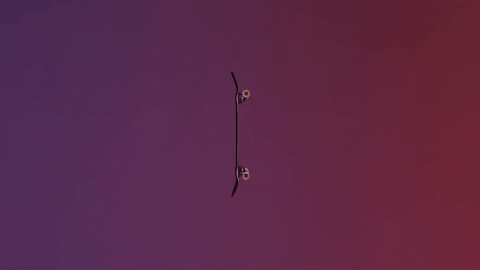
Animated Swing
Functionality-wise, this effect is similar to Animated Rotate. But instead of doing a full 360-degree rotation, the object here swings back to its original position after a 180-degree movement when it’s closer to the camera. It also can have additional zoom and lighting effects that help you add depth to your 3D model.
For now, these options can seem a little limited, but we can expect to see more animation effects bring added in future Procreate updates. Both of these animated options can have custom speed (or ease). You can also adjust the zoom level and duration of the animation before exporting a 3D object. Other than these basic options, each exporting format offers some exclusive features. We will focus on them in the next section.
Animated Export Options for 3D Models in Procreate
There are multiple animated exporting options available in Procreate. The effects in each of these options remain the same but the internal settings can vary slightly. Let’s get started and animate 3D objects in Procreate.
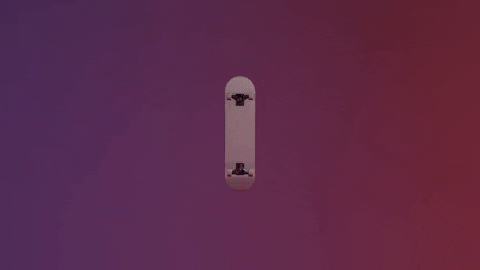
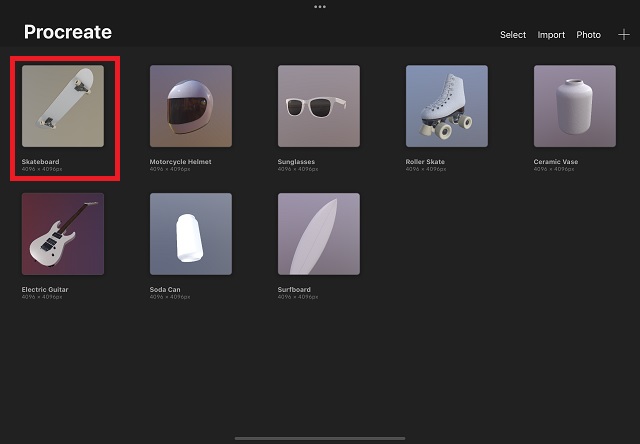
1. Start by opening the 3D model you want to animate by tapping on it from the Procreate homescreen. For this tutorial, we will use the 3D Skateboard, which is a part of sample 3D models provided by Procreate.
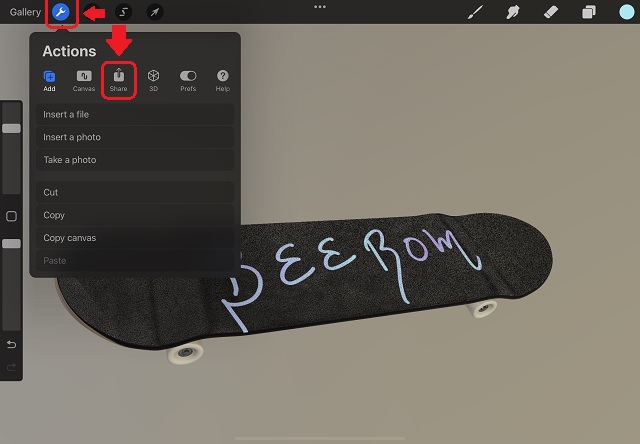
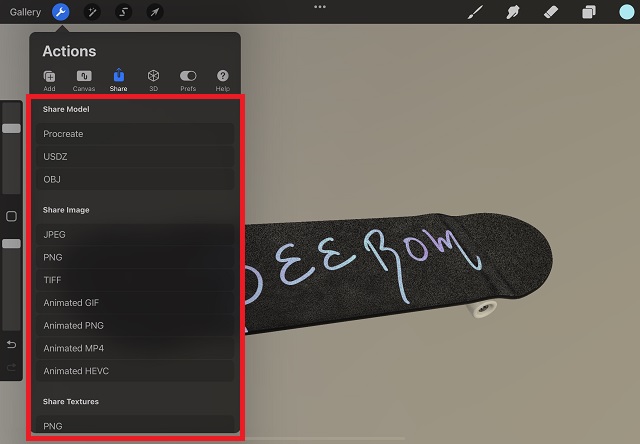
2. Then, tap the “Actions“ button marked by a wrench icon at the top left corner of the screen. Once the Actions menu opens, tap on the “Share” button.
3. Finally, you will have a variety of sharable file extensions, including the standard Procreate, USDZ, and OBJ options, along with some animated options. You can tap on any of the desired animated formats to load up options related to it. Let’s go over each of these animated options before you make your decision.
Animated GIF
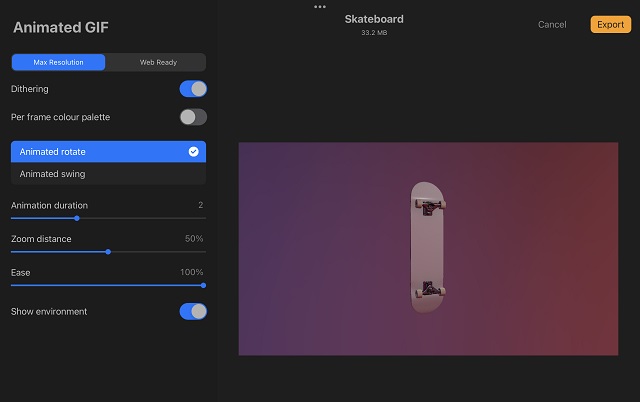
GIFs are probably the simplest animated formats to use. These do not support audio, so they are also usually lighter and lower quality than other animated file formats.
Procreate offers GIFs in two resolutions – the “Max Resolution” renders out the GIPS in 720p resolution, which is heavy in size. Meanwhile, the “Web Ready” option optimizes the quality and reduces the size of the overall file. Among the exclusive options, this format allows you to turn on/ off Dithering. It’s a form of noise applied over images to reduce their distortion even at larger scales. You can also allow per frame color palette to export more accurate colors, but that’s barely noticeable in the animated GIF.
Animated PNG
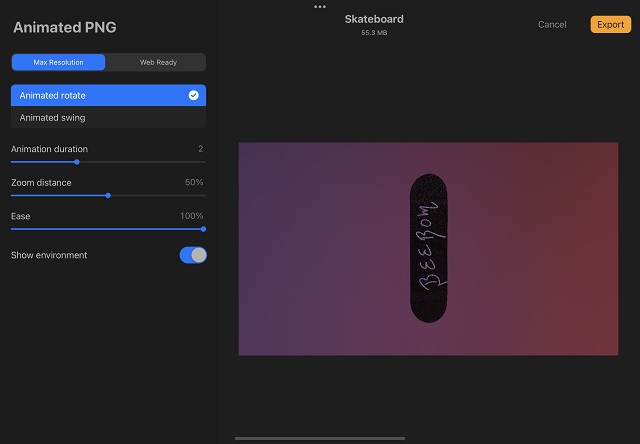
In theory, animated PNG is similar to GIF files. But these have better colors, some level of transparency, and overall higher image quality. Procreate allows you to export 3D models at “Max Resolution” and “Web Ready” resolution. However, if you plan to share your 3D model online, you might want to reconsider your choice.
Animated PNG sounds good in theory but isn’t supported by most platforms. For example, even the iPad’s Photos app shows it as a static PNG when exported from Procreate. If you need a low-quality file for easy sharing, GIF is still the way to go. For higher quality, you can always stick with an MP4 file.
Animated MP4
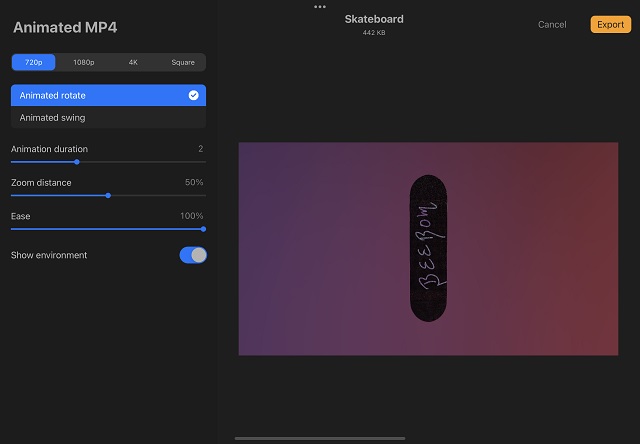
The most popular and reliable option among users is MP4. Procreate, other than animation effects, only offer options to choose the resolution of the MP4 file. You can export an MP4 at up to 4K resolution. If you plan on uploading your work to social media platforms like Facebook or Instagram, choosing “square” is the better choice. It will automatically bring the animated 3D object into focus. Most of the empty space in the frame will be cropped out.
Animated HEVC

The final export option offered by Procreate for animated 3D objects is HEVC. It is a comparatively lesser-known file format. You can expect the same quality and resolution as MP4 while using HEVC. The only additional option it provides is a transparent background. The HEVC file will function like any other video file, and just like a transparent PNG, you can place it over different backgrounds with ease. The maximum resolution for HEVC that Procreate offers is 4K.
How to Export Animated 3D Objects in Procreate on iPad
After choosing the desired format and making the adjustments, all that’s left for you to do is save the file.
1. To save your animated 3D file, tap the “Export” button on the top right corner of the export screen.

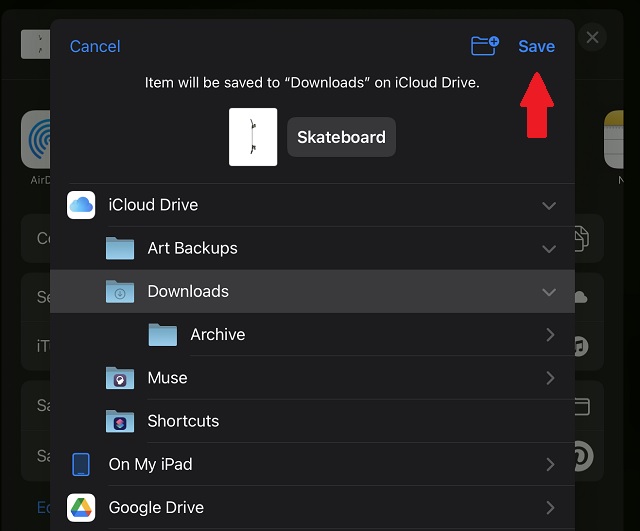
2. Once the loading finishes, Procreate will open up the share sheet and ask you to take action on the file. You can either share the exported file through Airdrop, the Mail app, or a popular messaging app like WhatsApp, Telegram, or others. Yeah, you can use WhatsApp on iPad with ease, and we have a detailed guide for it on your website. You can also choose the “Save to Files” or “Add to Photos” option to save the animated 3D model locally on your iPad.
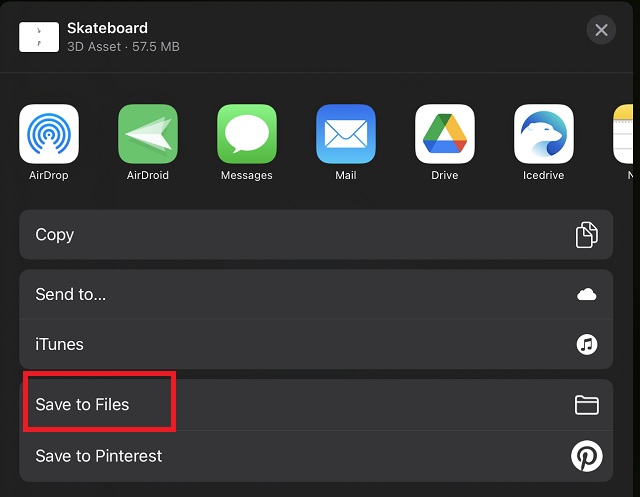
3. To save 3D files locally, tap the “Save to Files” option and choose an appropriate location on your device. Then, tap the “Save” button at the top-right corner of the pop-up window. You can even save your 3D models to iCloud or other installed cloud storage apps.
Easily Animate 3D Objects in Procreate in a Few Steps
Due to limited options, it’s easy to animate 3D objects in Procreate for now. We expect the app to add more complex and diverse options in the future. For those planning to present their work and how the 3D models will look like, the current options should be more than enough. Otherwise, you can always record your iPad screen while manually moving the 3D object in Procreate. Many users even choose to directly print their work from their iPad to present a hard copy to their clients. You can choose the option that suits your needs. If you feel stuck at any point, please drop your query in the comments below, and we will help you out.