
Instead of releasing new features with major annual updates, Microsoft is rolling out new changes with feature drops. In fact, as we learned in our Windows 12 explainer, the Redmond giant is moving to a new update cadence with “Moments” feature drops in 2023. But just before that, Microsoft added tabs support to File Explorer with the Windows 11 22H2 update. However, some users are yet to experience the latest File Explorer UI. Many users report that File Explorer Tabs are not showing up, despite installing the Windows 11 22H2 update. So, in this article, we bring you a detailed guide on how to fix the “File Explorer tabs not showing” issue in Windows 11.
In this tutorial, we have included six different methods to bring back File Explorer tabs in Windows 11. You can expand the table below and follow the step-by-step instructions.
1. Update to Windows 11 22H2 Build
First, before anything, make sure your PC is updated to Windows 11 22H2 build (also called the Windows 11 2022 update). Tabs support in File Explorer was officially added to the Windows 11 stable channel after the 22H2 update. You need to be on Windows 11 Build 22621.675 or later (KB5019509, October 18). So if you want File Explorer tabs to work by default, you must install this build after the 22H2 update.
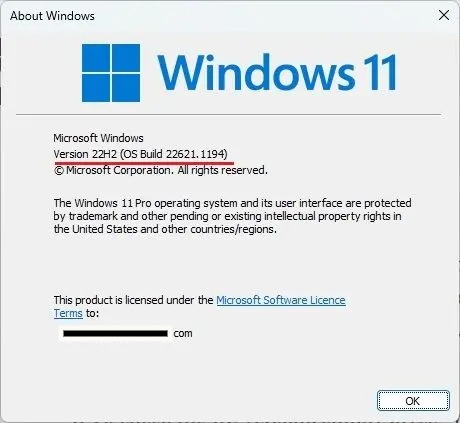
1. To check the OS version, use the Windows 11 keyboard shortcut “Windows + R”. This will open a Run prompt. Now, type winver and hit Enter.


2. Here, check if you are on the latest Windows 11 22H2 update (Build 22621.675 or later).

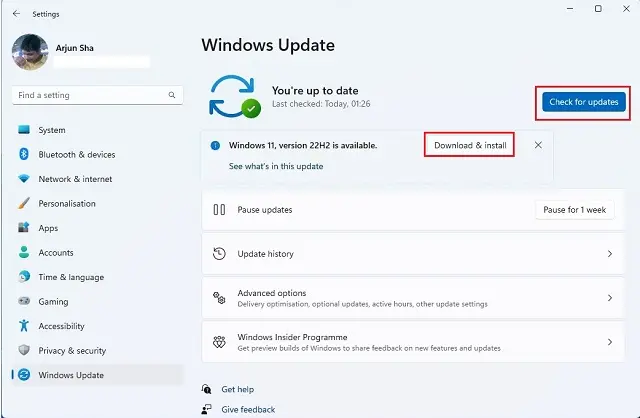
3. If you are on an older version, follow our guide and learn how to install the Windows 11 22H2 update.

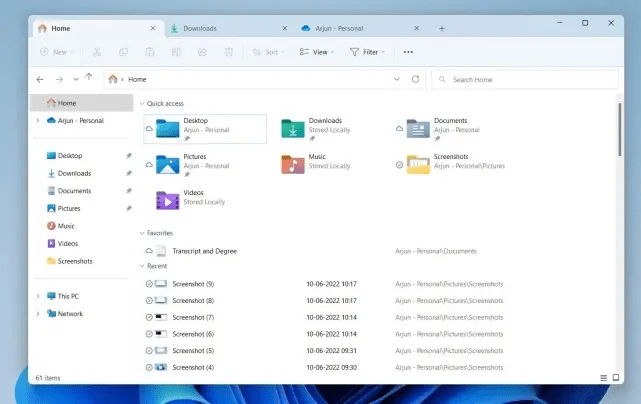
4. Once you have installed the latest update, open File Explorer to see the new tabbed UI. While the stable channel update does not let you move tabs or pull out tabs to open new windows, these features are being tested in the Dev and Beta channels. Watch our latest Windows 11 features YouTube video to see it in action.

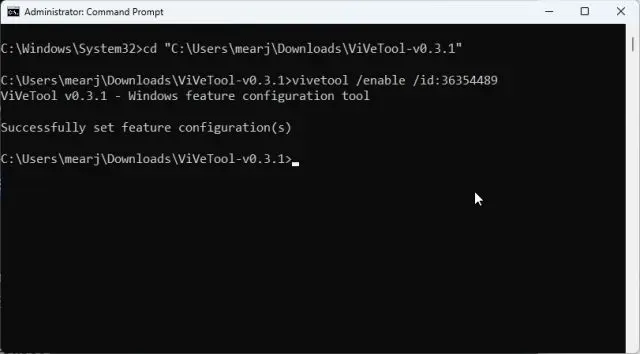
2. Force Enable Tabs in File Explorer With ViVeTool
If File Explorer tabs are not showing in Windows 11 even after installing the 22H2 update, you may need to force enable the feature using ViVeTool. We have already written a detailed tutorial on how to enable Tabs in File Explorer on Windows 11, so follow just this guide. After executing the commands, I am pretty certain that tabs will be enabled for Explorer on your PC.

3. Restart Windows Explorer
Often, the File Explorer does not show the new features and additions because of old processes running in the background. The problem is particularly compounded when you don’t restart your PC regularly. However, if we restart the process tree manually, it starts showing the new changes. So let’s restart Windows Explorer and hope that tabs in File Explorer show up.
1. To restart Windows Explorer, press the keyboard shortcut “Ctrl + Shift + Esc” to open the Task Manager. Now, under the “Processes” tab, select “Windows Explorer” and click on “Restart task”.

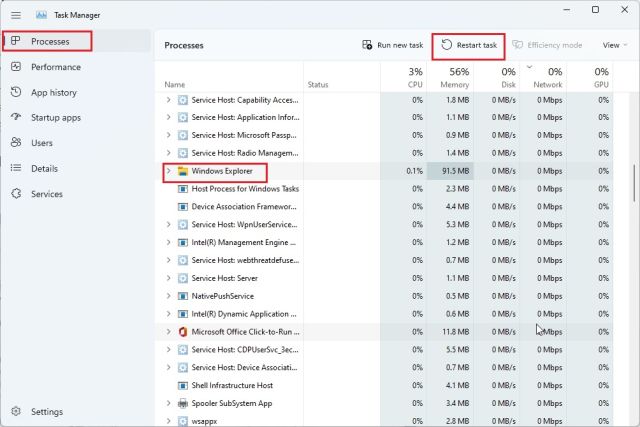
3. Now, all the Windows elements will reload instantly. If File Explorer tabs were not showing on Windows 11 earlier, this will likely do the trick.
4. Clear File Explorer Cache
1. If File Explorer is still not showing tabs in Windows 11, go ahead and clear the Explorer-related cache. To do that, press “Windows + E” to open File Explorer. Now, click on the 3-dot icon in the top-row menu and select “Options” from the drop-down menu.


2. Here, under the “General” tab, click the “Clear” button next to “Clear File Explorer History” at the bottom. Now, click on Apply -> OK. This will delete the File Explorer history and will likely show tabs in the native file manager.


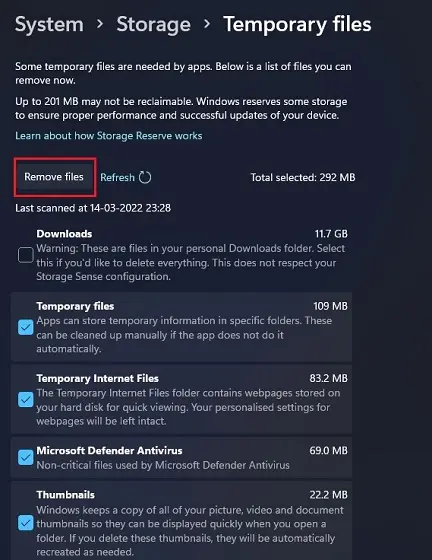
3. Apart from that, it’s recommended to clear the system cache in Windows 11 by following our linked guide.

5. Run the System File Checker (SFC)
If File Explorer Tabs are not showing up, run the SFC tool that checks and validates all the system files. It will ensure that none of the Windows 11 system files are corrupt. To do this, follow the steps below.
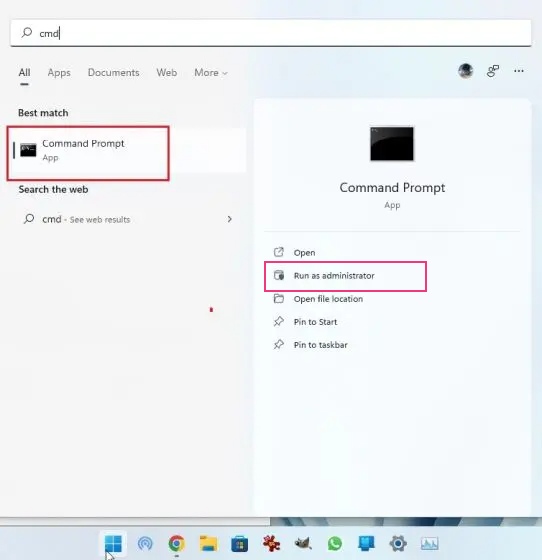
1. Press the Windows key and type “cmd“. Now, click on “Run as administrator” in the right pane.

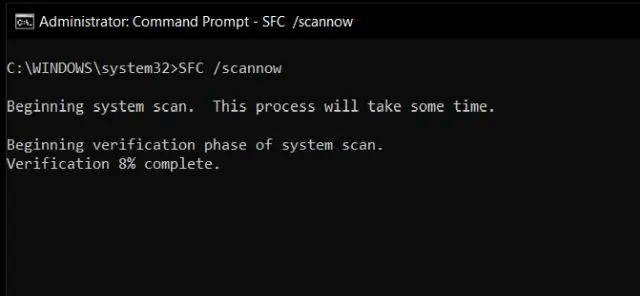
2. Next, enter the below command in the Command Prompt window and hit Enter. Let it complete the process and then restart your PC. After that, check if tabs appear in File Explorer on Windows 11 or not.
SFC /scannow

6. Reinstall Windows 11 22H2 Update
If nothing has worked so far, you likely need to reinstall the Windows 11 22H2 update on your PC. It will definitely bring back tabs to File Explorer, making multitasking easier for you. Here is how to go about it.
1. Press “Windows + I” to open Windows Settings and navigate to “Windows Update” from the left sidebar. Then, click on “Update history” in the right pane.

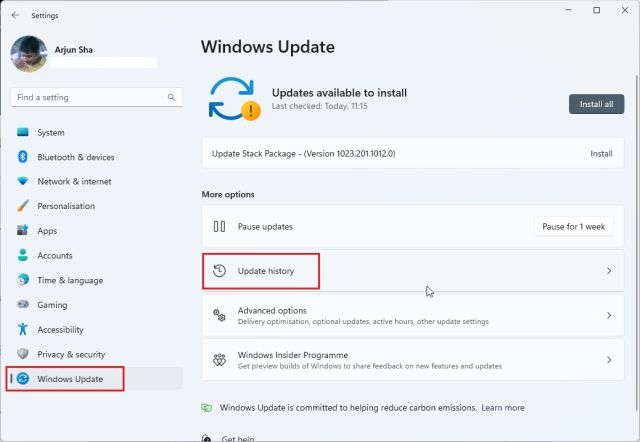
2. Now, scroll down and look for the “Uninstall updates” option. Click to open it.

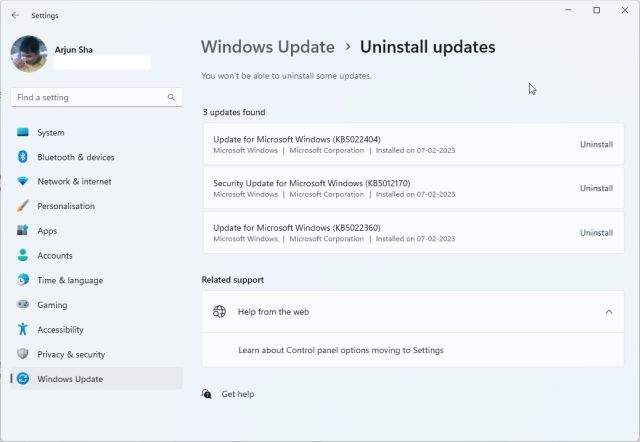
3. Here, go through all the recently-installed updates and look for the 22H2 build. Now, click on “Uninstall” next to it and restart your PC. If the 22H2 build does not show up here, you need to clean install Windows 11.
4. Finally, check for updates again in Windows Settings and install the Windows 11 22H2 update anew. After that, install the next update (KB5019509) and File Explorer tabs should show up in Windows 11 for you.

So this is how you can get tabs in File Explorer if it was not appearing on Windows 11 earlier. As we mentioned above, you must be on the Windows 11 22H2 build in order to access the tabs feature. So before trying any fix, go ahead and update your PC. Anyway, that is all from us. If you want to get screen recording in Snipping Tool on Windows 11, follow our linked guide. And if you wish to enable and use Internet Explorer on Windows 11, our tutorial has you covered. Finally, if you have any questions, let us know in the comments below.

