GNU/Linux has improved a lot in the last few years with desktop environments upping their game. The GUI is much better than it was a decade ago, and can almost rival Windows. However, due to Linux being easy to use, a lot of users don’t use the terminal. The Terminal may appear intimidating to many users, but it is a powerful tool that lets you do a plethora of tasks with ease. In this article, we will look at some of the most important Linux Terminal commands that every user should know.
We have covered commands for everything, ranging from basic file and directory management to more complex tasks like networking and system administration. Whether you are a novice or a seasoned Linux user, it’s time to open the Terminal and try out these commands. Linux has lots of uses but the most prominent use is in the software industry. Knowing Linux can heavily boost your resume and increase your chances at landing your dream job and it all starts with the Terminal.
Basic Help Commands
These are some of the basic Linux help commands you can use when you are stuck with something.
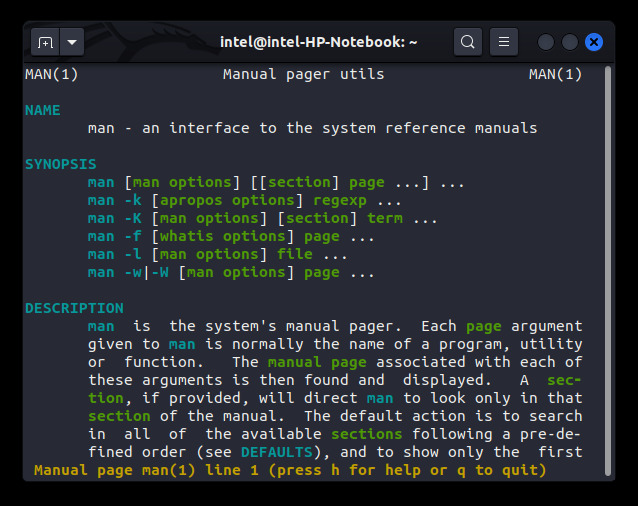
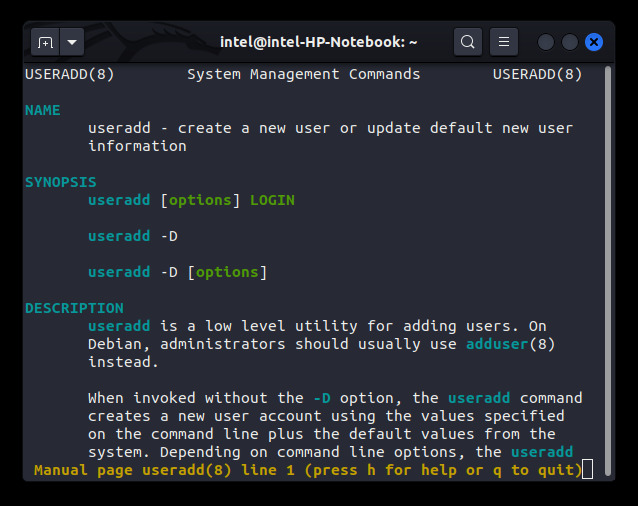
1. man – Show Manual of Commands
This command is going to be your savior whenever you need to know what a command does and all its options. It stands for “manual” and is used to show the help menu for any command along with its syntax and options to use.
The syntax to use the command is:
man <command>
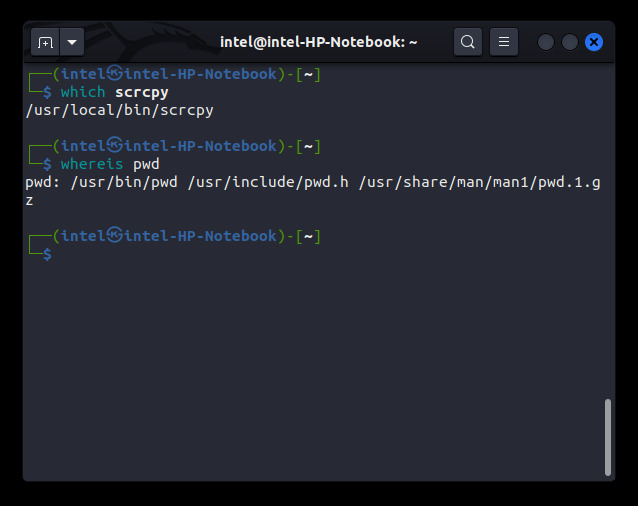
2. which, whereis – Shows the Location of Programs
Sometimes, you might want to know the location of an executable command. The which command returns the path of any program’s executable file on the system. It returns the path where the command is installed. The syntax to use the command is:
which <command_name>
The whereis command works similarly to the which command, except it provides the path for the executable, the source code and the man page. Here, the syntax to use the command is:
whereis <command_name>
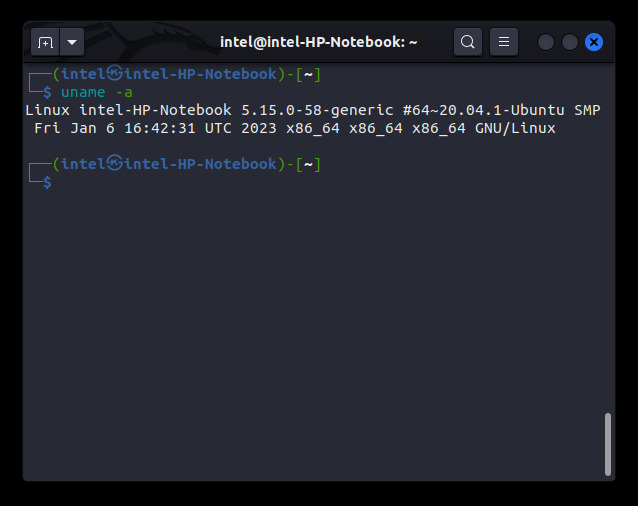
3. uname – Print System Information
This command is used to print the system information like the operating system name, kernel name, etc. The syntax to use the command is:
uname <option>
The options to use with the name command are:
| Option | Description |
|---|---|
-a | Show all system information |
-s | display the kernel name |
-n | print the network node hostname |
-r | print the kernel release |
-v | print the kernel version number |
-m | print the system hardware name |
-p | print the processor type |
-i | print the hardware platform type |
-o | print the operating system type |
Session Management Commands
Linux’s granularity allows users to interact per session. There are a few commands that you might use for session management.
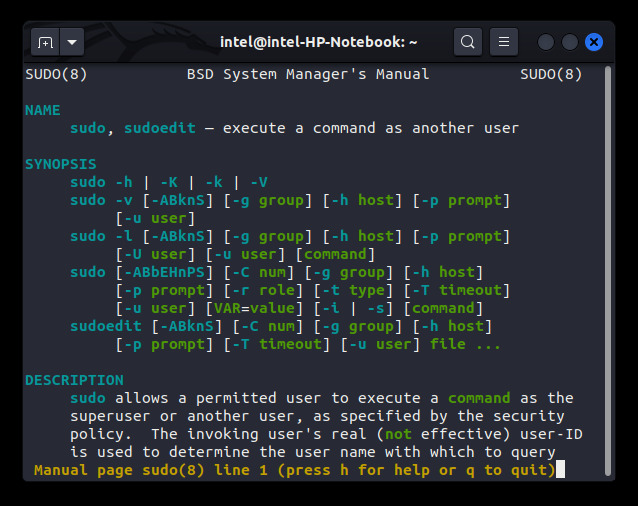
4. sudo – Execute Commands With Higher Privileges
If you ever see an error “Permission Denied”, the sudo command can help you in executing commands as the “superuser,” also known as the “root user”. It is advisable not to run a command with sudo privileges always, as it can do some serious damage to the system. sudo can only work as the superuser if you have privileges to run the command as the root user. The syntax to use the command is:
sudo <command_name> <options>
5. ssh – Establish an SSH Connection
ssh stands for “Secure SHell” and is used to connect to a remote host system using the ssh protocol. If you have a computer online somewhere in the world and want to access its contents, you can essentially “SSH” into the computer and access its files, provided it is set up to do so. Here, the syntax to use the command is:
ssh <username>@<host_ip_address_or_domain_name>

6. su – Switch User
There may be times when you need to switch to another user. This can be done using the su command which stands for “switch user”. The syntax to use the command is:
su <username>
Once you execute this command, this will prompt you for a password and start a new shell/session for the new user.

7. who
The who command is particularly helpful inside a multi-user system and is used to show information such as the name of the user who’s currently logged in, last boot time, etc. The syntax to use the who command is:
who <option>
Generally, the who command is used without any options, but the most common option used with the command is -a, which shows all the users logged in and their boot times.
8. whoami
The whoami command is used to show the current user who is logged in into the system. The syntax to use the command is:
whoami
User Management Commands
Linux makes it extremely easy to manage users with just a few simple commands.
9. useradd, adduser – Add a User
If you ever need to add a new user to your system, use the useradd or the adduser commands. The adduser command is a symbolic link to the useradd command. These commands add a new user to the system and is very useful in the case of a multi-user environment. To execute the command, use the following syntax:
useradd <username> -d <user_home_directory>
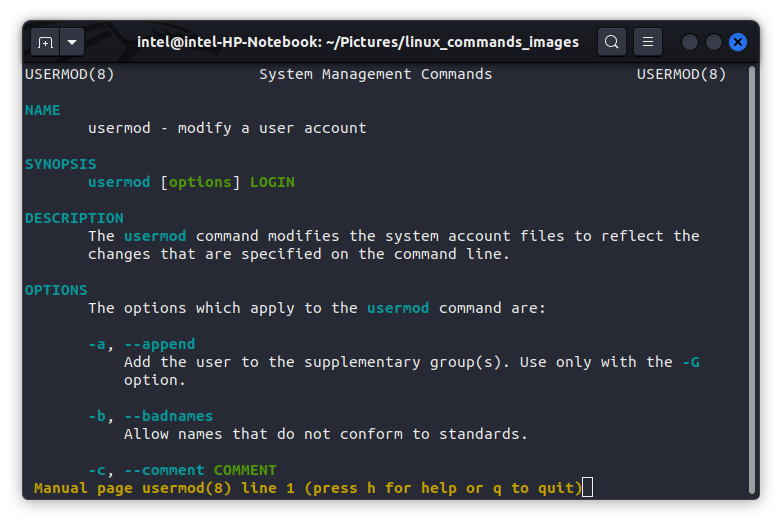
10. usermod – Modify User
This command works similarly to the useradd command, except it modifies an existing user. It can modify groups, permission, etc for any existing user. The syntax to use the command is:
usermod <options> <permission_set>
11. passwd – Password
Much like you can modify the user permissions using the usermod command similarly, you can also modify the password for the current user using the passwd command. Or, if you are the superuser, you can also change the password for other users using the same command. To change the password for the current user, run the command passwd, type the old password and then type the new password twice and hit enter.
Syntax of passwd command is as follows:
passwd <options> <username>
File And System Management Commands
File and system management commands let you, well, manage files and certain parts of your system with ease.
12. pwd – Print Working Directory
If you ever get lost in the Linux filesystem, run the pwd command. It stands for “print working directory” and as the name suggests, it shows your current position in the entire file system. The syntax to run the command is:
pwd
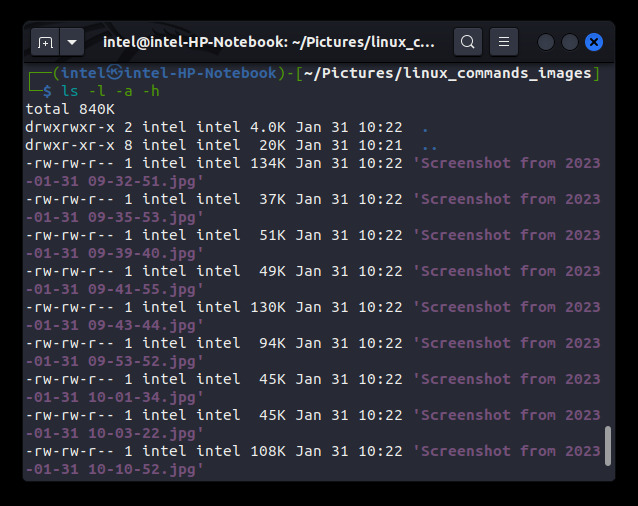
13. ls – List Storage
ls command is used to show the contents of any directory specified, if the user has read permission. By default, it shows the contents of the current directory if no other parameter is specified. It is one of the most useful commands in Linux. The syntax to use the ls command is:
ls <options> <directory_name>
There are many options to use with the command to provide more information about the contents of a directory. The options which you can pair up with the ls command are:
| Option | Description |
|---|---|
-a | show all hidden files and directories in the directory |
-A | show all files, including hidden files, except the top directory |
-h | displays the file sizes in human-readable format like 1K, 234M, 2G etc. |
-S | shows the contents in decreasing order of file size |
-l | show more information like file permissions, modification date, file size, etc about each entry |
14. cd – Change Directory
This command is used to switch to a different directory from the current one. The syntax to use the command is:
cd <directory_name>
If the command is used without any arguments, it will redirect you to the home directory, i.e. /home/<username>/
There are two types of paths which can be used with this command:
- Absolute path: An absolute path of the directory is specified with respect to the root directory or in other words the complete path of the file or directory.
- Relative path: In this mode, the path is specified with respect to the current directory. In the relative path, the current directory is specified with a “.” and the parent directory is specified using “..”.
15. mkdir – make a directory
This command creates the directory(ies) if they do not already exist in the specified path. The syntax to create a new directory using mkdir is:
mkdir <directory_name>
You can also use both absolute and relative paths to specify the directory name while creating a new sub-directory inside a different directory.
16. rmdir – Remove Directory
Generally, this command is used to delete empty directories, but can also remove directories with content using some special flags. The syntax to use this command is:
rmdir <options> <directory_name>
Some of the options which the command can take are:
| Option | Description |
|---|---|
--ignore-fail-on-non-empty | used to delete non-empty directories |
-p, --parents | used to delete the directory along with its children specified |
-v, --verbose | used to get a diagnostic message for every directory |
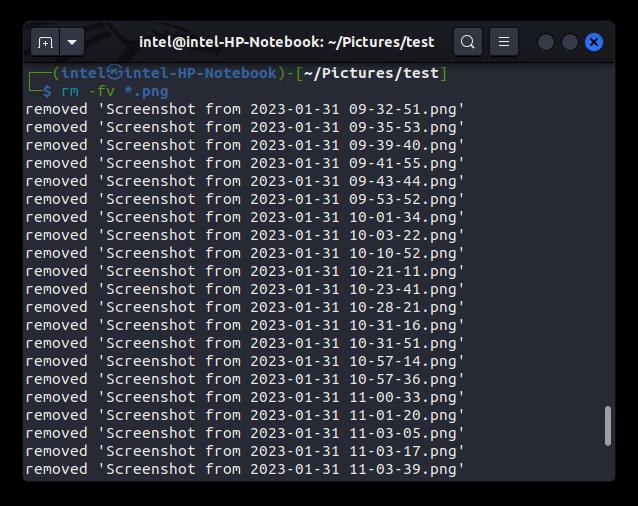
17. rm – Remove
This command is more versatile than the rmdir as it can remove both folders as well as files and also has many options to work with. The syntax to use the rm command is:
rm <options> <file_or_directory_name>
Some of the options that the rm command can take are:
| Option | Description |
|---|---|
-f | When this flag is used, the command will never prompt the user and it will ignore all the nonexistent files and directories. |
-i | When this flag is used, the command will prompt the user for each deletion. |
-r | When this flag is used, the command will remove all the contents of the directory specified. |
-d | This flag is used to remove empty directories. |
-v | This flag is used to get an explanation of what is being done currently. |
18. cp – Copy
This command works the same as the COPY-PASTE in Windows and is used to make copies of files and directories and store them in the specified directory. Here, the syntax to use the command is:
cp <original_file_path> <copied_file_path>
19. mv – Move
The mv command works the same as the CUT – PASTE in Windows and is used to move a file or directory into a different directory. The syntax to use the mv command is:
mv <source_file> <destination_file>
20. ln – Link
The links in Linux are similar to shortcuts in windows. To create a link in Linux, use the ln command as per the syntax shown below:
ln -s <source_path> <link_name>
Here, the -s flag is used to create a soft link. Soft links can be used to link to anything in a system including directories, file systems, etc. Any changes made to the original file are not reflected in the linked file.
If the -s flag is not used, a hard link will be created which has numerous limitations, such as you cannot link directories, file systems, etc. Any changes made to the hard-linked file will be reflected in the original file also.
21. xdg-open – Opens Files and Directory
This command is used to open any file or directory from the terminal with the default application selected. The syntax to use the command is:
xdg-open <file_directory_name>
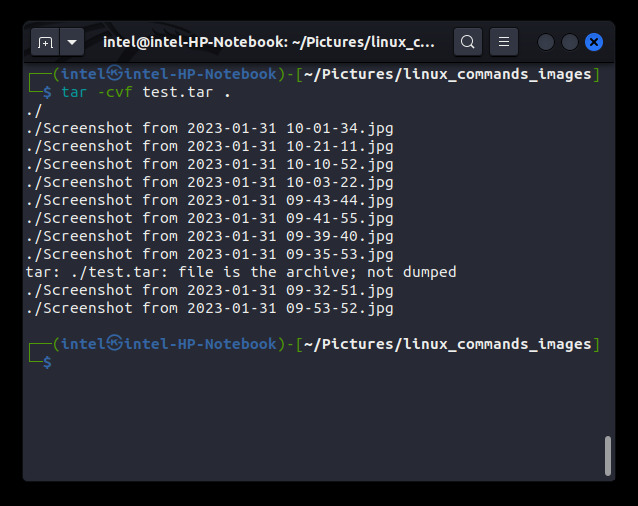
22. tar, zip, unzip, gzip, gunzip – Compress and Decompress Files
The tar command stands for “tape archive” and is used to combine multiple files into a single archive file. It is one of the most important commands in Linux and can be used to both compress and decompress files. So, the archive file thus formed is with the extension .tar. The syntax to use the tar command is:
tar <options> <archive_file> <file_or_directory_to_be_archived>
So, the options to use with the tar command are:
| Option | Description |
|---|---|
-c | creates an archive file |
-x | extracts the archive file |
-f | creates an archive file with the given file name |
-t | displays the contents of an archive file |
-v | displays more information about the current operation being done |
-A | combines the archive files |
-W | verify an archive file |
-r | update an existing tar file |
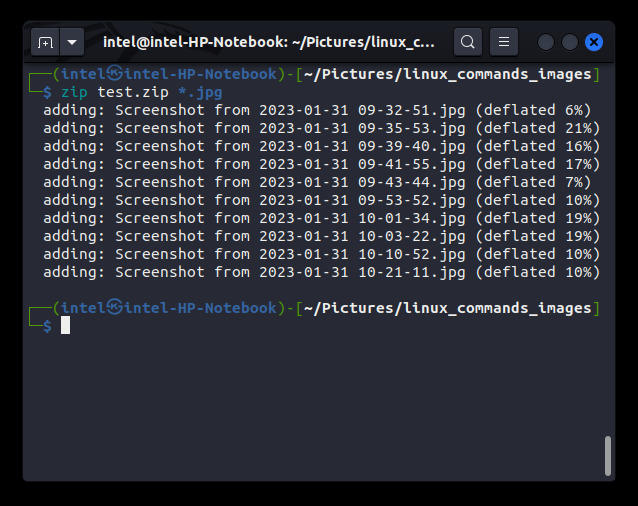
The zip command is used to compress a set of files and directories into a .zip archive file without losing the quality. Here, the syntax to use the zip command is:
zip <file_1> <file_2>
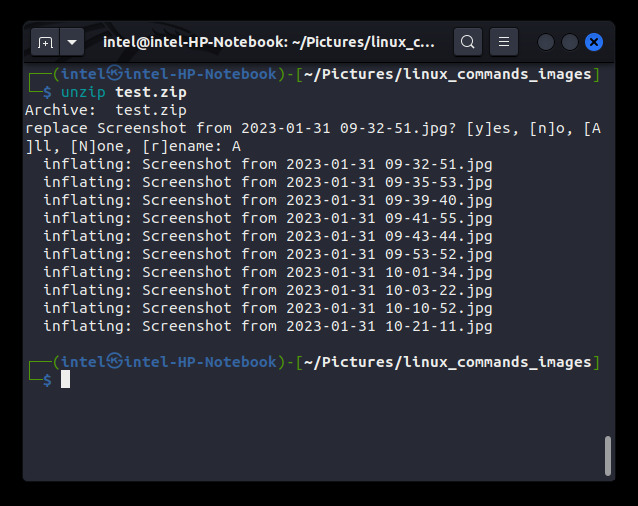
The unzip command is used to extract .zip files. Syntax to use the unzip command is:
unzip <zip_file>
The gzip command works similarly to the zip command, except it has a higher compression rate and creates smaller archive files. So, the archive files are created with .gz file extension. The syntax to use the gzip command is:
gzip <file_1> <file_2>
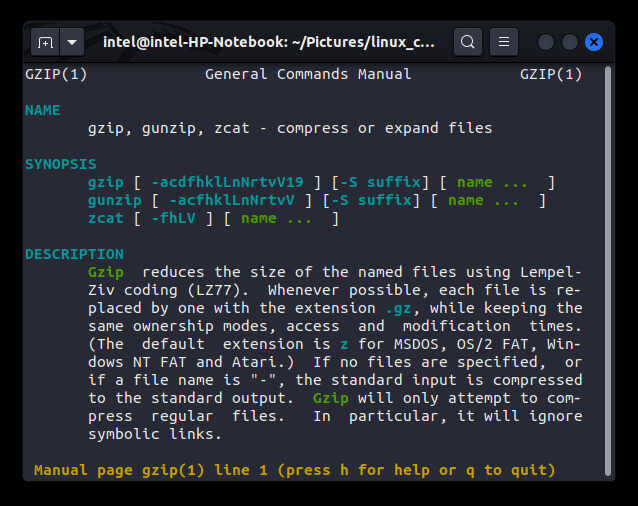
To extract .gz files, use the gunzip command. It works similarly to the unzip command, except it takes more time to extract as it has a higher compression rate. The syntax to use the gunzip the command is:
gunzip <archive_file>

23. mount, unmount – Mounts File Systems
In Linux, everything is treated as a file, even storage devices and file systems also. The mount command is quite useful as it can help in mounting various types of storage devices and file systems with the default mount location as /etc/fstab. The standard form of the mount command is:
mount -t <type> <device> <path_to_mount>
To remove a file system or a storage device from the system, use the umount command. The syntax to use the umount command:
umount <path_of_device>
24. du – Disk Usage
At times, you must have seen the annoying error message for lack of storage but can never find the file which is occupying the most disk space. For such a situation, you should use the du command which can help to monitor the files occupying the most disk space and further reveal some internal problems. The basic syntax to use the du command is:
du <option> <file_or_directory>
Some of the options you can use with the command are:
| Option | Description |
|---|---|
-a | counts the disk usage for all files and directories |
-h | displays the sizes in human-readable format and not in bytes |
-c | displays the total disk usage for a particular directory |

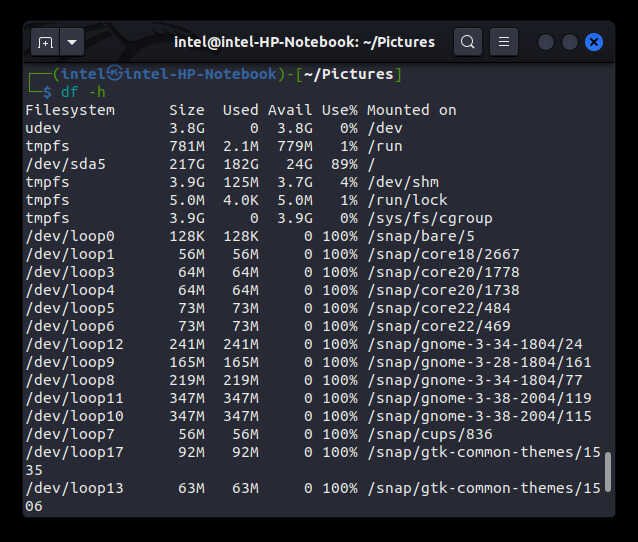
25. df – Disk Free
This command works similarly to the du command, except it shows you the complete summary of the total available space in the file system. The syntax to use the df command is:
df <options>
The common options which you can use are:
| Option | Description |
|---|---|
-a | used to include all files and directories |
-h | shows sizes in human-readable format |
-l | shows information about the local file system only |
-t | shows the total disk size and availability |
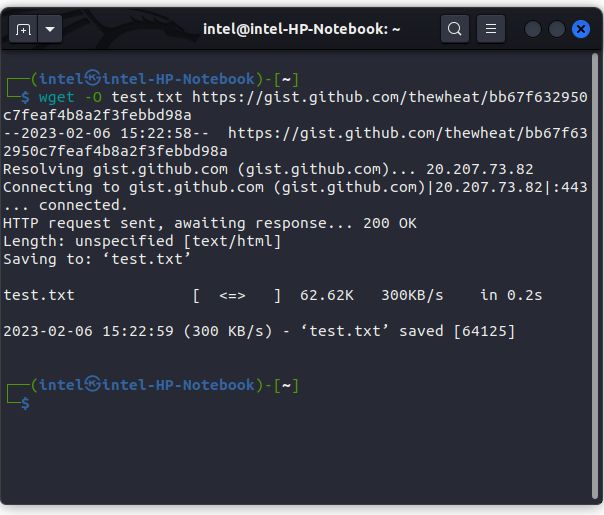
26. wget
wget command is used to download files from the internet using various protocols like HTTP, HTTPS, FTPS, etc. The basic syntax to use the wget command is:
wget <options> <url_of_file>
Some of the essential options to use with the command are:
| Options | Description |
|---|---|
-i | Download from multiple URLs stored inside a file |
-O | Save the downloaded file with a new name |
-b | Run the downloading task in the background |
-P | Save the downloaded file to a specific directory |
File Modification Commands
This section contains every basic file creation and modification command you need to know to effortlessly create files.
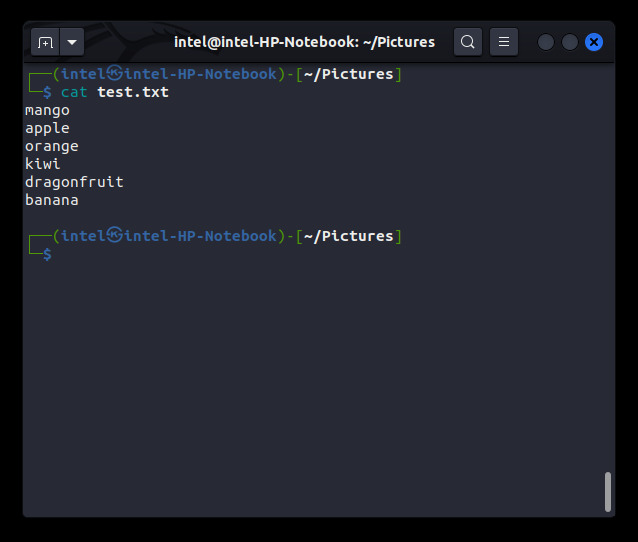
27. cat – Concatenate
The cat command is used to print the entire contents of any given file(s). To view the contents of any number of files, use the following syntax:
cat <path _to_the_file-1> <path _to_the_file-2>
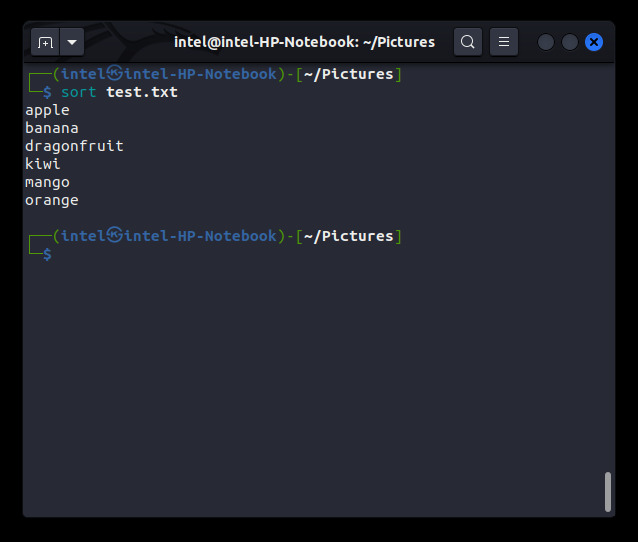
28. sort – Prints Sorted Output
This command works similarly to the cat command, except it prints the contents of a file in ascending order. The syntax to use the sort command is:
sort <options> <file_name>
The common options to use with the sort command are:
| Option | Description |
|---|---|
-u | removes duplicates from the output |
-r | sorts the output in descending order |
-o | writes the sorted output to a file and not to the output screen |
29. uniq – Prints Unique Lines of a File
This command removes the duplicate lines from the file’s contents or from another command’s output. The syntax to use the uniq command is:
uniq <file_name>

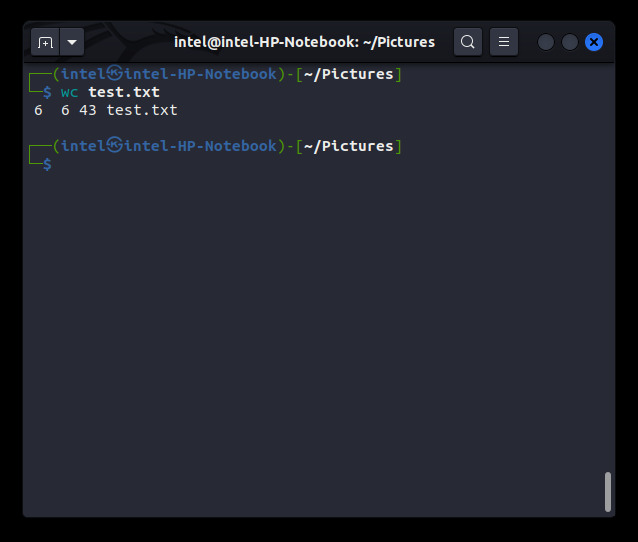
30. wc – Word Count
The wc command stands for word count. It can count the total number of words, characters, number of lines, etc. The syntax to use the command is:
wc <file_name>
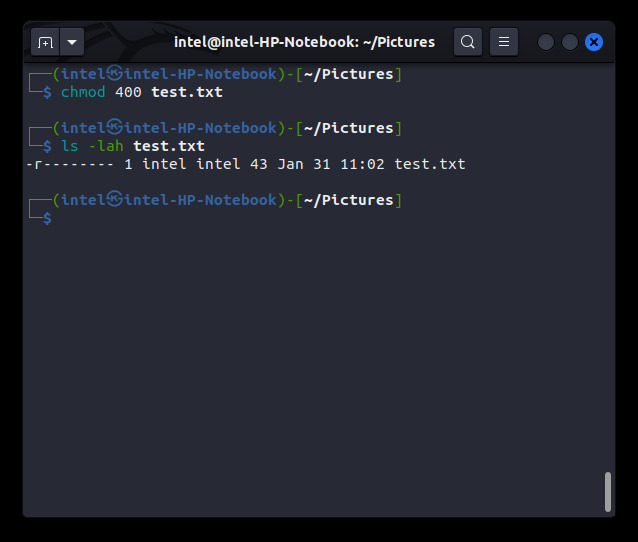
31. chmod – Change Mode
This is probably one of the most important Linux commands and is used by every Linux user. The chmod command is used to modify the permissions for a particular file or directory. Syntax to use the command is:
chmod <permission_set> <file_or_directory>
There are 3 types of permissions you can specify, using the permission set:
- read: Allows the users to view the contents of a file or directory, abbreviated as ‘r’.
- write: Allows the users to make changes to the file or directory abbreviated as ‘w’.
- execute: Allows the users to execute a file abbreviated as ‘x’.
32. chown – Change Owner
This command works similarly to chmod, except it changes the file owner by modifying the user group. Only the owner and the root user can change the file ownership. The syntax to use this command is:
chown <username> <filename>
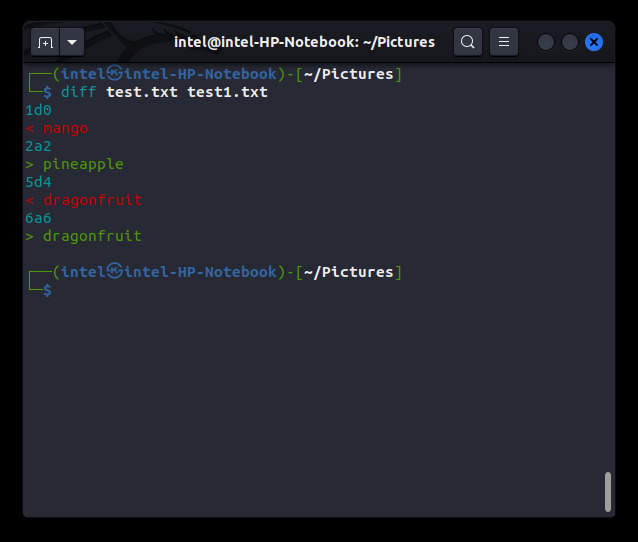
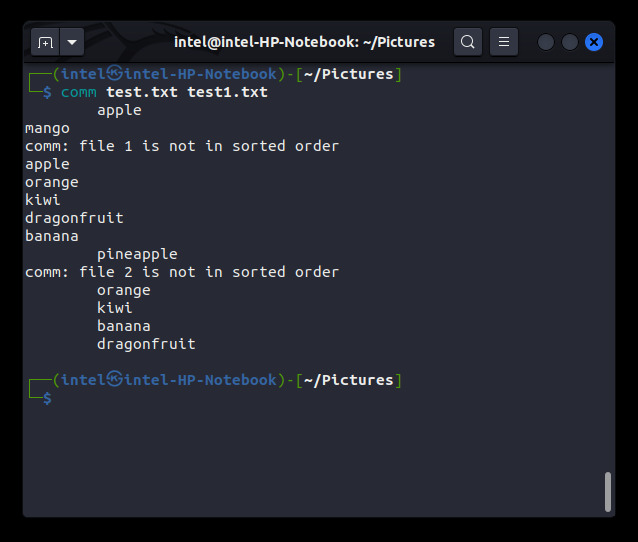
33. diff, cmp, comm – Difference, Compare, Combined Checking
In Linux, if you ever need to compare two files, there are three commands to use – diff, cmp, and comm. The diff command displays the differences in two files line by line. The syntax to use the diff command is:
diff <file_1> <file_2>
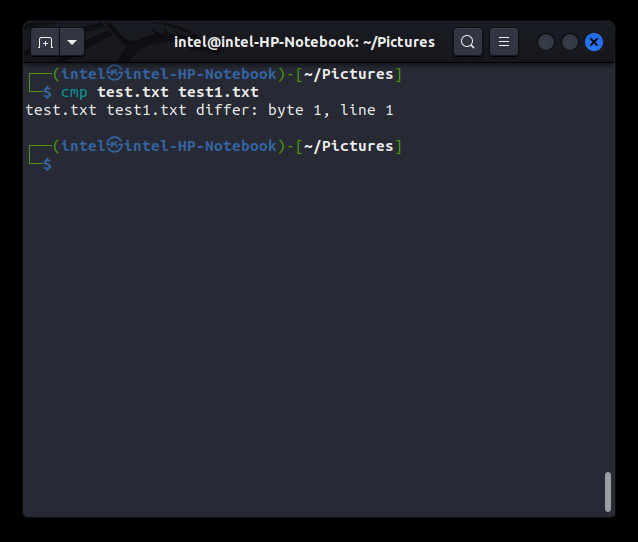
The cmp command works similarly to the diff command except it compares the two files byte-wise. If the command finds any disparity between two files, then it returns the first location of the disparity. So, the syntax to use the cmp command is:
cmp <file_1> <file_2>
The comm command combines the output of both the diff and the cmp commands. It shows both line-by-line comparison as well as the byte-wise comparison. The syntax to use the command is:
comm <file_1> <file_2>
34. head, tail – Print the Beginning or the End of the File
Suppose you have a very large file like an access log file and want to see the first entries or the latest entries in it. You can always use the cat command to print out the file contents but it can become very cumbersome to scroll through thousands of lines.
In such a situation, you can use either the head command or the tail command. The head command will print the first 10 lines of the file by default, and the tail command will print the last 10 lines of the file, making it easier to see the desired lines. Syntax to use the head command is:
head <options> <file_1> <file_2>
The syntax to use the tail command is:
tail <options> <file_1> <file_2>
35. less
As we said above, viewing the contents of a large file like a log file via cat command is not the best way as it may take a pretty long time to print the contents. Here, less command will be your saviour as it will show the file contents without cluttering the terminal screen and it also works much faster than the cat command or any other text editors. It also has syntax highlighting and scrolling using the arrow keys or the page up/down keys. The syntax to use the less command is:
less <option> <filename_1> <filename_2> <filename_3>
To exit out of the less view, press the “q” key.
36. touch – Create a New File
This command is useful if you want to create multiple empty files quickly. You can also use the touch command to change the access time of a file in the logs. The syntax to use the touch command is:
touch <file_name>
37. nano, vi – Terminal-Based Text Editor
These text editors have a variety of use cases like creating new files, searching for content inside files, viewing file content, etc. apart from editing files. The nano command-line text editor is the easiest text editor for any beginner to use. When you open any file in nano, you can straight away start making changes. All other shortcuts are mentioned below in the bottom pane. To open any file using the nano text editor, use the following syntax:
nano <file_name>
If the file does not exist, an empty file will be created, else the existing file will be opened in the editor.

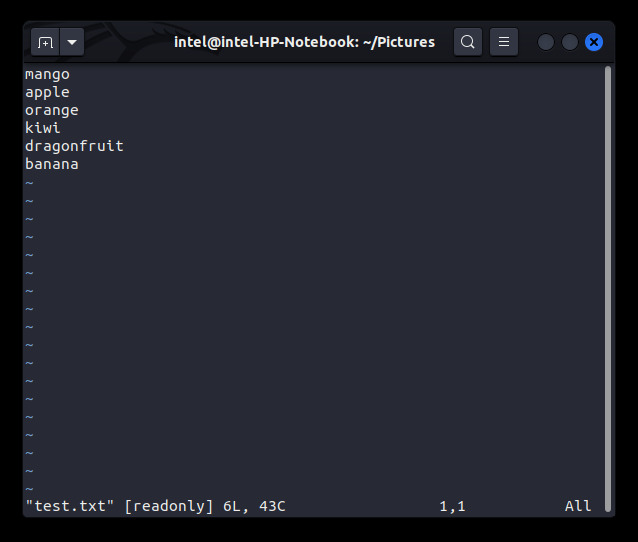
The vi text editor has a relatively steep learning curve. It has several modes which tend to confuse new users. To open a file using the vi text editor, use the following syntax:
vi <file_name>
This will open the file in default mode. To make any changes, press “i” on the keyboard. This will change to INSERT mode. To save the changes made and exit out of vi, first press ESC on the keyboard and then press “ZZ”.
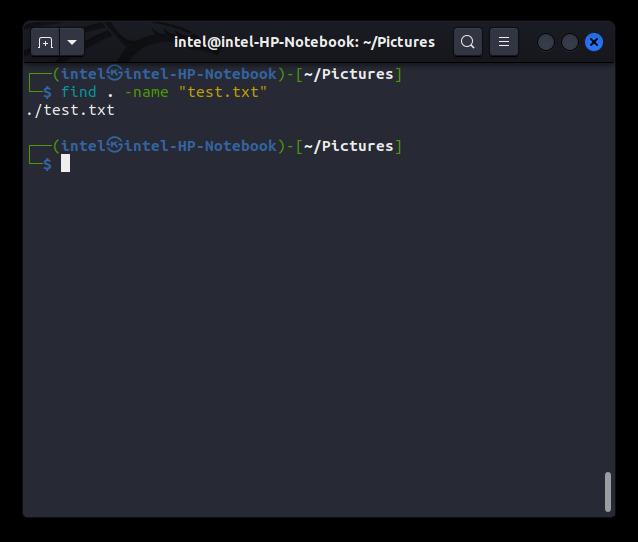
38. find, locate – Shows Where a File is Located
At times you need to work on a file, but you don’t know where it is located in the entire file system. To search for files in the system, you can either use the find command or the locate command. The find command has more options but takes more time to search for the query. The syntax to use the find command is:
find <option> <expression>
Some of the options, which the find command can take:
| Option | Description |
|---|---|
-name | Search by exact name or partial name |
-type | Search by particular file type |
-maxdepth | Search for the item by limiting the depth of search space |
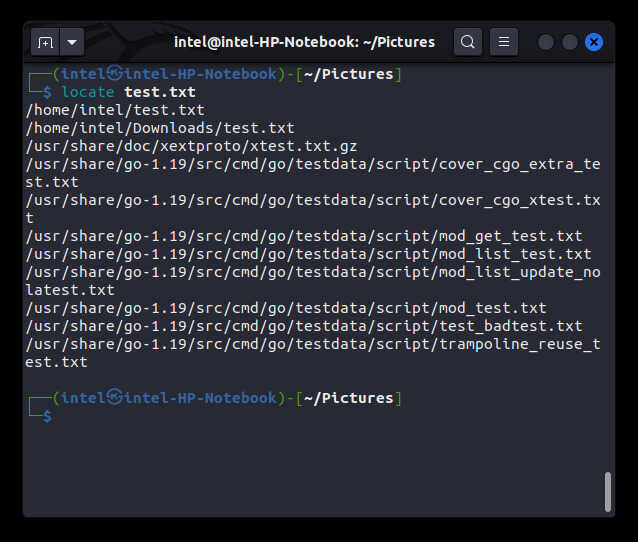
The locate command does not have many features but works very fast as it indexes every file and folder inside a database. The syntax to use the locate command is:
locate <expression>
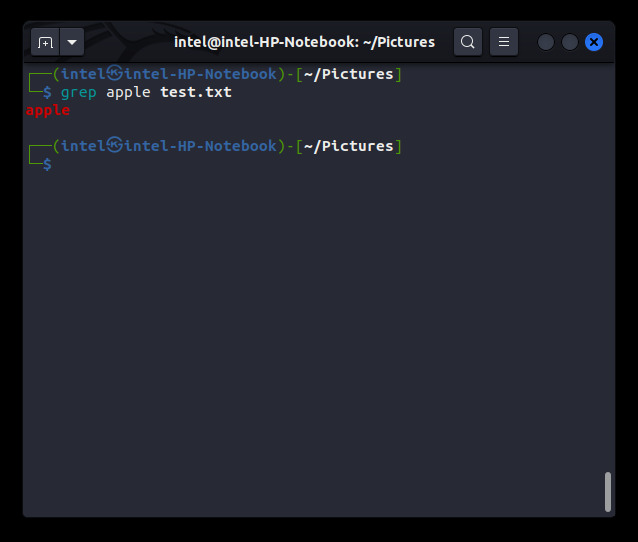
39. grep – Search Using Patterns
grep is one of the most important commands for Linux. It stands for “Global Regular Expression Print”. It helps to search for a particular string based on a pattern. The command uses both regular expressions as well as normal strings to search inside files or another command’s output. The syntax to use the grep command:
grep <options> <pattern> <file_name>
the most common options to use with the grp command are:
| Option | Description |
|---|---|
-e | to use regular expressions as the search pattern. |
-f | used to specify the file to search for the pattern. |
Process Management Commands
Process management commands are crucial to ensure you have the important processes running and the less important ones discarded. It’s also useful when you want to manage system resources to allocate memory to a process that’s more important than the other.
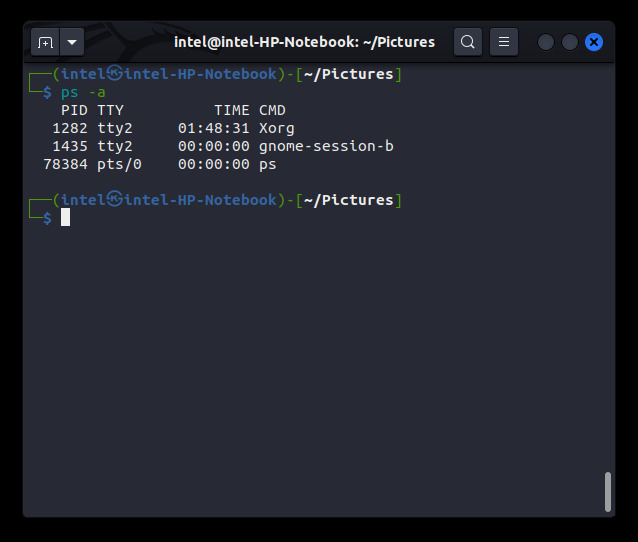
40. ps – Shows Running Processes
This command shows the list of running user processes in the system for the current user or for other users. By default, it shows the current running process id, terminal ID, status, running time, and command name. The syntax to use the command is:
ps <options>
Some of the options that this command can take are:
| Option | Description |
|---|---|
-a | Shows all running processes. |
-x | show the running processes except for the current session headers. |
-f | displays the full format listing for all running processes. |
-u | displays processes initiated by a particular user. |
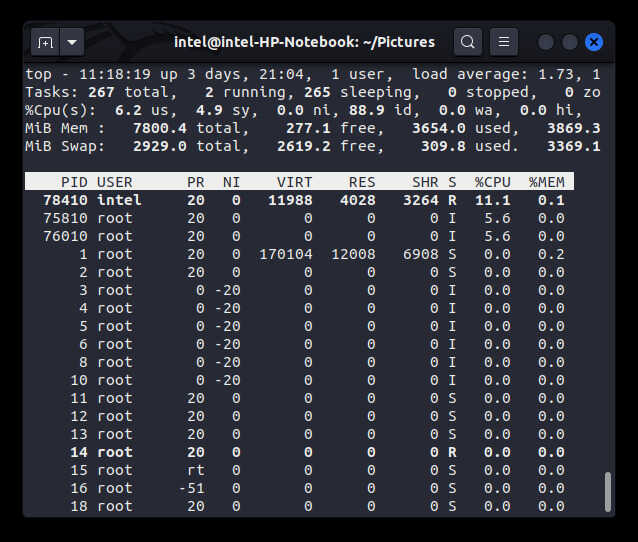
41. top, htop – Shows the Top Processes
The top and the htop commands work similarly to the ps command, with the difference being they display more information such as CPU utilization, memory usage, etc., which gets updated in real-time. You can use the top and htop commands to kill a process in Linux. The top command can be viewed as a CLI version of the Windows Task Manager. Syntax to use the command is:
top
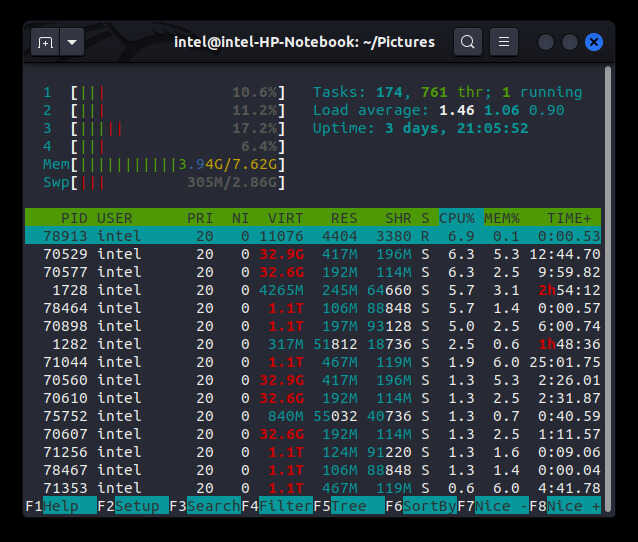
The htop is similar to the top command, except it has more features and a user-friendly console but it does not come preinstalled. To install htop on Debian-based systems, use the following command:
sudo apt install htop
To use the htop console, type htop in the terminal and press enter on the keyboard. To exit out of either top or htop console, press q on the keyboard.
42. kill, killall – Kill Processes
There may be times when some program is not working properly or freezing the system by consuming a ton of system resources. In such a situation, the best solution is to terminate the process. To kill a process, use the kill or the killall commands. Both commands work the same. However, there are certain differences. kill takes the process id of the process you want to terminate, which you can fetch either from ps or top command, Whereas, the killall command outputs all the processes running with the name given as input. The syntax to use these commands is:
sudo kill <process_id>
sudo killall <process_name>
43. History – history of commands executed
If you have executed a really big combination of commands and want to execute it again but can’t remember what you used, there’s a command for it. To see a list of commands you have already executed, use the history command. The history command stores generally a list of 500 commands. The syntax to use the command is:
history
To execute a command from the history list, use the syntax:
!<serial_number>
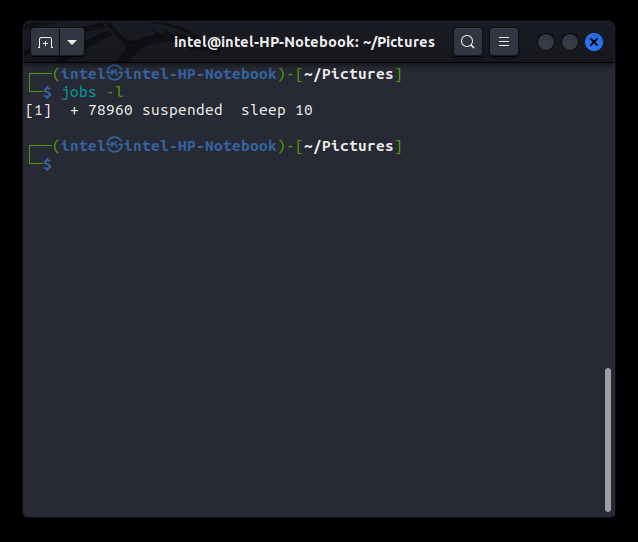
44. jobs, fg, bg
In Linux, processes that are currently managed by the shell and have not yet finished execution are known as “jobs” and are assigned a unique sequence number to identify them. If you use the ampersand symbol “&” along with any command, the job will run in the background and will not occupy the terminal window. Such a job is known as a “Background Job”.
If you run the command without the ampersand symbol, then the job will execute in the foreground and will occupy the terminal window. Such a job is known as a “Foreground Job”. To see all the running jobs in your system, use the jobs command. This will list all the jobs along with their job IDs. The syntax to use the command is:
jobs <options> <job_id>
These two parameters are optional to control the output of the command. The options which the command can take are:
| Options | Descriptions |
|---|---|
-l | Shows more information about each job listed. |
-p | Display only the process IDs for the process group leaders of the selected jobs. |
To place a job in the background and assign the status of “running” until it finishes execution, use the following syntax:
bg % <job_id>
To bring back a running background job, use the following syntax:
fg % <job_id>
45. export – Create Environment Variables
The export command is used to create and view all the environment variables. To create environment variables with the export command, use the following syntax:
export <variable_name>=<value>
Environment variables so created are temporary in nature and get removed as soon as you reboot the system. To permanently create environment variables, add the above command to the .bashrc file using any text editor of your choice.
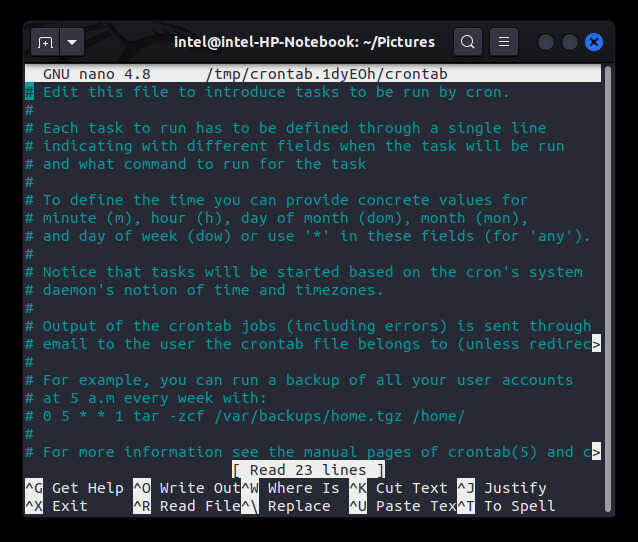
46. crontab – Automated Tasks
The crontab command is an actual boon for Linux users as it can run any task automatically periodically. Any task which runs at specific time intervals by the crontab command is known as cronjobs. This command can be very useful for taking backups or cleaning the system, etc. To use the crontab command, use the following syntax:
crontab <option>
Some of the options which the crontab command can take are:
| Option | Description |
|---|---|
-l | Lists all the cronjobs for the current user |
-e | edit the crontab to add new tasks or modify the time interval inside the default text editor specified |
-r | removes the current crontab |
When you use the crontab -e command, it opens the default text editor to edit the current crontab. The syntax to schedule a task using the command is:
<minute> <hours> <date_of_month> <month> <day_of_week> <command>
In the command portion of the above syntax, you can use any command or even run custom scripts to perform a series of tasks.
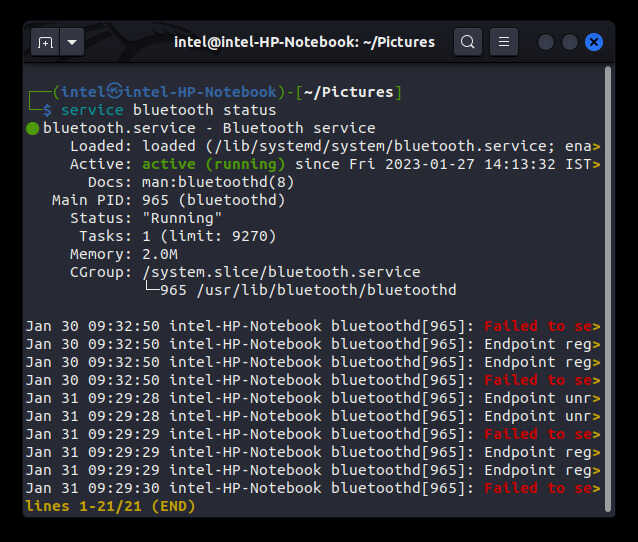
47. service – Control Services
A service is a program or an application that runs in the background. To manage such background services in Linux, you need to use the service command, as shown in the syntax:
service <service_name> <option>
The common options are:
| Option | Description |
|---|---|
| start | start a service |
| stop | stop a service |
| status | check the status of a service |
Terminal Management Commands
These commands help you manage the inputs and outputs and the history inside the terminal for a cleaner, more personalized experience.
48. clear
This command is often overlooked but a very essential command in Linux. After running many different commands, the terminal screen may feel cluttered. To clear the screen of all the command outputs, use the clear command as shown below:
clear
You can also the shortcut CTRL+L to clear the screen.
49. echo
The echo command is used to print the parameter passed to it. The syntax to use the echo command is:
echo <parameter>
50. alias, unalias
At times, you may have to use a very big set of commands multiple times. So, to save time from typing the big commands again and again, use the alias command. It is used to replace the big commands with a smaller character set. The syntax to create an alias is:
alias <name>="<value>"
To remove an alias, use the unalias command as shown below:
unalias <alias_name>
51. bc
If you are stuck in a system without a GUI and need to do some simple calculations, you can use the bc command. It will open a terminal-based calculator. To open the bc calculator, use the following syntax:
bc
52. exit
The exit command is used to exit out of the current terminal session. Use the following syntax to use the exit command:
exit
Package Installation Commands
Linux uses package management and each Linux distribution has its own package manager. As a result, Package Installation Commands may differ from distro to distro. Here are all the basic package installation commands you need to know.
53. apt, dnf, yum, pacman, snap, flatpak
These are probably the most essential Linux commands you will ever need. In Linux, you can install almost all packages and software using the distro’s respective package managers. For Debian-based systems, you have apt package manager, for Fedora and RedHat-based systems, you have dnf package manager, and for Arch-based systems, you can use the pacman package manager. Apart from these distro-specific package managers, you can also use snap or flatpak which can work on any Linux distro. To install any packages using the apt package manager, use the syntax:
sudo apt install <package_name>
For installing packages using the dnf, use the following syntax:
sudo dnf install <package_name>
To install any package using the pacman package manager, use the given syntax:
sudo pacman -S <package_name>
To install any package using the snap package manager, use the given syntax:
sudo snap install <package_name>
For flatpak, use the given syntax:
sudo flatpak install <package_name>
Network Management Commands
Linux can also handle network management with ease using a variety of commands. It makes the overall process less tedious and a breeze.
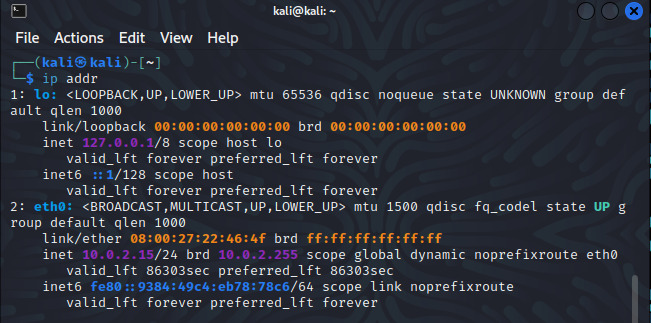
54. ip, ifconfig
If you ever need to know what is your IP address, MAC address, etc. you can use either the ip command or the ifconfig command. The ifconfig has more features than ip command but has to be installed separately with the command:
sudo apt install wireless-tools
To see the IP address of your network interface, using the IP command:
ip addr
And the syntax for using the ifconfig command is as follows:
ifconfig
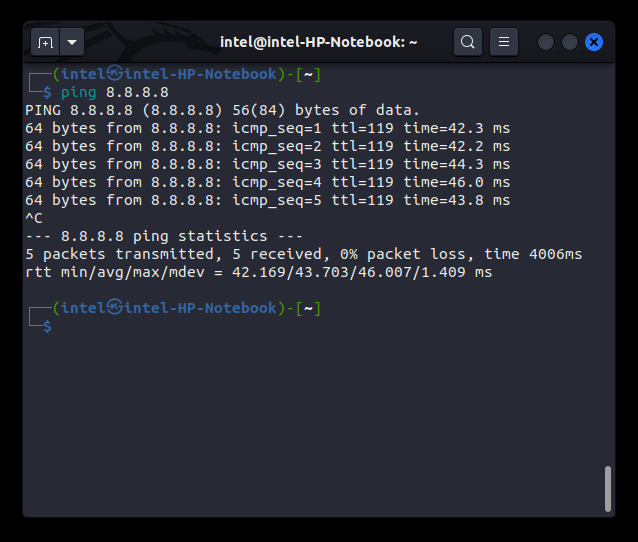
55. ping
Use the ping command to test the network strength, as shown below:
ping <ip_address>
Bonus Linux Commands
56. Shell Operators
The shell operators are a fantastic way to combine Linux commands and run as a single one. There are a few important ones that you’ll be using such as:
‘&’ operator
The ‘&’ operator allows you to run any command in the background so that you can use the terminal for other tasks. For example, you need to copy a huge file which will take a lot of time to finish, thereby, blocking your terminal for any other use. In such a situation, you can use the regular cp command as shown above but add an ampersand symbol (&) at the end to let the command run in the background.
‘&&’ operator
Even though the ‘&&’ symbol looks similar to the ‘&’ but it works completely differently. The ‘&&’ allows us to run two or more commands at the same time. Syntax to use the ‘&&’ operator is:
command_1 && command_2
Here, we have combined two commands to run in a single line, but the command_2 will get executed once the command_1 finishes executing.
‘>’ operator
The ‘>’ operator works as an output redirector and redirects the output of one command to another command and is known as the “overwrite operator”. This operator will help you to overwrite the contents of a file without even opening a text editor. For example:
echo "Test line" > test.txt
This command will overwrite the contents of the test.txt file with the line “Test line”.
‘>>’ operator
This operator is known as the “append operator” and works similarly to the “overwrite operator,” except this does not overwrite a file with new contents but helps you to add new content at the end of the file. For example:
echo "Hello World" >> test.txt
So, this command will add the output of the first command at the end of the file “test.txt” without overwriting the contents of the file.
We have covered several useful Linux commands which will help you to use the command line easily. If you ever feel stuck or can’t remember the flags or the command syntax, be sure to check the official man pages. Hope this article has helped you to learn some new Linux commands. In case of any problem, do let us know in the comments below.