Windows 10 is the most popular desktop OS in the world right now and Microsoft is continuing to improve it. However, there is a growing perception among users that Windows is not on par with other operating systems and the performance deteriorates over time. It’s true to some extent as it does have some underlying issues like disk fragmentation, BSOD, and various other Windows-specific problems. In this article, I will discuss the problem of fragmentation and share some easy steps to defrag Windows 10 to make it faster. So without wasting any time, let’s first briefly understand what exactly defragmentation is.
What is Defragmentation?
To understand defragmentation, we need to begin with fragmentation first. In simple terms, fragmentation is a process of spreading data across different sectors of the hard disk. It usually happens when there is no contiguous block of memory available to store a file. In such situations, the file is split into several data chunks and spread across different blocks of the hard drive. And defragmentation is, you guessed it right, a process to bring the scattered pieces of data at one place.
Fragmentation is not much of a problem if you have an ample amount of free storage on your PC. However, when there is a space constraint, it becomes harder for the hard drive to allocate data in contiguous blocks. The problem becomes worse when files are moved, deleted or modified from the hard drive over a long period of time.
In such cases, the data is spread across different sectors of the hard drive. It essentially means, the hard drive takes a long time to access the scattered data bringing the read/write speed and overall performance down. So we should defrag Windows 10 periodically so that chunks of files are kept closer to each other. And as a result, it will speed up your Windows PC.
Should You Defrag Windows 10?
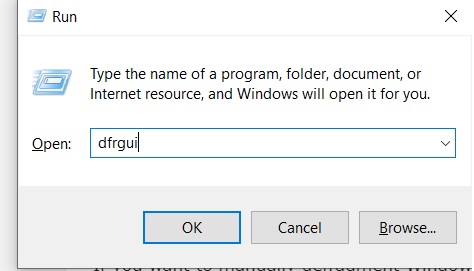
Of course, you should. However, Windows 10 automatically defragments the hard disk every week. And the good thing is that it’s turned on by default. Whenever Windows finds your PC is sitting idle, it runs a scheduled task in the background which defragments Windows 10. If you want to check when was the last time your hard disk was defragmented, press Windows and R key at once and type dfrgui. Now, hit enter.
It will open the Defragmentation window. Here, you can check the details of the last defragmentation under the “Last run” label. If Windows 10 is defragmenting the hard disk according to the schedule then you don’t need to do anything.

Keep in mind, you must not defrag Windows 10 if you are using a solid state drive(SSD) laptop. SSD is built on a different technology than mechanical HDD. SSDs have limited read/write count and regular defragmentation will further decrease its lifespan. So you should absolutely NOT defrag Windows 10 if you are using an SSD. To find out the type of memory storage, open the Run window again by pressing Windows and R key. After that, type dfrgui and hit enter. Here, under the “Media type” label, you will find the required information.

Having said that, if you are not happy with the scheduled defragmentation or want to manually defrag Windows 10 then move to the next section to learn about the steps in detail.
Defragging Windows 10 in 2020
If you want to manually defrag Windows 10 then here are the three different ways to do it. You can choose any of them based on what you find convenient. So without wasting any time, here we go.
1. Defrag Windows 10 with the Inbuilt Tool
As we already know there is an inbuilt tool to defragment Windows 10. Here, we will learn how to manually analyze the hard disk and then defragment it. You can also configure various settings related to defragmentation. Here are the steps to do it.
1. Open the Run window by pressing Windows and R keyboard shortcut. Here, type dfrgui and hit enter.
2. In this window, select the drive you want to defragment and click on the “Optimize” button. In case, you want to defragment the whole hard disk, select all the hard drives at once and click on the “Optimize” button.

3. Windows will start the defragmentation process. Do note that the time to complete the process will depend on how long you have been using your PC. You will get a better idea of the degree of fragmentation under the “Current Status” label. The lower it is, the better.

4. Also, if you want to configure automatic defragmentation, then click on “Change Settings” under Scheduled Optimization. Here, you can change the frequency to daily, weekly or monthly. Also, you can choose the specific drives to be automatically defragmented. That’s how you can defrag Windows 10 without any third-party software.

2. O&O Defrag
If you found the inbuilt Windows Defragmenter tool unreliable then O&O Defrag is a great alternative. It is a popular defragmentation tool for both beginners and advanced users. You can simply click on “Optimize all” and it will begin the defragmentation process for all the drives. You can also click on “Analysis” to get a better idea of fragmentation. The great thing about O&O Defrag is that you can visually understand the memory fragmentation through pie charts and Disk Stats. It also shows allocated and available memory blocks. In addition, you get scheduled defragmentation similar to the native tool on Windows 10. All in all, if you are dealing with a high volume of memory storage with insufficient space then this utility can help you a lot in defragmenting the hard disk.

Install O&O Defrag (Free, Premium version at one-time purchase of $29.95)
3. Other Third-party Defragmenters
The inbuilt tool on Windows 10 and O&O Defrag should be enough for you. However, if you are still looking for an alternative, then Defraggler and Auslogics Disk Defrag are two popular choices out there. Both the utilities are pretty good and do the job sufficiently well. You have a one-click button to initiate defragmentation process.

There are a few modes available on Auslogics Disk Defrag which I found interesting. Among many other things, you can run the defragmenter stealthily in the background without slowing down your PC. If you are using a hard disk without much space, this mode can help you combat fragmentation in real-time. So to sum up, if you want to defrag Windows 10 without any fuss, both the utilities are pretty good and you can choose either of them.

Install Defraggler (Free, Premium version at one-time purchase of $24.95)
Install Auslogics Disk Defrag (Free, Premium version at one-time purchase of $16.47)
Defrag Windows 10 and Speed Up Your PC
As we went through the article, we can see that fragmentation is no longer an issue on Windows 10 since automatic defragmentation has become a part of the OS. Still, if you want to manually defragment Windows 10 then you can very well go ahead and do it. Also, you can use O&O Defrag if you want to dive deeper into the sectors of the hard disk. If your PC is still slow after the defrag, you might have a differnt problem. In such a case, you should try to reset your Windows 10 device and set it up from scratch. But before you do that, remember to create a backup so you don’t lose your data.