Windows 10 is supposed to bring a lot of performance improvements over its predecessors, however, that might not be the case. In spite of the Microsoft’s hard efforts, the latest Windows iteration may fail to satisfy your performance expectations because of heavy apps, wrongly configured settings, etc. To help you bring the best performance out of your Windows 10 PC, we’re providing the best 15 tips and tricks to get rid of sluggish performance and improve responsiveness of your system. Here we go:
1. Avoid Resource-hogging Software
Various software use too much of the system resources, degrading the other apps’ performance and even the overall system performance. That’s why, you must uninstall such apps and use their lighter alternatives for best results. For instance, Google Chrome takes more memory than Mozilla Firefox, Adobe Acrobat uses more resources than Foxit Reader, Windows Media Player takes more memory than VLC Media Player, etc.
2. Minimize Browser Load
Browser extensions might be useful at times but they also degrade the system performance, especially if you’ve installed lots of them. Using bundles of browser extensions and add-ons utilizes too much of the system resources and hence, results in a slow system. That’s why, disabling extensions and add-ons, which aren’t much used should be a good idea to improve overall performance.
To disable/remove the unwanted extensions in Google Chrome, follow these steps:
- Open Chrome and click on the Menu button at the top right.
- Go to ‘More tools’ and click ‘Extensions’.
- Delete/Disable the unwanted extensions individually.

To disable/remove the unwanted add-ons in Mozilla Firefox, follow these steps:
- Open Firefox, click the Menu button and click ‘Add-ons’.
- Remove/Disable the extensions individually.

3. Turn off Background Apps
Apps running in the background often tend to slow down your PC because they keep running in the background even if they’re not in use at some point of time. This results in more RAM consumption and more CPU usage, creating heating issues and ultimately deteriorating your system’s performance. Hence, switching off such apps is better.
To close all background apps, please follow these steps:
- Open the Start menu and go to Settings->Privacy.
- Choose ‘Background apps’ from the left menu.
- Turn off the individual apps you don’t require running in the background.

4. Uninstall Unwanted Software
Unwanted apps and games excessively consume the space on your hard disk and moreover, they may be running in the background, eating up the precious RAM space and CPU cycles. The result is a sluggish Windows 10 PC, with the other (maybe important) applications not performing at their full potential. Hence, cleaning up the unnecessary software and games speeds up the Windows 10 performance significantly.
Please follow below steps to uninstall the bloatware(s):
- Open ‘Control Panel’ and go to ‘Program and Features’.
- Select the unwanted/unused program(s) and click ‘Uninstall/Change’
- Follow the on-screen instructions in the uninstall dialog boxes to uninstall these software.

5. Cleanup the Disks
Using excessive software and applications clutter up the disk space, which as a result, leads to a slower system because Windows find it hard to use temporary files or caches for speeding up the overall performance. Hence, cleaning up the disk helps speeding up your PC.
To perform disk cleanup, please follow these steps:
- Search for ‘disk’ and select ‘Disk Cleanup’.
- Select the disk that requires cleanup.
- Select the type of data/files that should be deleted and click OK.

6. Defragment the Storage Drives
Defragmentation is necessary to optimize your PC’s hard disk drives and organize the files & folders efficiently. If you keep a huge amount of files and especially of large sizes in your PC, then these scatter over the hard disk drives randomly, resulting in slower access. Thus, you might find various processes on your PC slower because the system gets slow in accessing important files from the drives.
To defragment your hard drives in Windows 10, please follow these steps:
- Search for ‘defragment’ in Cortana and open ‘Defragment and Optimize Drives’.
- Select the drives (you wish to defragment) and click Optimize.

7. Turn on Fast Startup
Fast Startup is a Windows feature that combines hybrid power mode to hibernate mode with shutdown properties. The fast startup mode speeds up the Windows 10’s startup process. With it enabled, your Windows computer will supposedly take less time to boot up, allowing you to get to your desktop faster than ever.
To enable fast startup, please follow these steps:
- Go to Windows 10 Settings->System.
- Click ‘Power & sleep’ from the left menu, then tap ‘Additional power settings’.
- From the left-side menu, click ‘Choose what the power buttons do’.
- Click ‘Change settings that are currently unavailable’ and check the ‘Turn on fast startup’ option.
- Click the ‘Save changes’ button.

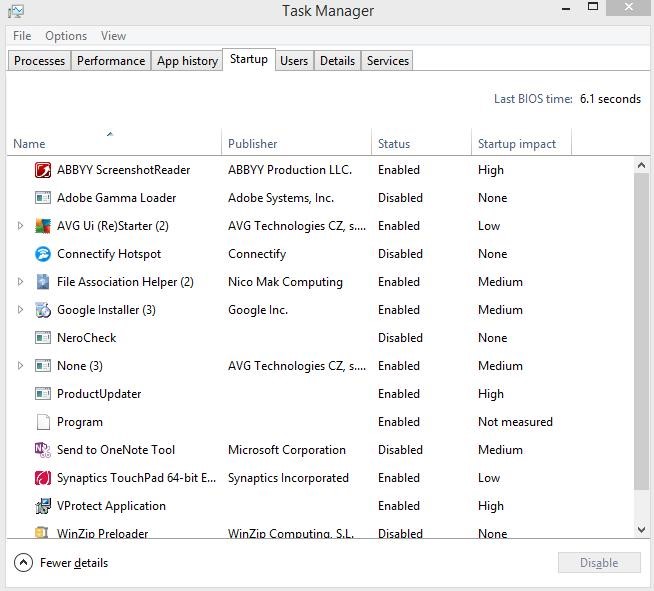
8. Limit Startup Programs
Startup programs are apps which start running in the background as soon as your Windows 10 PC powers up. While some of these are necessary tasks, some are not. Hence, the not so necessary tasks result in a slower Windows 10 PC, as they already take up a huge chunk of RAM. That’s why, limiting the number of startup programs benefits the Windows 10 performance.
To limit the startup programs, please follow the steps below:
- Click Ctrl+Alt+Del keys and open ‘Task Manager’.
- Click on the ‘Startup’ tab.
- Right-click on the unnecessary startup programs and click ‘Disable’ one-by-one.
9. Minimize Startup Services
Like startup programs, startup services are background-running services, which start running with the startup of Windows 10. This affects the other software’s loading speeds and the Windows’ overall responsiveness. That’s why, minimizing the count of startup services speeds up overall things.
To decrease the number of startup services, please follow the steps below:
- Search for ‘services’ in Cortana and click ‘Services’.
- Choose the unnecessary services, right-click and click ‘Properties’ one-by-one.
- Choose ‘Manual’ as their Startup type and click OK for individual services.

10. Choose Maximum Performance Mode
The power saving mode in Windows 10 tends to come in handy when our PC is low on power, however it also diminishes your computer’s performance to save power. This obviously results in a slower Windows 10, which can be fixed by using maximum power (demanding more energy, of course) to run the system. You can opt for the power saver mode when running on battery, but do stick to performance mode while the system is connected to a power socket.
To change power settings to maximum performance, please follow these steps:
- Go to ‘Control Panel’ and click on ‘System and Security’.
- Click on ‘Power Options’ and choose ‘High performance’.

11. Disable Search Indexing
Search indexing, though improves search responses, can deteriorate your Windows 10’s performance, which can be sometimes noticeable too. Hence, if you don’t do lots of searches every now and then, disabling the search indexing feature is a better option.
To stop/disable the search indexing process, please follow the below steps:
- Right-click on ‘This PC’ and click on ‘Manage’.
- Double-click on ‘Services and Applications’ and click on ‘Services’.
- Look for ‘Windows Search’ and double-click on it.
- Choose the ‘Startup type’ to Manual or Disabled and click OK

12. Configure File Explorer Options
Windows 10’s file explorer contains a number of options for improving the overall user experience. Though it eases a few things, these enhancements affect the system’s performance and hence, it’s better to disable these options (if not needed).
To configure folder options, please follow this process:
- Open ‘File Explorer‘ and click the ‘View’ tab.
- Click on ‘Options’ button.
- The ‘Folder Options‘ dialog box should open up. Here, go to the ‘View’ tab and uncheck the following options:
- Always show icons, never thumbnails
- Display file icon on thumbnails
- Display file size information in folder tips
- Show encrypted or compressed NTFS files in color
- Show pop-up description for folder and desktop items
- Show preview handlers in preview pane
- And check the following options:
- Hide empty drives
- Hide extensions for known file types
- Hide folder merge conflicts
- Hide protected operating system files (Recommended)
- Click OK at the last.

13. Disable Visual Animations
Visual effects and animations make sure that Windows 10 looks smooth and responsive but they also consume too much RAM and CPU resources and hence, result in a slower system. Hence, disabling the animations speeds up your PC.
To turn off animations in Windows 10, please follow this process:
- Open ‘Control Panel’ and choose ‘System and Security’.
- Click ‘System’ and choose ‘Advanced system settings’ from the left panel.
- Click ‘Settings’ under ‘Performance’ heading.
- Choose ‘Visual Effects’ tab in the window.
- Check the radio button ‘Adjust for best performance’ and click OK.

14. Adjust Virtual Memory
If your system has low amount of RAM, then multitasking on your Windows 10 might not be as smooth as you’d like. The best option here is to upgrade your physical memory (RAM), but if that’s not possible, increasing the system’s virtual memory is a must. This will result in a more responsive Windows 10 and a faster overall experience for you.
To adjust Windows 10’s virtual memory, please follow these steps:
- Open ‘Control Panel’ and choose ‘System and Security’.
- Click ‘System’ and choose ‘Advanced system settings’ from the left section.
- Click ‘Settings’ under ‘Performance’ heading.
- Choose ‘Advanced’ tab in the new window.
- Click ‘Change…’ button
- Uncheck ‘Automatically manage paging file size for all drives’.
- For ‘C:’ drive, click ‘Custom size:’ radio button, and set initial size to your RAM’s size and maximum size to double of your RAM’s size (for example, if your RAM’s size is 4GB, then initial size should be 4000 MB and maximum size be 8000 MB)
- Click the ‘Set’ button and then OK.

15. Nothing works? Reset your PC
Sometimes the stubborn problems refuse to sort out in Windows 10 even after you have performed the aforementioned steps. In that case, the only way to speed up your reset your Windows 10 is by resetting your PC.
To reset Windows 10, please follow these steps:
- Go to Windows 10 Settings->Update and Security->Recovery.
- Click ‘Get Started’ under ‘Reset this PC’.
- Click ‘Keep my files’ and click Next.
- Then, follow to on-screen instructions to continue.

SEE ALSO: 10 Common Problems in Windows 10 (With Solutions)
Ready to speed up your Windows 10 PC?
Well, we’ve covered all the speed boosting tips & tricks available for Windows 10 and we are pretty sure that these tricks will boost your PC’s performance. So, try them out and do tell us if these tricks speed up your Windows 10 PC. Also, don’t forget to share with us any tips and tricks for Windows 10 that we missed out on. Sound off in the comments section below.